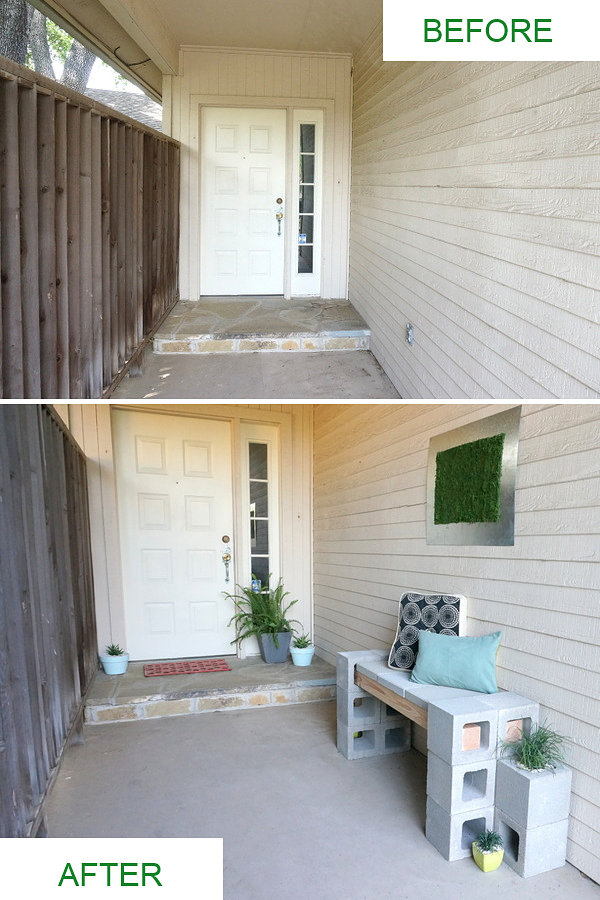
Adding a cinder block bench on the front porch takes little time to craft. It’s easy to make, durable and perfect for DIY enthusiasts looking for affordable front porch makeovers that are trendy and look chic.

Today’s patio makeover was inspired by a cinder block project I featured in this post. Here’s a close-up sneak peek at a few details. Be sure to read on for full project coverage…

Cinder Block Bench Options
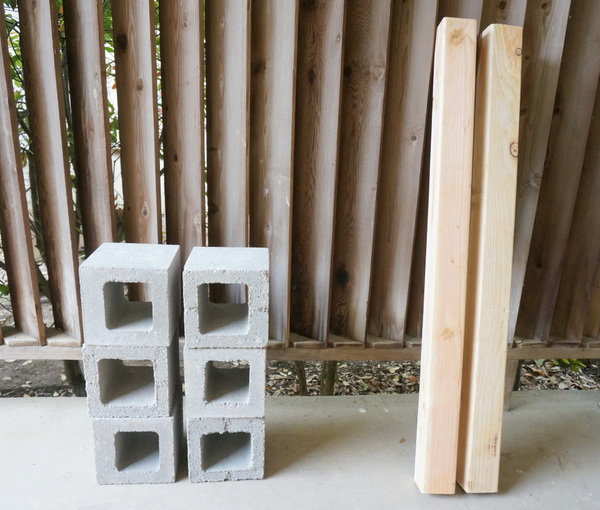
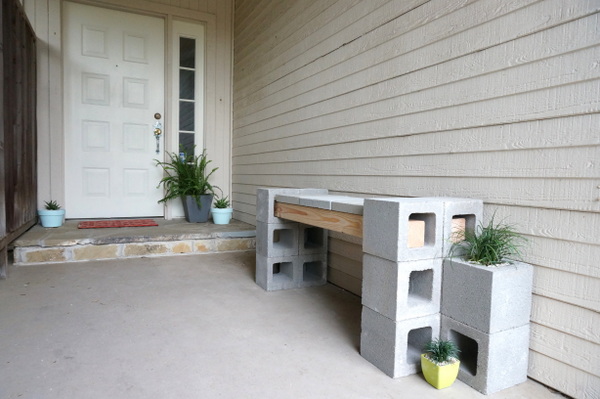
I knew that the centerpiece of my front porch makeover would be a cinder block bench. The question: how to design and build it?! I headed to Home Depot and picked up 16 cinder blocks, along with two pieces of lumber. I had a vague idea of what I wanted, but I made sure to get extra materials. Just in case!
Option #1: A Cinder Block Throne
I initially decided to ditch the lumber and build a small cinder block bench, which really turned into a plant stand/”throne” of sorts. While we ended up opting for another bench design (which I’ll cover later in the post), I thought I’d share the details of this version:

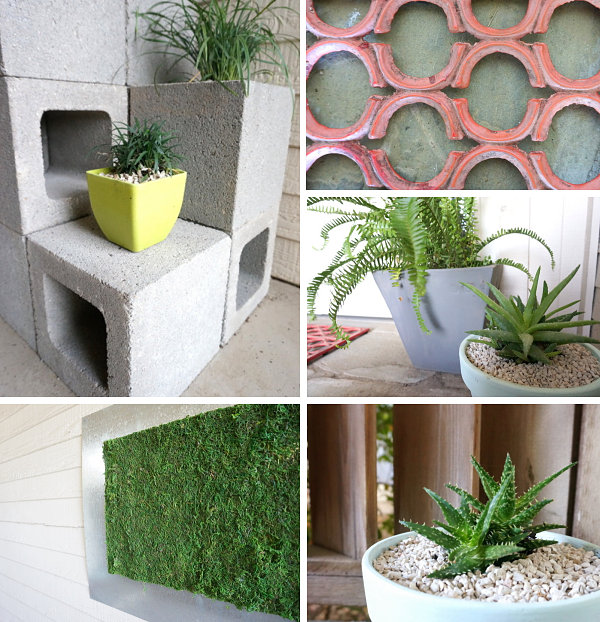
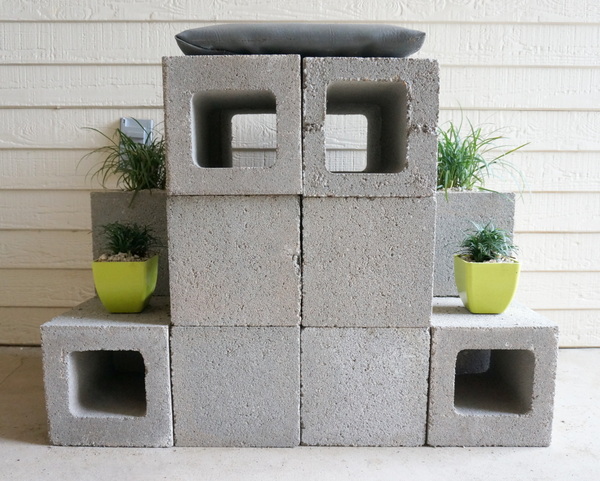
I started by placing two rows of four cinder blocks on the ground. I then turned the two end blocks so they opened to the front. Next I stacked six blocks on the top level, two in the upright position so they could hold plants. See them in the back row on the second level? Check out the pics above, which show the “throne” from several different angles.

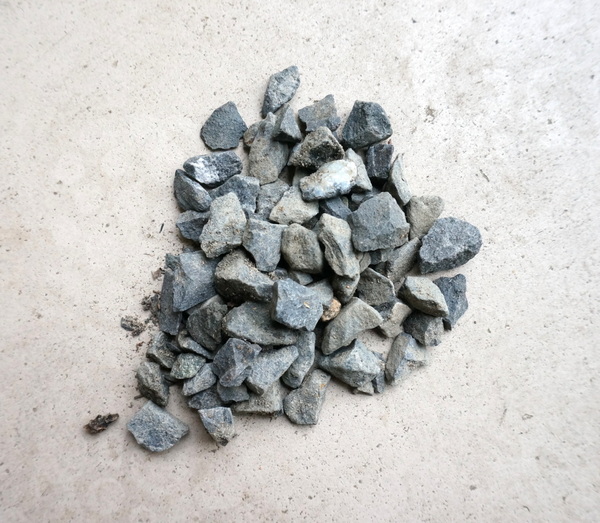
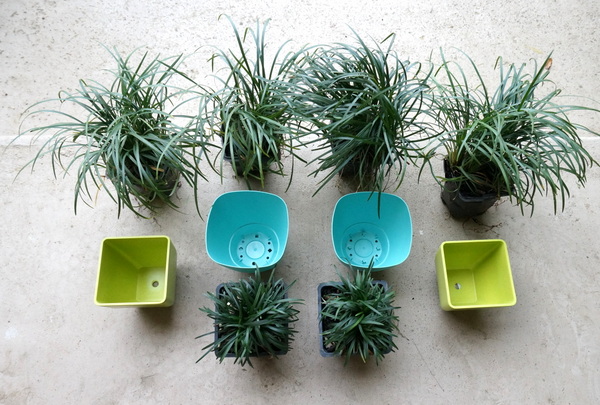
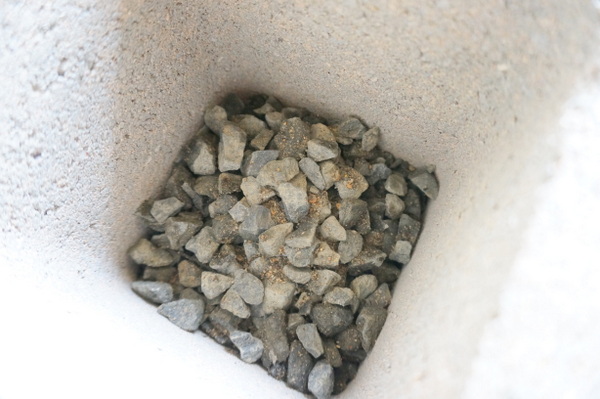
I knew I wanted to add plant life to this mini-bench, so I placed some gravel in the open cinder blocks on the top row of my design–gravel is perfect for filling the bottom of the open block/providing a barrier/offering drainage. Below we see mondo grass and a variety of colorful pots.

Here’s a view of the gravel in the bottom of the cinder block–this basalt gravel is left over from an earlier backyard landscaping project:

When all was said and done, I added four more blocks to the top of the mini-bench–I liked the sculptural look that resulted. I topped it all off with a cushion, then placed some small plants in lime green pots in the nook on each side of the bench. You can see the throne/planter/sculpture below:

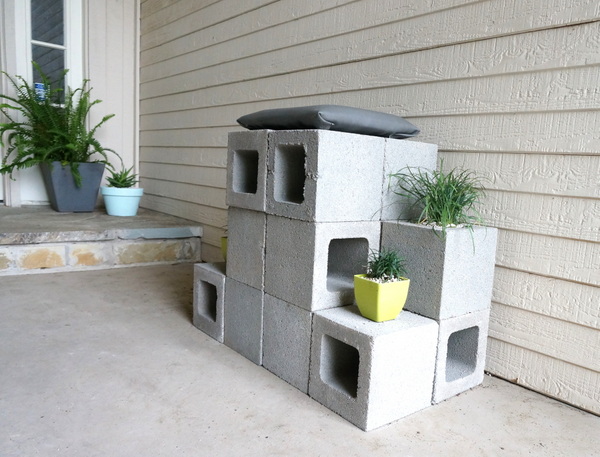
Here’s a view from the front! Another option: Forgoing the cushion and adding a large plant at the top of this piece. The cinder block structure then becomes a decorative wall that doubles as a plant stand that adds interest to your patio!

Option #2: A Cinder Block Bench
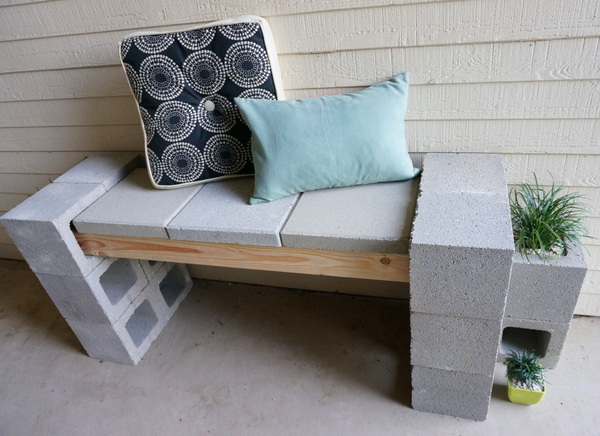
While I loved the look of the throne above, I ultimately wanted a structure that better resembled a bench! The bench I built was inspired by the DIY outdoor bench created by Kayla of The Basement. It’s easy to build, it’s a fabulous no-hassle idea, and you can read all about it here. Taking my cues from that project, I opted for a smaller version that would ultimately involve pavers and built-in planters. I give my husband full credit for coming up with the final design–the pavers made all the difference! Here are a few supplies that got me started:

Supplies:
- One 8-foot piece of lumber cut in half (I opted for wood that had been cured and treated for the elements – the cost was around $12). Feel free to go with a longer piece of lumber if you want your bench to be a larger size.)
- 16 single cinder blocks (doubles can also work for the main structure of the bench)
- 3 concrete pavers (12 in. x 12 in.)
- plants (I used mondo grass, which does well in shady spots)
- gravel for drainage
- potting soil

Steps:
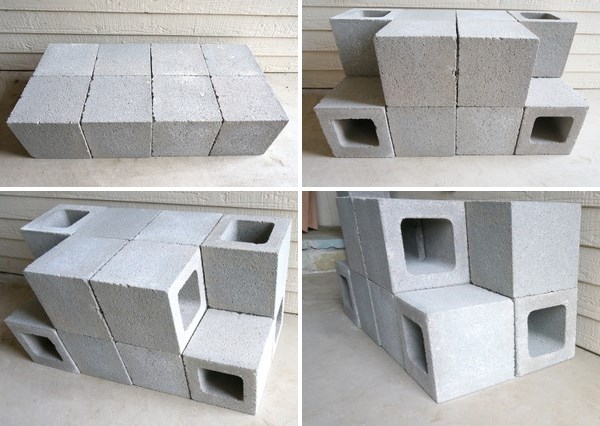
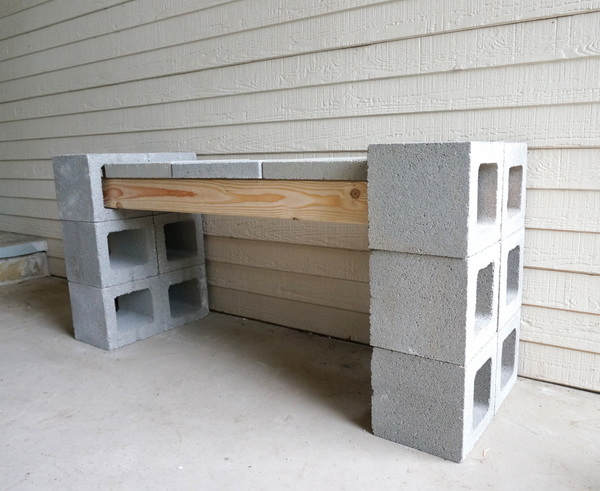
- Stack the cinder blocks in three rows of two, ensuring that they are the correct distance apart to support the wooden beams and accommodate three pavers in between (a trial run on the ground level helps here).
- Place the two wooden beams through the holes, connecting the top rows of the blocks. The wooden beams may not reach the very end of the holes once settled, but they should be rather close to ensure good support.
- Stack the pavers on top of the wooden beams.

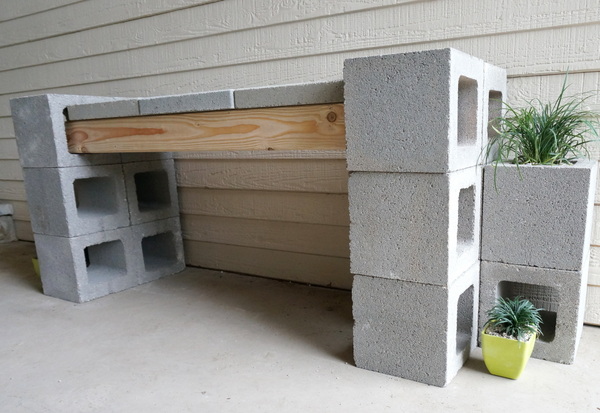
And for some fun “extras,” add two cinder blocks near the base of each side of the bench–one with the hole facing the front, and one in the upright position (to hold a plant). Fill the top cinder block 1/3 of the way with gravel, then follow with soil and a plant. Top it off with limestone gravel for a decorative effect if you wish. Though it’s hard to tell in the picture below, there are plants on each side of the bench.

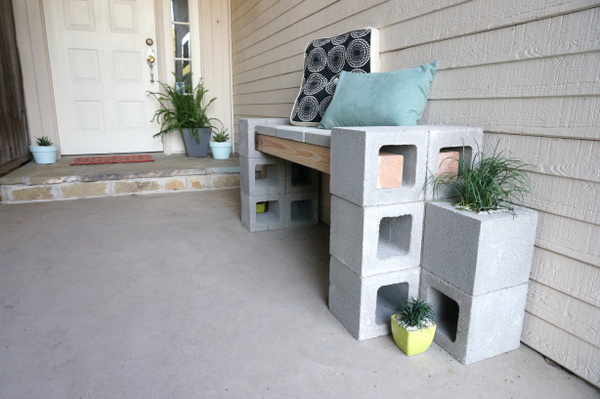
Don’t hesitate to add cushions or pillows! We get a lot of squirrels on our front porch, so rather than leaving the pillows out, I’ve decided to store a couple of them in my entryway closet and bring them out when I’m enjoying an evening drink on the bench.

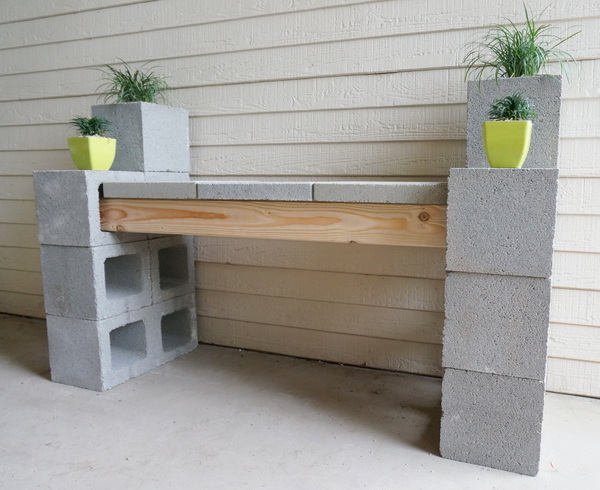
Want to know a little secret? Originally the bench looked like this (see below)! The extra cinder blocks and plants were stacked on top of the bench, rather than at the base. While this is a great option, I ultimately wanted a more clean-lined look and instead chose the design above.

I was happy with the end result, but I still felt like the patio looked a bit bare…

An Outdoor DIY Wall Art Project
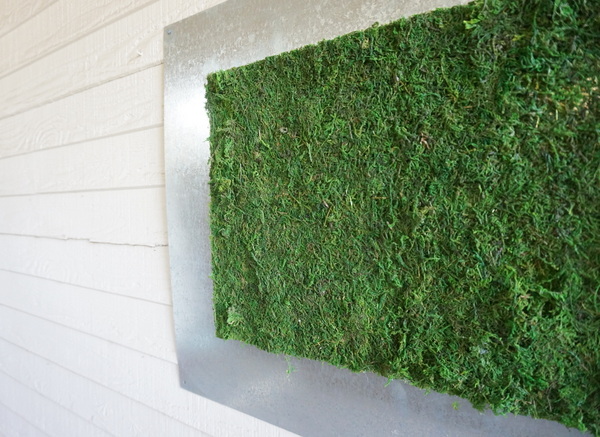
…which is why I decided to do a little DIY outdoor art project! In fact, earlier this week I blogged about outdoor wall art and came across an amazing project from Amy of Positively Splendid. You can read all about it here. Amy framed sections of rolled moss (the kind you buy at a craft store). I loved the idea, and I adapted it a bit to resemble the look of a freshly cut, manicured lawn with metal edging.

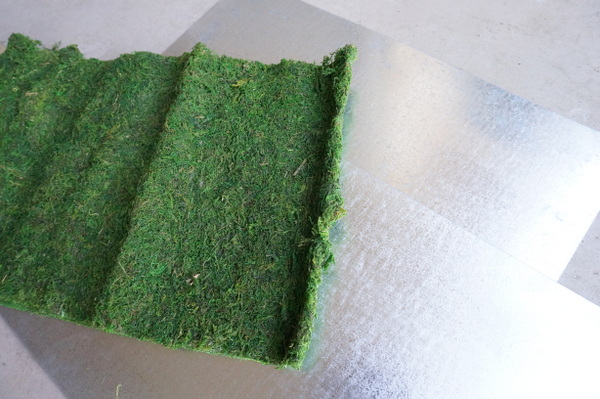
Years ago, my hubby purchased some custom-cut sheet metal and drilled holes for nails. He used small magnets to display posters on the metal, which was the perfect option for someone who enjoyed switching out his artwork on a regular basis. The metal created a modern frame for the art. For my project, the metal created a “frame” for a sheet of moss!

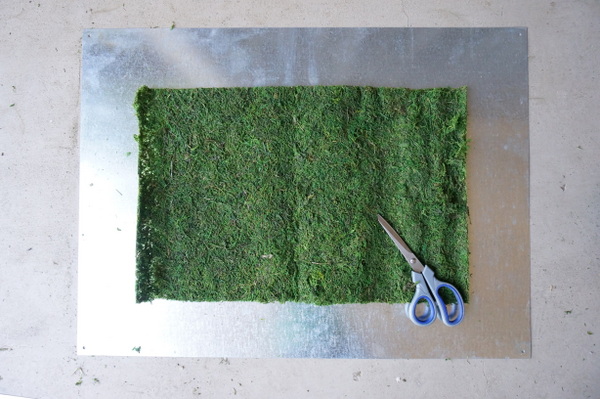
I simply measured and cut the moss, then hot glued it to the sheet metal. I love the clean look that resulted–very Zen!

Final Touches
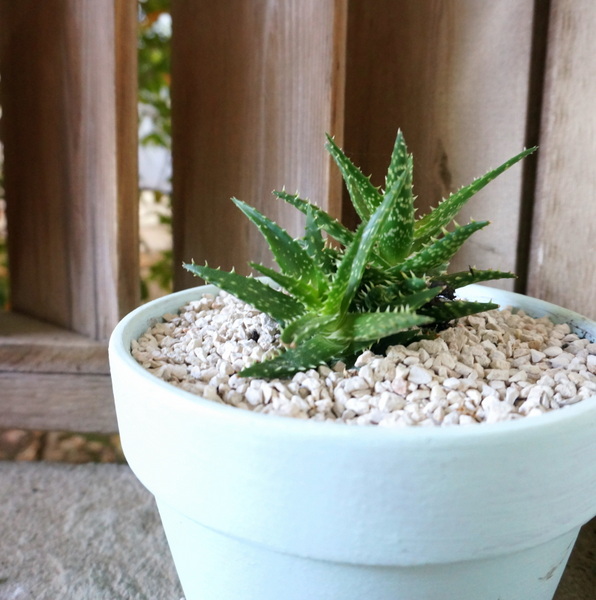
Below we see the end result of the project. I added a potted fern by the door, as well as a red metal doormat and two aloe plants in small pots painted a soothing shade of blue.

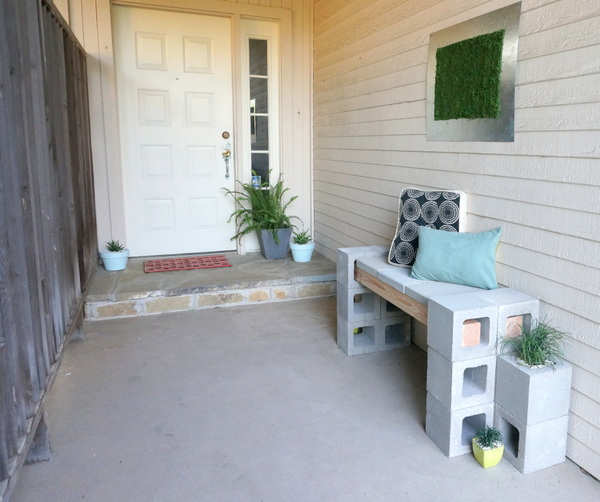
Sometimes it’s the little details that make a big difference! Thank you for joining me for today’s front porch makeover. As you can see, there’s still room for more color on this porch. I guess I’ll just have to continue my DIY marathon and come up with some other outdoor projects for the exterior of my home–as always, I promise to keep you posted!