There is a major texture revolution going on, and I have to tell you, I LOVE it! From elaborately embroidered wall hangings to more modern DIY versions, texture on the walls is here to stay (I hope!). Today I’m bringing you a project close to my heart because I have wanted one of these since I was 11 years old. No joke!

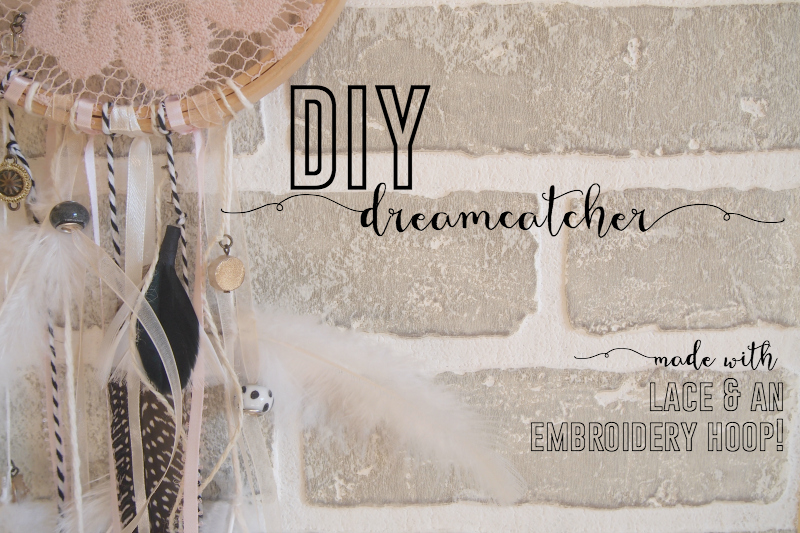
It’s so stinkin pretty!
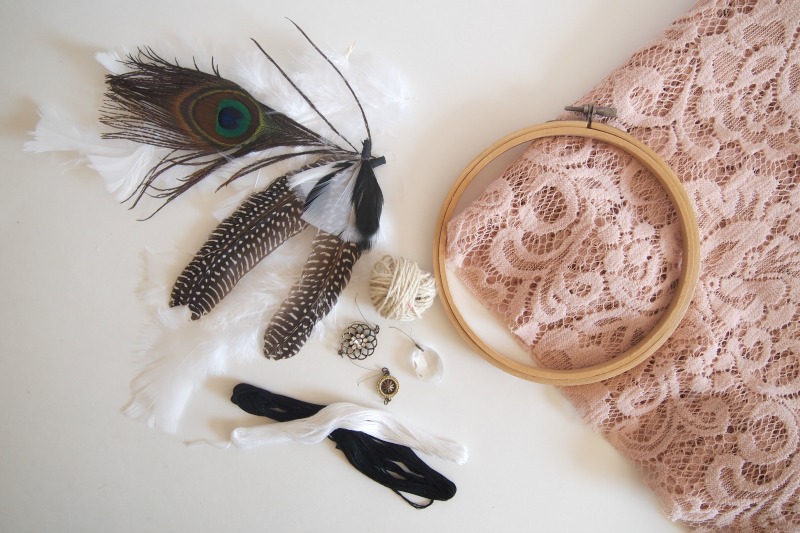
So here’s everything you’re going to need to make your own sweet little DIY dreamcatcher:
- an embroidery hoop (any size you want, really)
- some lace – feel free to use an old tablecloth too!
- a variety of beads
- ribbon, string, twine, wool… whatever you think is pretty and make sure it’s all varied in width and texture
- feathers
- glue (super glue or a hot glue gun)
- scissors

If you’re a DIY nut like me, you might find that you actually already have all of the materials for this! Now lets get to making!
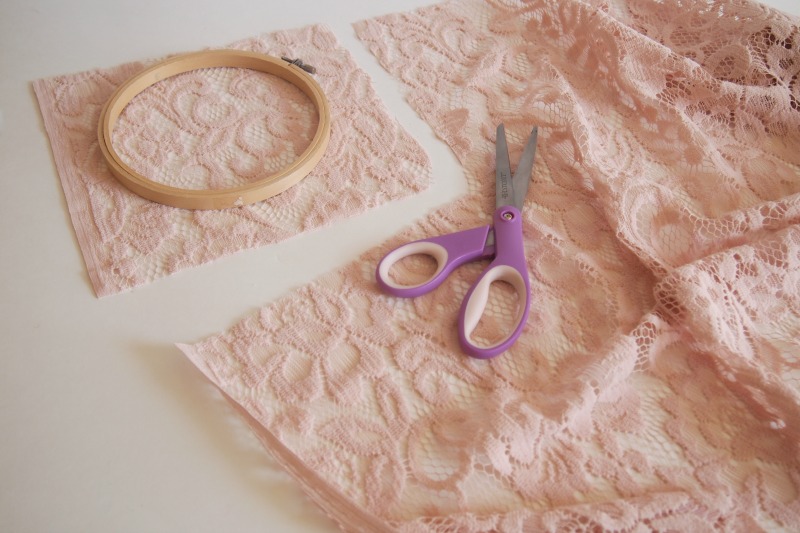
Step 1
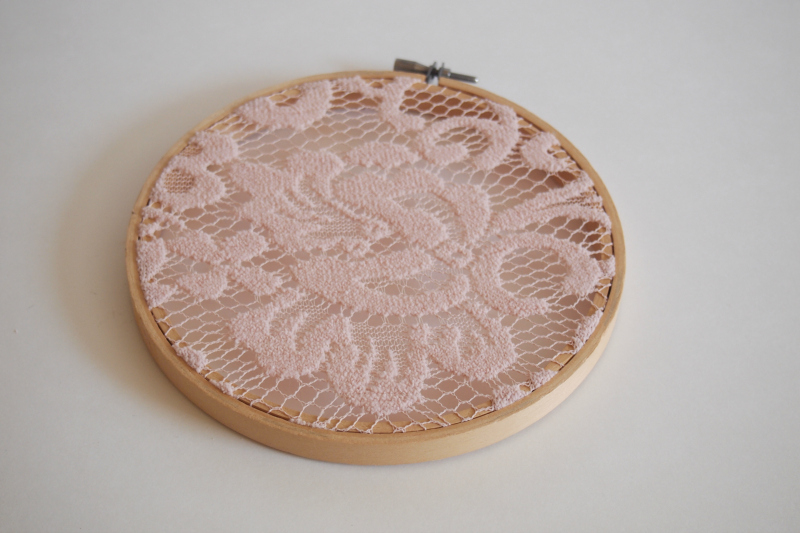
Measure and cut a piece of lace to go into your embroidery hoop. This is also a good opportunity to line up the pattern in a way you like to center it on the hoop.

Step 2
Loosen the outer part of the embroidery hoop, separate from the inside part and place your fabric over the inner hoop. Now put the outer hoop back, center the design, and tighten the top, pulling on the sides to get the pattern you want and make it tight. Now cut off the excess fabric as close to the hoops as possible.

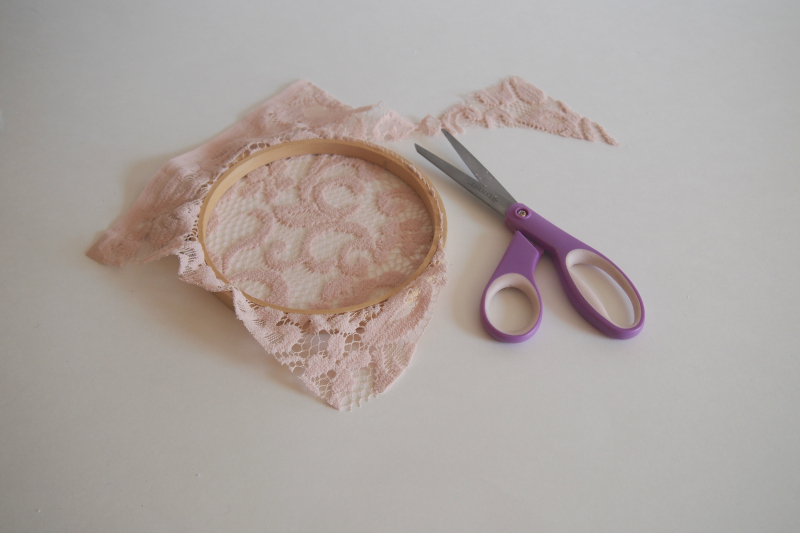
This might be a good time to use some of that super glue or glue gun if you have slippery fabric. You’ll end up with something like this:

Step 3
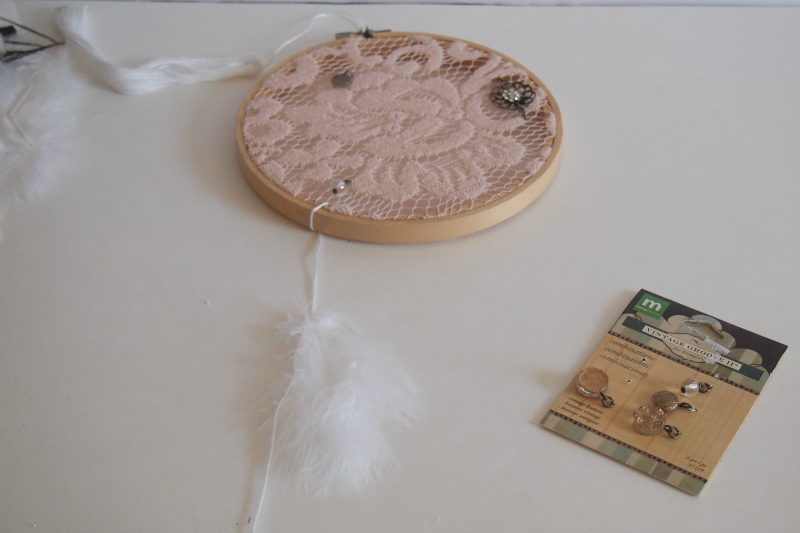
Start tying on some of the string and ribbon you have, making sure knots are all on the back of the hoop. Because I used a very loose lace, I didn’t need a needle to feed any of the materials through and just threaded them in between the lace’s loops. You can also add some beads to your lace at this point, or leave it as is!

Step 4
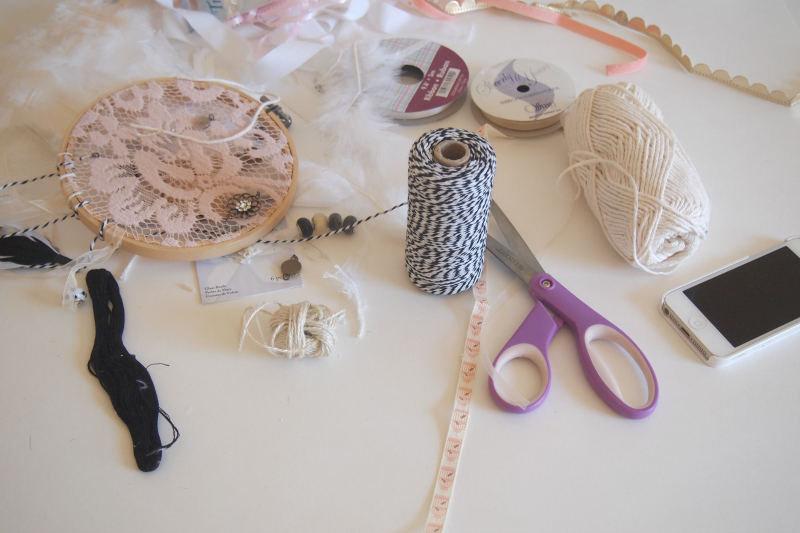
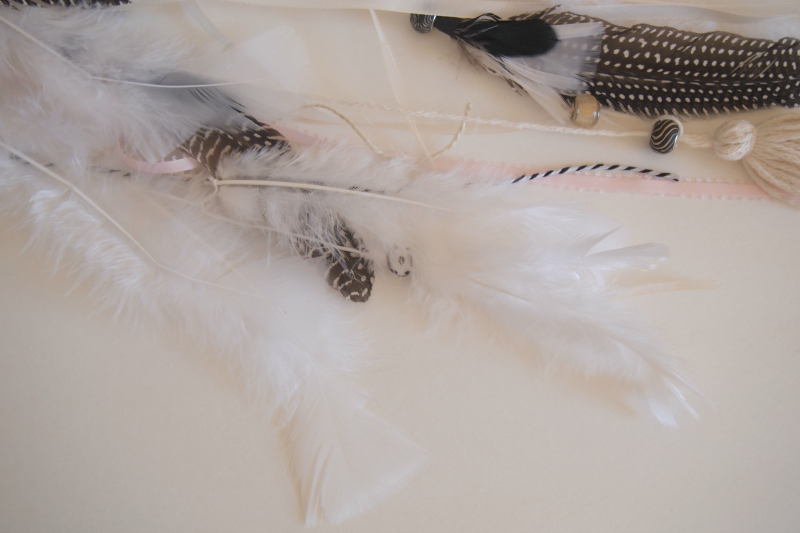
Make a huge mess. Bring out all of the materials and go nuts. No, seriously… that’s part of the process! Mix and match to your taste and remember to have fun during this part because it’s all about making something YOU love!

Step 5
Add any more beads or feathers you might like to your dreamcatcher. This does not need to be perfect – you’re literally just tying a knot around the feathers and beads to keep everything very loose and, of course, textured!

Once you have the look you want, you’re done. It’s easy to go on forever with this, and really, more is more so don’t be afraid to go overboard!
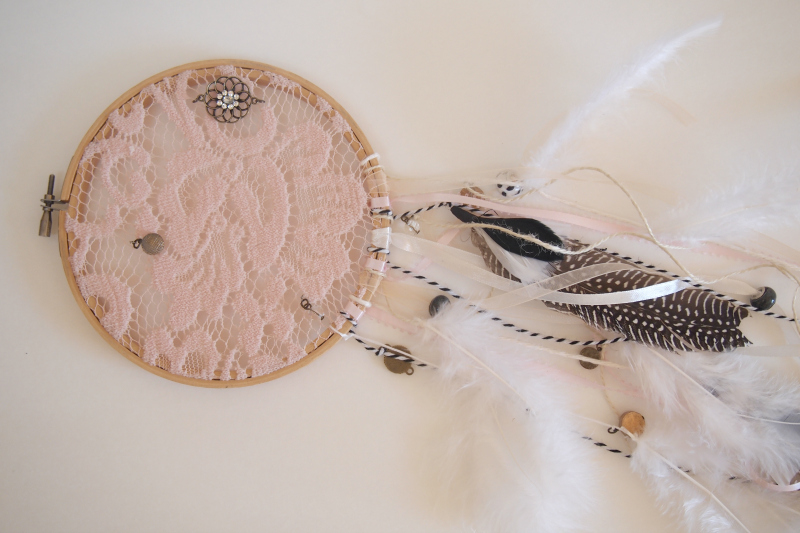
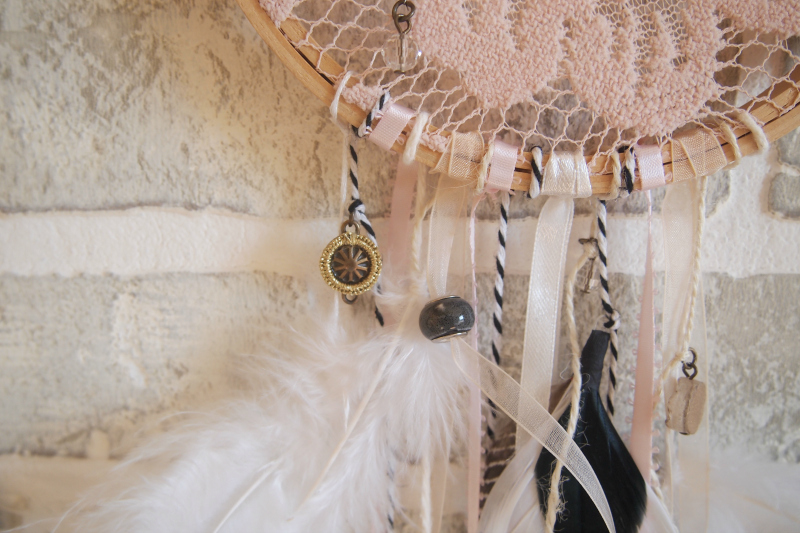
Here’s a closer look at the bottom of the dreamcatcher so you can see how loosely the beads and feathers are tied on:

I also added a tassel to mine (because I loooooove tassels as you can see here and here), which I made out of some cotton yarn. Easy peasy!
Hang it in Style!

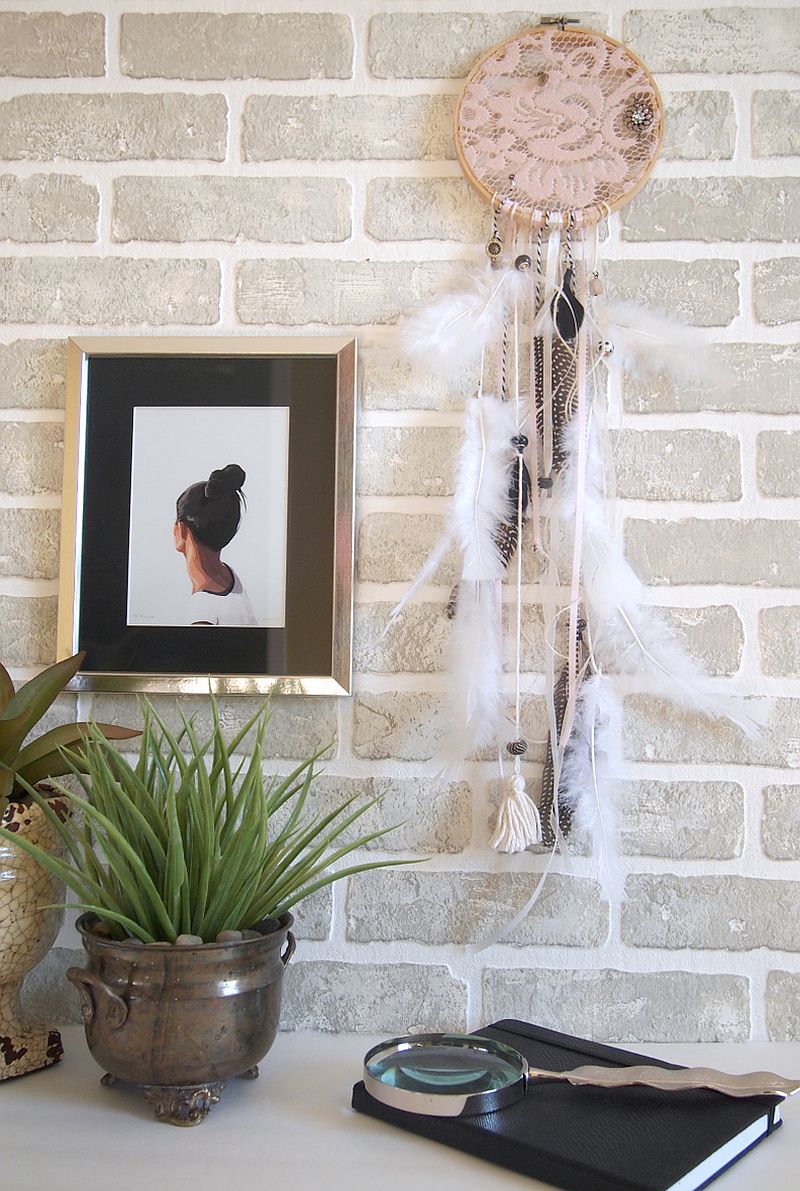
I chose not to hang mine on my window because I’m really using it as a piece of art, and not a traditional dreamcatcher, but this would be beautiful hung just about anywhere! I mean, could you imagine a dreamcatcher mobile over a baby’s crib? So dreamy! Cheesiness intended!!

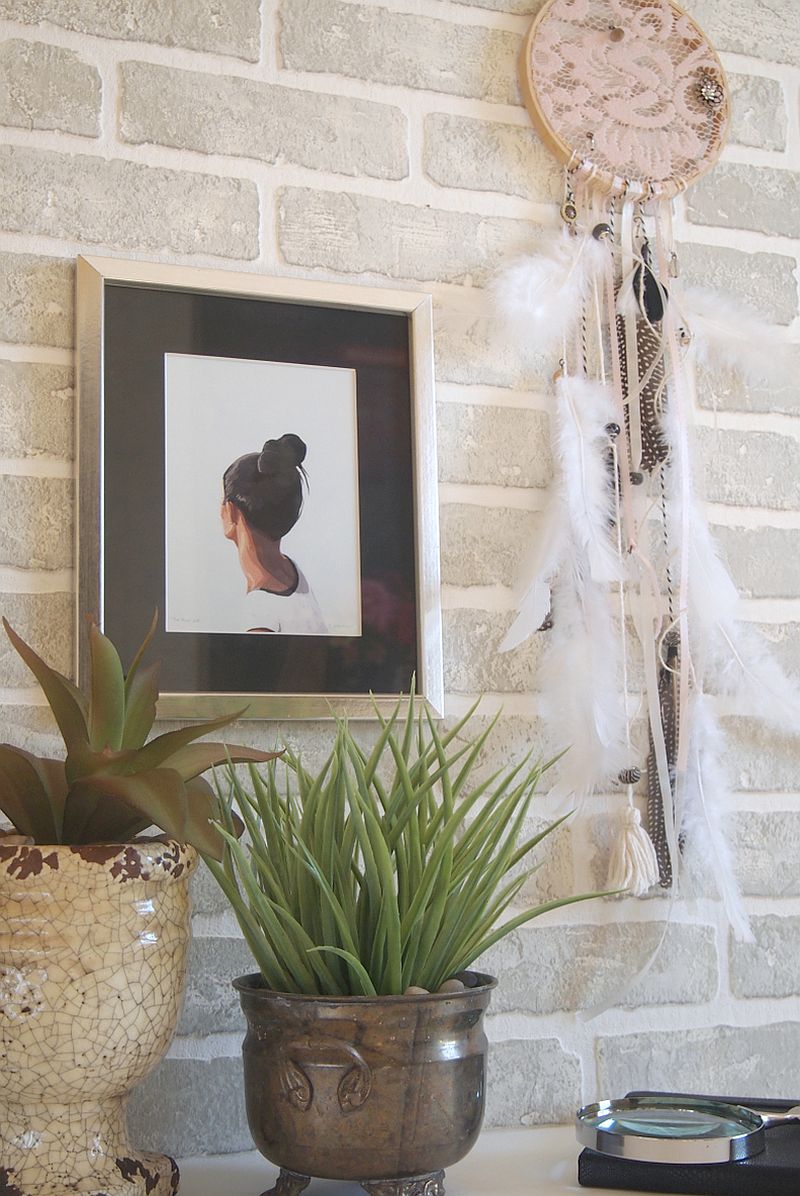
And with that I leave you a final up-close look at the dreamcatcher in action for those of you that may want to know just how many different pieces of string and ribbon I used.

Sweet dreams, my friends! And don’t forget to show us your dreamcatchers – drop a link in the comments or visit us on Instagram!


![Backyard Landscaping Trends [10 Inspiring Ideas!]](https://cdn.decoist.com/wp-content/uploads/2021/04/Fire-Pit-in-Backyard-28968-270x180.jpg)