Hey lovelies!
Before we get started, I realized the pun in the title of this post, and I need to tell you it was not intentional, but now that I see it, I love it. Did you catch it? Heart string art? Heartstring? As in the heartstrings you can tug on? Pretty good, right?


Love for Minimalism!
So Valentine’s Day is coming, and if I’m going to be honest, I’ve never been one of those people who decorates for Valentine’s, because I find that almost everything is either pink or red or both! Now I love pink (you already know that if you have read any of my articles here on Decoist), but pink hearts and doilies are not my thing, and sometimes being a little more minimalist is where it’s at! So I give you… No pink, no red, no fussiness. For the minimalist in all of us!
Now, for this project you’ll need a few tools we don’t normally use, like a hammer. Yep… sometimes crafts require a trip to the hardware store!

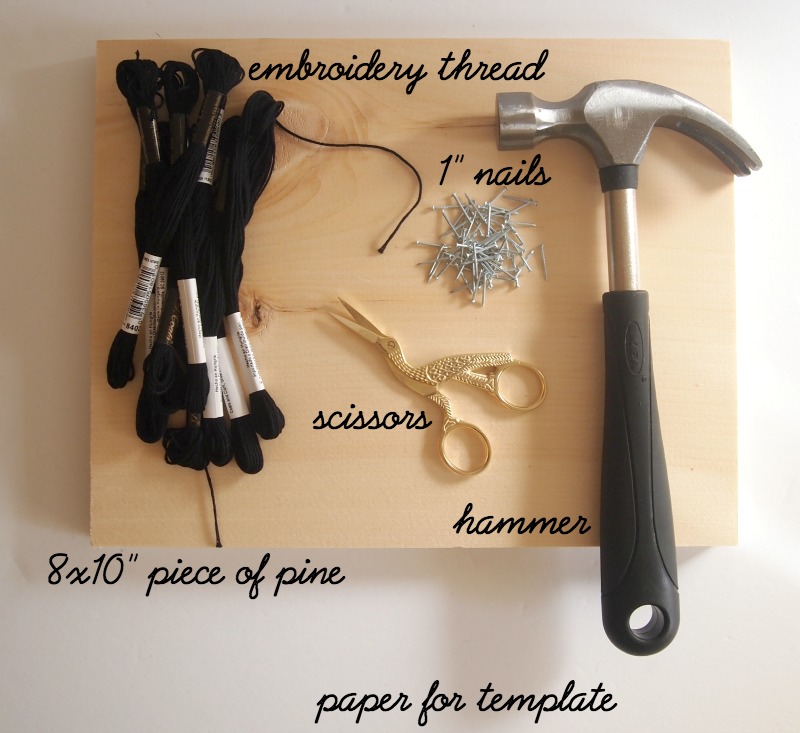
The pine I used for this project is pretty ideal because it’s easy to find, inexpensive, has lots of cool knots in it, and pine is a soft wood, meaning it’ll be easy for you to hammer those nails into it! If you need the wood cut, make sure to ask for that at the hardware store. Most places will cut it to size for you! This is also a great project for anyone who has leftover wood from past home improvement projects, so make sure to look in your garage first!
Now the first thing you need to do is pretend like you’re back in school and make a heart template.

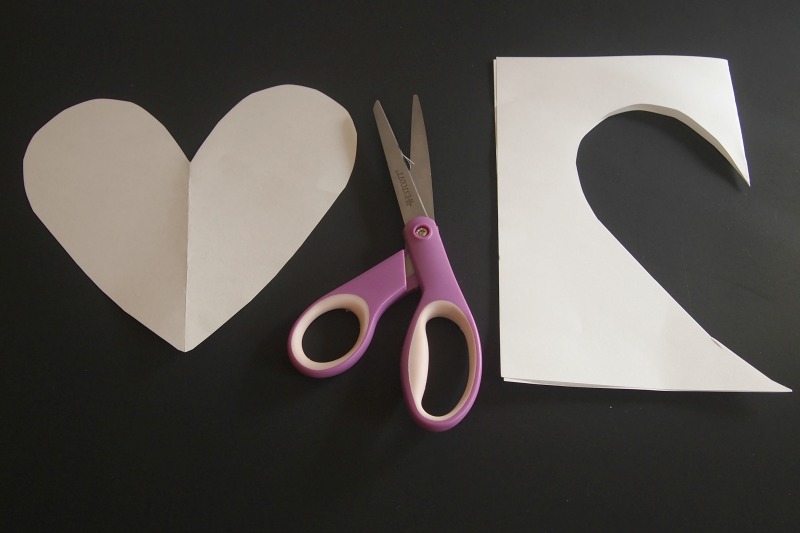
It’s just like you remember: fold a piece of paper in half and cut a half heart shape. Unfold, and you have the whole heart!
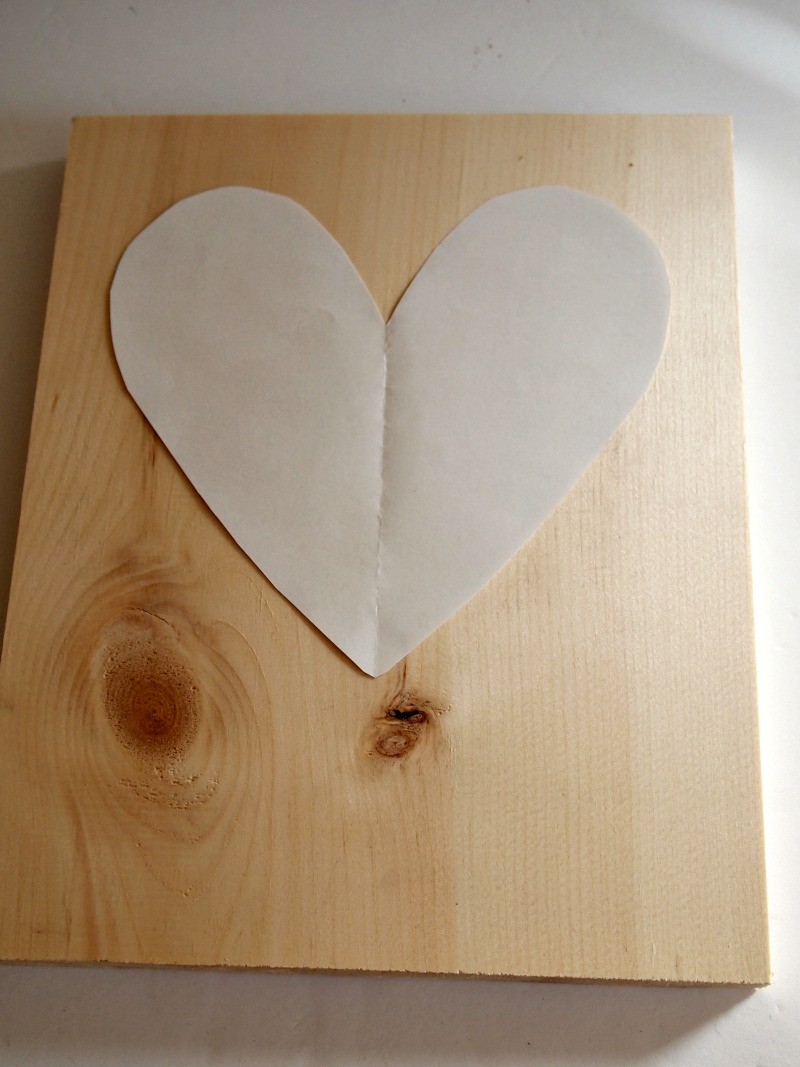
Now place some tape on the heart and center it to your wood plank.

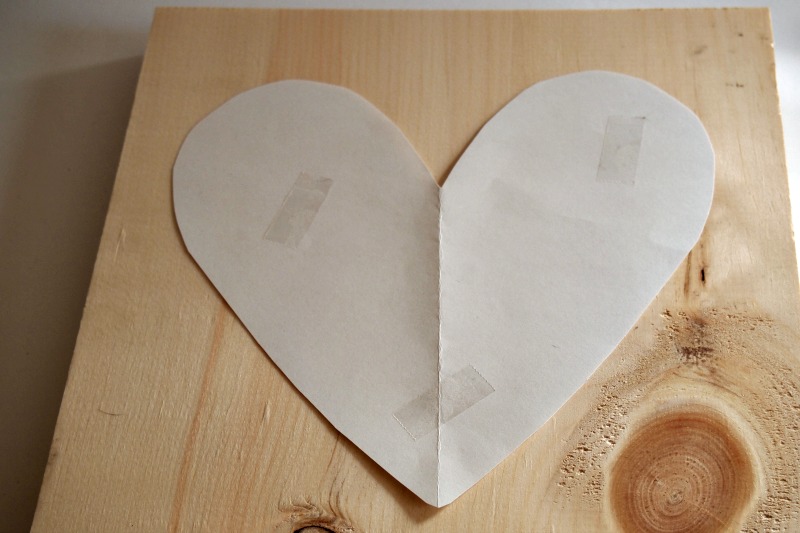
I chose to have mine a little closer to the top, but centered it horizontally. This is entirely up to you, of course!

Nail It this Valentine’s Day!
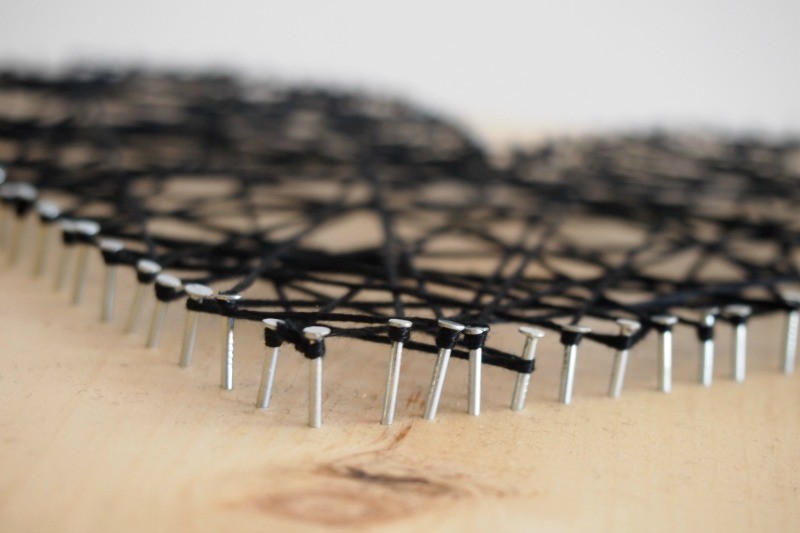
Now you can get started on hammering! Start at either the top or bottom of your heart for the sake of keeping it simple and hammer your nail in about halfway, like this:

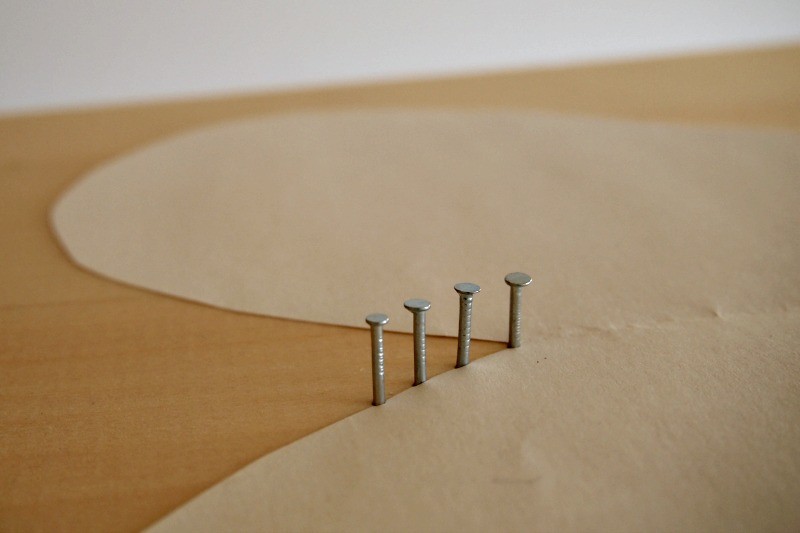
Keep the spacing as even as possible, but don’t worry if you make some too close or too far apart. In the end, you won’t be able to tell, and this isn’t a craft based on perfection. As you go, you may even notice they’re not all straight. I kind of love that because it’s the true handmade feel of the project, and let’s face it, hearts aren’t perfect – whoa, this tutorial just got deep!

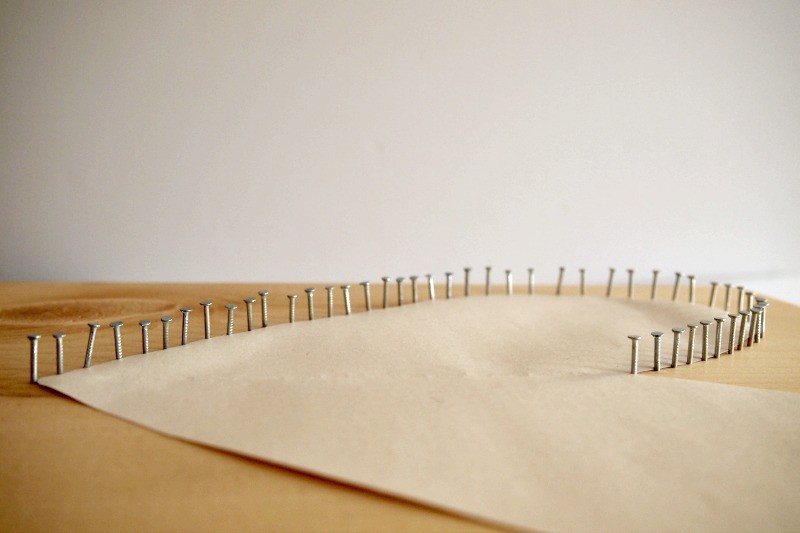
And just like that, you’ve hammered about 400 nails (no, I didn’t really count, and I don’t think it’s actually that many), and you’re almost ready to get started with the thread! Don’t worry, nailing doesn’t take that long, and it turned out to be sort of therapeutic!

Time to Tie the Knot
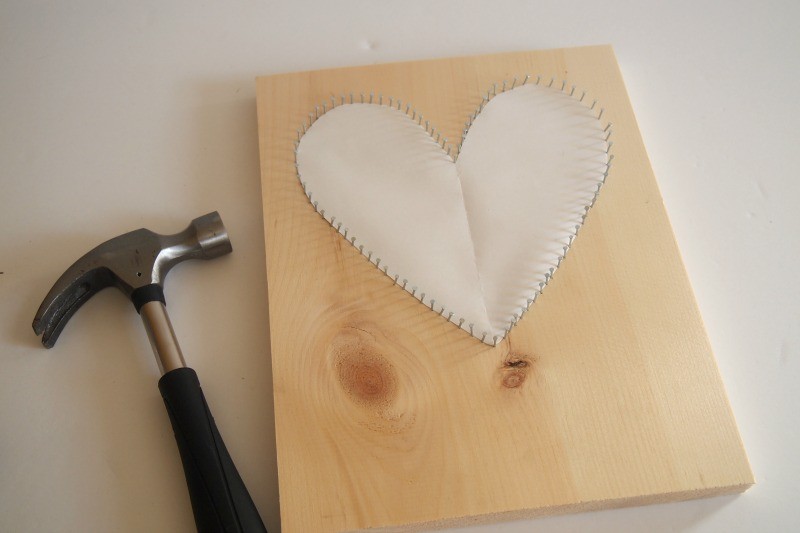
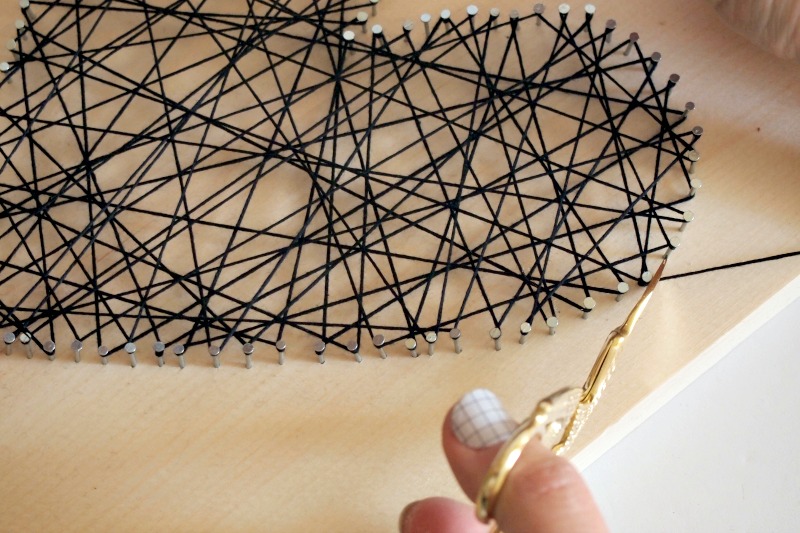
Remove your paper template and unwind some embroidery thread. Tie a knot around your first nail (make that a double knot) and cut off any excess thread.

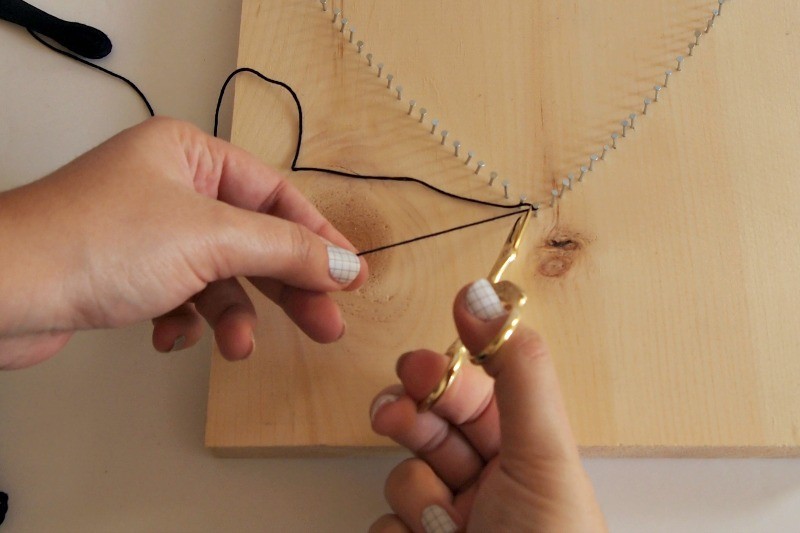
Now you can start connecting the nails with thread, making sure to loop around the nail at least once. Trust me, you’ll want to make sure you’re looping them because you want the thread to be as tight as possible.


Keep going until you have connected all of the nails. I only connected mine once because I like the negative space in between the strings, but if you want a more opaque look to your heart, keep going! When you connect the thread with another piece, try to make sure the knot is on a nail, otherwise it’ll be noticeable in your artwork.

When you finish, tie another double knot around a nail and cut off the excess thread again. Remember to cut as close to the knot a possible so that you don’t see any bits of thread sticking out.

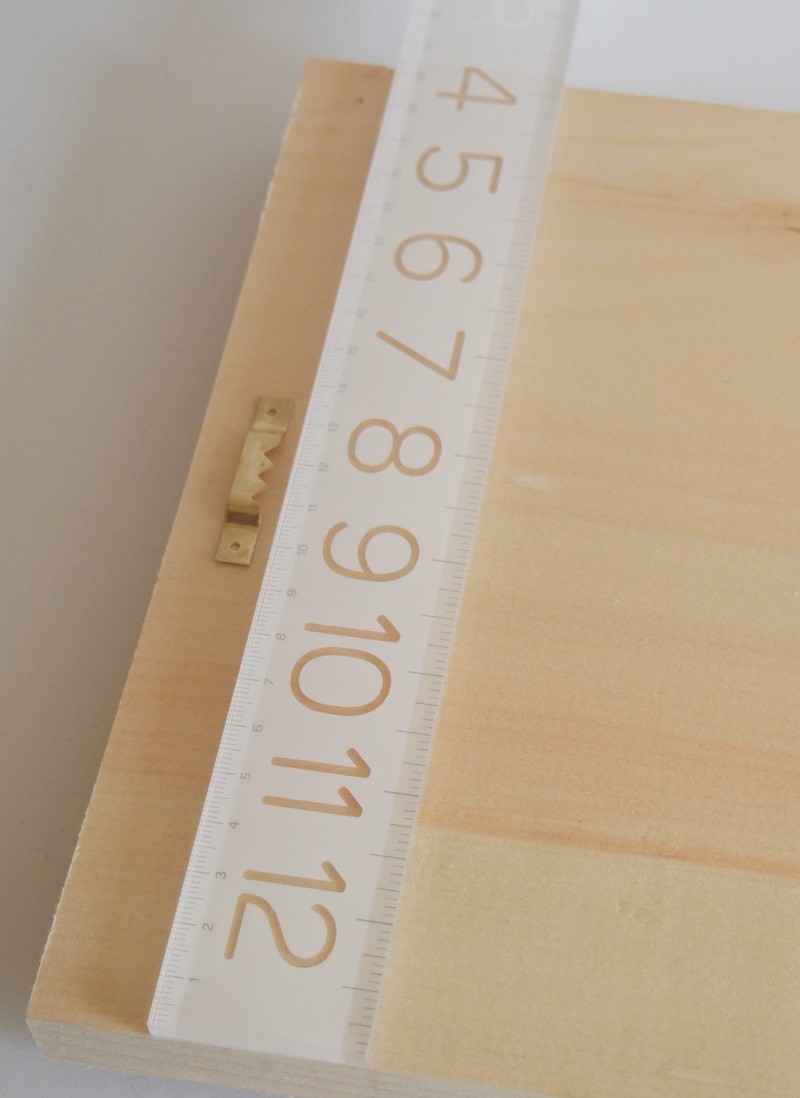
If you need to hang this on a wall, you can get some hardware (also at the hardware store, duh) to make this easy peasy for you. Just find the center of the pine block and hammer in two nails. Done!

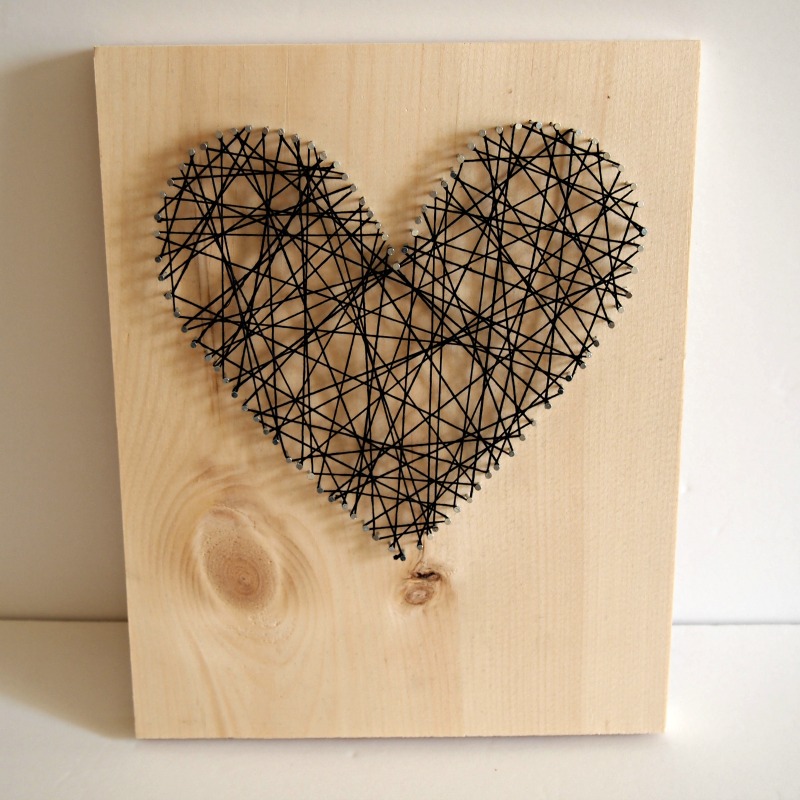
And just like that, you’re finished! This entire project took about 45 minutes from start to finish, so that’s really not too bad considering the detail and the amount of hammering going into it!

Decorate with Panache
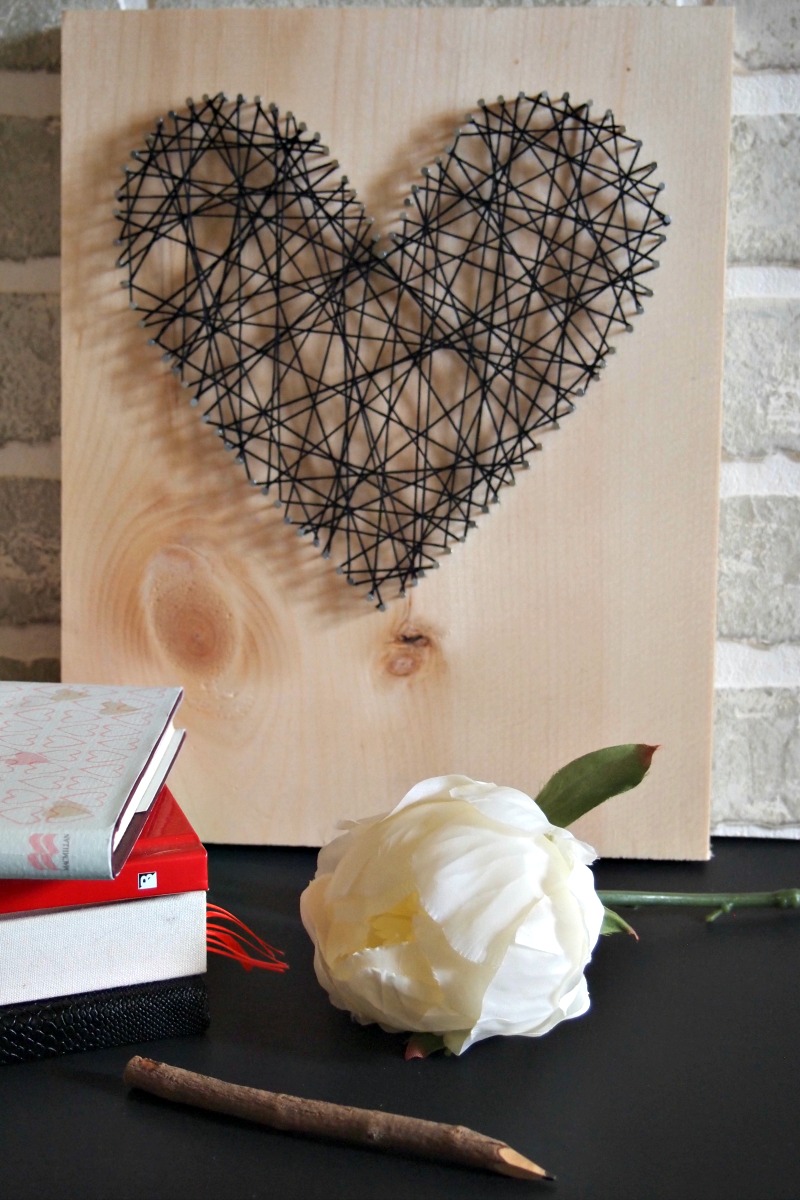
I love how simple (yet complex with all of the lines) this looks, and I love the almost Scandinavian feel of the piece with the raw wood and black together. I styled it a couple of different ways so you can see how this can be used.
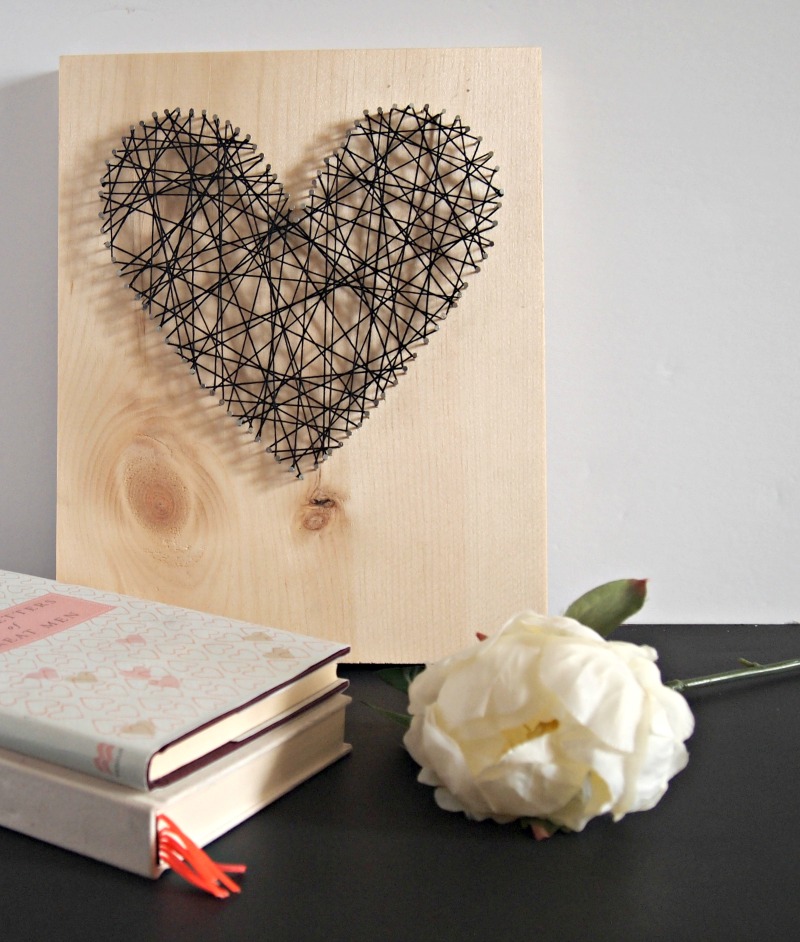
Simplest: with a couple of books and a flower, so it’s Valentine’s themed, but not so in your face.

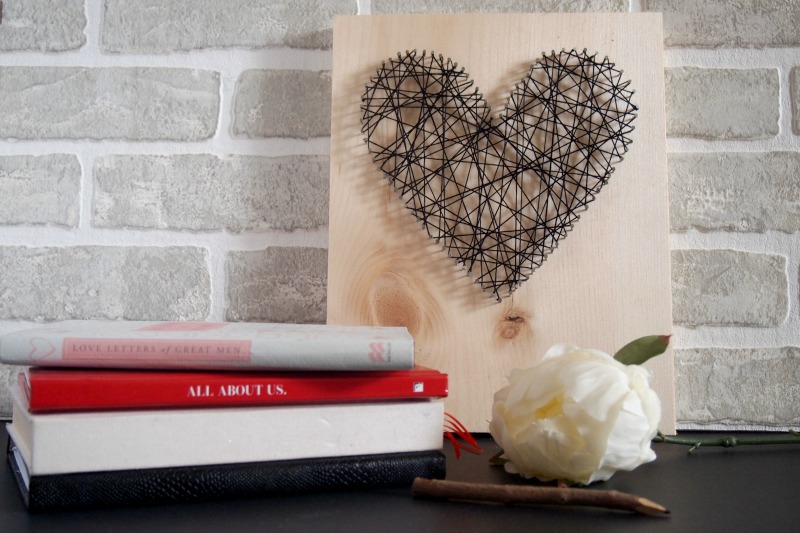
Then I added a couple of books (so we get a touch of red in there), and put the artwork against a brick wall. This is an easy way to style a shelf or bedside table without having to hang anything on your walls!

And there you have it. It’s pretty obvious that this is a Valentine’s Day vignette, but the fact that the heart isn’t red or pink keeps it from being too obvious.
Also, don’t you think that you could totally use this year round? I do! It would make for some adorable artwork in a little girl’s room, or how about using it on a gallery wall?

So would you try some Valentine’s Day art for your house? And hey, if you want to make this heart string art using red and pink thread, all the power to you. Nothing wrong with loving a little love, am I right?