Ready for another holiday DIY project? This month at Decoist, we’re filled with the spirit of the season, and we’re eager to share our design ideas with you. Kate here, and this past weekend I created a retro-style centerpiece that evokes a tropical feel for the holidays. In fact, this DIY Christmas project couldn’t be easier to complete, and it will give your holiday decor a vintage look, whether you want to create an Art Deco vibe, a Mid-Century feel or even a touch of ’80s flair. The finished product is definitely fun–with a hint of Copacabana style! Read on for all the details…

DIY Christmas Centerpiece Supplies


Here’s what you’ll need to get started…
- faux tropical greenery
- metallic spray paint
- Christmas ball ornaments
- a glue gun and glue sticks
- a vase for display
- a vase for holding the greenery upright while spray painting
- newspaper or another protective covering for your work surface


Let’s start with the faux tropical greenery. When it comes to the major craft supply stores, one of them will typically be having a sale on faux greenery at any given time! My bundle of greenery (it was actually sold as a bundle with one stem) was priced at around $20, but thanks to a sale, I was able to get it half price. If you purchase individual stalks/leaves instead of a bundle, you may want to fasten your greenery together in a bundle, taping the bottom portions into a stem for easy spray painting purposes. I used glass ball ornaments in a shade of iridescent cream for this project, but plastic ball ornaments would work as well.

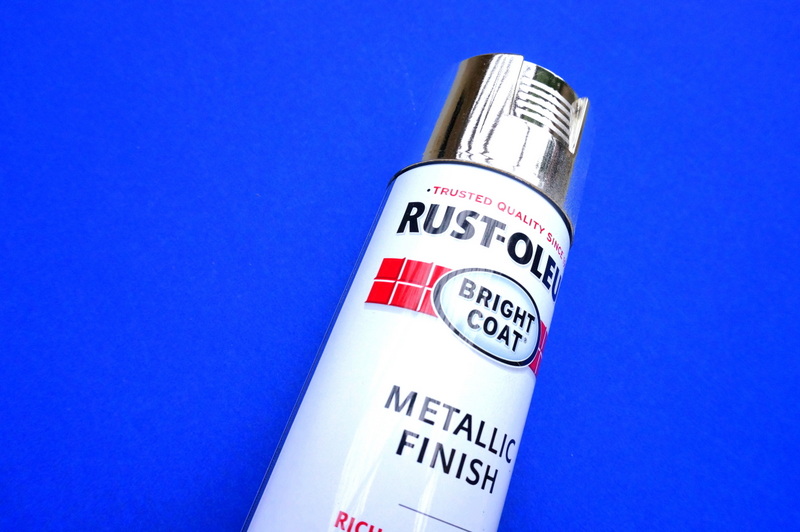
I love shiny silver spray paint! Worried it will be too shiny? The textured surface of this greenery kept the paint from appearing too chrome-like. Not that I would have minded…

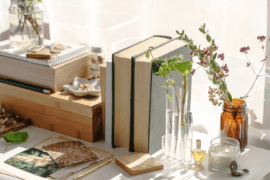
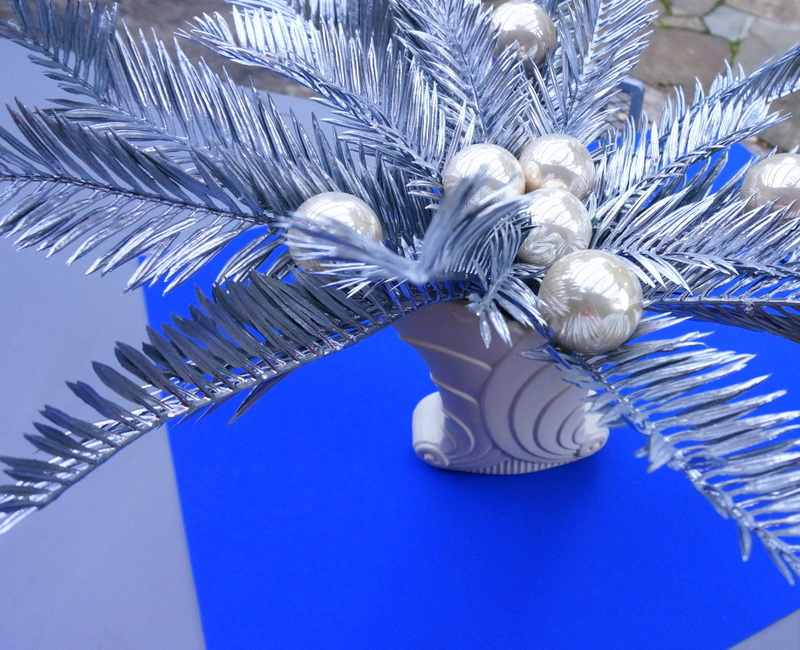
For my display container, I chose an Abingdon vase that I’ve had for years. It’s a true vintage piece that I found for a bargain price at a garage sale. The Deco curves make this vase perfect for a tropical holiday project!
Holiday Centerpiece Project Steps


Step 1: Spray paint your faux tropical greenery.
This step goes very quickly, but it’s important to prep for it. I spray painted in my driveway, and while I was outside, I still made sure to tape newspaper to the driveway to protect it from the silver paint. I spray painted the back of the greenery first (placing it face-down on the newspaper).


I waited an hour for the spray paint to dry, and then I placed the greenery in a newspaper-wrapped glass vase (for protection) so the top of the faux tropical plant was exposed–and off the ground so it would dry nicely. Spray painting the greenery while in the vase was super easy, and it kept my hands from getting covered in paint during the spraying process!

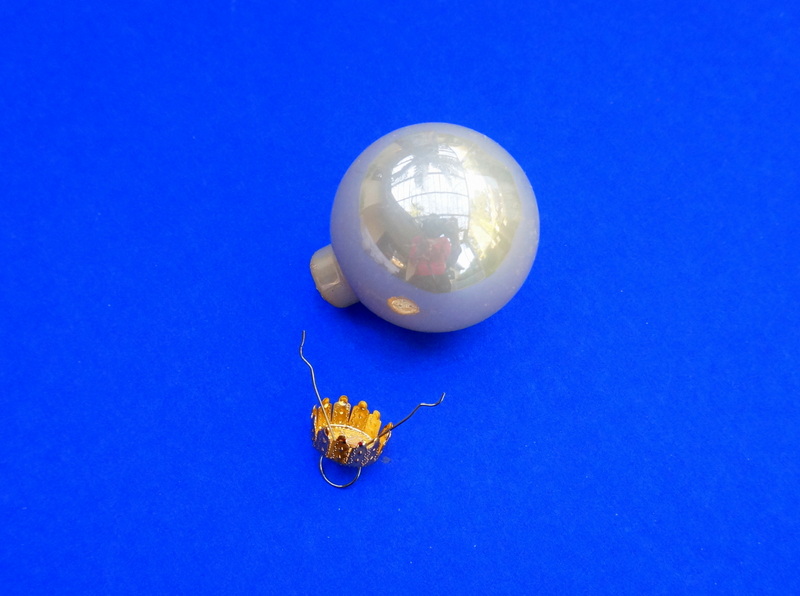
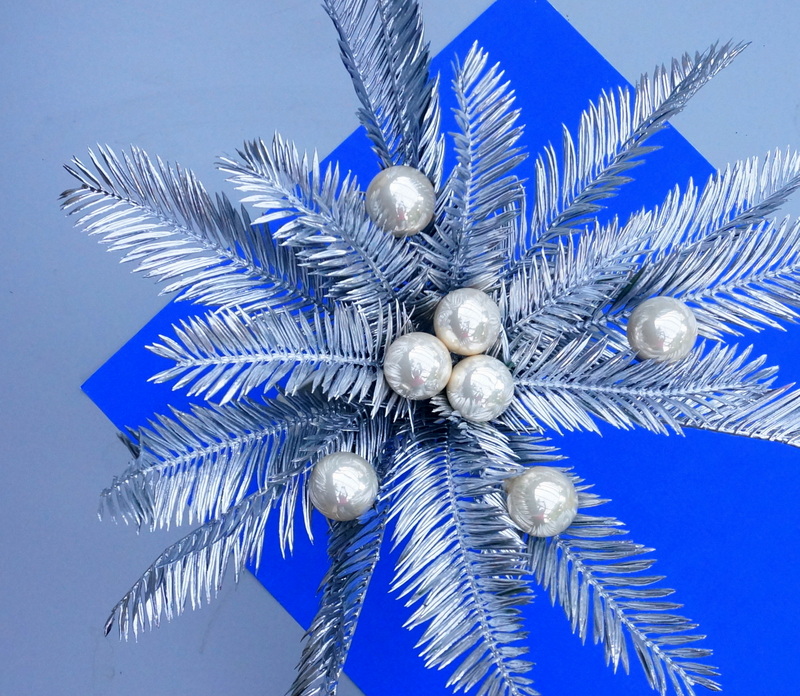
Step 2: Hot glue three ball ornaments to the center of your faux greenery arrangement.
Once again, I waited about an hour until the spray paint had initially dried before adding the ornament embellishments. However, if you want to be on the safe side, you can wait the full 24 hours (it takes this long for the paint to officially cure). I removed the tops of the ornaments before gluing them down. This helped camouflage the tops, giving the glass balls more of a giant pearl appearance than an ornament appearance. Actually, they kind of evoke the tropical feel of coconuts!

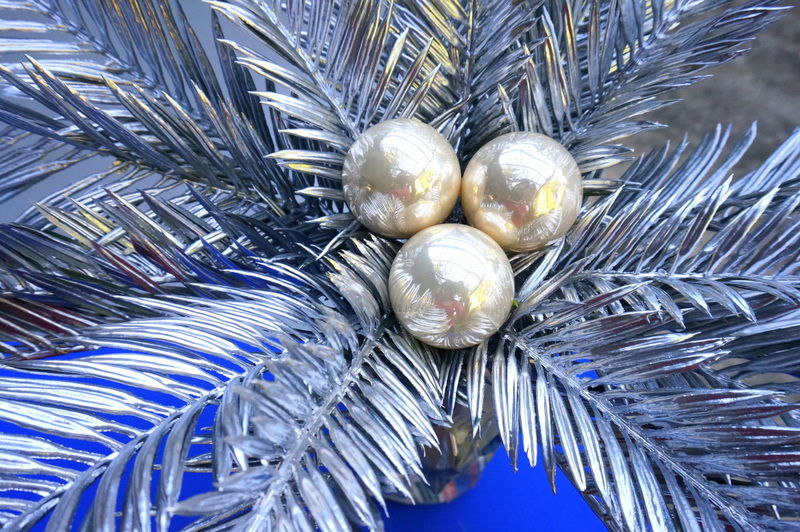
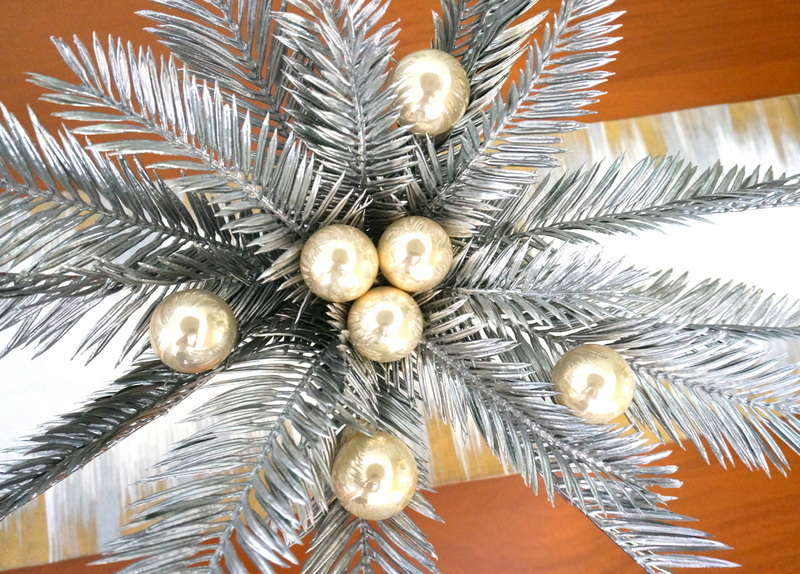
Step 3: Hot glue a few more ornaments to the outer leaves of the arrangement.
Once again, I made sure to hide the protruding tops of the ornaments in dense clusters of leaves. This also hides the globs of hot glue! When I’d completed this step, the centerpiece looked like this:


This DIY Christmas centerpiece has such a festive, retro look. It’s a bold statement, making it a great party centerpiece as well. And you can leave this one on display through New Year’s!

Step 4: Place the decorated tropical bundle in your vase, and display it with pride.
Once I saw the arrangement in the Deco vase, I knew I’d picked the right container:

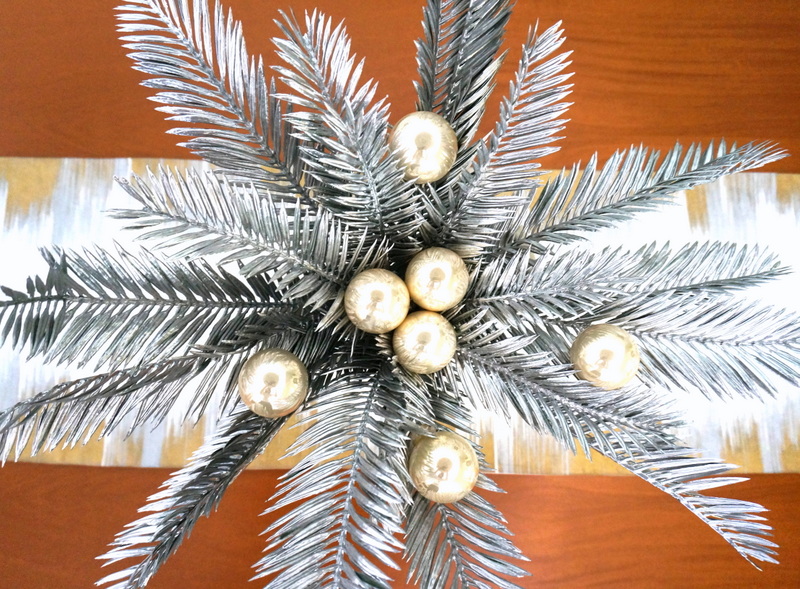
Here’s the centerpiece on my dining room table. The runner is from West Elm–it sold out online and in retailers last year, and I convinced the sales clerk to let me buy the last runner off the holiday display table! The candle holders are from CB2. They are super affordable and one of my favorite purchases of all time. Recognize the wall hanging? You may remember it from this DIY project post. For the holidays, I switched out the bright orange yarn with yarn in shades of silver and glittery taupe. I have a feeling it will be a constantly evolving piece!
Here’s one more overhead shot. Why not go all out at a time of year when shiny and festive decor takes center stage?!

Thanks for letting me share my latest DIY project. Stay tuned for more Decoist DIY fun throughout the holiday season!