When creativity meets budget-friendly design, the result is pure magic. And there’s nothing like watching it all unfold, which I’ve been fortunate to do over the last few months. That’s because the builder of the tiny house you see below is none other than my brother, Andy Pluta. He was determined to build this house on a budget, so in addition to selecting cost-effective plans, he took many measures to put his own expense-savvy stamp on the project.

Why build a tiny house? For Pluta, it was all about creating a space in his backyard that could serve both as an artist’s studio and a modern dwelling for accommodating guests.

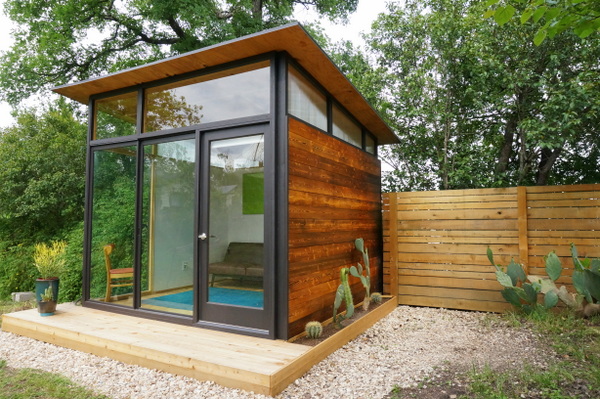
For the basic design of the house, Pluta settled on the plans for the MD100, created by furniture designer Edgar Blazona. Not only did the plans present a clean-lined, budget-friendly design, the challenge of building a structure of this magnitude was a powerful motivating factor for taking on the project.

Pluta adds, “One of the best-looking and most affordable designs I came across was the Edgar Blazona MD100, which he designed to be built by someone with a modicum of skills, and to be built for the most part with materials you can get at any big-box home improvement store.”
Read on for all the design details…

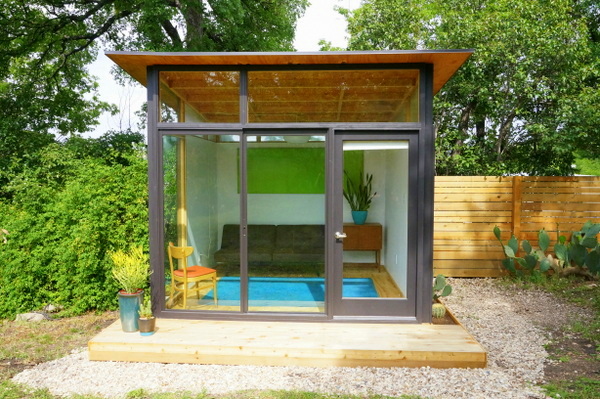
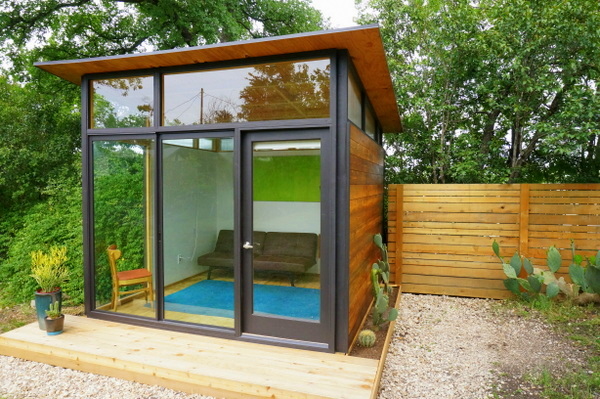
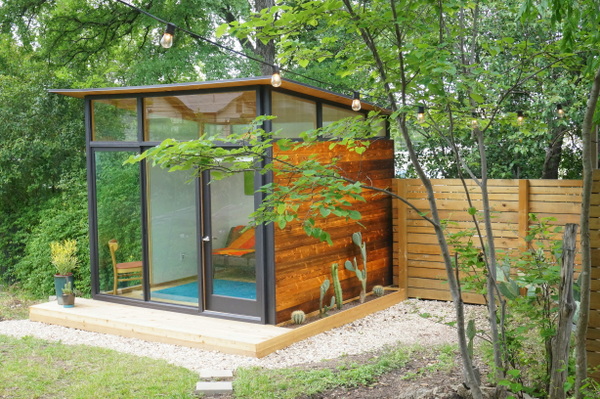
Budget-Friendly Design
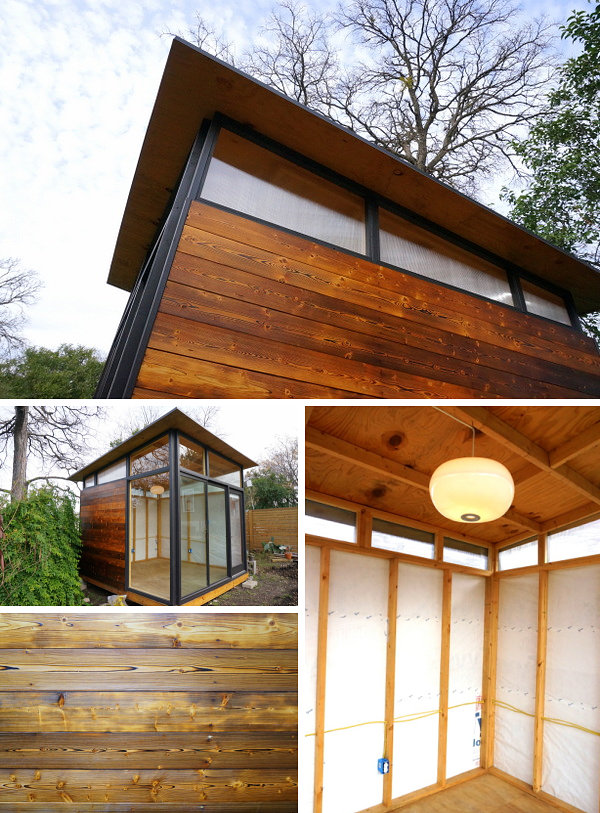
To keep costs down, Pluta made use of recycled materials, such as the two front windows, which were acquired from the Habitat for Humanity ReStore (pieces of glass that size would have been quite expensive). In addition, he received the door for free, and he utilized Craigslist to purchase the polycarbonate plastic used for the side and rear windows that line the top of the house.

Pluta shares, “The most expensive part by far was the custom glass I got cut for the top front windows and the large side window. Other than that, it was a lot of trial and error, a lot of doing things for the first time and hoping it worked out, and luckily for the most part it did.”

Personal Touches
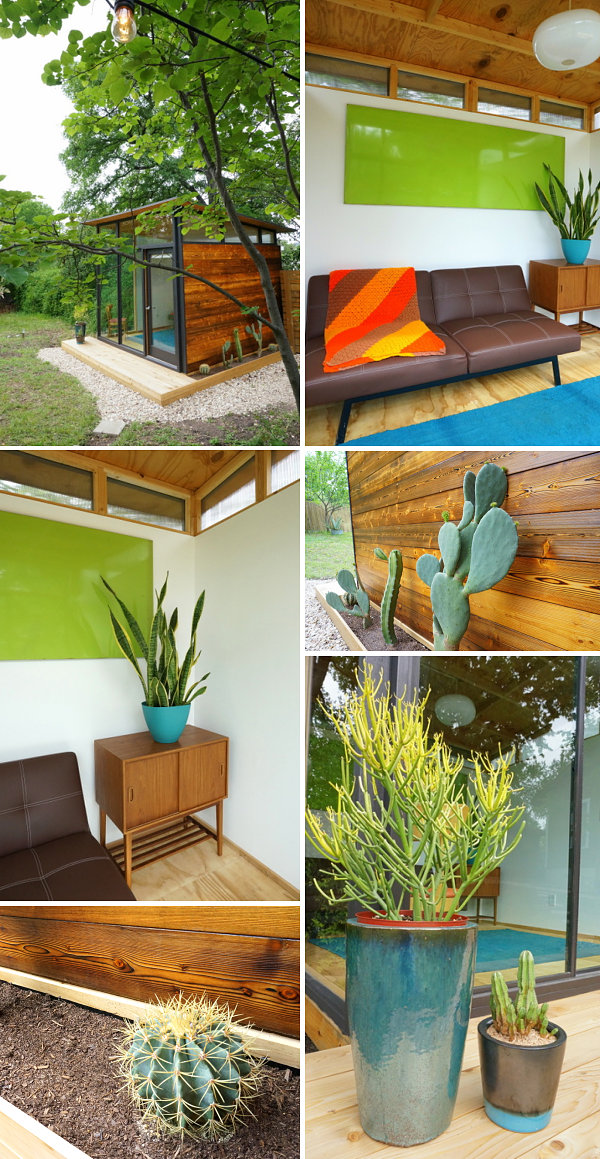
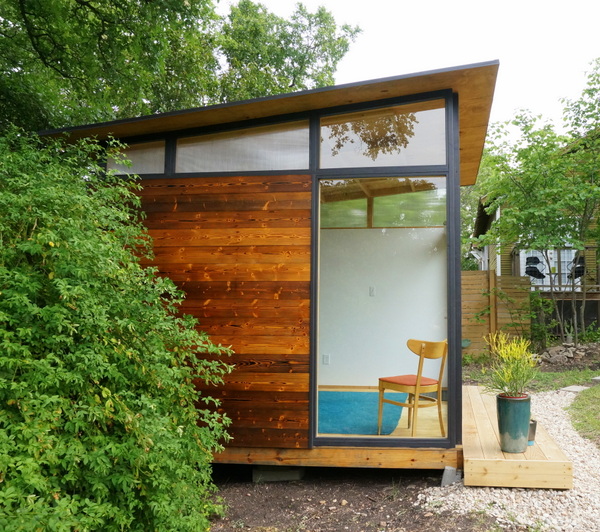
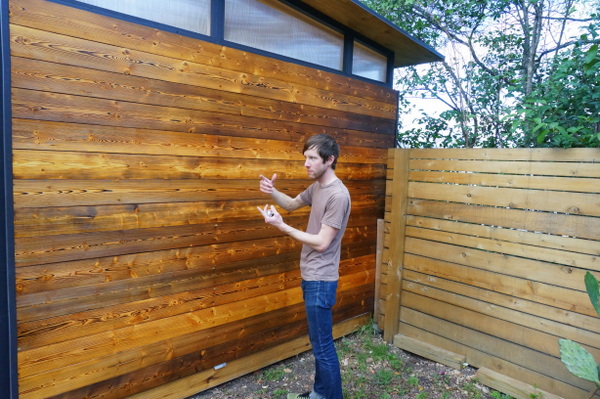
Taking the basic frame from the MD100, Pluta then incorporated a variety of customized touches, including his personal favorite: the charred wood siding, created with the help of a blow torch.

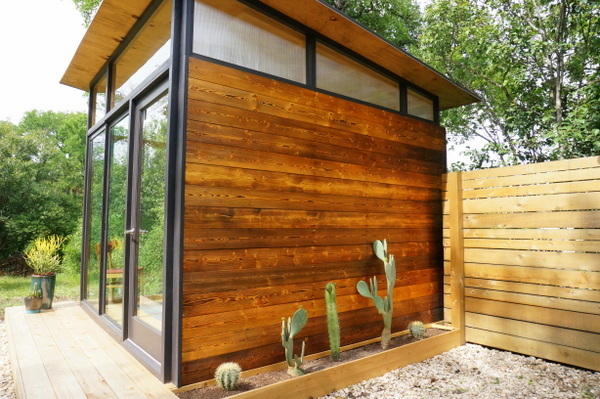

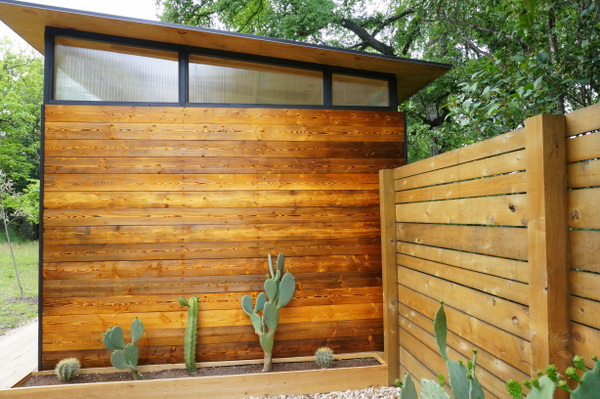
Using a Japanese process that involves charring the wood, sanding it with a wire brush to remove the excess char, and rubbing it with linseed oil, Pluta was able to create a durable, weathered finish. To increase the strength, he then added a coat of spar varnish, which has a UV-resistant effect.

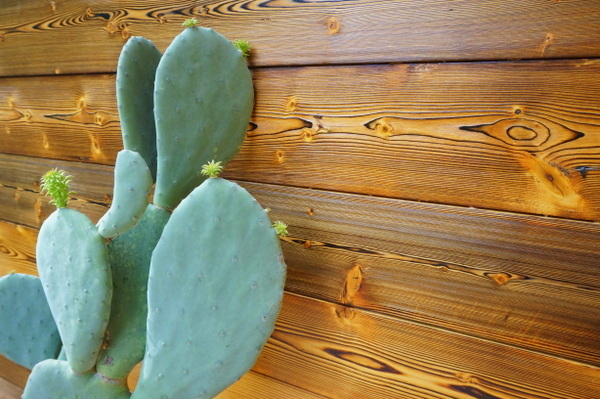

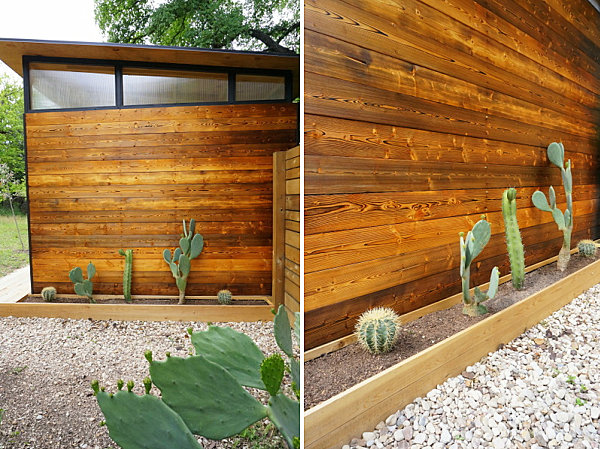
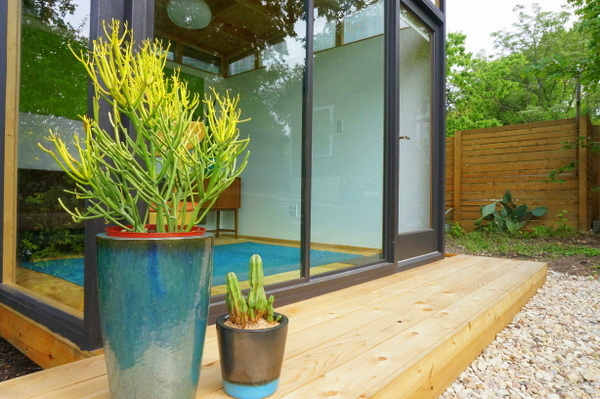
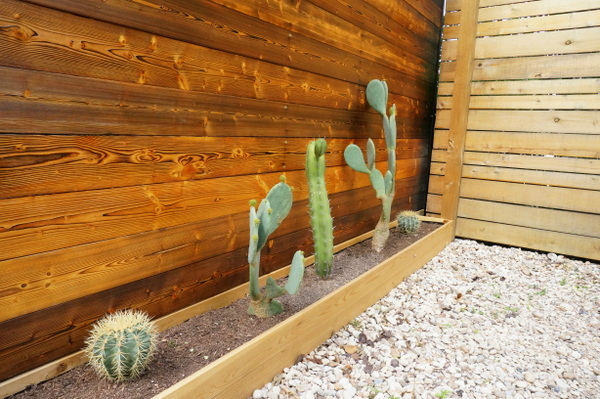
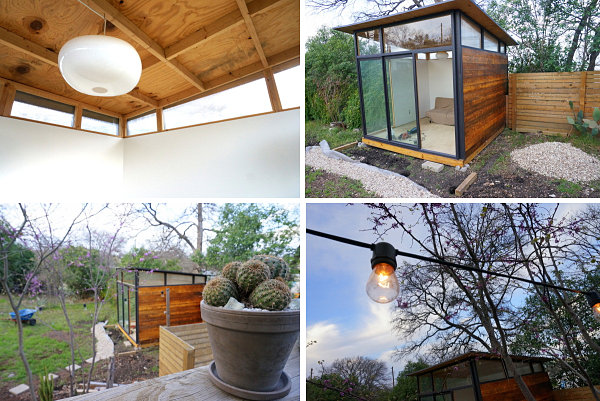
Another custom feature: the cedar deck in the front and the cactus planter on the side of the house, which contribute to the modern aesthetic while creating a stylish, lived-in feel.


Pluta also added polycarbonate top and rear windows to enhance the clean-lined design of the house and to bring in additional light:

Building a Tiny House
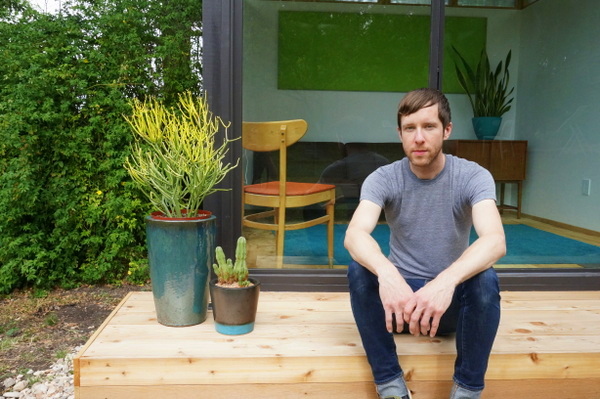
Curious about the process? Let’s start with Pluta’s background. An artist by nature, he is also intrinsically handy, more than willing to fearlessly tackle repairs on his own or engage in home improvement projects. But aside from building a couple of fences, including the cedar fence in front of his home (pictured next to the tiny house in the images above), he’d never attempted anything of this magnitude. And that’s encouraging to the rest of us who are hoping to get a bit braver in terms of our DIY projects!

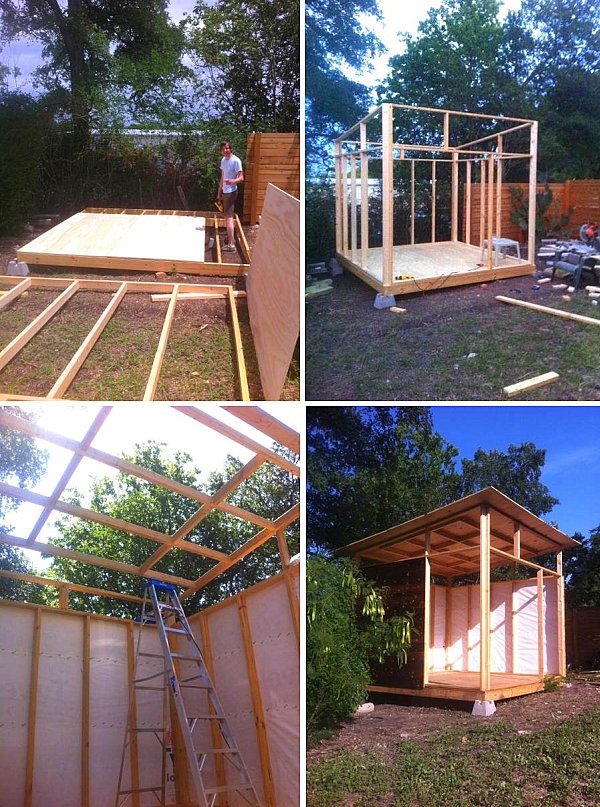
Pluta started by positioning the concrete blocks that support the home–there are nine of them–and leveling the floor frame. After building the remaining frames, he assembled them and installed the roof. Some key moments in the project included the framing process and the momentum gained once it was clear that everything fit.
Pluta shares, “All the frames fit together when I put them up–I’d never framed anything before.” About that defining moment when the roof was solidly overhead, he adds, “At that point, it looks like–wow, this is a real structure! But you’re still nowhere near done, because there are still a lot of little things that eat up your time.”

One of these “little things” was putting up dry wall, which was also new to Pluta. In fact, there were a lot of firsts involved in this project.

The key was knowing when it was time to slow down and take extra care with certain tasks. Also important was being OK with doing something over again if it didn’t quite work out the way he’d hoped.

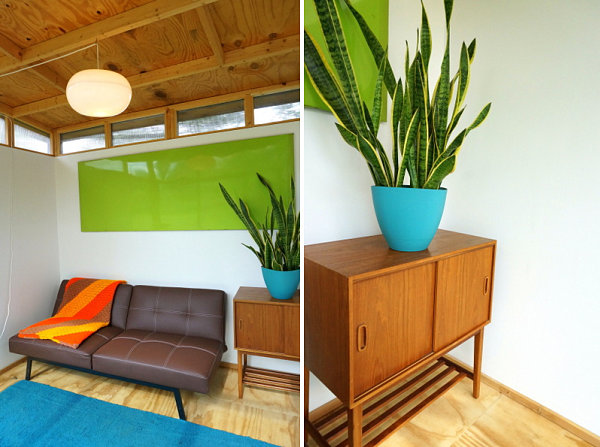
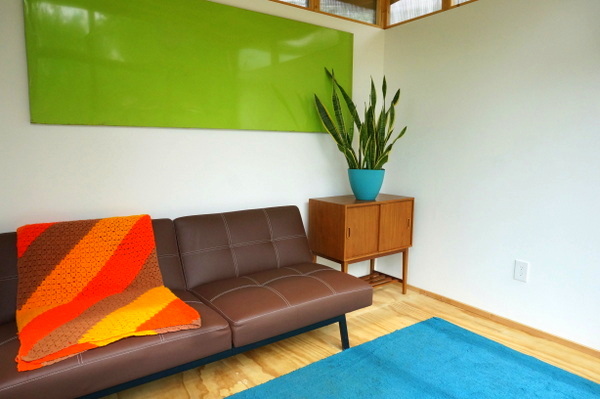
Interior Design Details
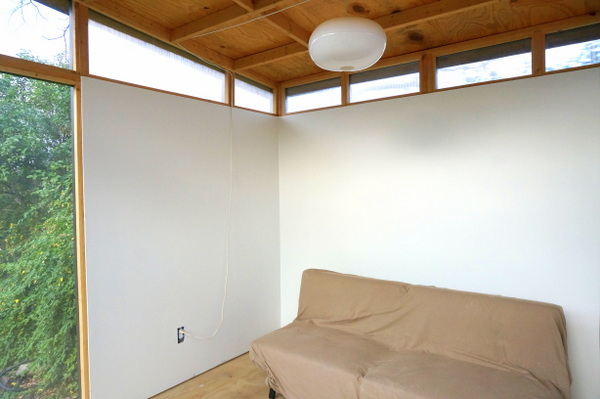
To ponder design ideas for the inside of the dwelling, Pluta explored various tiny house blogs. He also honored his love of Mid-century modern design, which is evident in the furnishings he selected and the overall feel of the interior:

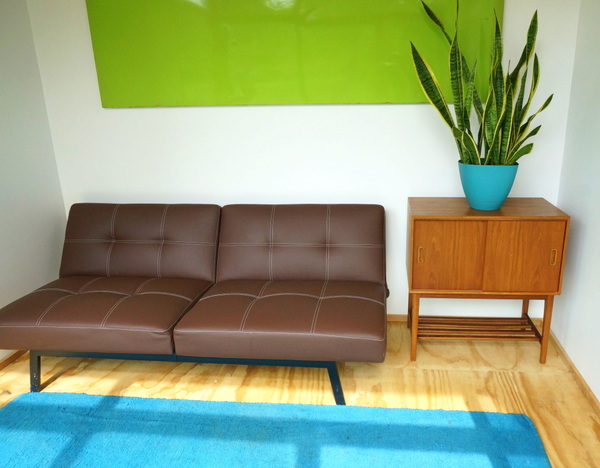
Splashes of color appear in the form of a vivid blue rug, a planter in a similar shade, a vibrant throw and a lime green metal sign Pluta found at a salvage yard. It appears to be part of a larger 7UP sign/installation, and its monochromatic style is perfect for this space.

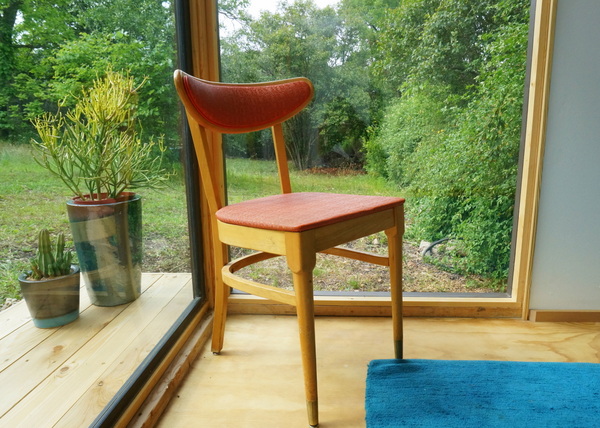
Other details include a modern chair with rust-toned upholstery that sits in the corner where the large glass windows meet:


Pluta’s Advice to Others…
On one of my visits with Andy, I asked him about his advice for those looking to attempt a project of this magnitude. I have to admit, I’m intimidated by the thought of creating such a large structure! I was interested in how he faced the challenge.
Pluta brings the process down to earth, sharing, “There were a lot of points where I was getting discouraged because it was taking a lot longer than I’d anticipated, so my advice would be ‘just stick with it.’ It’s going to take longer than you think it is, especially if you’ve never attempted a construction project of this size before, which I had not. But in the end it’s very satisfying to know you did it all yourself. Now I have my own tiny space for guests or creative endeavors.”


But surely some type of experience is necessary, right? Pluta adds, “You need to have a basic proficiency with a circle saw, a mitre saw and a power drill. Those were some of the only tools I used in this whole process…so if you’re generally confident using those tools, then it’s easy to put something up like this.”
That’s very encouraging. But what about people like me, who have no experience building, sawing or drilling? Pluta recommends getting a helping hand, especially in the beginning when everything seems brand new. And yes, it is crucial to have someone teach you how to use the tools before you begin if necessary. But there’s definitely an element of just “going for it” and being brave.


“I had a Subaru hatchback with a roof rack,” Pluta says. “I carried every material except the sheet rock on or in that car, even though maybe I probably shouldn’t have! So I was able to just get it done by myself. I put the frames up by myself, got the roof on by myself. I probably should have gotten help at certain points, but a lot of the time I was just working on my days off during the week.”
To celebrate the completion of the home, Pluta had a “tiny house”-warming party. Guests admired his handiwork while enjoying the spring breeze under the twinkle of globe lights. When you complete a project of this magnitude, there’s definitely a lot to celebrate.

“All in all, it came out better than I ever thought it would,” Pluta shares. We couldn’t agree more.