With online marketplaces such as Minted, Etsy and Society6 providing a huge selection of affordable art options, it’s easy to purchase wall decor on a budget. So why DIY? For one thing, you may have a specific idea of a design or palette for your space. If you don’t find exactly what you want, it’s tempting to create it yourself. And why shouldn’t you?! Not only can art be therapeutic, it can give you a sense of pride, especially when you see the efforts of your hard work on display in your home on a daily basis.
Today’s post explores the fun of creating DIY watercolor wall art. This tutorial is by no means intended to guide you through a strict step-by-step process. Use it as a jumping off point for your own artistic endeavors, in whatever palette you choose. Keep reading for tips, tricks, and helpful hints that apply to creating any DIY wall art project.

Choose a Muse
If you’re interested in creating your own DIY watercolor wall art, perhaps something inspired you to take the plunge. Was it a place that created feelings of serenity? Perhaps it was an object, or even another work of art.

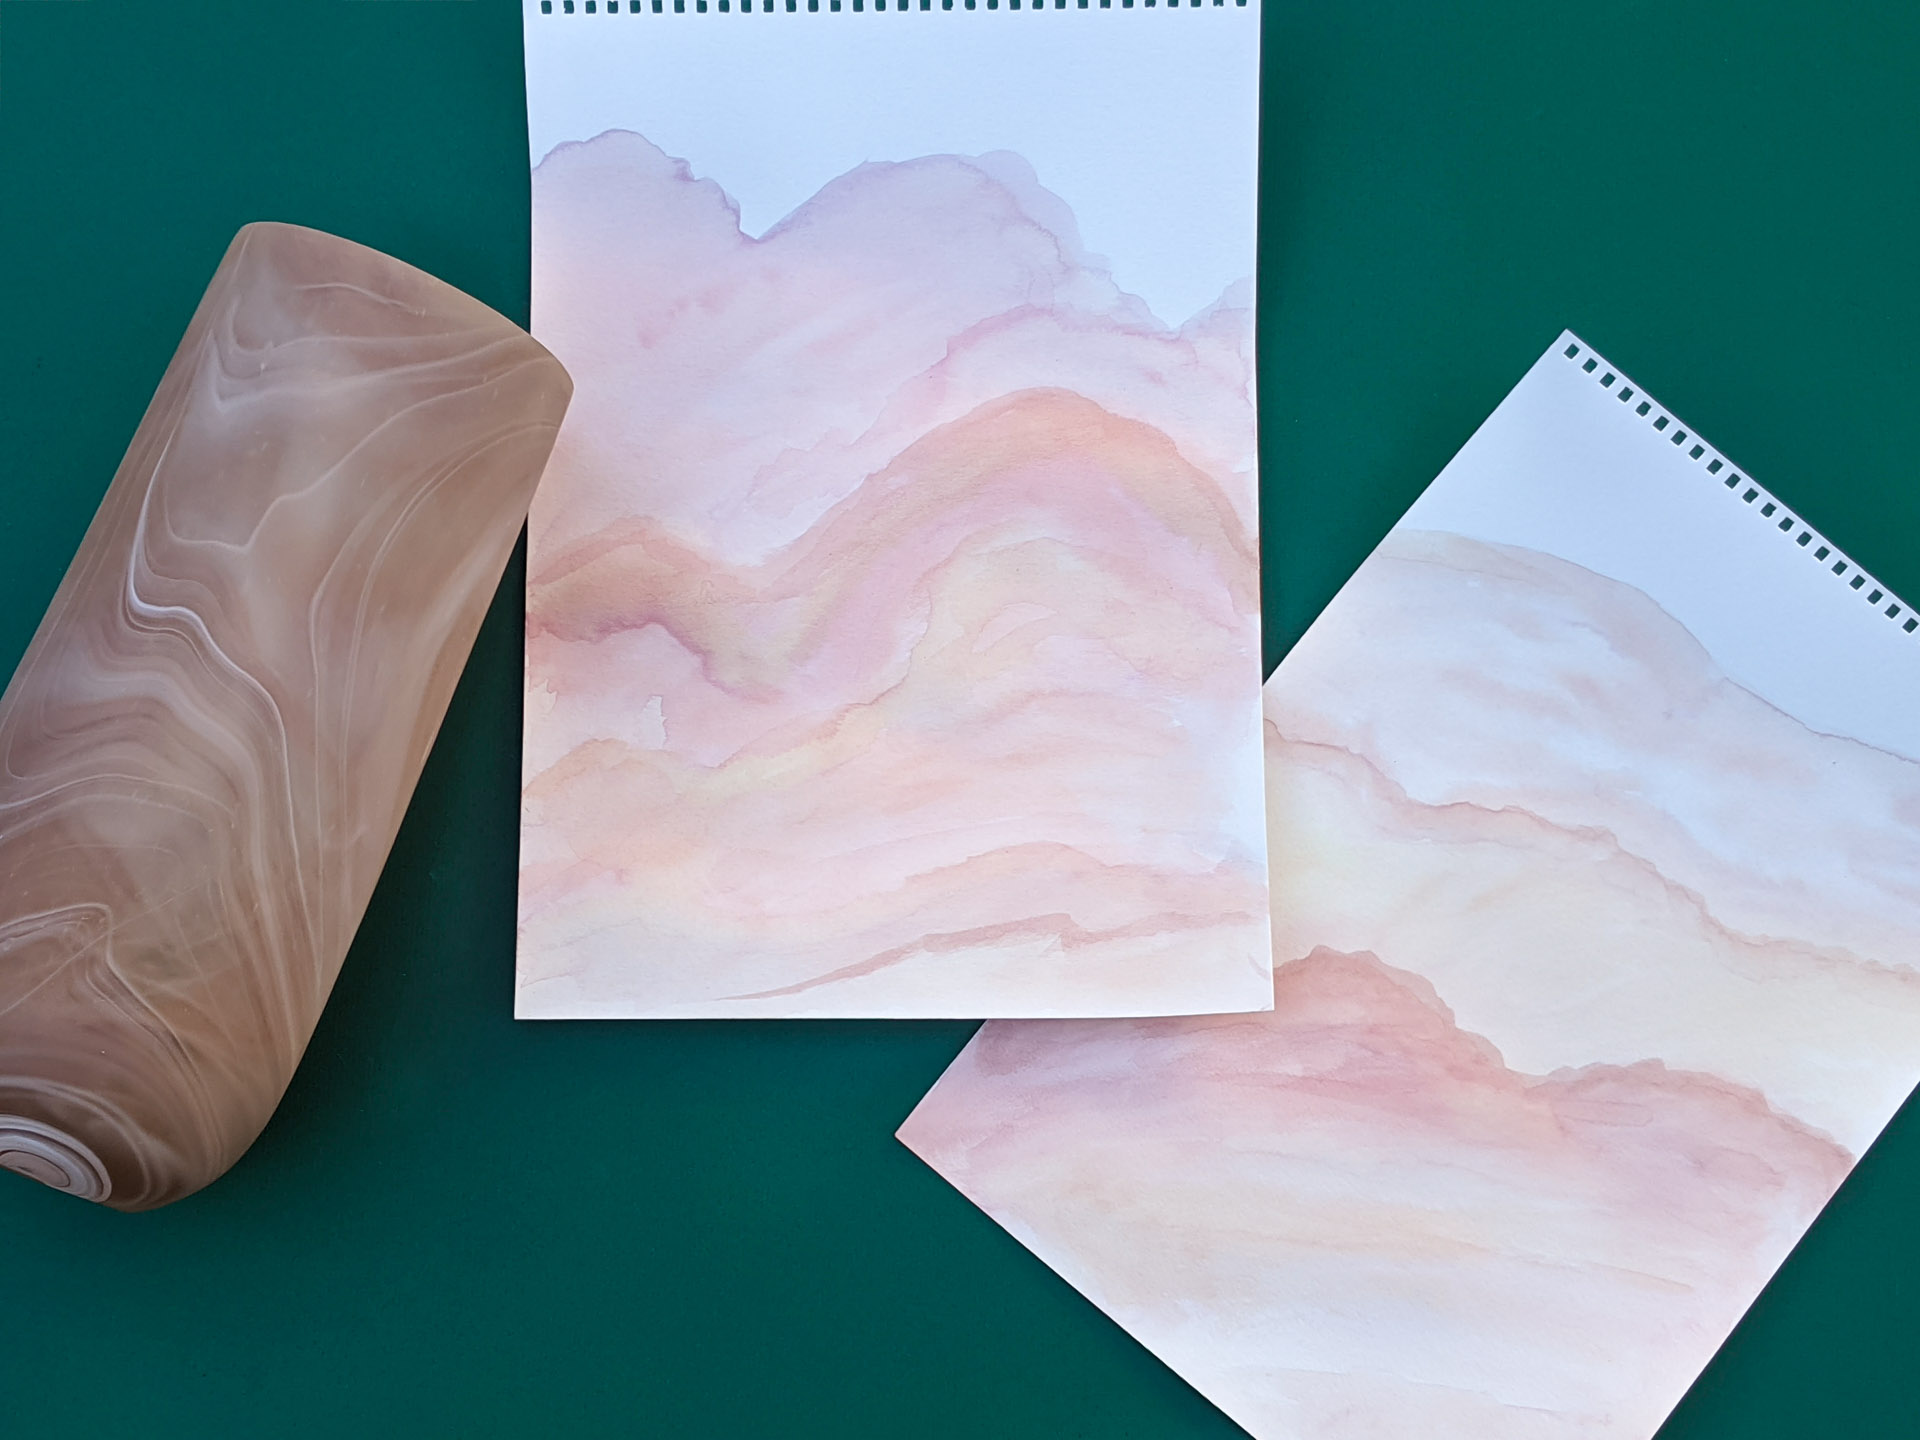
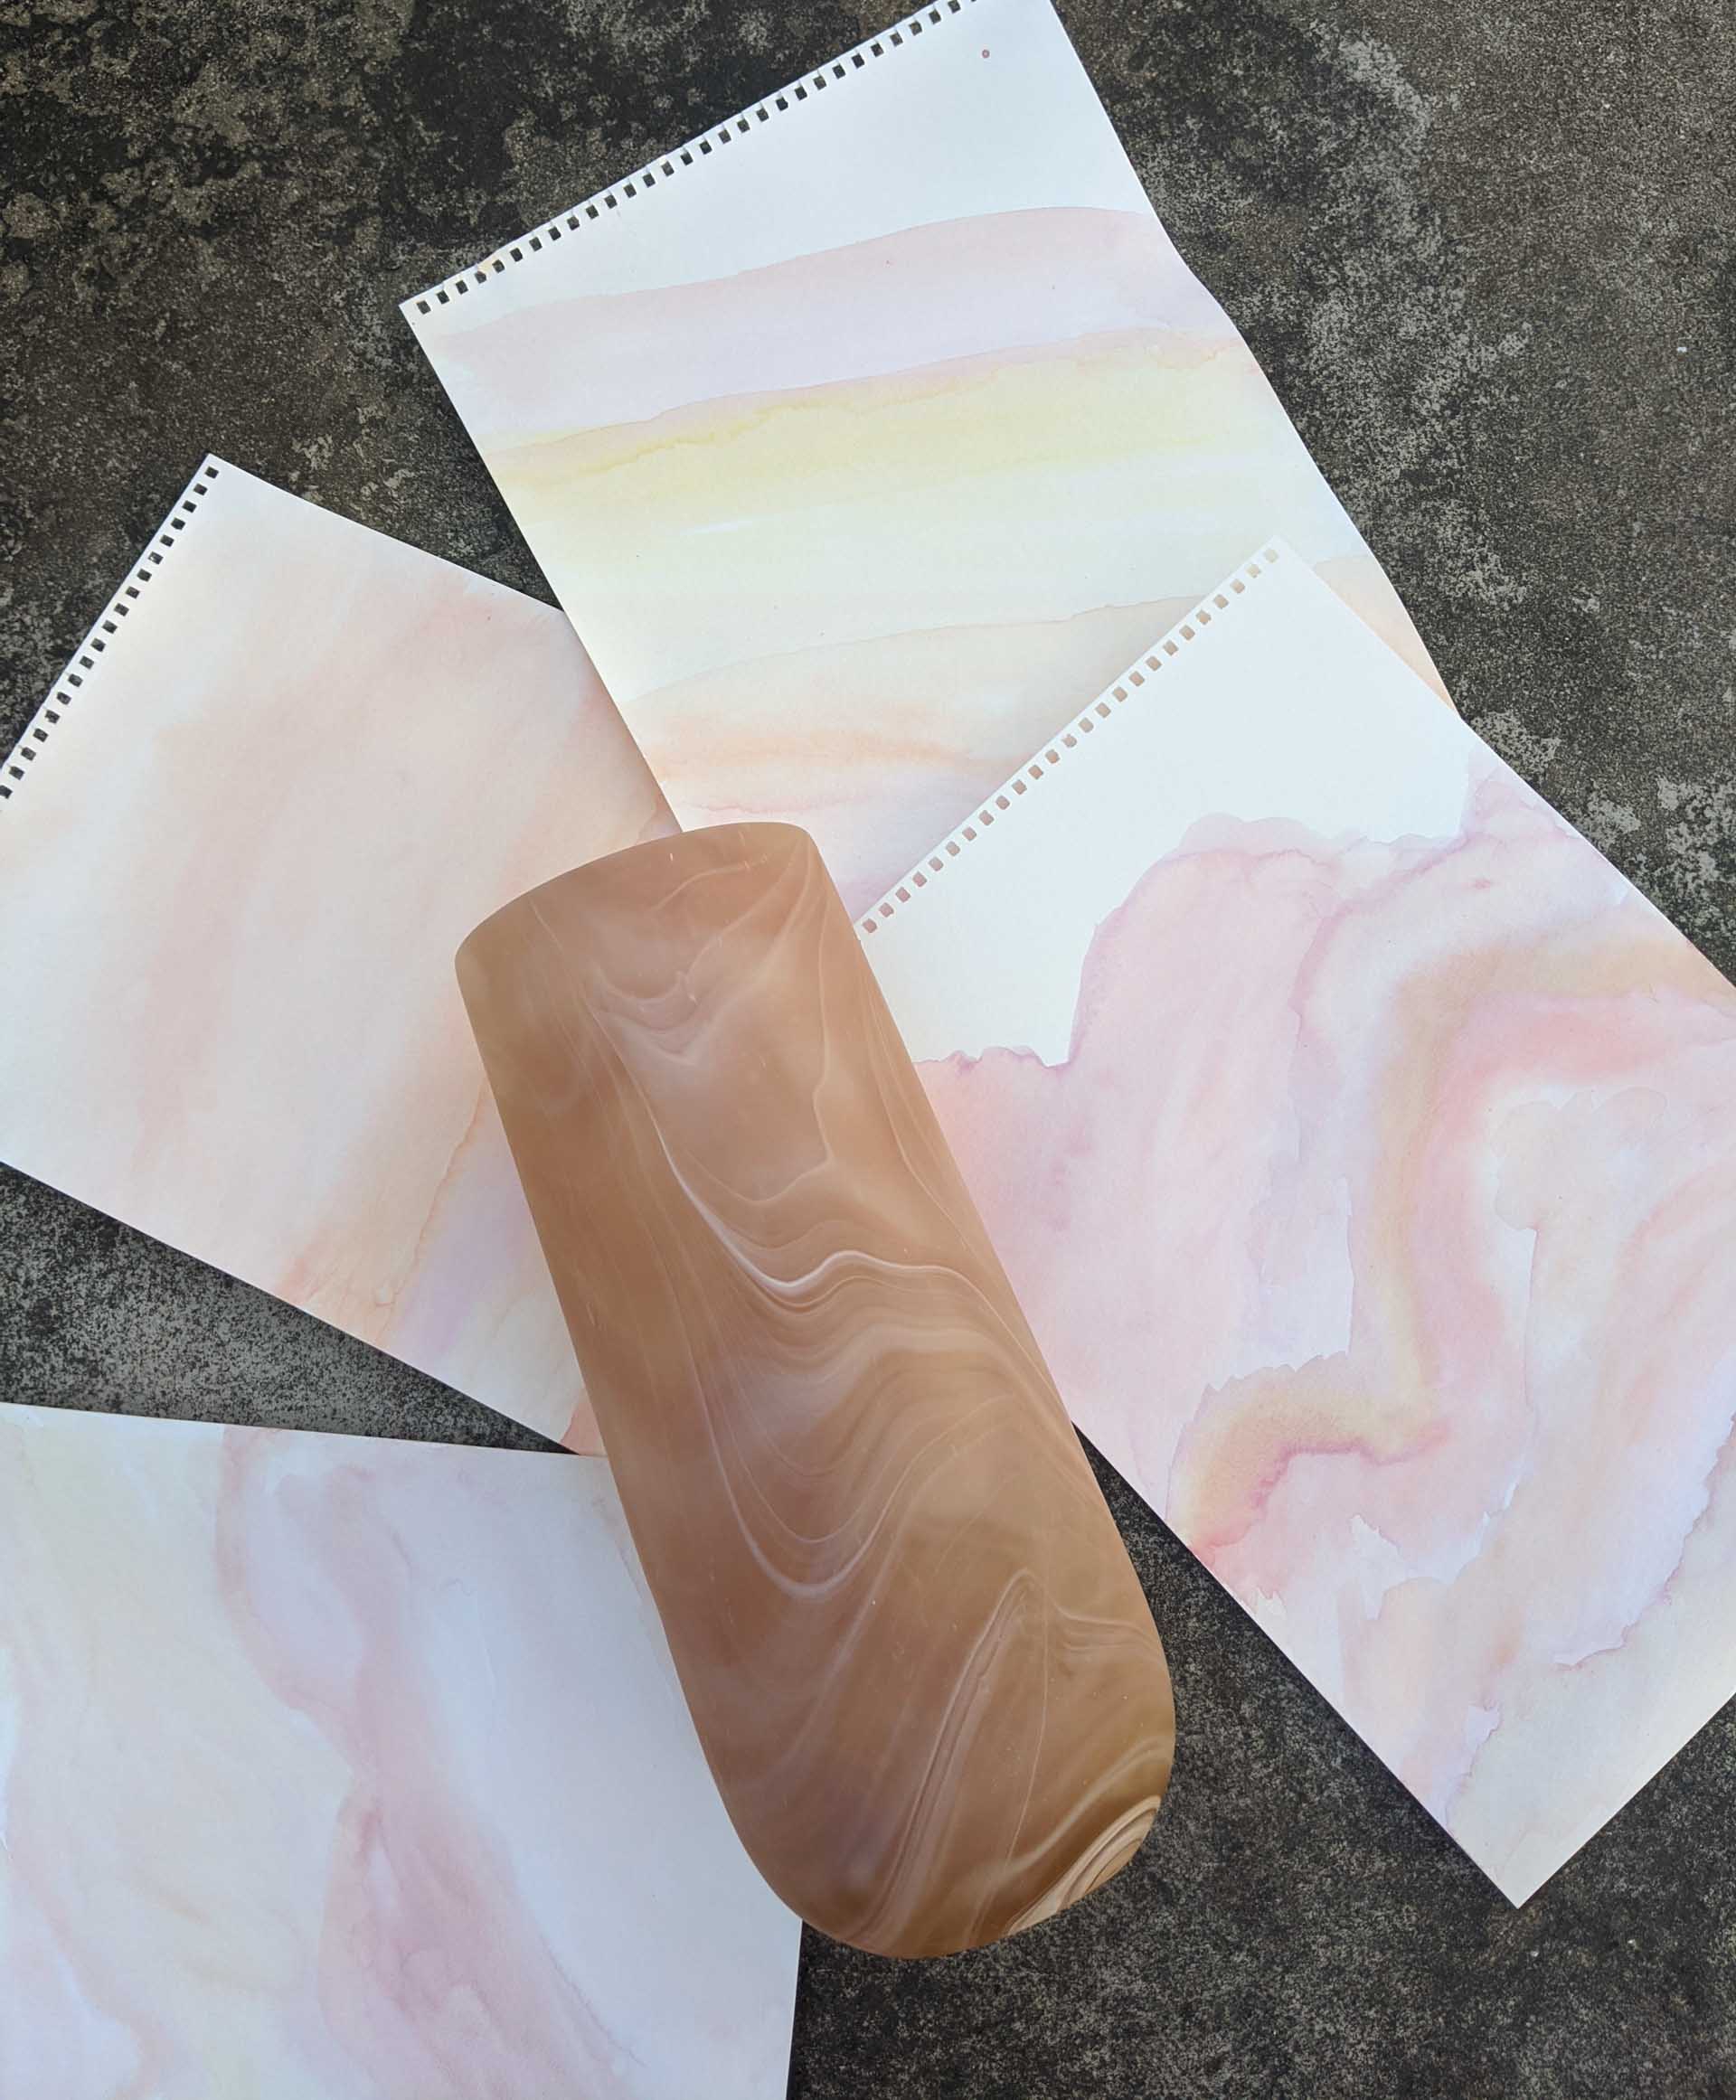
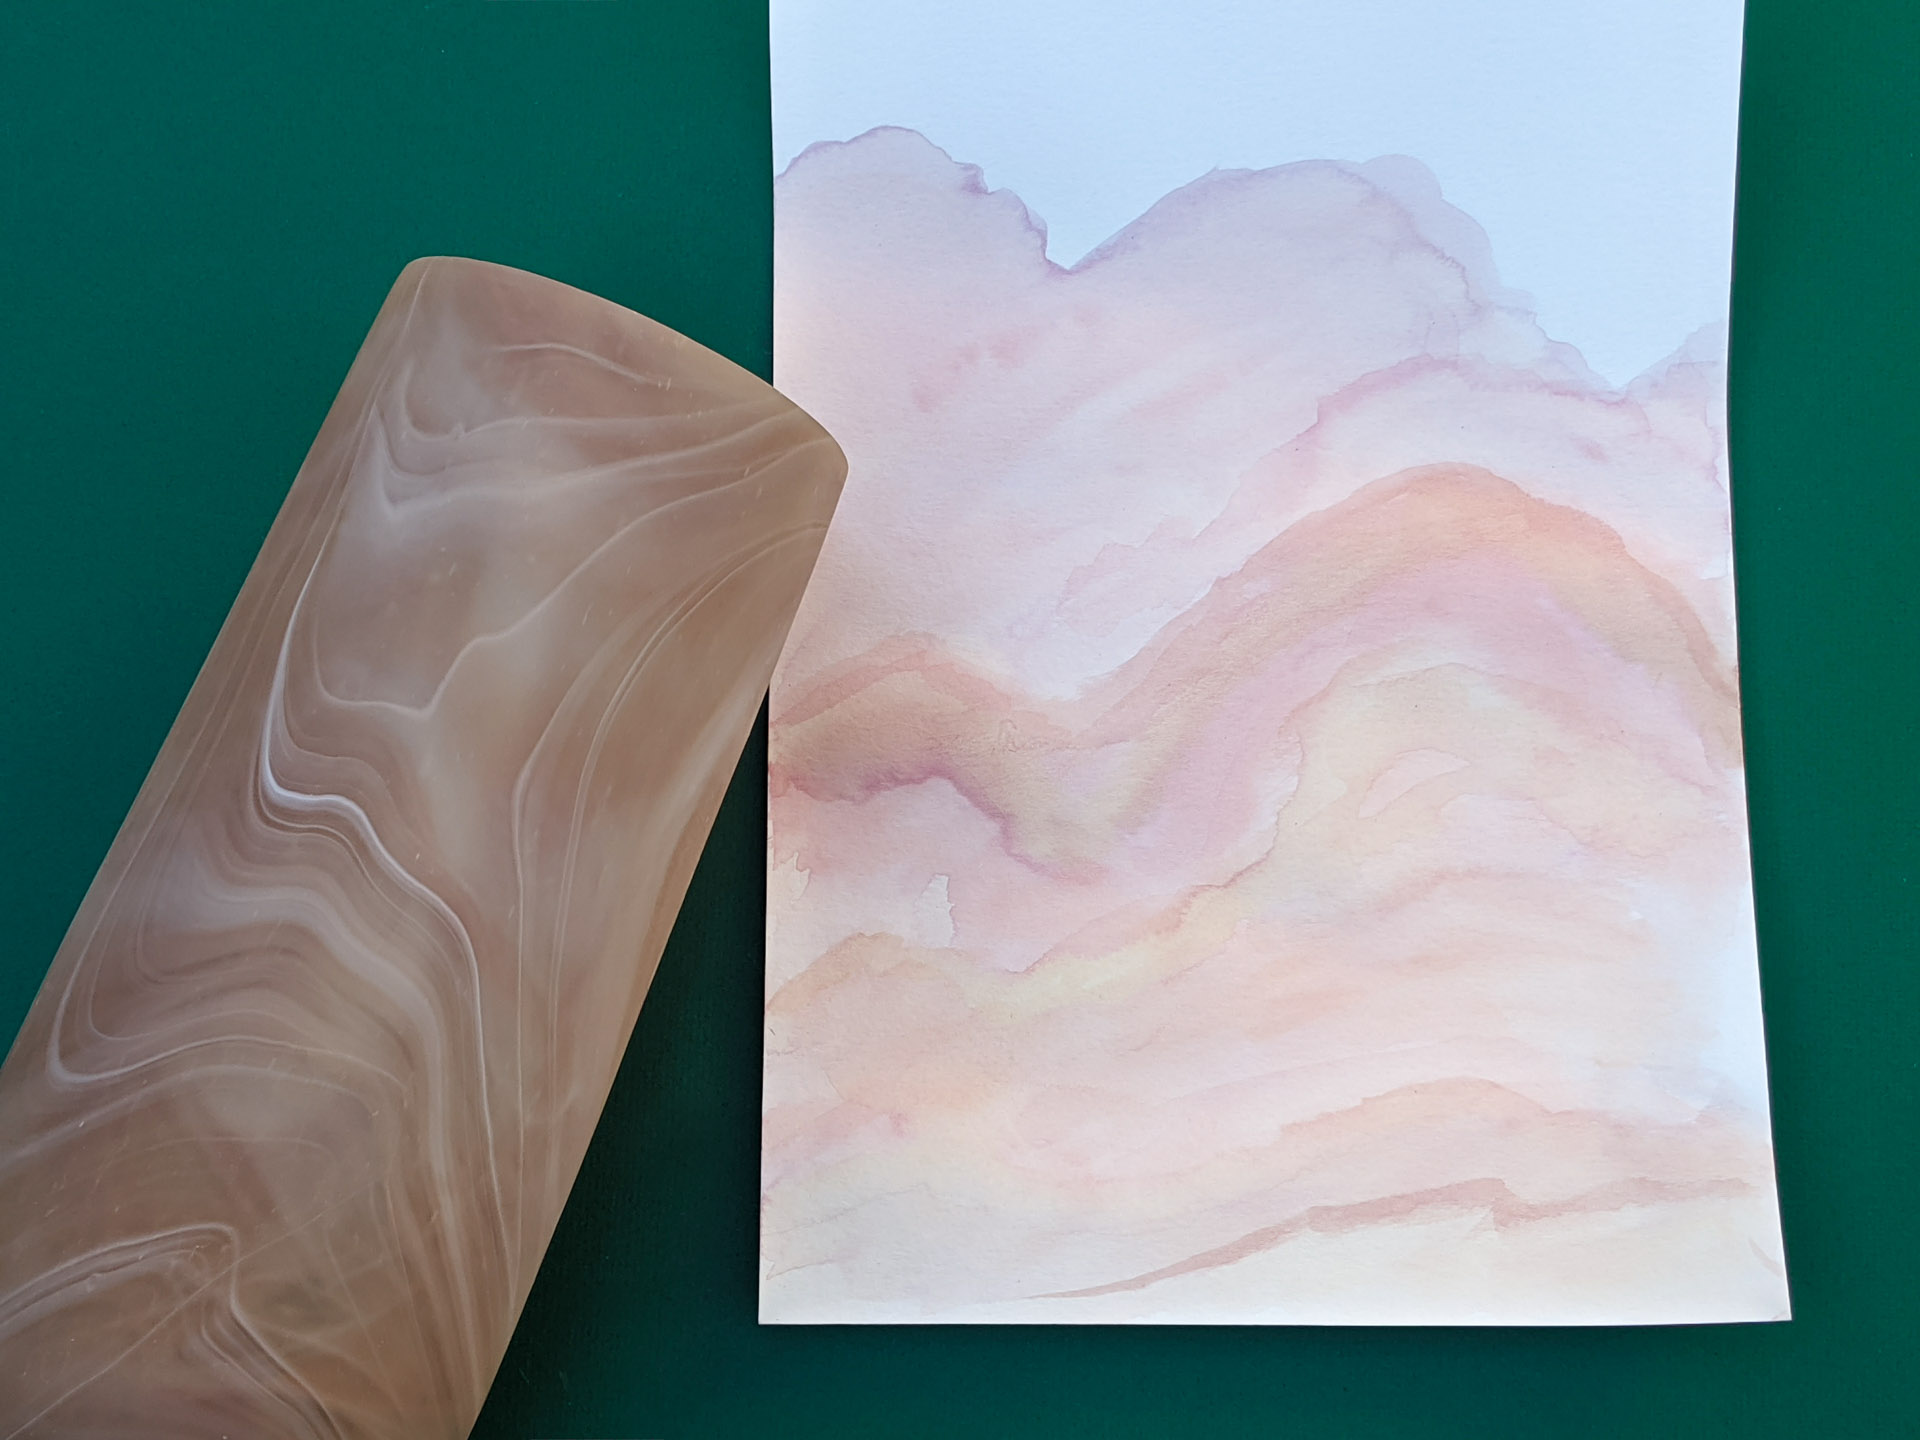
The paintings in today’s post were inspired by the Nile Vase from CB2, shown above. While the vase is no longer for sale, CB2 offers a Nile Glass Planter with a similar look. Whether you already have a muse or you’re hoping to find one shortly, keep the muse (or a picture of it) on display nearby as you create your artwork. There’s nothing like a tangible reminder of the color, texture, shape or pattern that inspired you in the first place.
Practice, Practice, Practice
If the creativity gods shine down upon you and your work of art is exactly what you’d hoped for on a first try, don’t question it! Display your art with pride. For most of us, it’s going to take a bit of practice to get the desired results. If you have a pad of watercolor paper, you’re set. Turn the page to start anew, and see each fresh start as a chance to develop your skills.

For art projects involving more expensive supplies, you may not have the benefit of unlimited tries, but being prepared to purchase another canvas if necessary can take the pressure off each brushstroke. It takes time to match what’s in your head with what shows up on the page.
Whether you have a set of watercolor paints in tubes or you’re borrowing your toddler’s watercolor set with a snap-to-close lid, you may be surprised by the way that your brushstrokes dry. Perhaps the palette is lighter than you imagined and you crave some richer colors mixed in. Or maybe you want more visible brushstrokes and more movement overall. The two paintings at the top of the image above were a first try. With practice came more motion and fluidity, as well as a greater range of tones.
Let the Brushstrokes Shape Your Creation
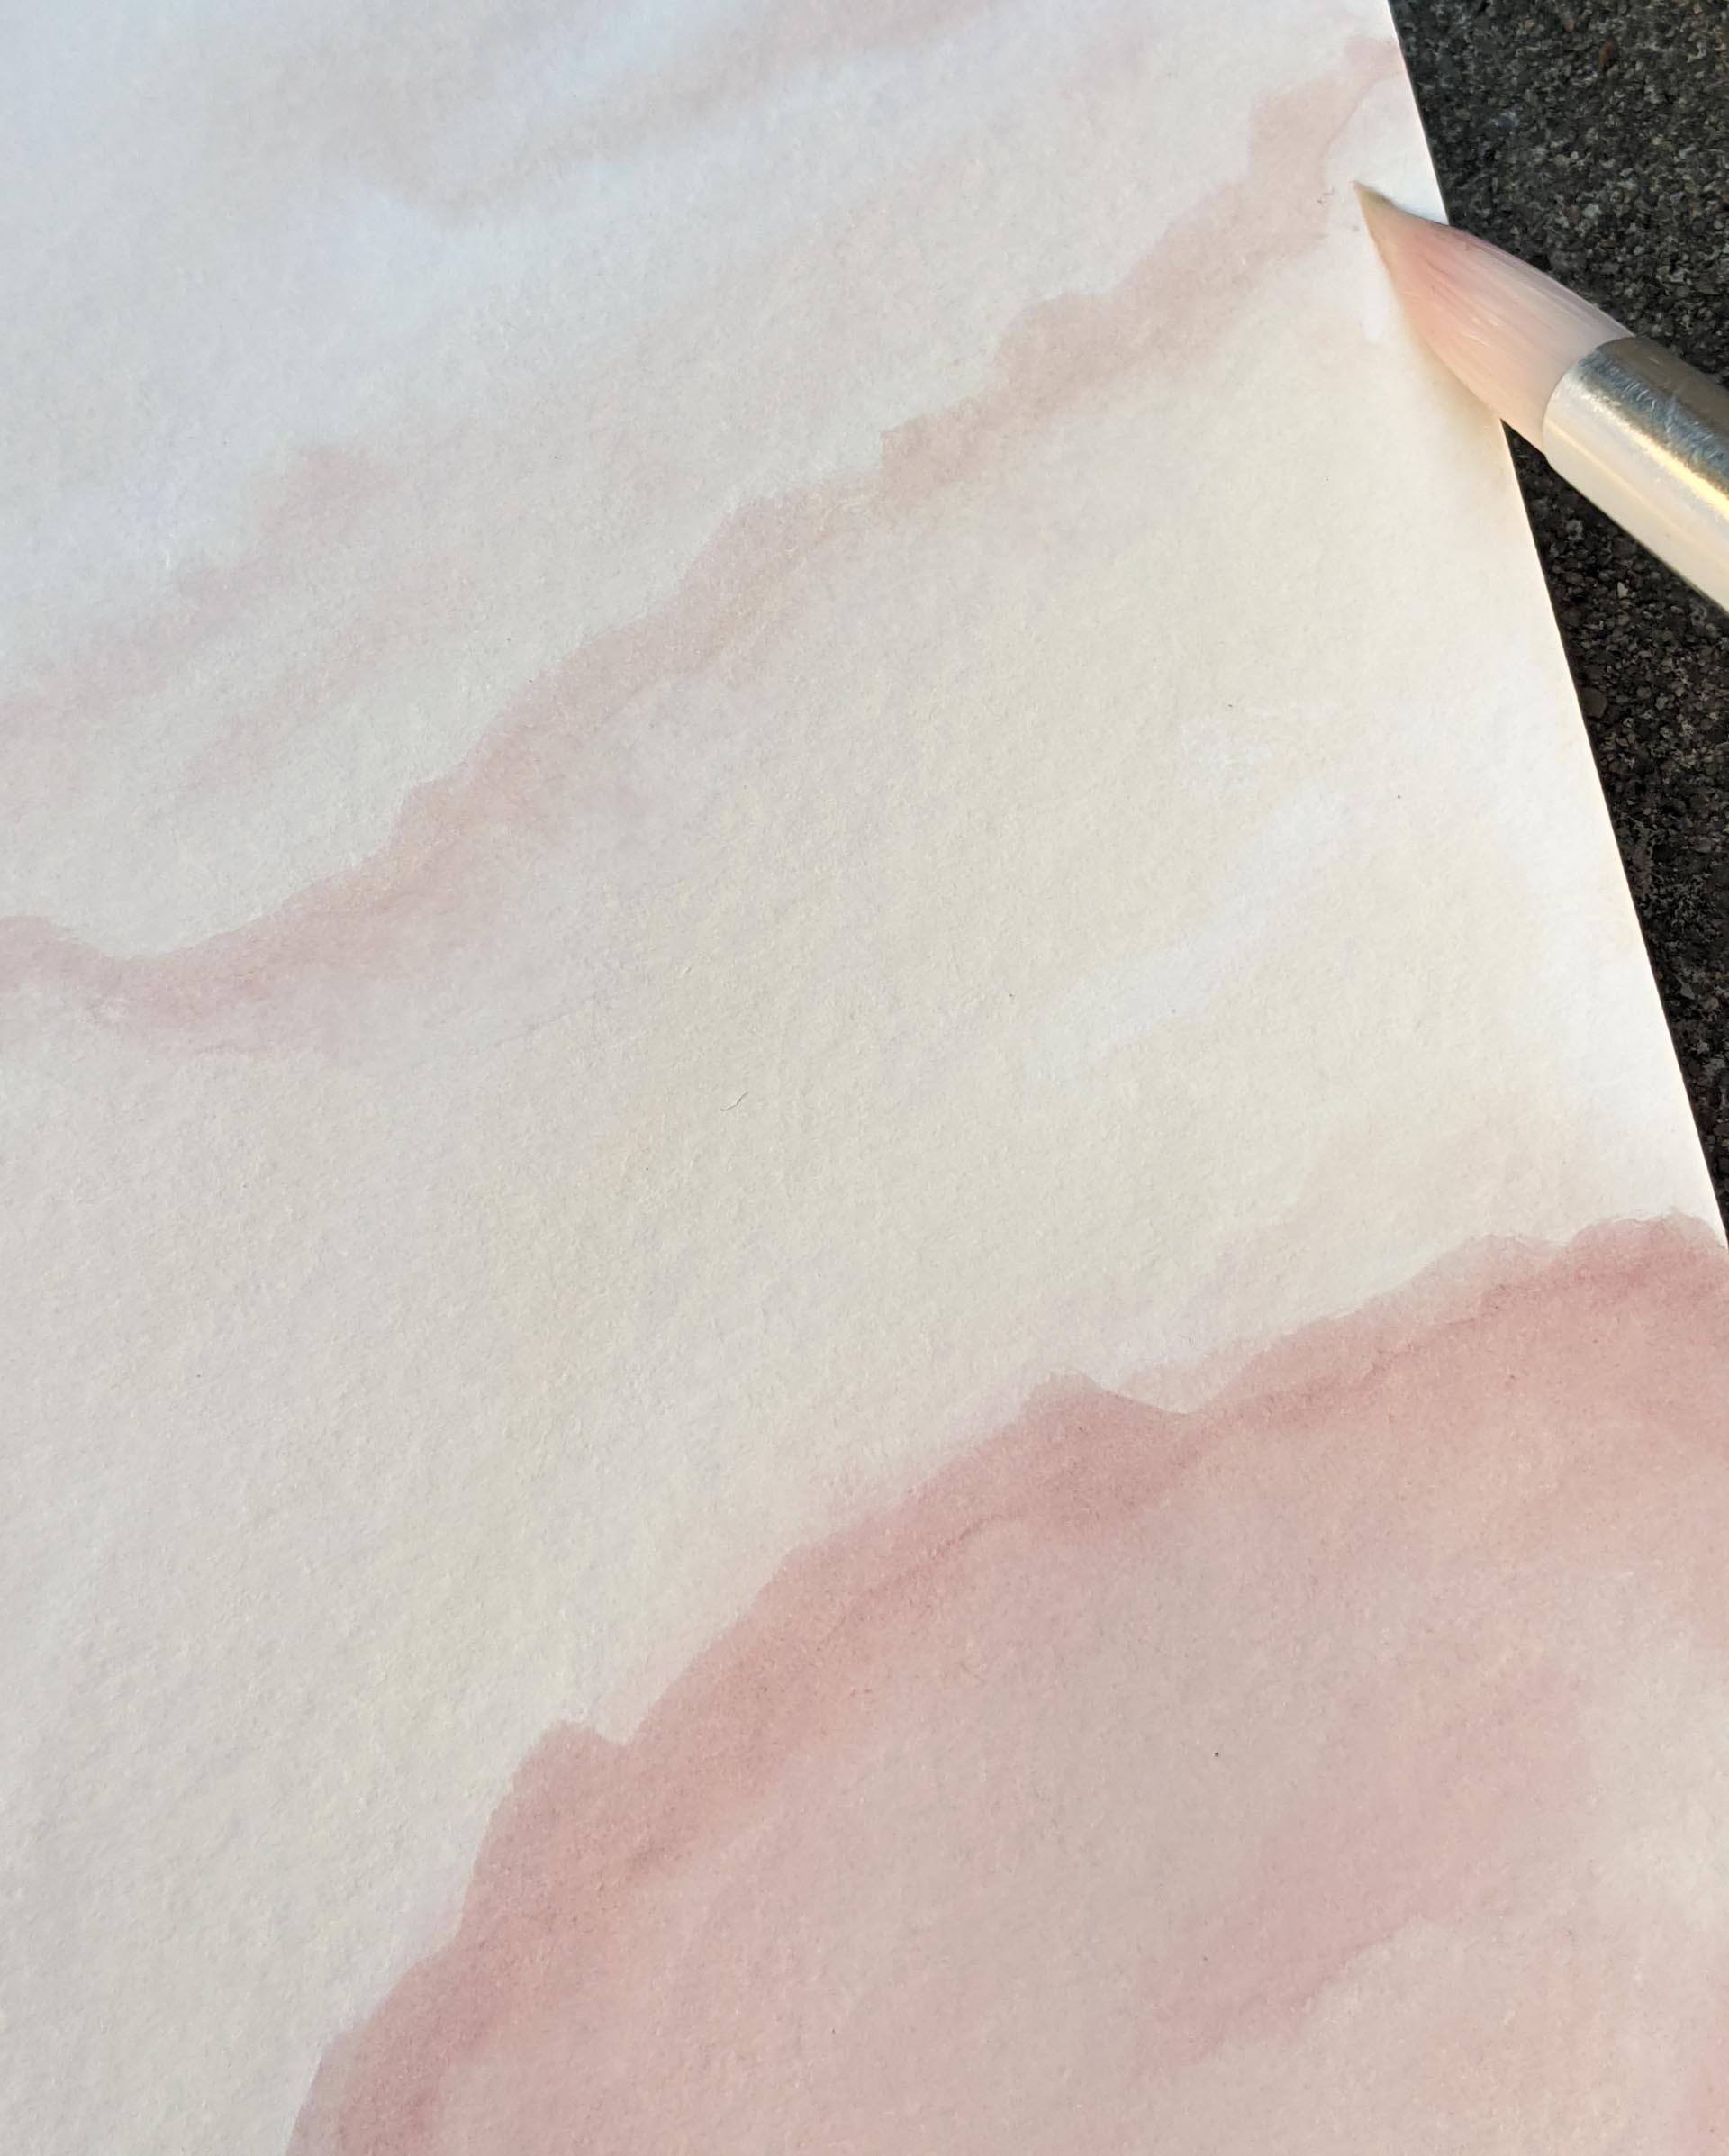
For watercolor painting, each brushstroke can speak volumes. It can be tricky to achieve the exact colors you desire, all the while creating interesting brushstrokes. Don’t let the pressure of “messing up” keep you from taking interesting risks in your painting. The watercolors featured in today’s post were created using a wet-on-wet approach, which involves applying wet paint to wet paper (as opposed to dry paper). This created some time for experimentation, as the paper didn’t dry quickly.

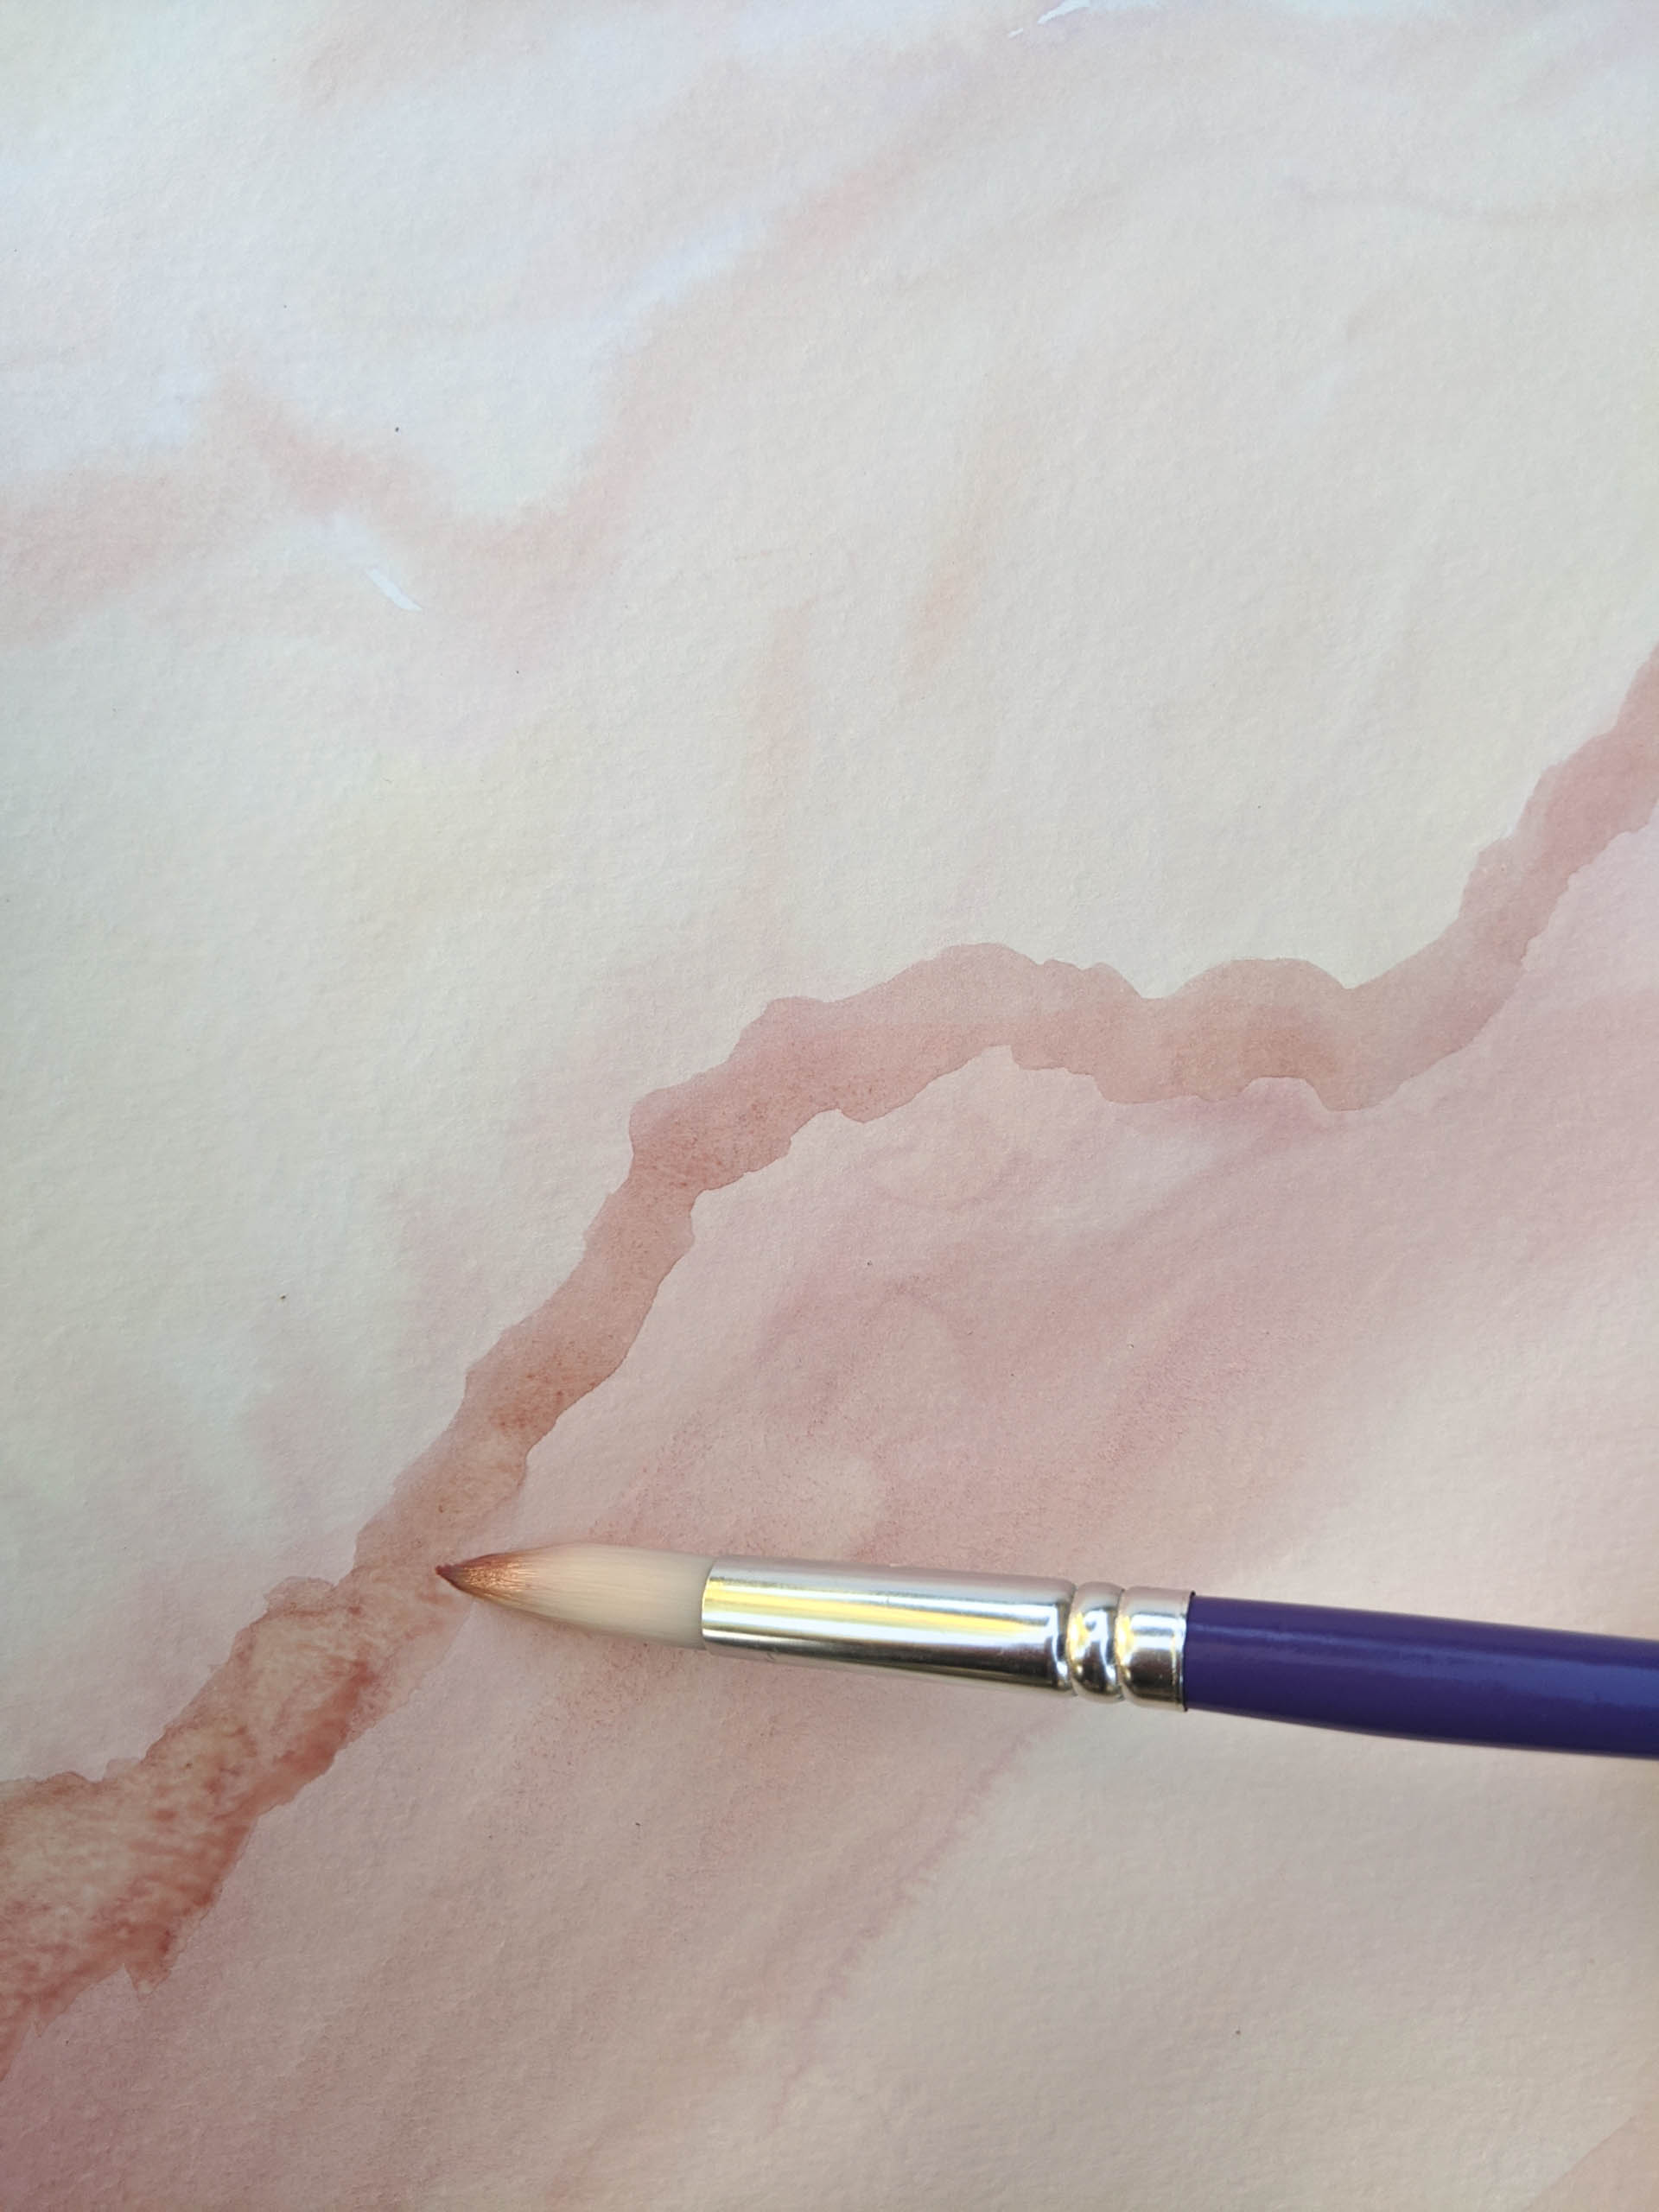
If you feel that a stroke you’ve created needs lightening up, try dipping a brush in water and brushing over the edge of the design in question in order to soften it. This also works if you aren’t a fan of how a portion of your watercolor is drying. Sometimes adding a bit of water to the affected area creates a more seamless look (see above). You can also use a brush to touch up your overall design, as shown below. Are there any white spots you’d like to see filled in with color? Does the paint run all the way to the edge of the paper as you’d hoped? It’s not too late to make changes.

Layer and Repeat
Are you taking a look at the beautiful painting you’ve just created and wondering why the wow factor seems to have faded? Especially when using a wet-on-wet approach, the color may dry lighter than you might have anticipated. Time to layer! Adding another layer of paint adds dimension and depth to your work of art. Don’t be afraid to give it one, two, or ten more passes before you feel like your work is “done”.

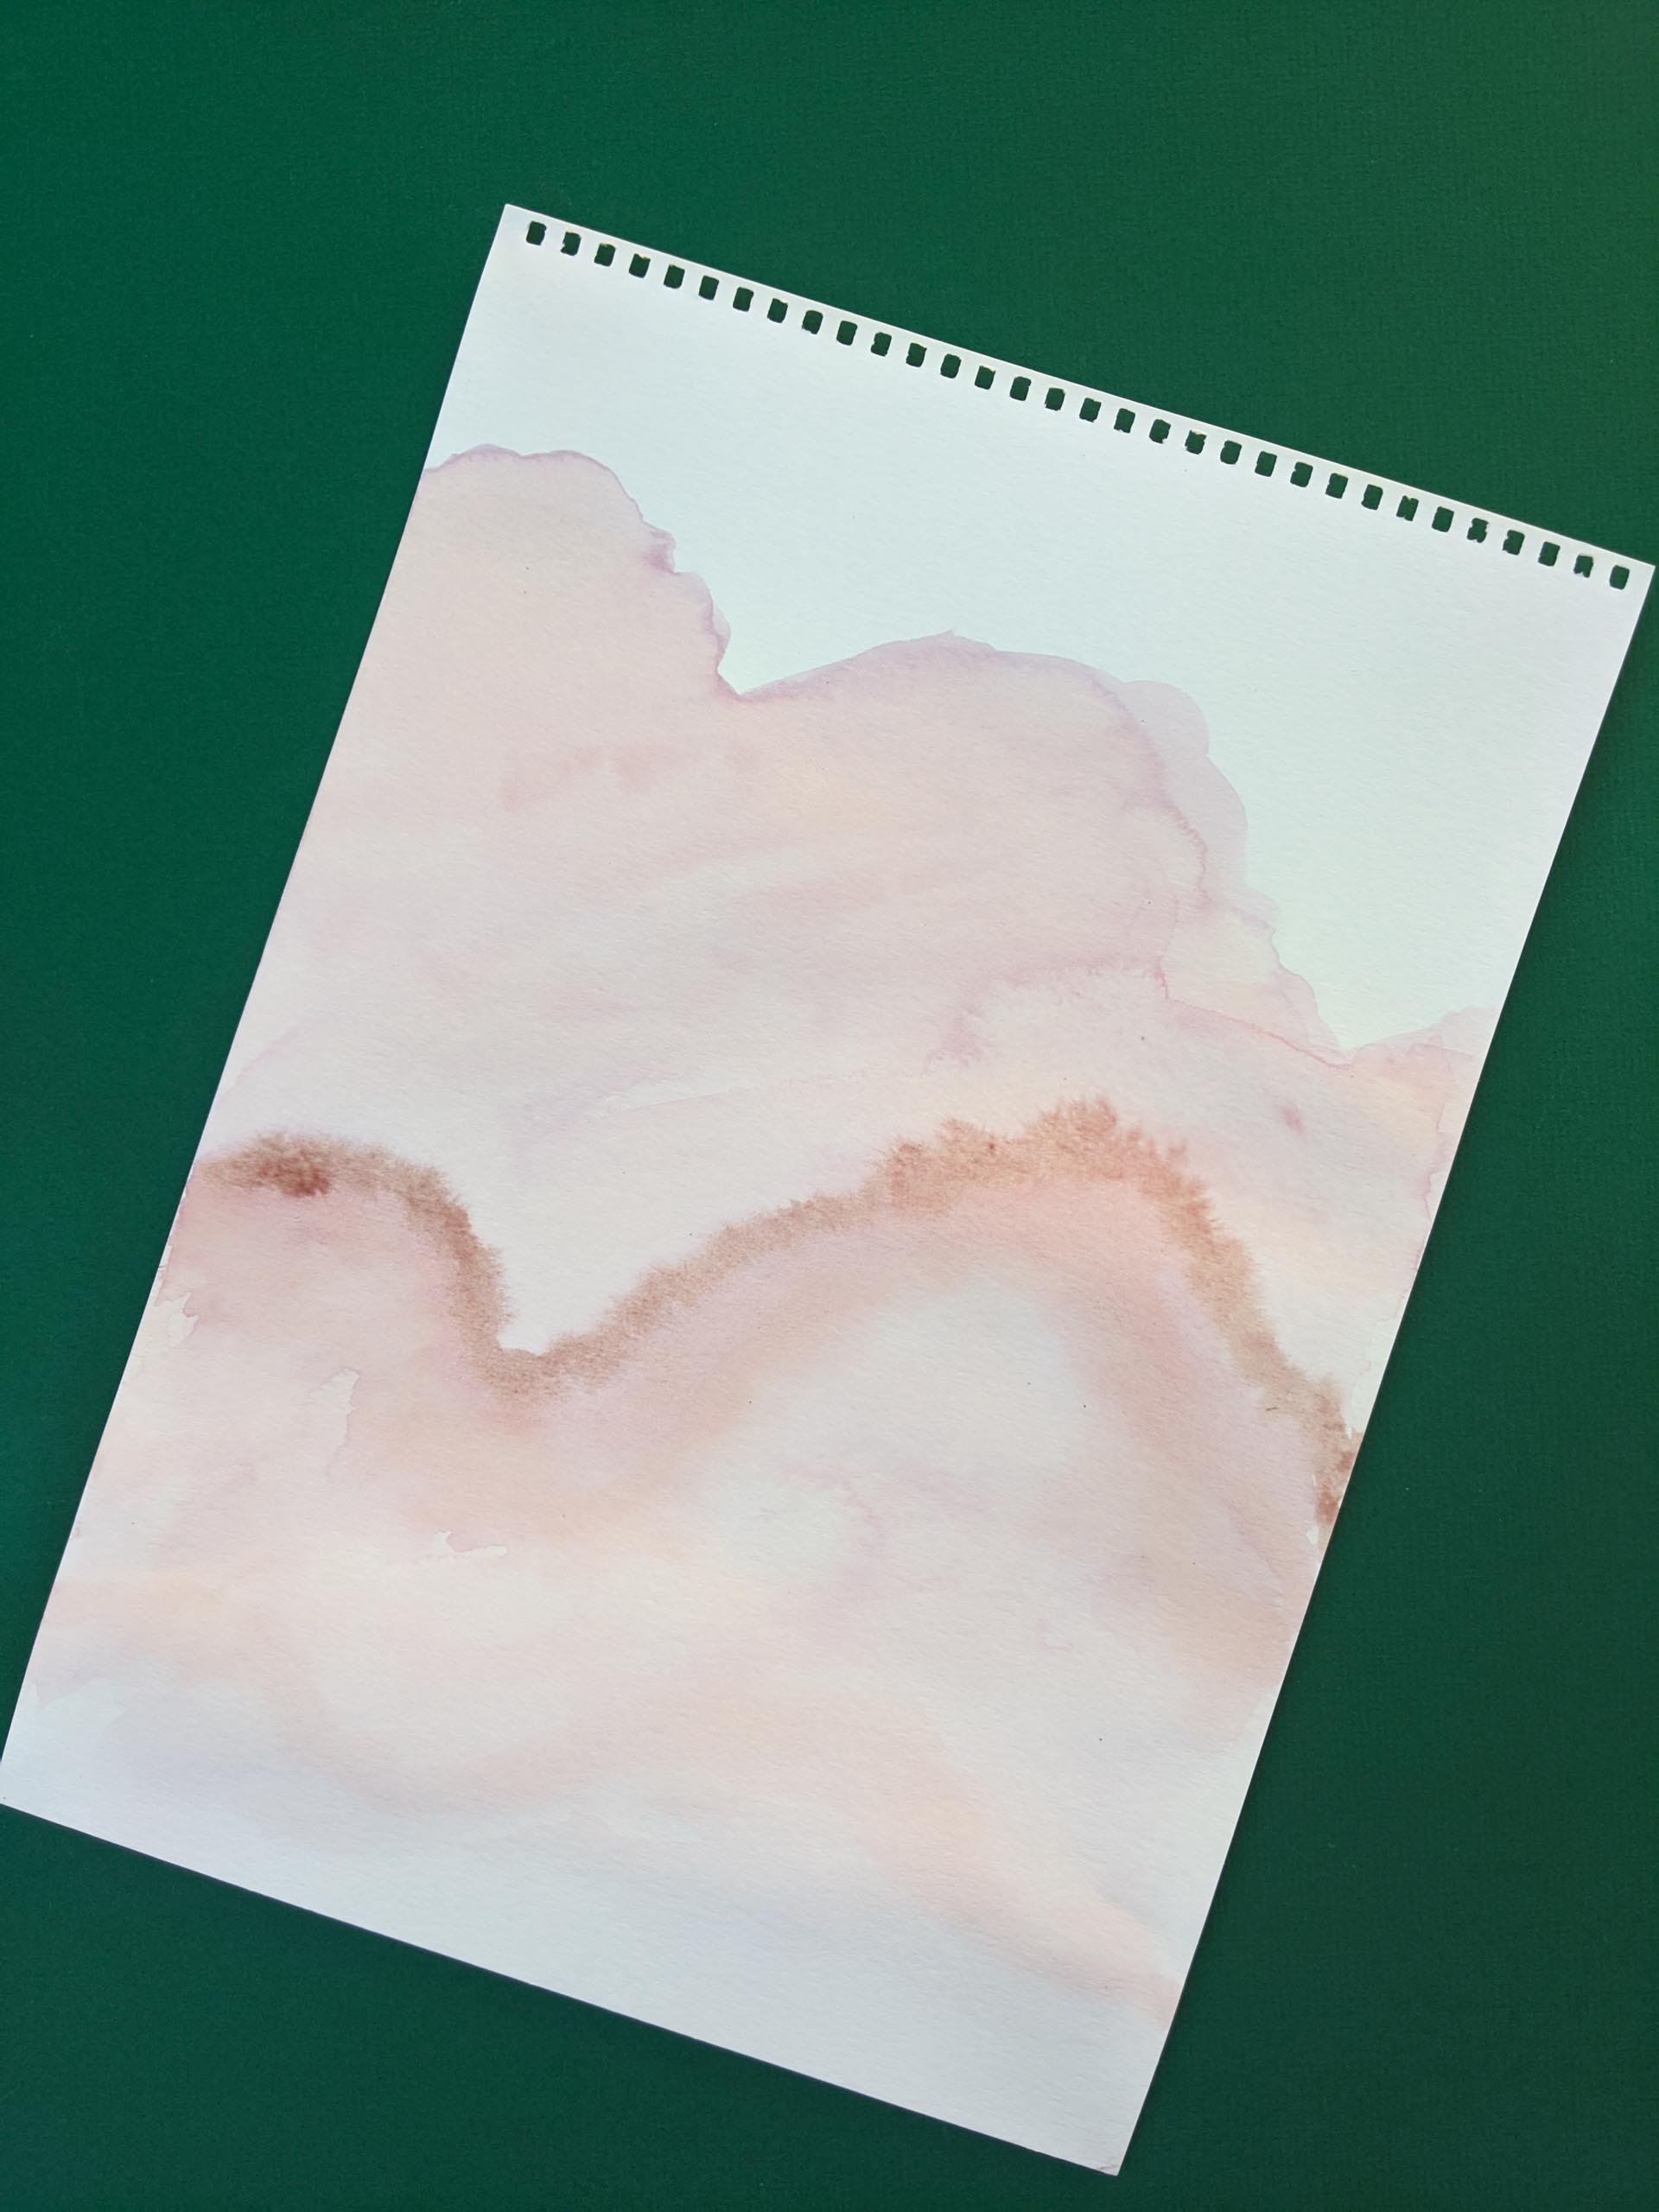
At the same time, knowing when to stop can come in handy. Don’t second guess yourself to the point of adding more and more until the design becomes too much. Put the brush down and let the artwork speak for itself. The watercolor painting featured above and below was created by lightly washing the page with a few different rows of hill-like structures. As the paint dried, new layers were added, with special attention to creating a few bold, color-rich lines and curves that would serve as focal points and create variety.

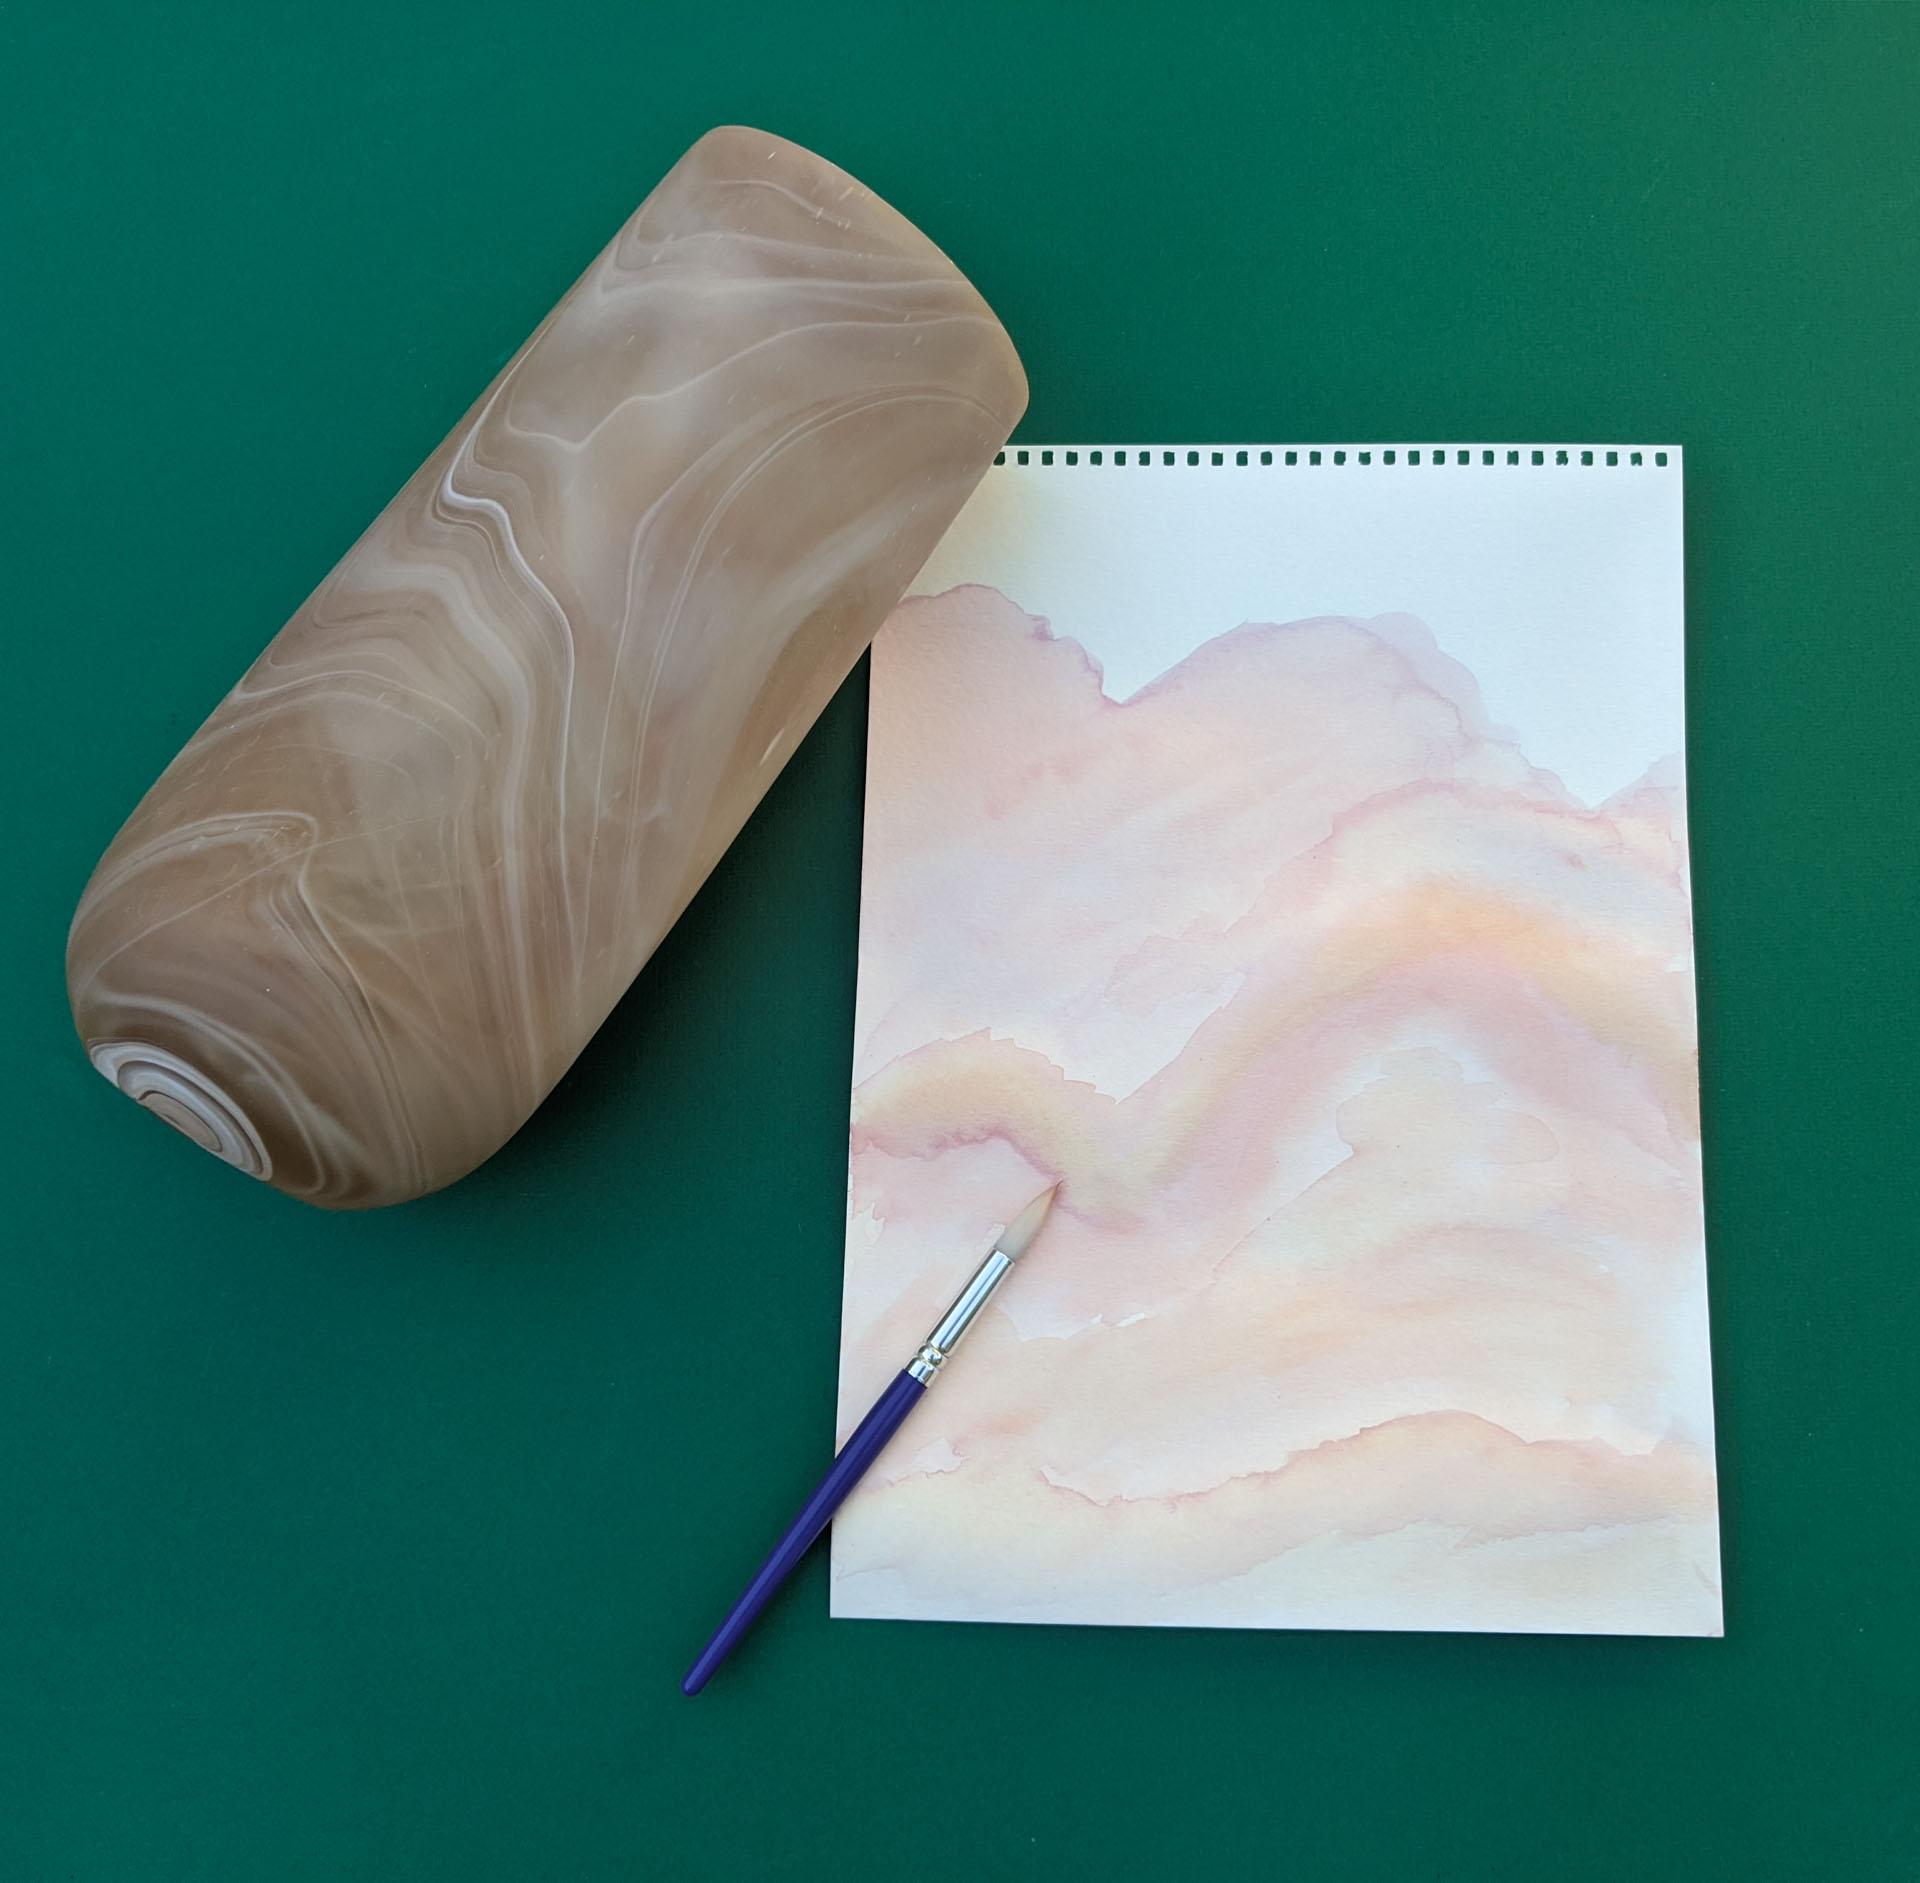
The marble-like structure of the vase in the photo above inspired the wavy bands of in the artwork. It was challenging to create different shades of color from a few key hues (purple, brown, red and orange), yet watering down certain mixes of color while letting others be more saturated was a great place to start.
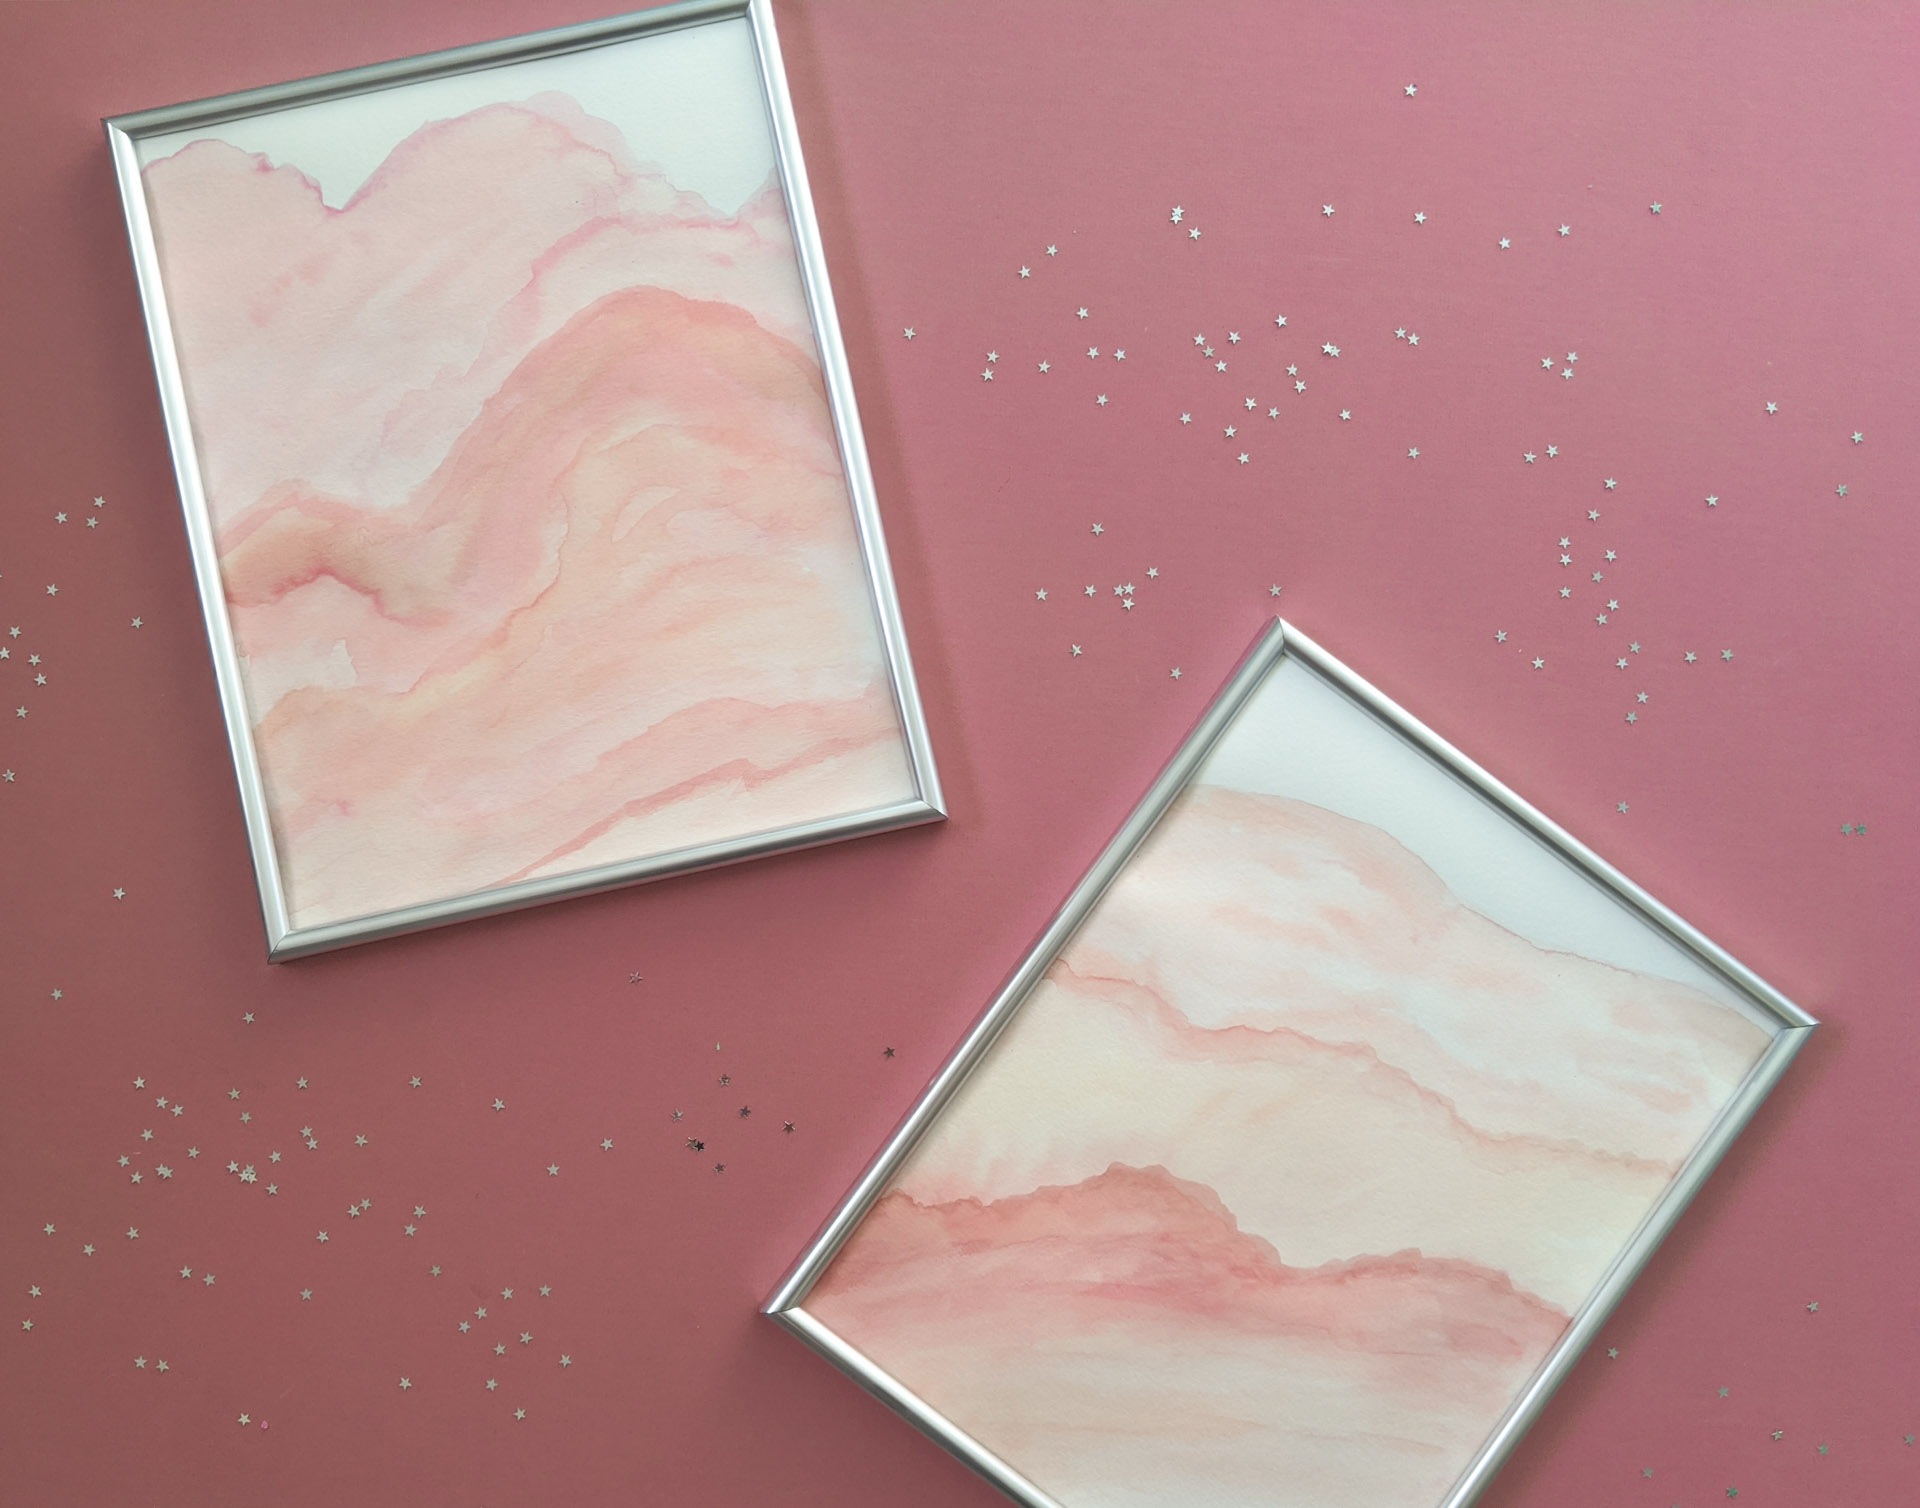
Frame It
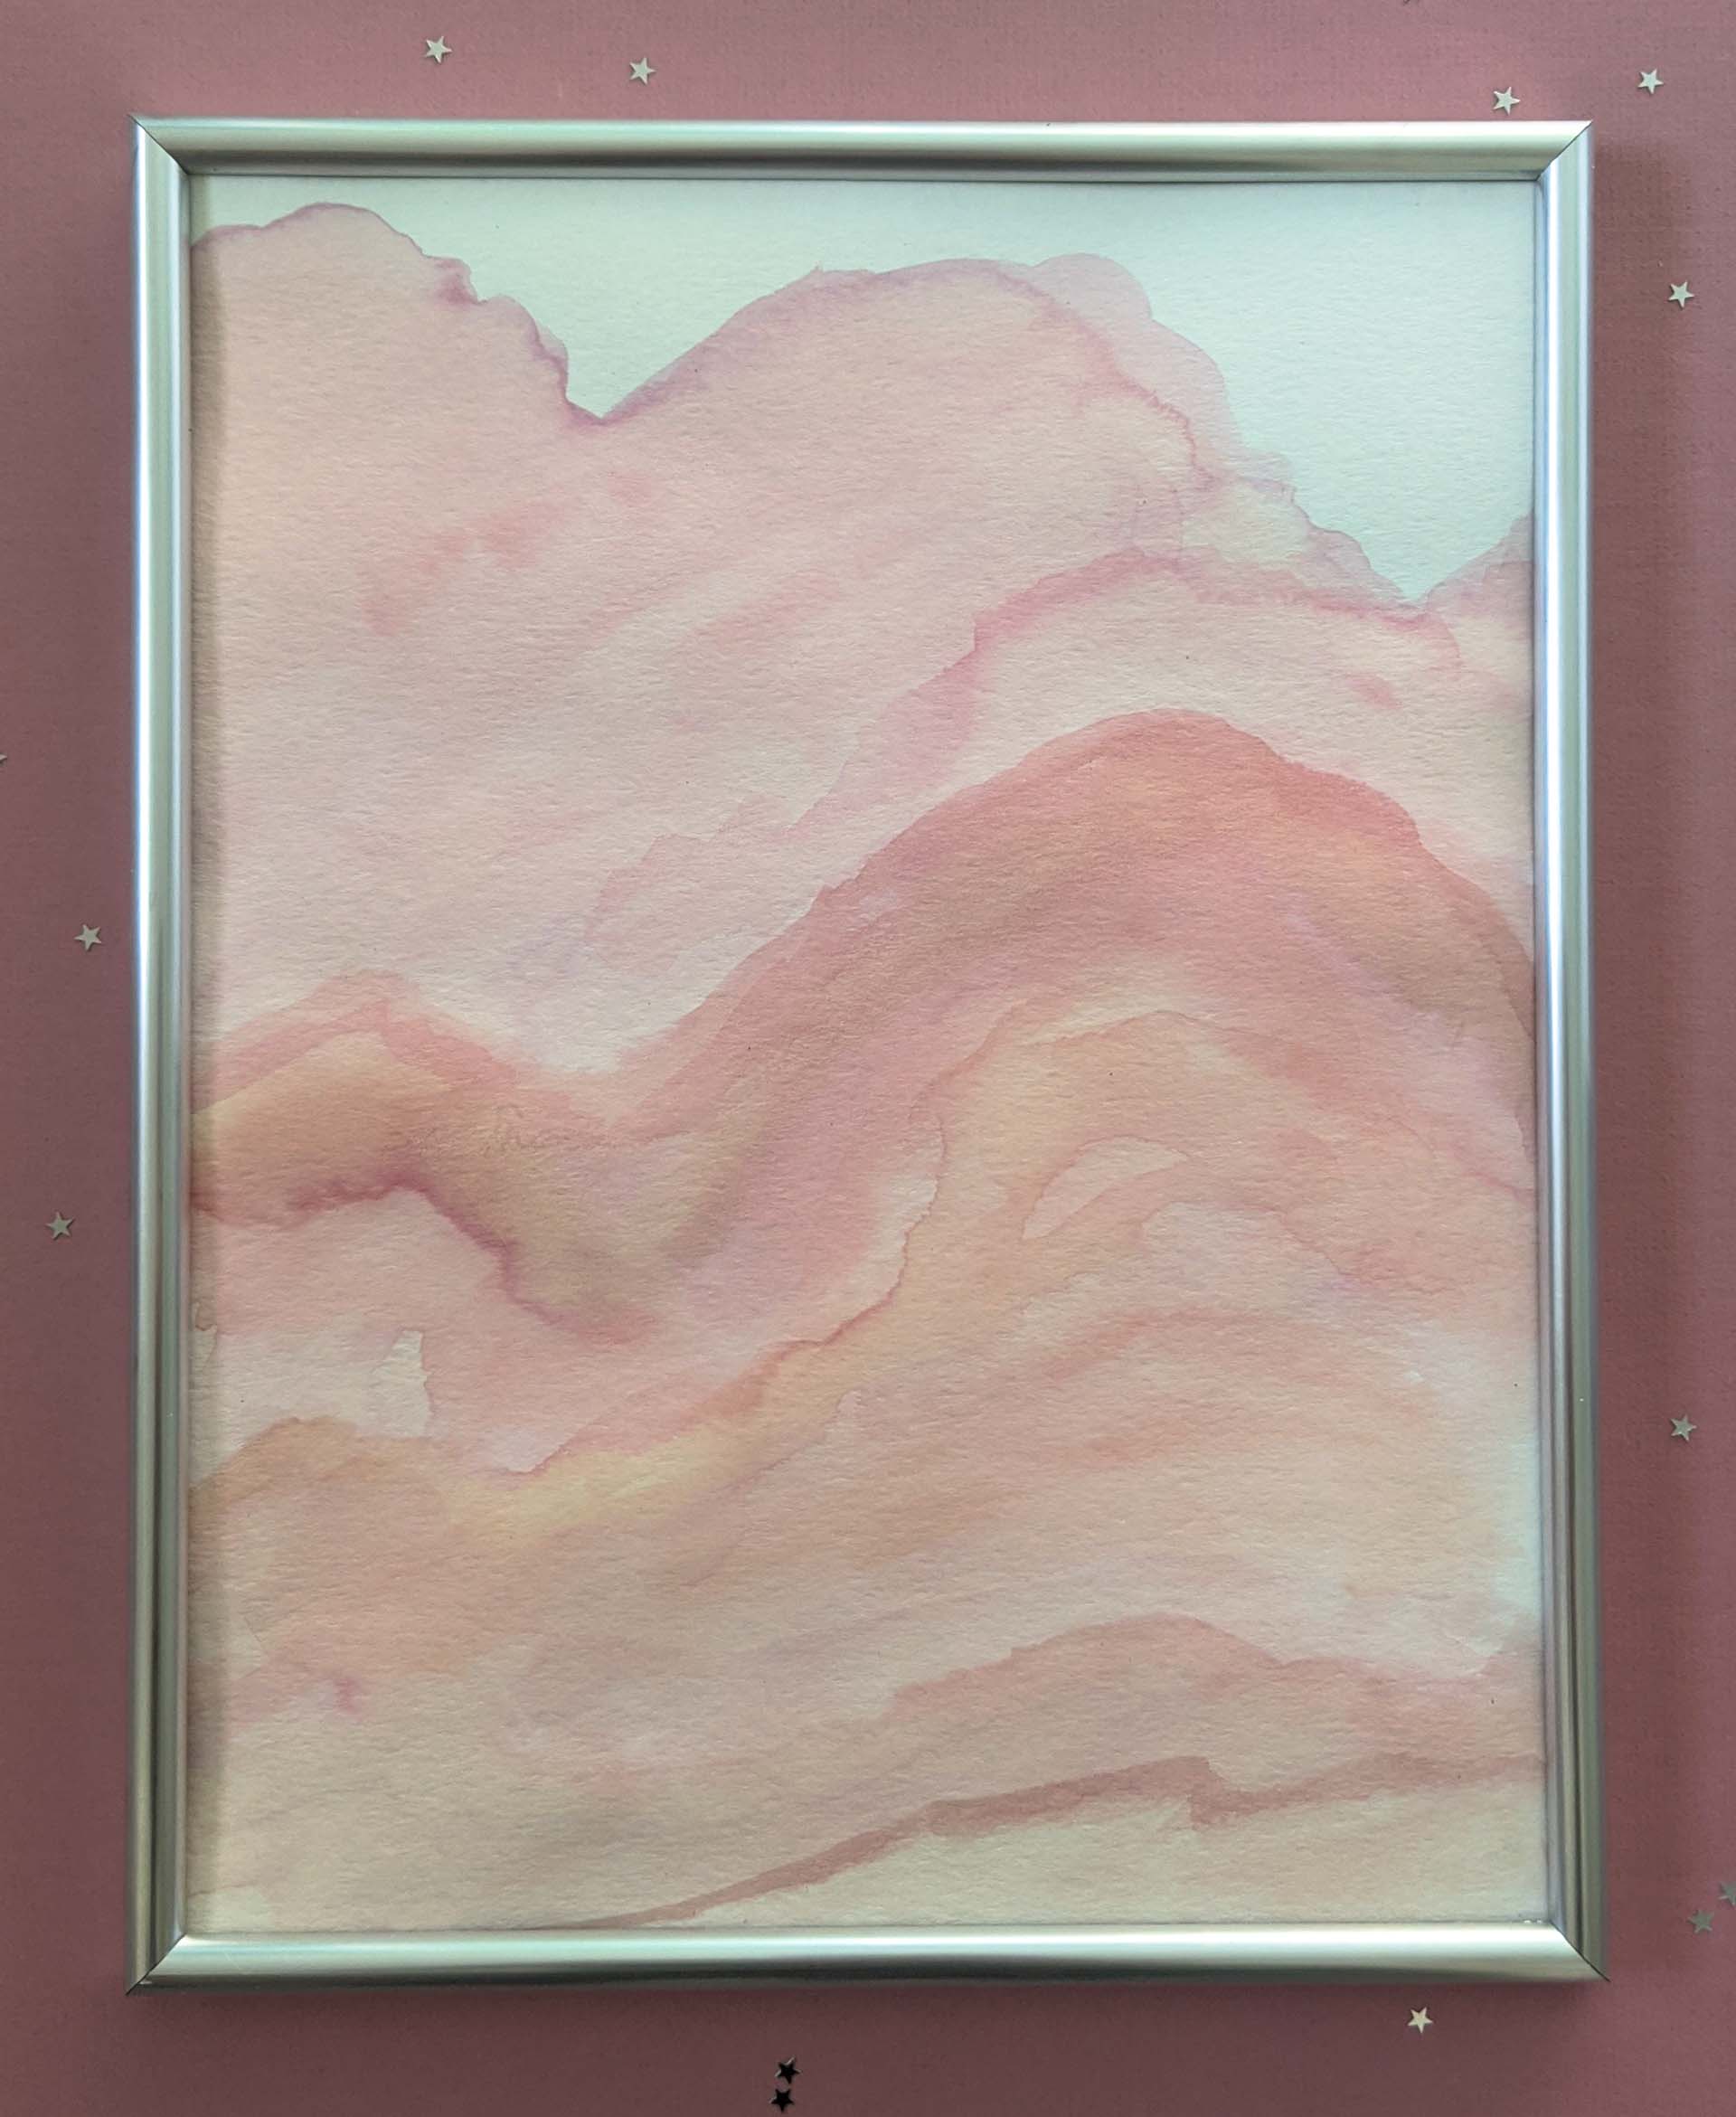
Once your DIY watercolor wall art creation has fully dried, it’s time to frame it! Wooden frames are always timeless, while the silver-toned frame below was chosen to evoke a sense of retro style. Pick a frame that makes sense for the artwork, as well as the space in which it will hang. You may find that your painting takes on a different feel depending on the frame that holds it.

We’ll end today’s post with a couple more photos of the DIY fun…

Happy painting and thanks for reading!!


