
Today we’re exploring the wonders of affordable holiday style! Kate here, and I’m excited to share this easy Thanksgiving centerpiece that is anchored by a bouquet of grocery store flowers. Yes, the cost of the flowers was only $3.99! Take a budget-friendly bundle of mixed blooms and turn it into a decadent focal point for your Thanksgiving table. Read on for details, including special accents that will take this centerpiece to the next level…

Thanksgiving Centerpiece Supplies
The key to turning grocery store flowers into a decadent floral display is surrounding them with rich tones. Get ready to gather a few basic supplies that will make this DIY concept a reality:


Here’s what you’ll need to get started…
- vases in a variety of sizes
- a bouquet of flowers (grocery store flowers work well here)
- scissors
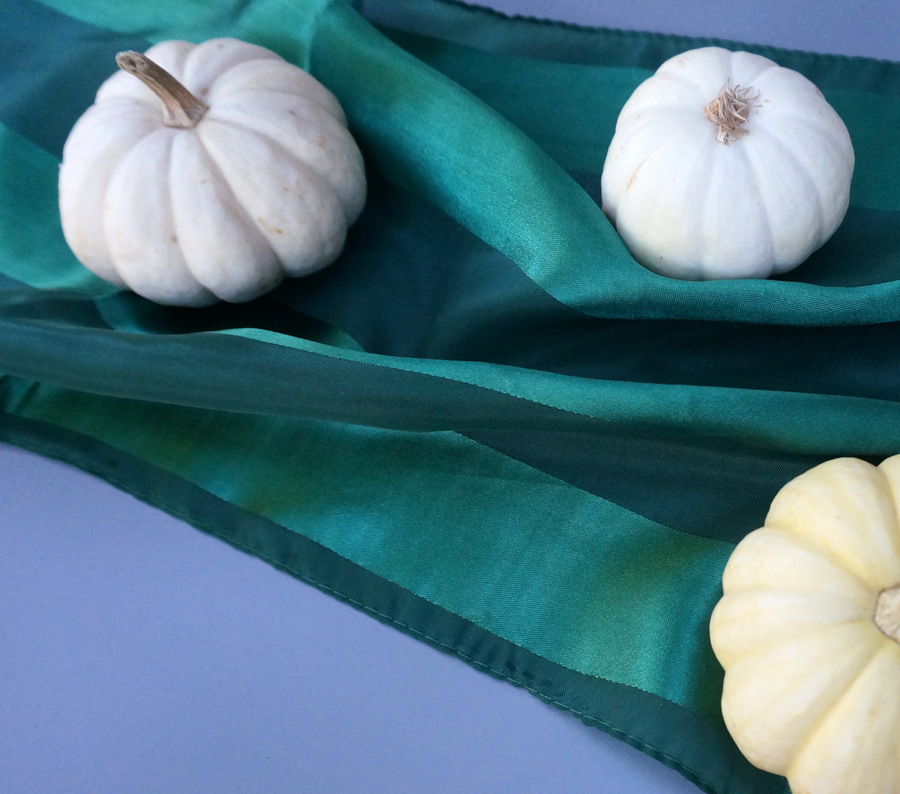
- a long scarf or table runner in a rich hue
- small pumpkins (optional)
- metallic accents (optional)

DIY Project Steps


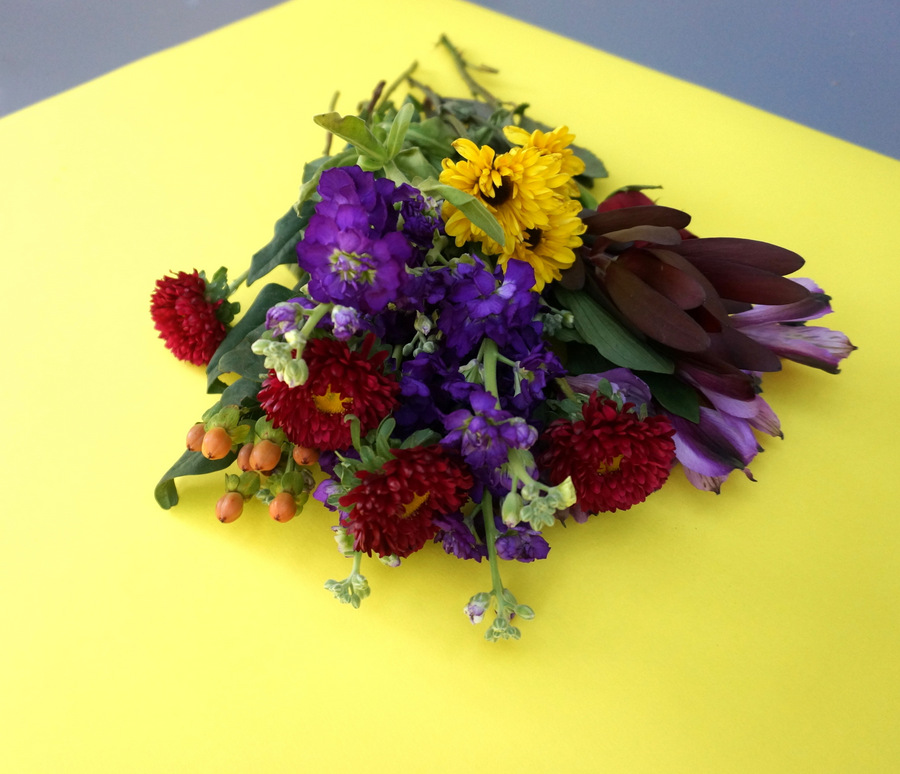
Step 1: Separate your bouquet into smaller bundles.
This step will allow you to take stock of what you have. While wonderfully affordable, grocery store bouquets can be awkward, often featuring odd numbers of blooms that are difficult to divide. There are even selections that have no match, such as the red rose in the photo above.


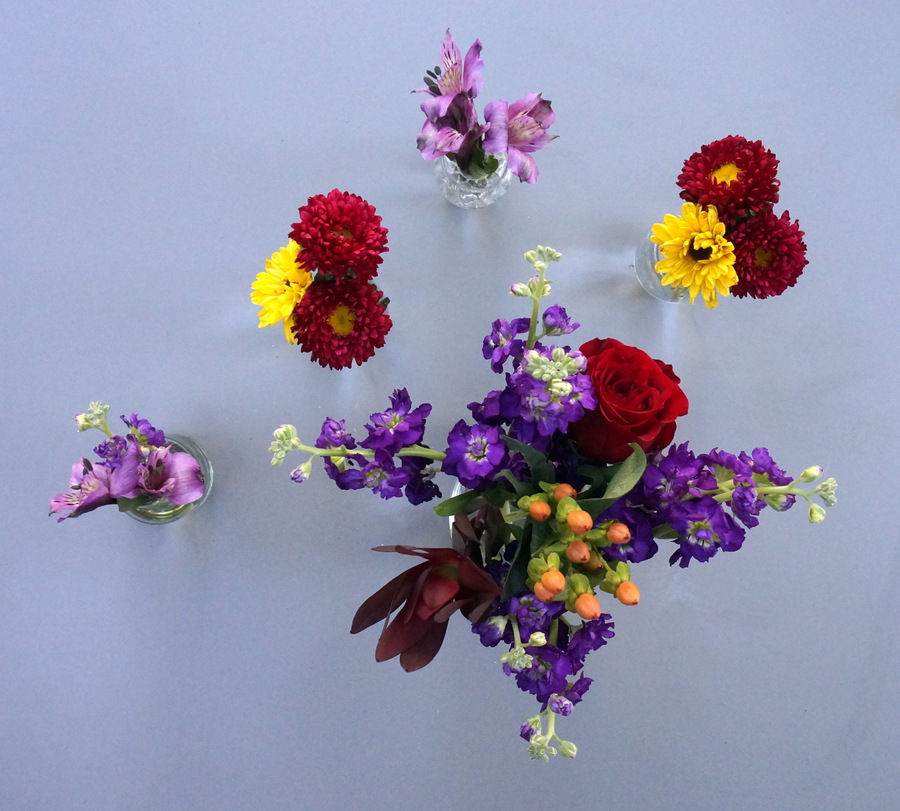
Step 2: Begin grouping the flowers into the bouquets you will use in your centerpiece.
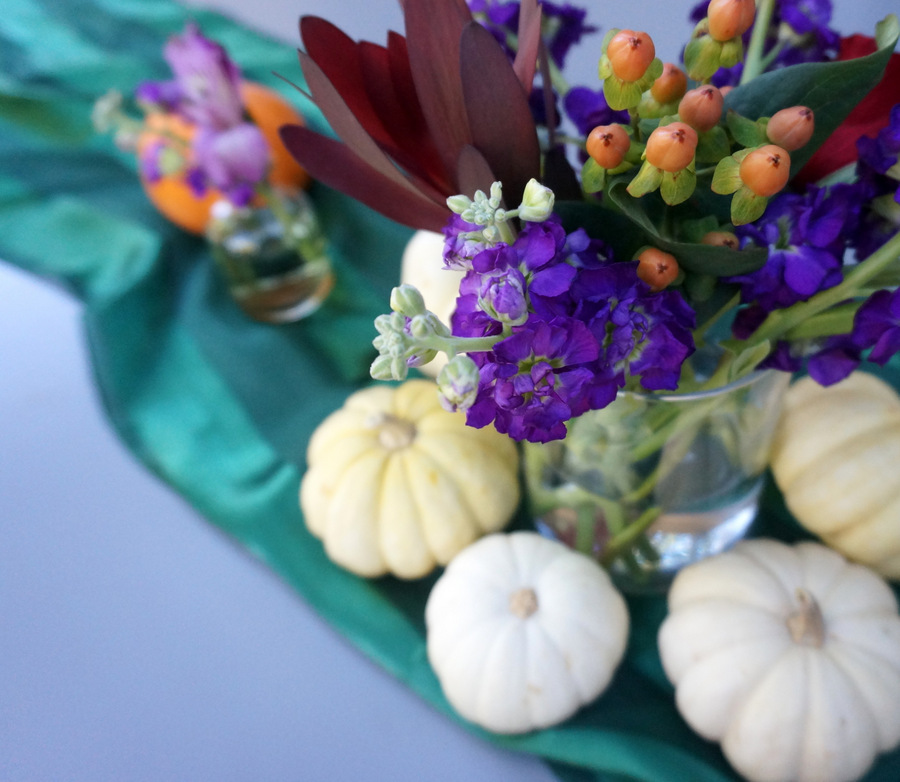
Play with different combinations of blooms. While you can always group them by color, this decadent centerpiece concept works well when there is a mix of flowers, at least in the largest bouquet (which will go in the very center of your grouping).


Initially, I decided to have purple dominate my largest arrangement, then group the yellow and red flowers into two bouquets. I would then finish with two very small vases of purple alstroemeria.


Step 3: Set aside flowers that don’t fit your overall vision.
I decided to remove the red rose, because it reminded me of Valentine’s Day. As you’ll see later in the post, the rose made the final cut!


Step 4: Place your small bouquets of flowers into vases and arrange.
Get creative. Don’t be afraid to change your mind. For example, I eventually decided not to use the red and yellow bouquets shown below. Edit, regroup and start over if you like. There are no rules here! It’s important that you’re happy with the final centerpiece.

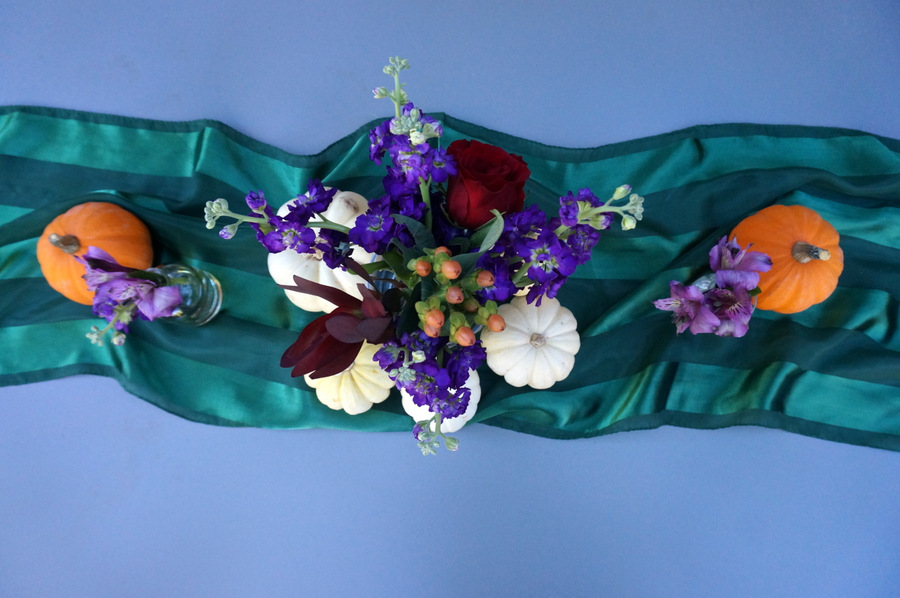
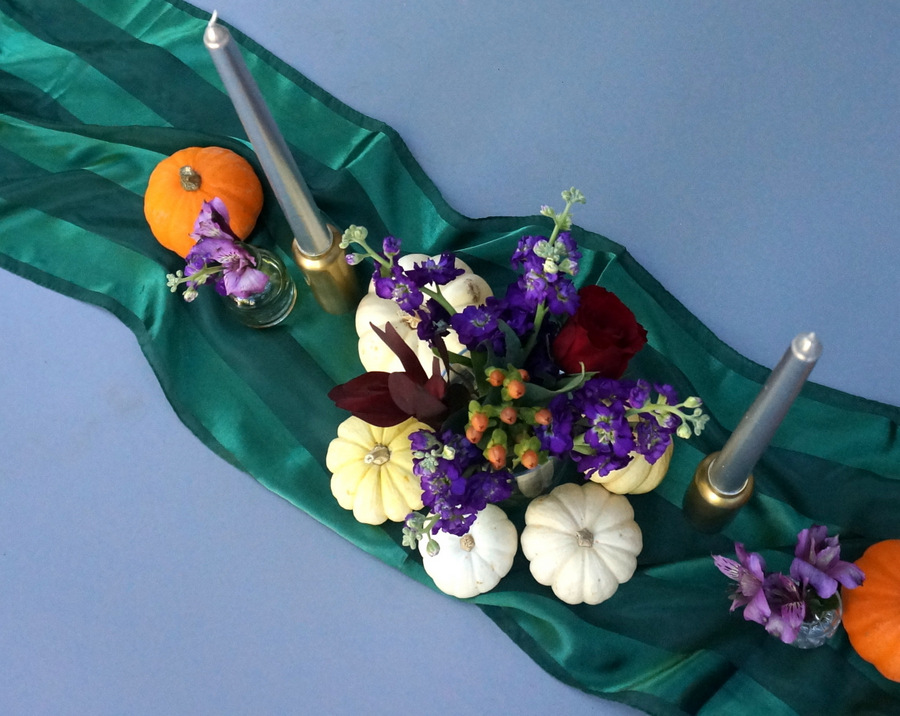
Step 5: Place a runner on your table and begin assembling your centerpiece.
I used a green scarf as a runner. As mentioned, the secret to making this centerpiece look decadent is the use of rich tones. At first I worried that the green scarf would look too Christmas-y, but it wasn’t long before I realized it was just what this Thanksgiving table needed!

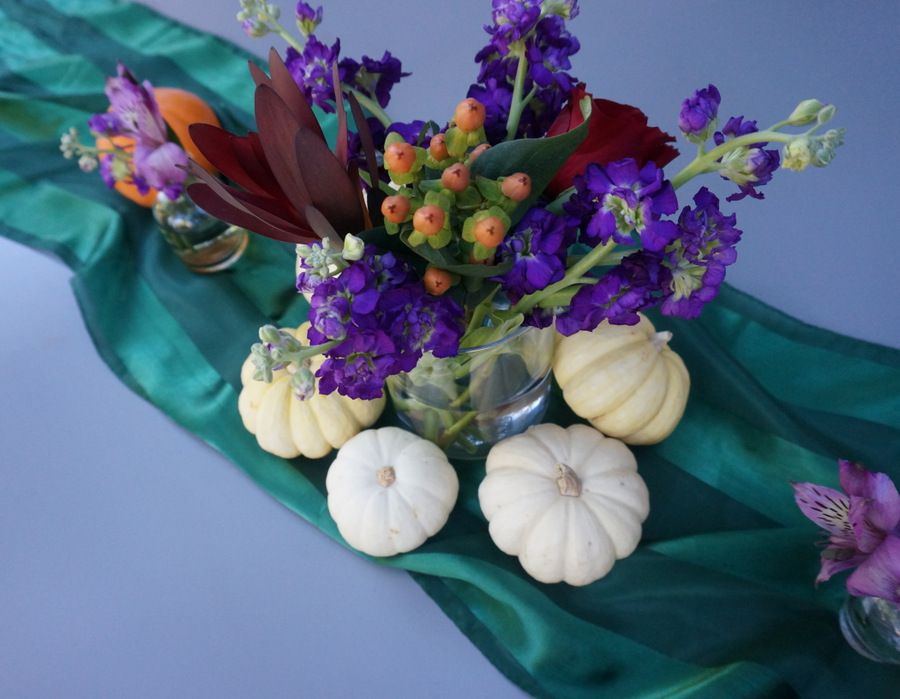
Step 6: Add special touches, such as pumpkins and metallic accents.
As you can see below, the small white pumpkins were a classy touch, but the centerpiece really came together when I added the orange pumpkins:

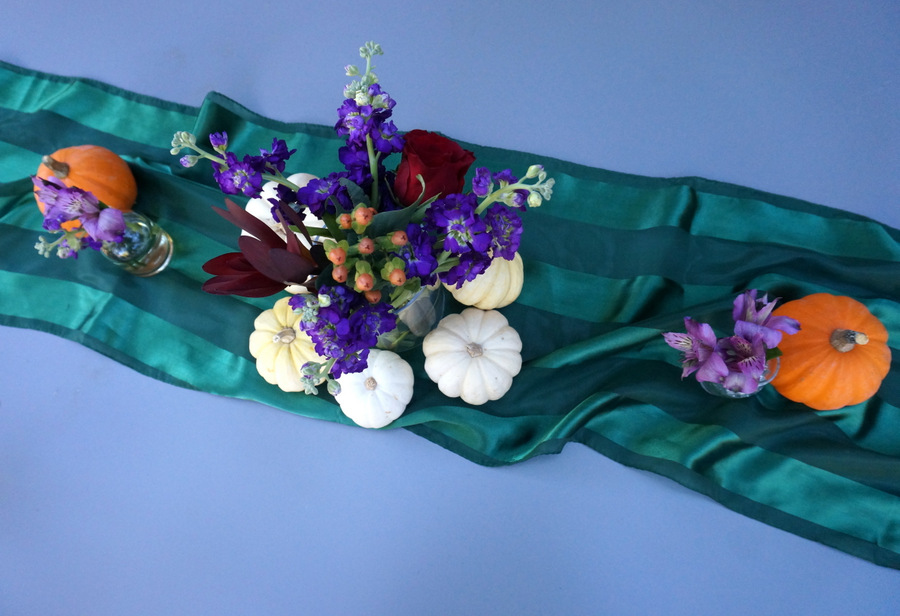
I placed the central bouquet (a mix of flowers) in the middle of the table, and I love how the red, purple and orange tones combined to create a colorful, rich arrangement.

I also added some brass candleholders from CB2, as well as some silver taper candles…

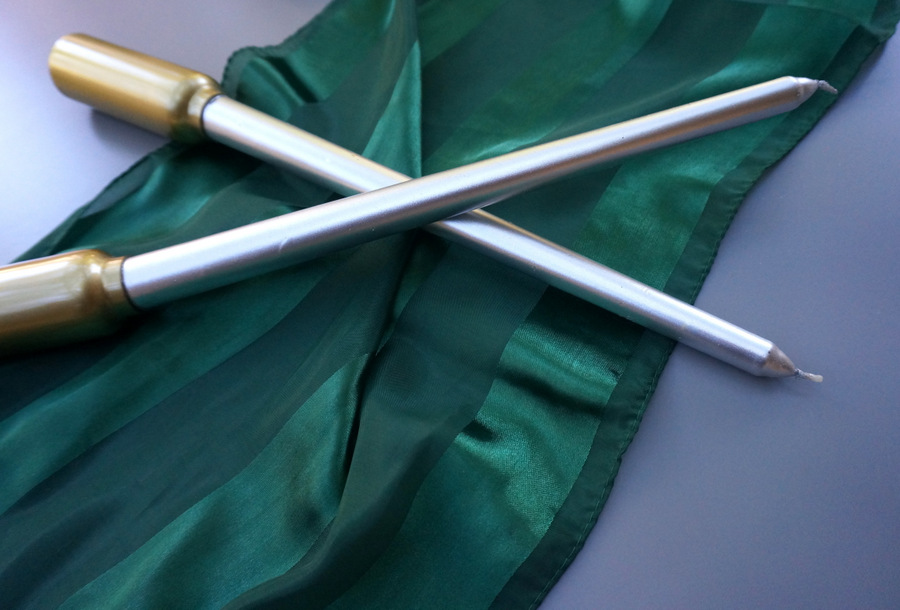
Candles contribute to the decadent vibe, and metallic tones really help the centerpiece come alive. It also helps if the runner is arranged to appear flowing rather than perfectly straight. Have fun playing with the centerpiece until you get a final product that you love!

This project couldn’t be more affordable. As mentioned, I spent $3.99 on the flowers, and I had the other items scattered around my home. Sometimes the best DIY projects result from using what you have! Wishing you and yours a lovely Thanksgiving!


