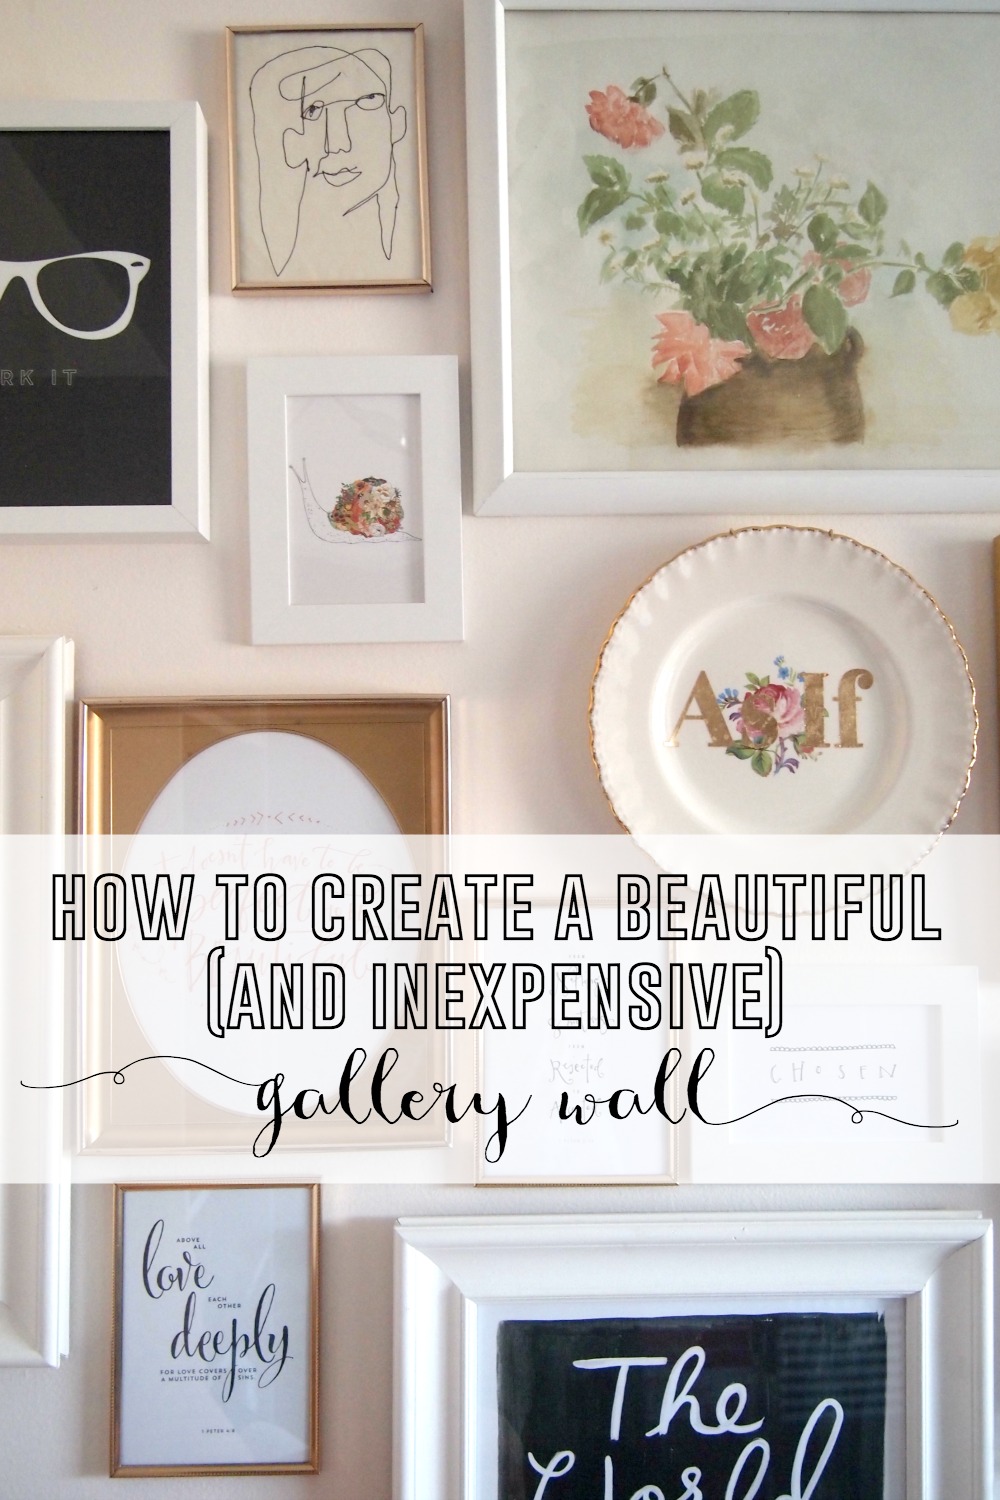
Hey friends! So gallery walls have been around for quite some time now, and I don’t think they’re going anywhere. Can you blame everyone for loving the versatility and major fun factor of a collection of art and frames? Didn’t think so!

Framing it Right!
The thing with gallery walls, however, is that they can get a bit pricey with purchasing multiple frames, art pieces and mats. I’m here to tell you that you can have a gorgeous wall and not spend a gazillion dollars!
First, start by looking online at different shops and sites. Look through your Pinterest boards and Etsy stores, and browse around the internet for artwork that you like. You may run into expensive options, but just know that there are ways to get around them!
As for frames, your first stop is your own house! Look for frames that are sitting in boxes, that you’ve considered donating, or that are simply forgotten in the back of a closet. Can they be spray painted for an easy transformation?

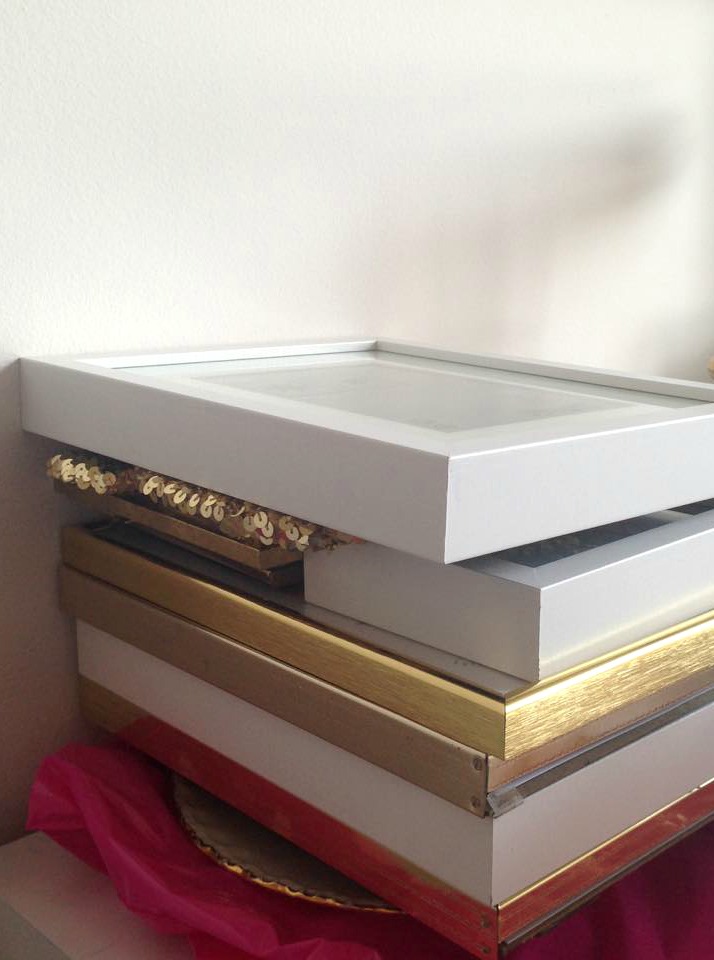
Don’t have frames laying around? Hit up your local thrift stores! Look for frames as well as already framed artwork. You can either keep the artwork (if you get really lucky) or just use the frames. It’s amazing how many thick wooden frames you can find, and SO many gold ones from the late 80’s, which is awesome since gold has made a major comeback!
Map your Wall
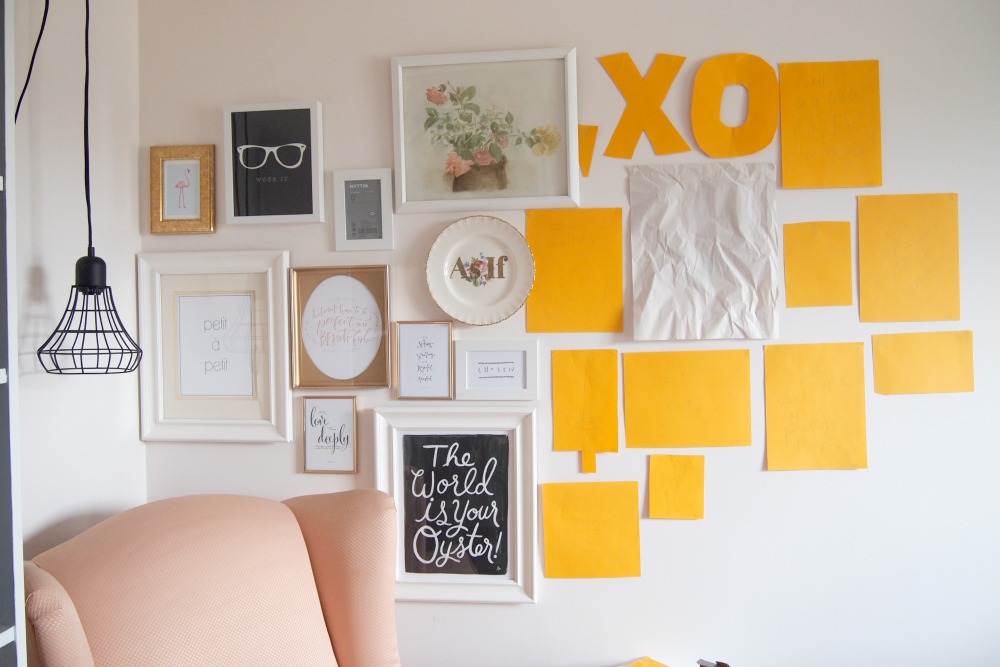
Now for putting together the actual gallery wall. Where to begin? Find some wrapping paper, newspaper or good ol’ printer paper and trace the size/shape of your frames onto them. Now cut them out and use tape or sticky tack on one side to help you plan your art wall.

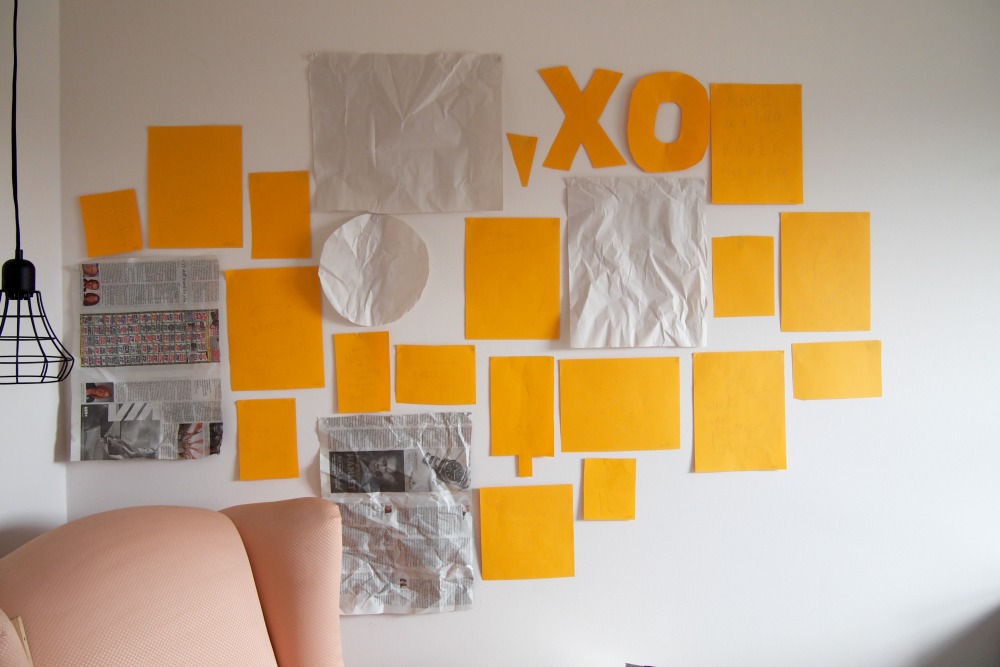
I find this method to be the most effective because you can visualize the exact placement of your pieces, and to make that even better, write a description of the piece on the paper or draw a rough picture of what the artwork is to help you along.

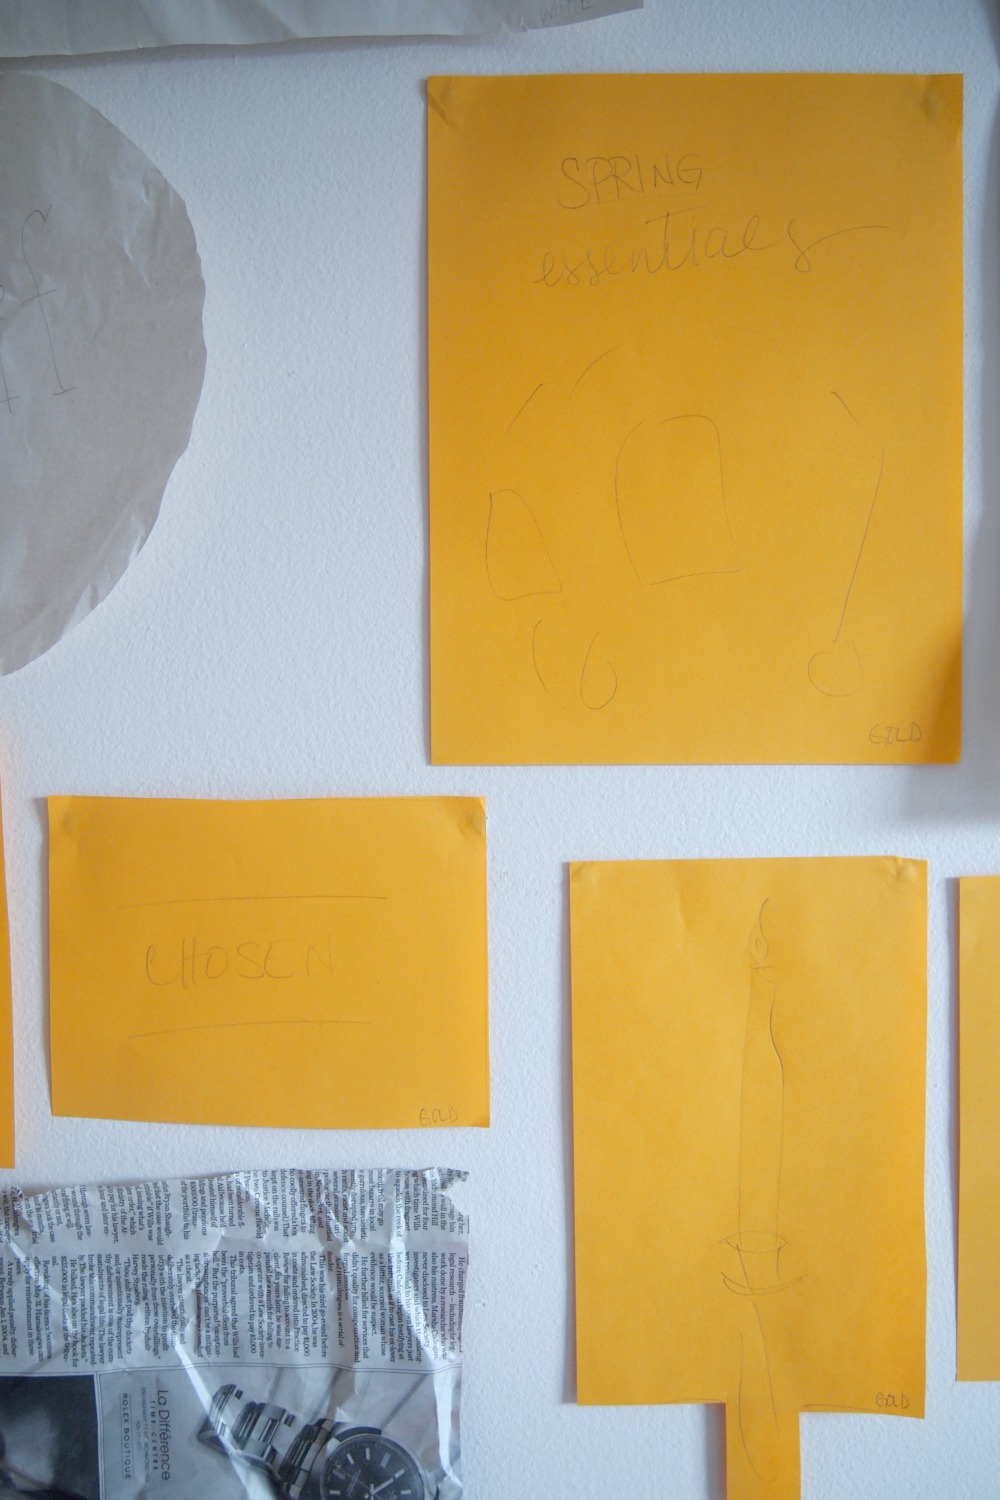
This also allows you to move things around!
Nailing the Perfect Gallery Wall
Now start putting nails in the wall and actually hanging things! If you’re like me, you won’t measure exactly where the nail should go, which means everything will have to shift a little. No big deal!


Starting on the side against the wall ensured I wouldn’t run out of space, so make sure you do the same! I also started at the bottom since there was a bit more room at the top.


Don’t worry if you have frames that are empty. If you know you want them up on your gallery wall, just use them anyway and you can get artwork for them later.

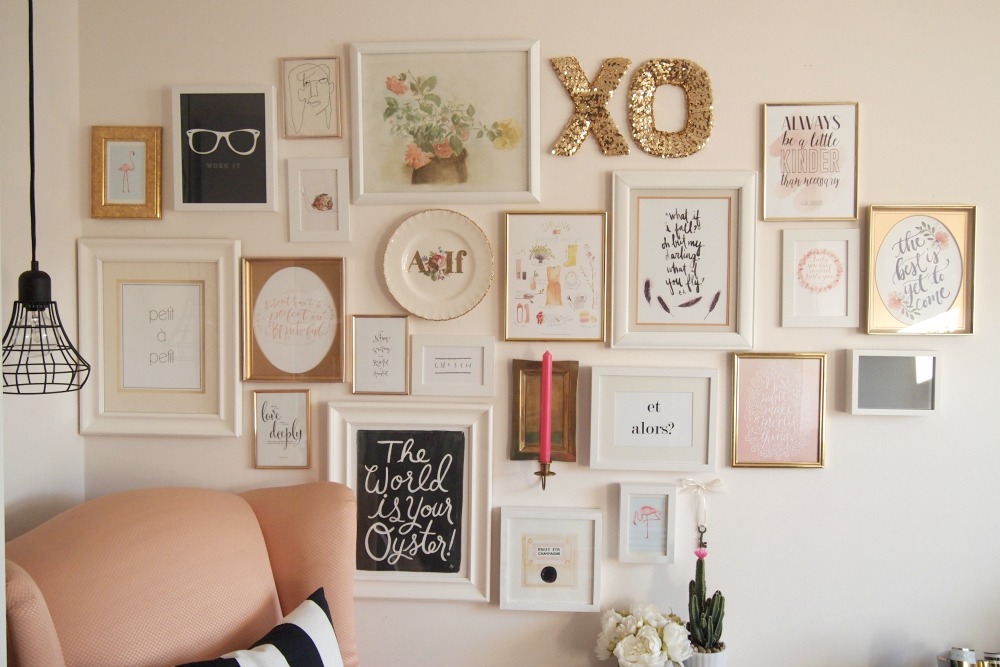
When you’re finished, you have a focal wall that is sure to make your room look and feel a lot more like your own, and looking at artwork you chose and love will bring you so much joy!

Mix, Match and Improvise
Here is a detail of the right side of the wall. I’ll even link to some sources of these either free or inexpensive pieces of art!

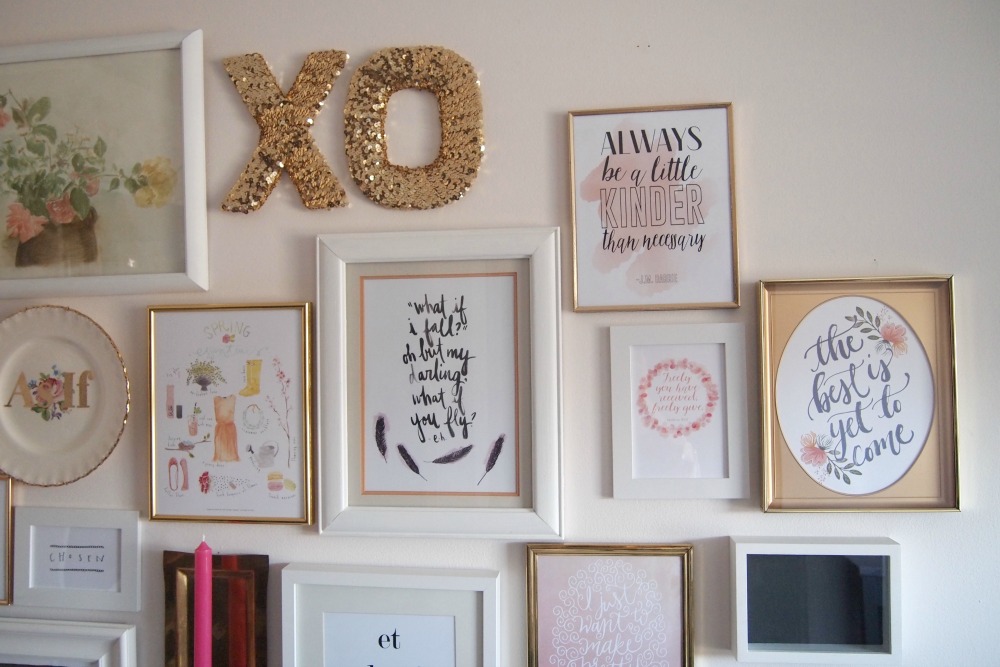
XO: Decoist DIY!
Always Be a Little Kinder: The L.O. Etsy shop
Spring Essentials: Jones Design Company
As If plate: The Sweet Escape Etsy shop
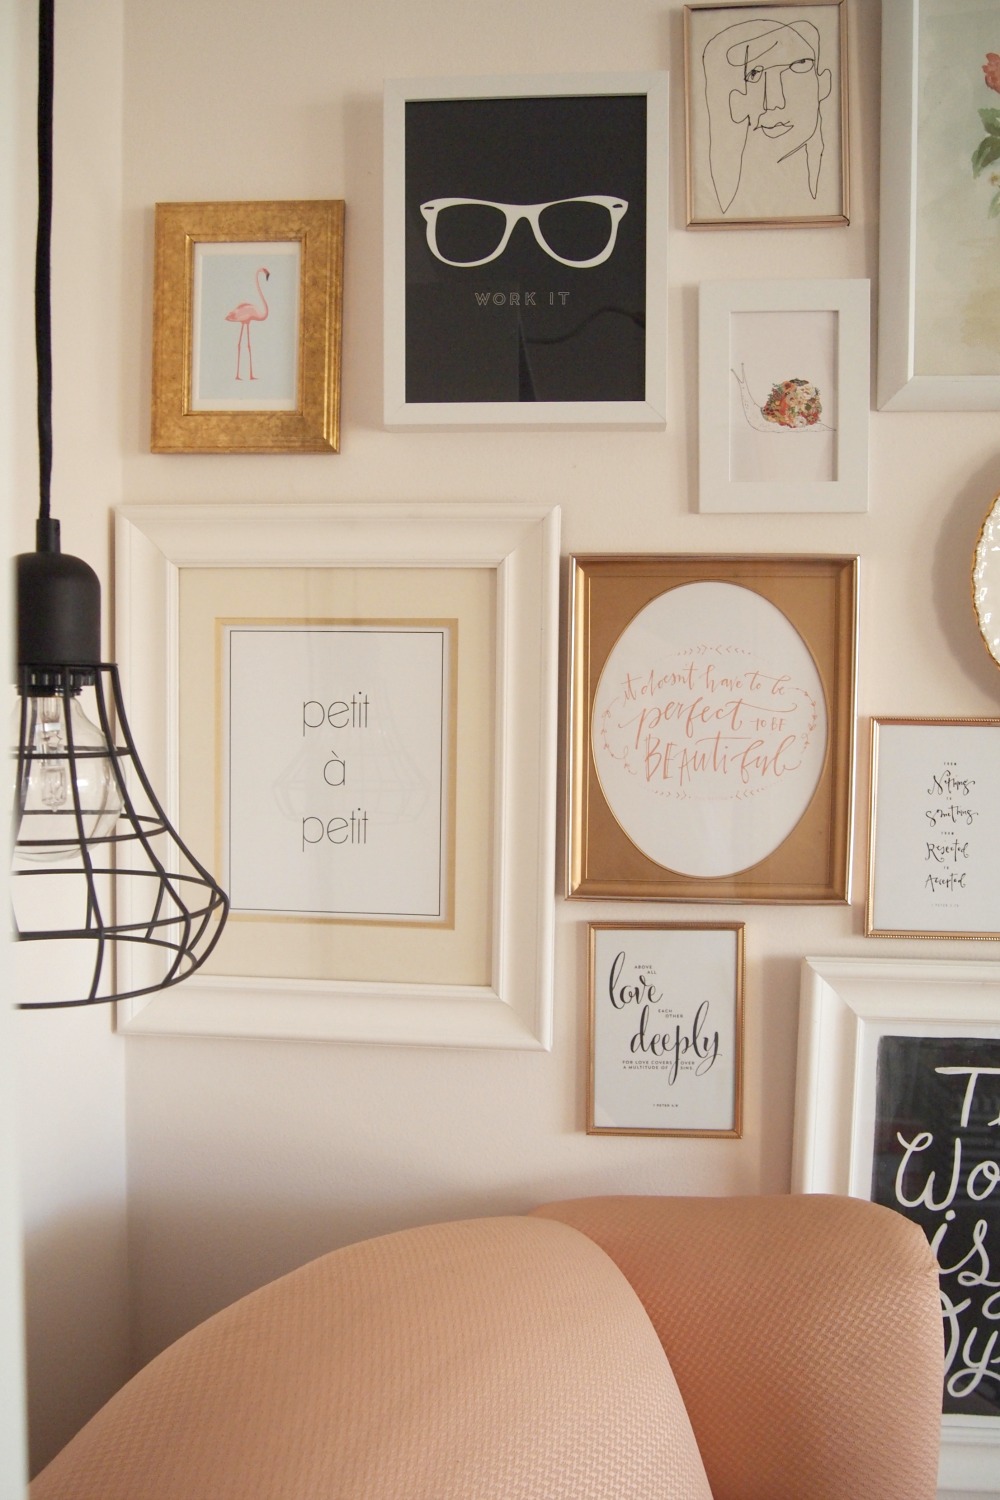
And a close up of the other side of the gallery wall:

So go on and start looking for those old frames and browse the internet for all the pretty things you like! Then have some amazing fun putting it all together for a space you can really call your own!


