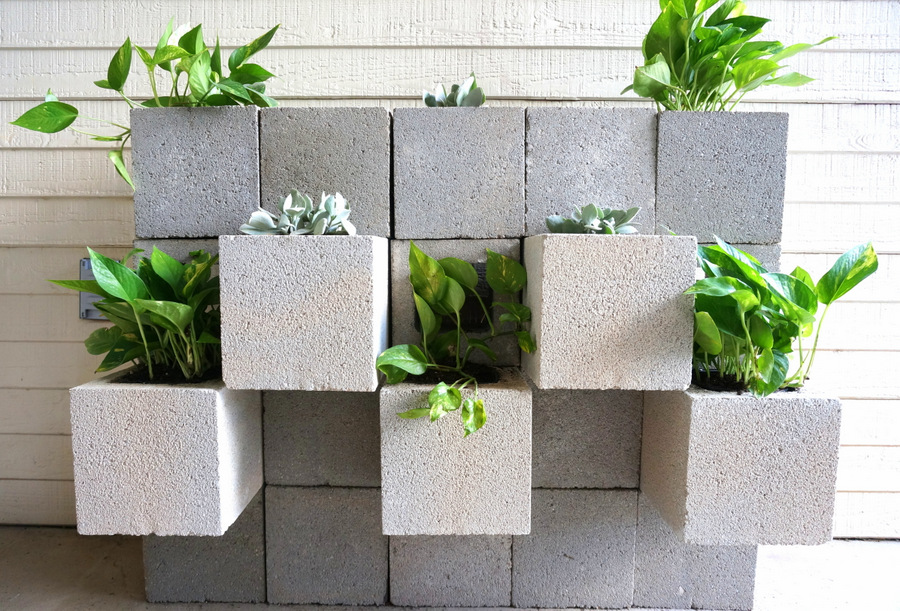
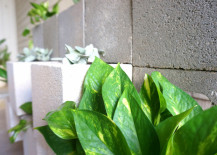
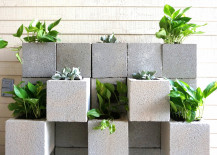
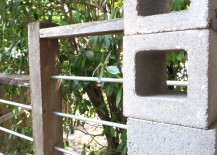
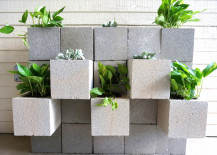
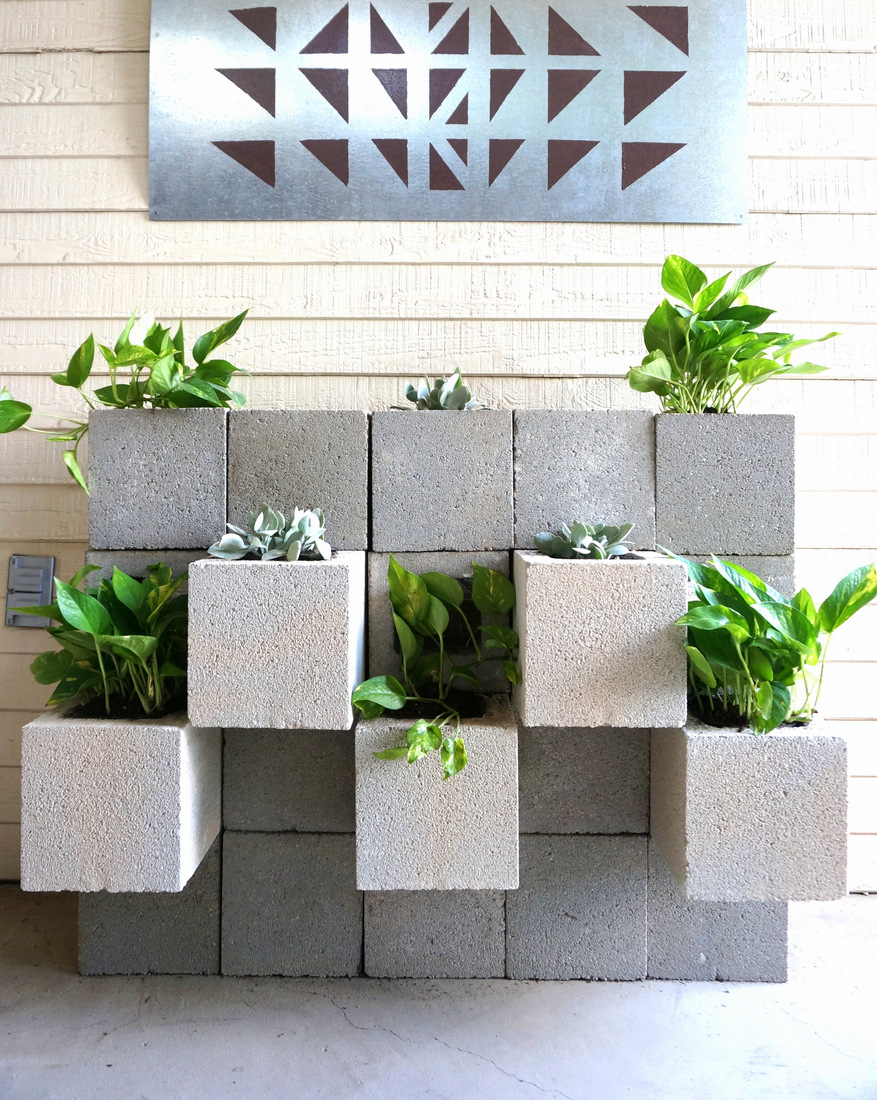
Today I’m sharing my latest DIY project: a cinder block wall that can be used for succulents and any other plants you wish to incorporate! This project is by no means a new concept, but I’ve added a special twist that makes it super easy to assemble! While I didn’t use mortar or any other means of sticking these blocks together (since the wall isn’t high), you may need to do so in order to make your wall more secure, especially if there are little ones who play in your yard.
I would also recommend stabilizing your wall by making the bottom larger than the top and/or adding the protruding blocks to the bottom level as well, despite what you see in the photo above. Yes, I took a few risks with my wall. But the finished product is perfect for my outdoor space! Read on for all the modern design details…


Cinder Block Wall Supplies
Here’s what you’ll need to get started…
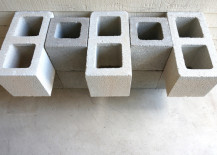
- cinder blocks, both regular (with two openings) and half blocks (half the size, one opening); I used 15 half blocks and 5 regular blocks
- the plants of your choice
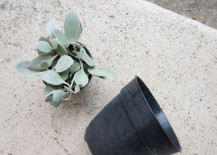
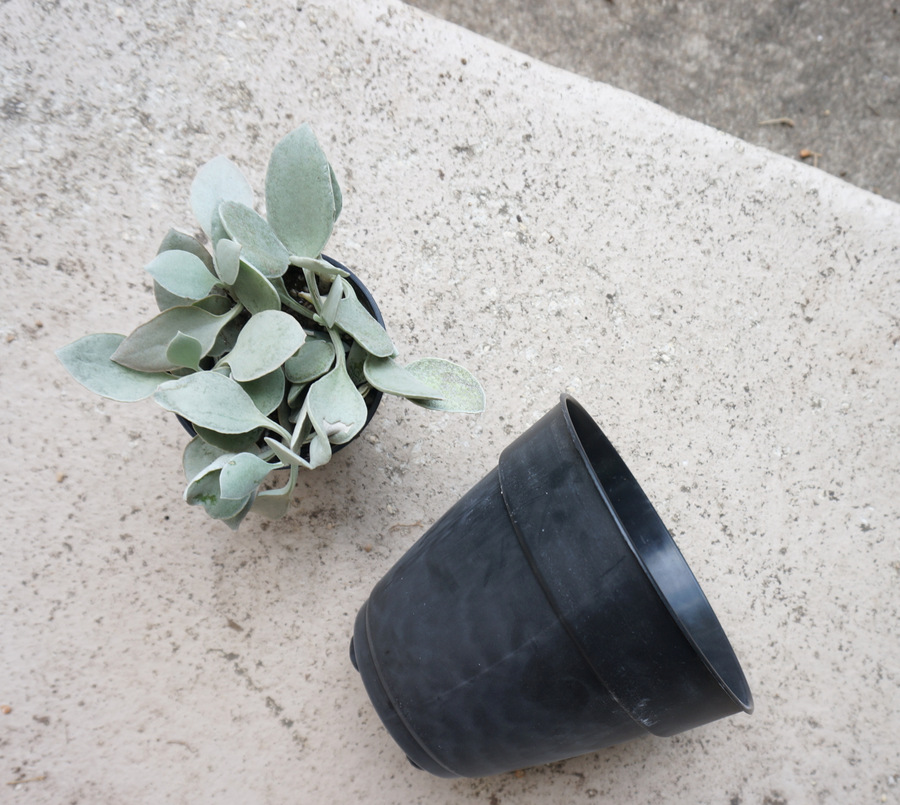
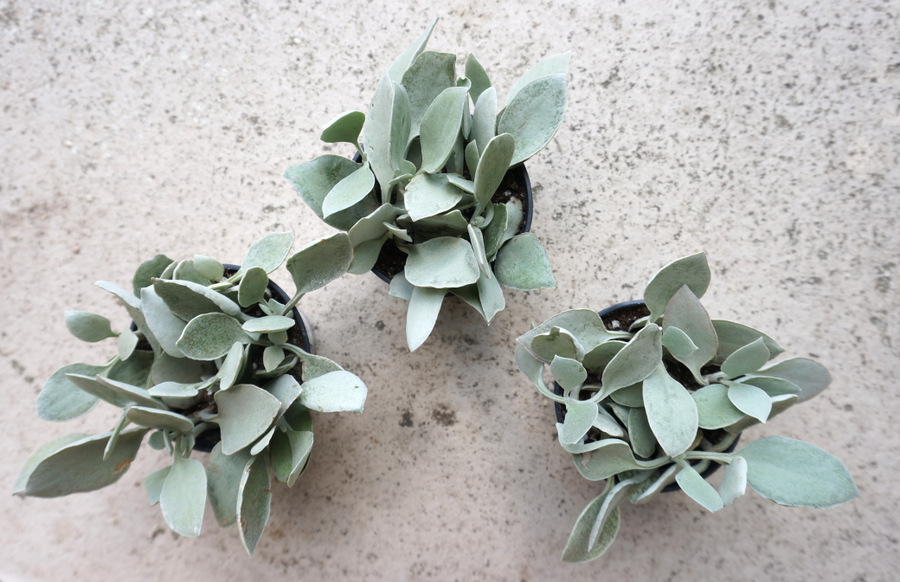
- plastic pots (pots that are around 5 1/2 or 6 inches in diameter work best for this project)
- potting soil
- a broom

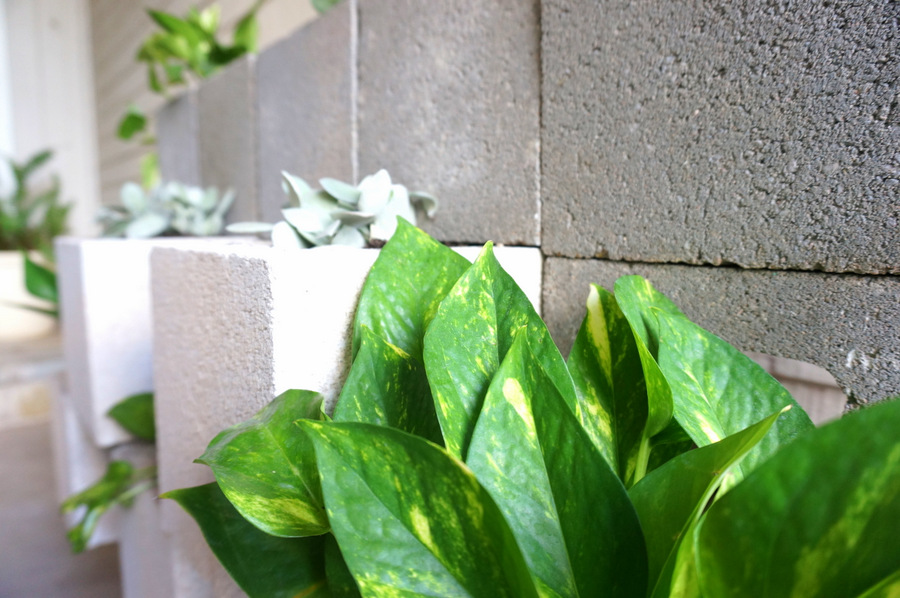
This project has a twist: You may have noticed that many cinder block succulent wall projects use chicken wire to hold the plants in place, yet there is no chicken wire on this supply list! That’s because you can place the plastic pots right into the cinder block openings and avoid the hassle of cutting sharp chicken wire and adding landscape cloth. It is best if the pots are a bit flexible so they can conform to the square-shaped openings of the cinder blocks. Stay tuned for more details later in the post.

Are you ready to get started?…
Project Steps

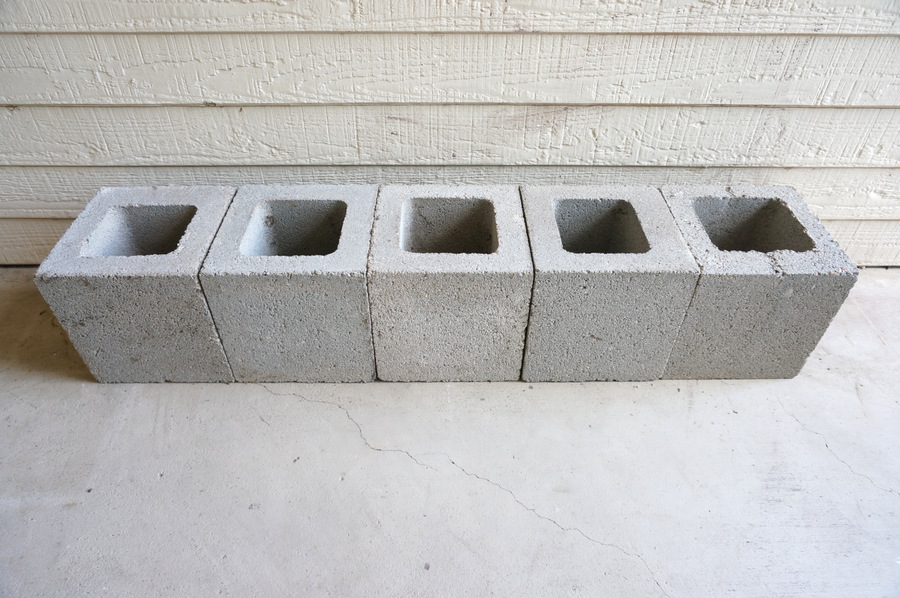
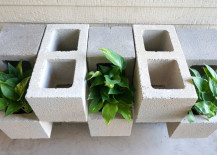
Step 1: Choose a location for your wall, make sure the area is free of debris, and line up your first row of cinder blocks.
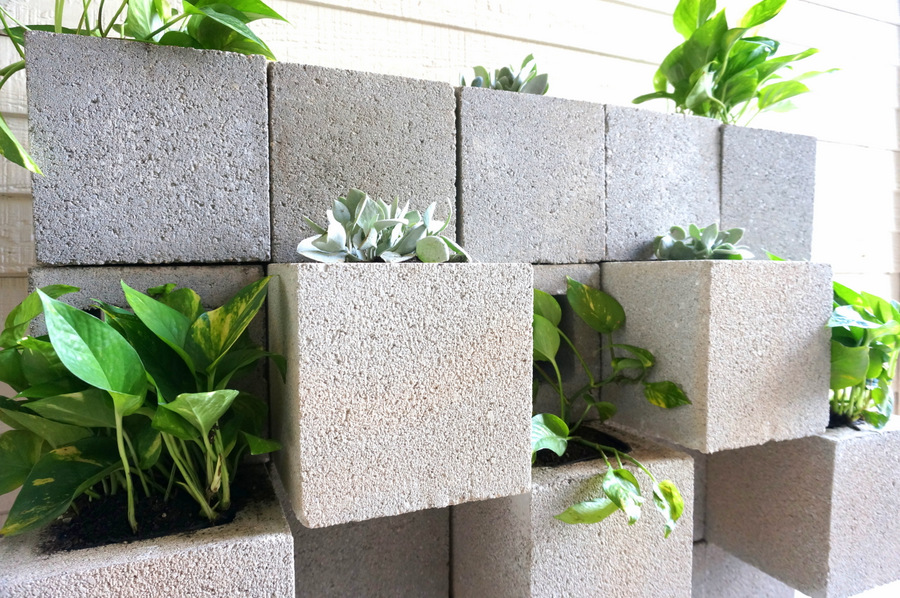
A broom is helpful when it comes to keeping the area around your wall free from debris and dirt. As you can see from the photo above, the bottom of my wall consists of five half-size cinder blocks. As mentioned earlier, it may be a better idea to use full-size cinder blocks on the bottom row, as this will help stabilize your wall. You may also choose to make the bottom row wider than the top for added sturdiness.

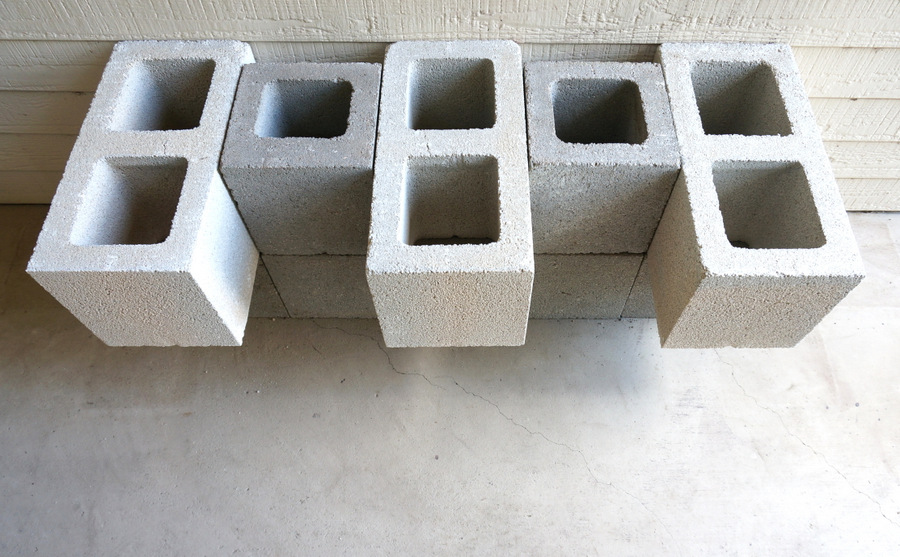
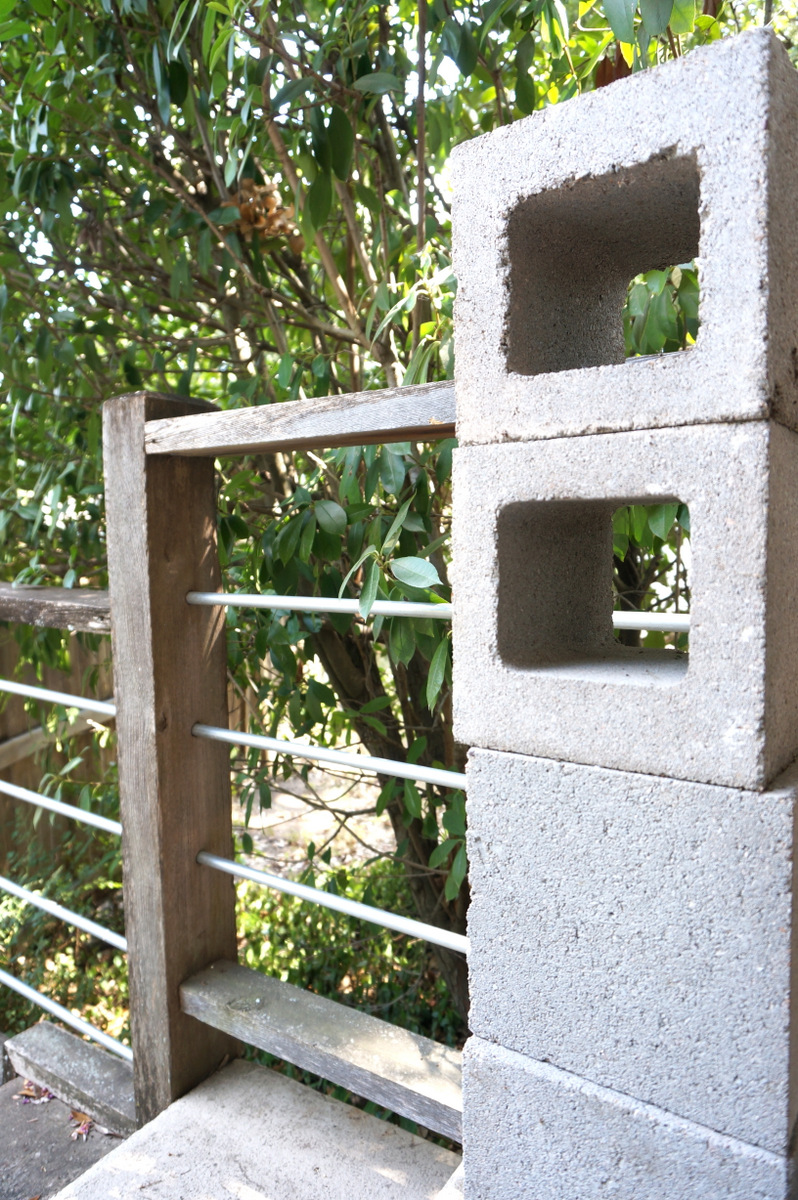
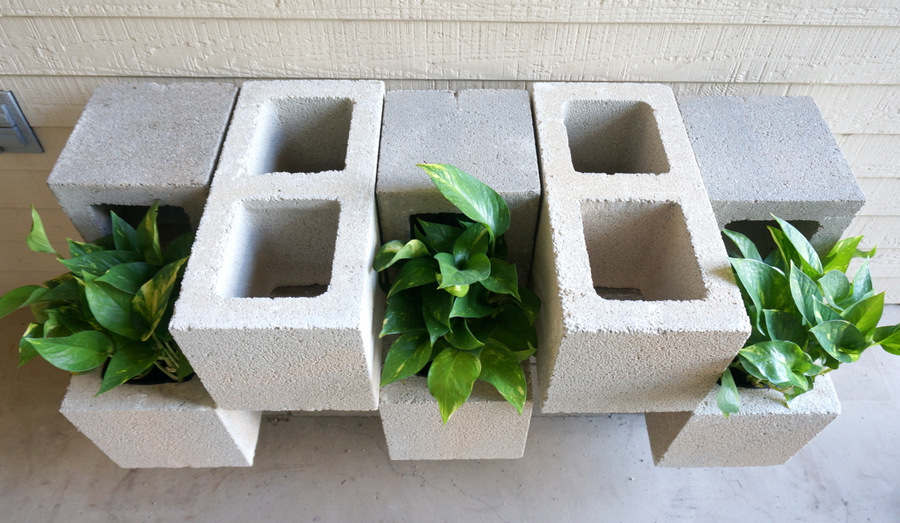
Step 2: Add a second layer of cinder blocks. If your second layer includes full-size cinder blocks, arrange them so the front of each block protrudes out from the wall.
You will add plants to the openings that protrude in the next step. You may also want to stagger the placement of your blocks, as shown above. Note that the full-size cinder blocks extend beyond the back of each half-size cinder block for added sturdiness.

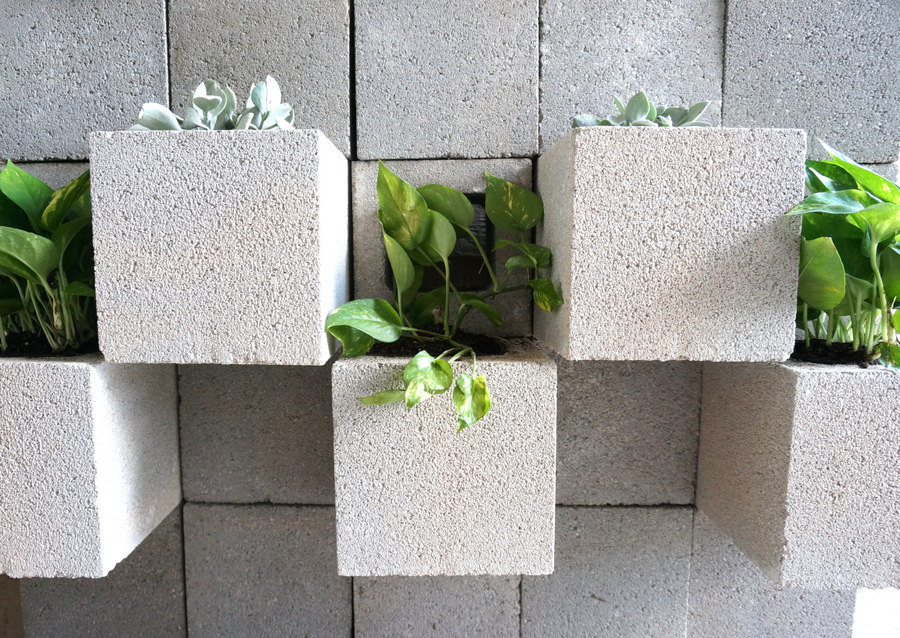
Step 3: Add plants as you go.
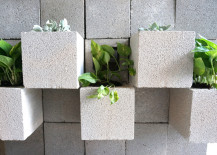
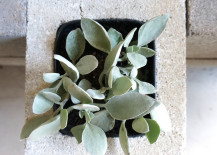
Take the plastic pots and wedge them into the cinder block openings. They should take the shape of the openings, becoming more square than round. The upper lip of each pot will catch on the top edge of the cinder block opening for added security. You may instead choose to plant at the end of the project, but this might be tricky for reasons I’ll go into below.

Step 4: Add your next row of cinder blocks, using the half-size blocks to hold the full-size cinder blocks in place.
You will place a half-size block over the back opening of each full-size block. Remember, staggering the blocks may be necessary. You will likely need to cover part of the front full-size cinder block opening (the side with the plant) with the half-size block as well. In other words, part of the opening with the plant sticking out will be obstructed to ensure sturdiness. That’s why it’s easier to get the plant in there first. If you design a wall that doesn’t require staggering the cinder blocks, you don’t need to worry about the last bit of this step.


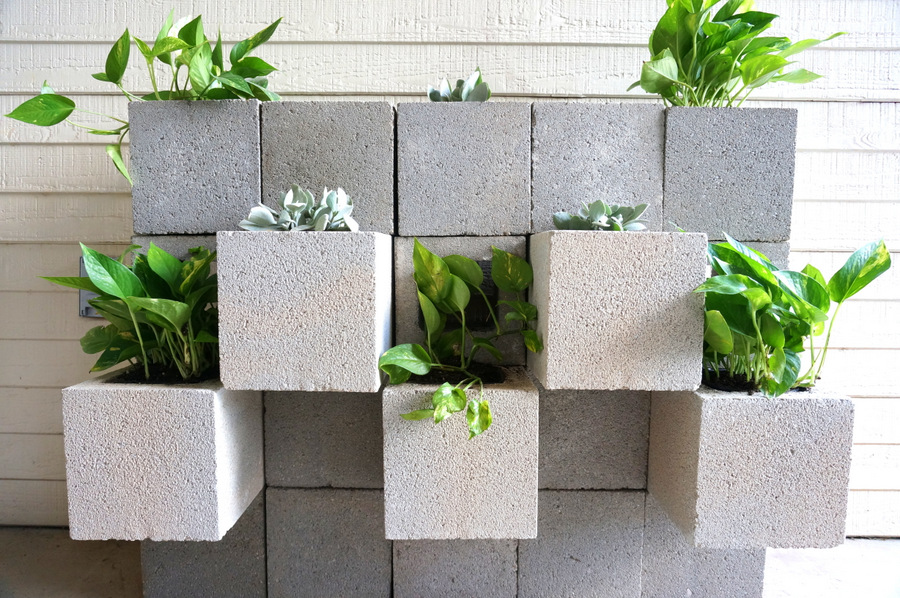
Step 5: Add the final row of cinder blocks and plants.
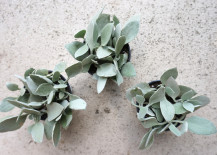
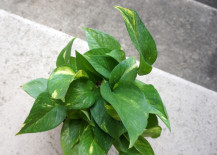
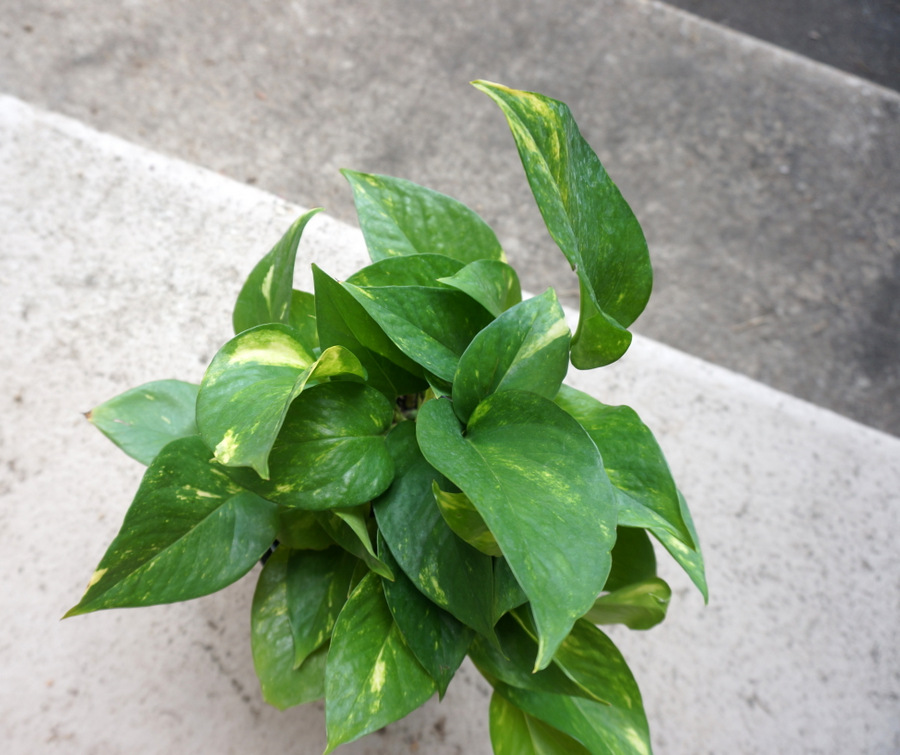
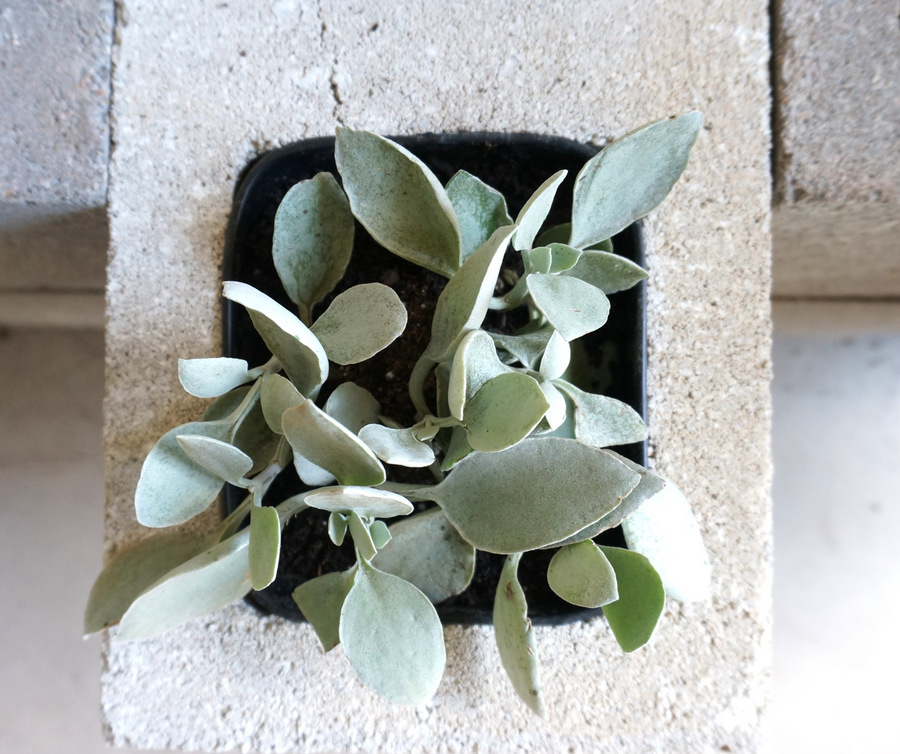
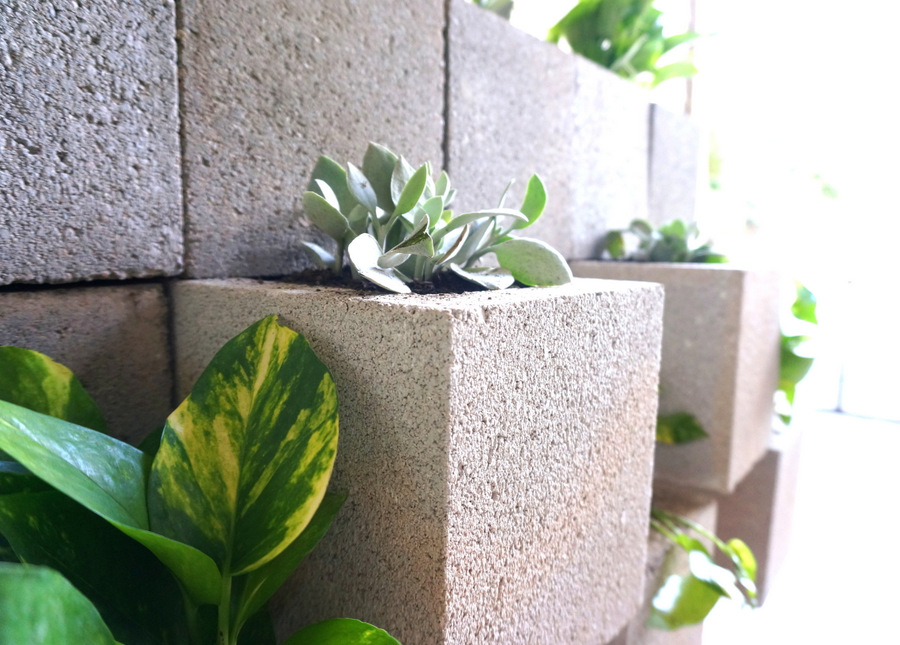
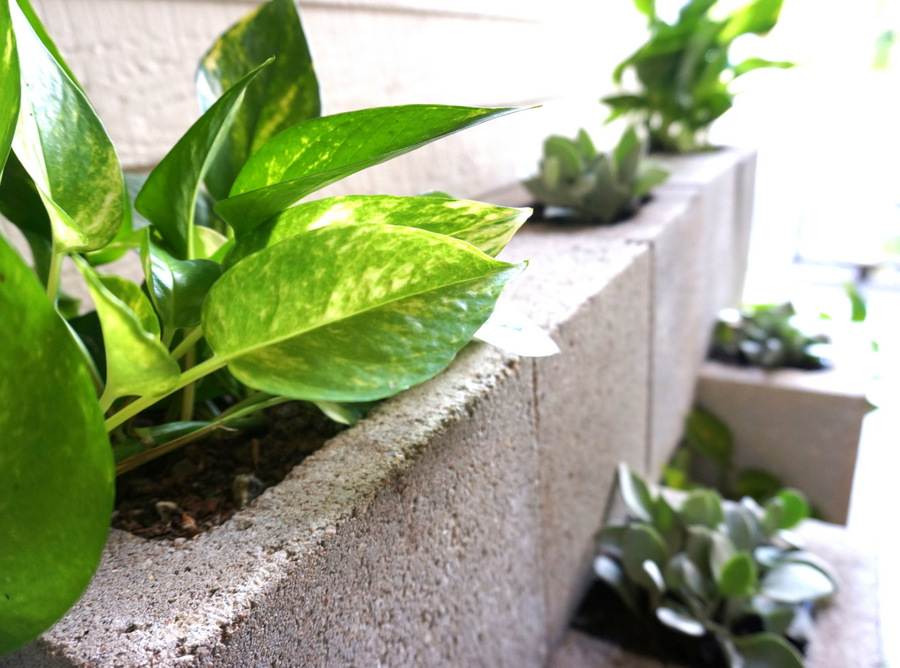
As mentioned, I chose Golden Pothos, and I also added a succulent called Kalanchoe. This variety has silvery-green leaves, which are a nice contrast to the warm tones of the Pothos:

Step 6: Use a broom to sweep excess dirt away from the wall.
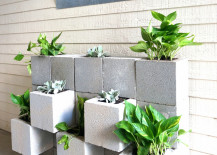
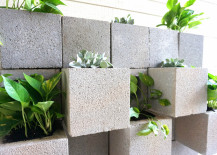
This project gets a bit messy, but what’s a little dirt in the world of modern gardening?! Here are some final shots of the modern plant wall:


While I didn’t secure the blocks in place with mortar or another adhesive, remember that this might be a necessary step if you want to make your wall taller or extra secure. As mentioned, it may be a good idea to make the bottom row wider than the top row for added sturdiness. The last thing you want is to have this wall topple over.

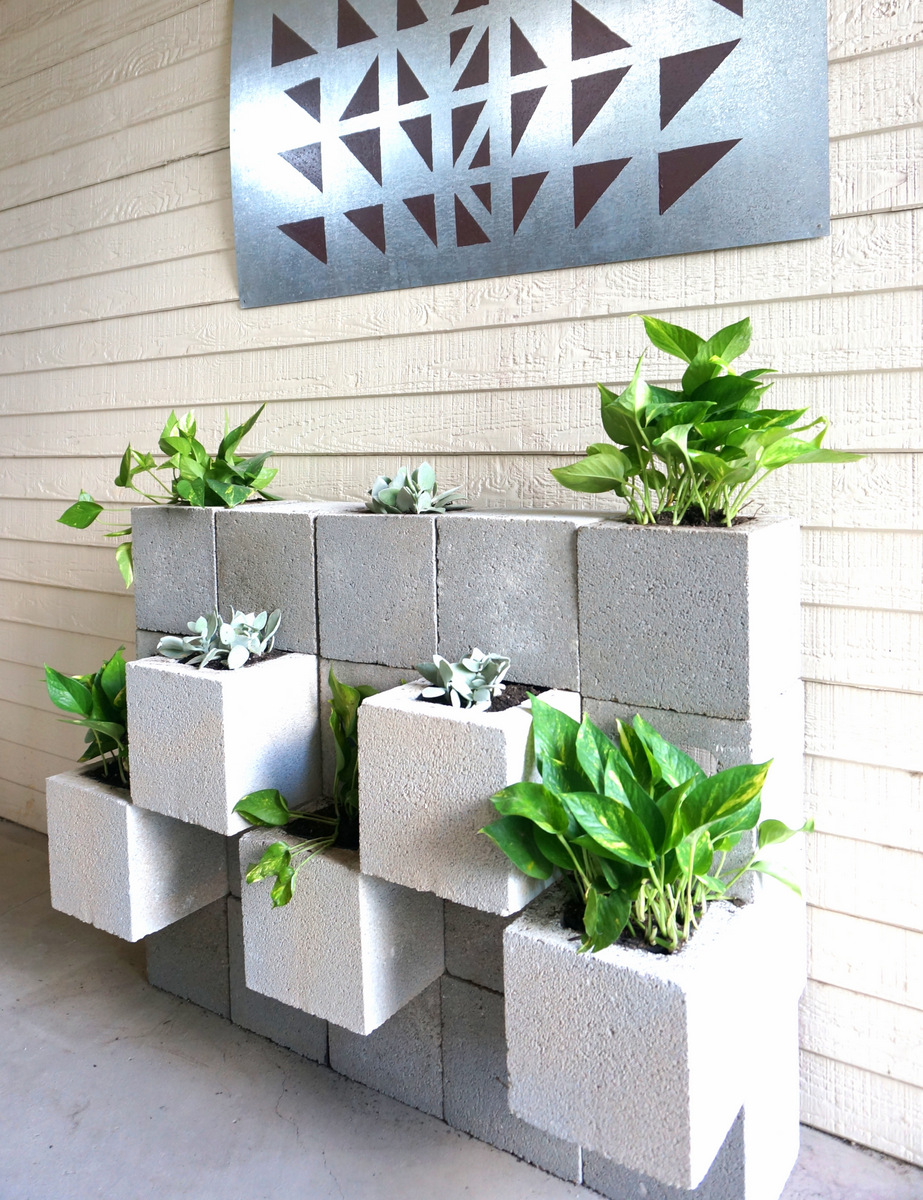
All in all, I’m thrilled with the finished product. I’ve already grown Golden Pothos on the the porch, so I know it will do well in this outdoor space. Here’s hoping the succulents are equally successful! There’s nothing like getting a compliment on your project just hours after it’s finished, so when the pizza delivery woman arrived at my door with my dinner and mentioned how much she liked my cinder block garden, it was the perfect start to the evening.
Thanks for letting me share my latest DIY project with you! I hope your last days of summer are filled with creativity and quality time outdoors…