Looking for an easy DIY project you can complete in an afternoon? This past weekend I created two geometric painted pots. This simple project has a big payoff, so I thought I’d share it with you today.
A little secret: while this DIY project can easily be completed in less than a day, I took my time with it over the weekend. On Friday afternoon, I headed to Home Depot to buy the pots and plants. On Saturday afternoon I added the first coat of paint. On Sunday afternoon, I painted the accent color and potted the plants. The project never felt tedious, and I was able to work on it as I had free time here and there. Easy and fun–that’s hard to beat!

Below I’ll take you through the steps involved, with the help of some pictures I snapped along the way. Inspired by one of today’s top trends — geometric decor — these pots are definitely timely. Yet the simplicity of the design also makes them timeless. I created this project as a final touch for my laundry room makeover, and I’ll share plenty of pics from that process later in the week. Until then, enjoy today’s featured project here on Decoist, and feel free to share your own painted pot ideas at the end of the post…
Step 1: Gather your supplies.
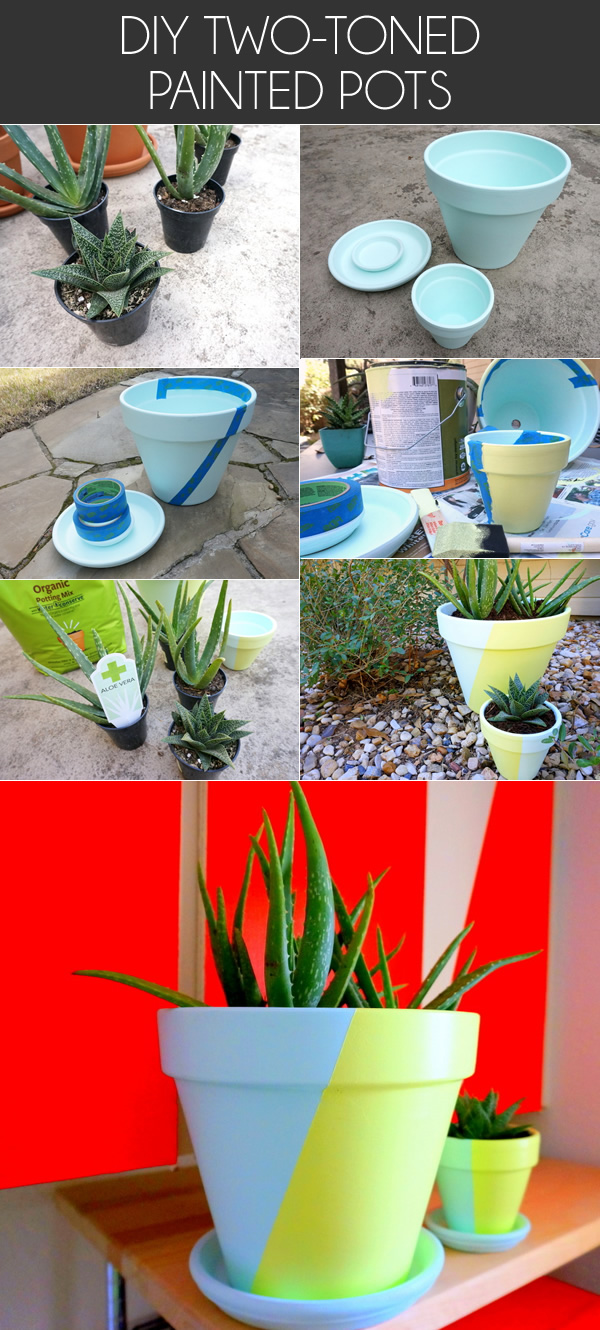
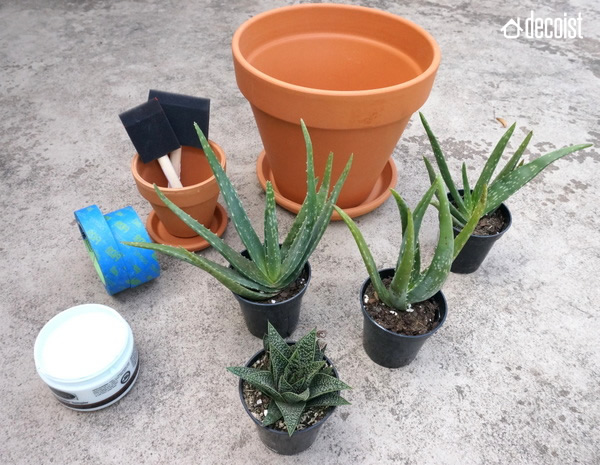
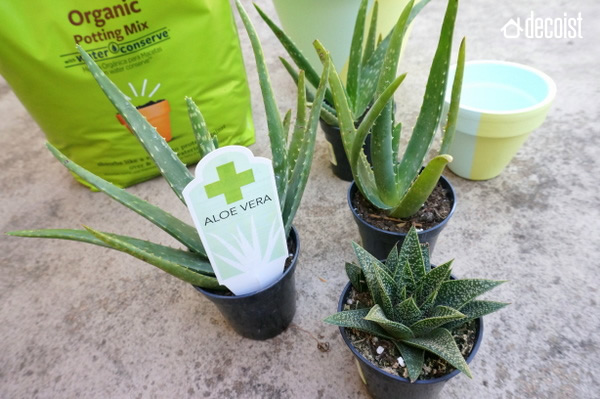
Begin by gathering your supplies. Here’s what you’ll need…
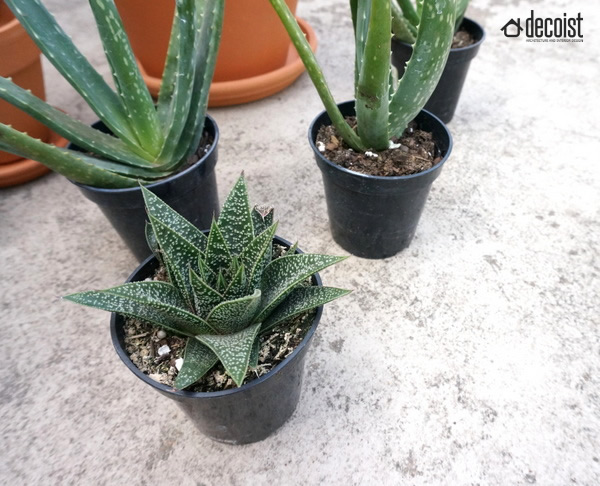
- terra-cotta pots in the sizes of your choice
- paint in two shades (I used leftover wall paint)
- foam brushes
- painter’s tape
- plants (succulents work well for this project)
- potting soil
- a drop cloth or spare paper to cover your work surface

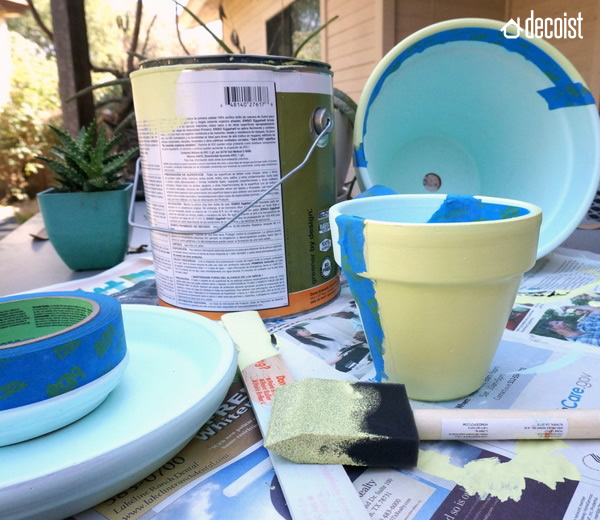
As mentioned above, the blue shade of paint I used for this project was a leftover sample I’d previously tested out on my dining room wall. The lime green paint was left over from painting an accent wall in my guest room. Its semi-gloss sheen was the perfect touch! A sample size of wall paint (pictured above) is more than enough for each color of paint you will use in this project! The project is very affordable, especially if you use leftover supplies, such as paint and pots. I spent $30 total.

Step 2: Paint your pots the lighter of the two shades.
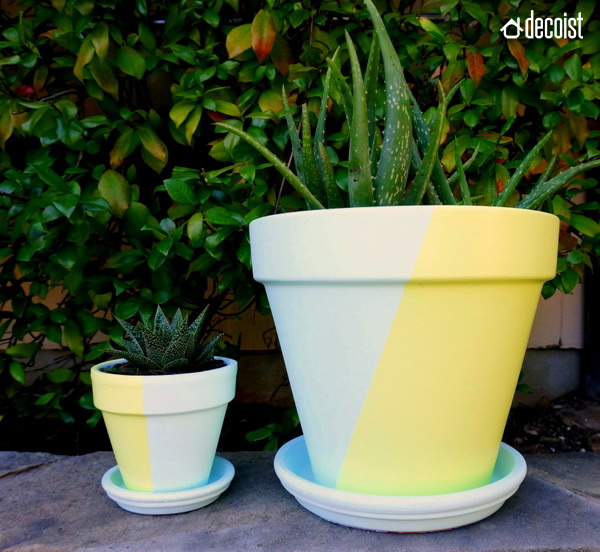
There are many opinions on the best paint to use, and whether to prime and seal your pots. I’ve painted many terra-cotta pots in my day, and when using wall paint, I typically don’t prime or seal. I prefer a look that isn’t too glossy. But if you’d like some extra protection and shine, seal away! Start with the lightest of the two paint colors. This will be your base coat. Two coats of this color should do the trick. Once I began painting, I found that the paint dried quickly enough for me to add a second coat during the same painting session. Super easy…

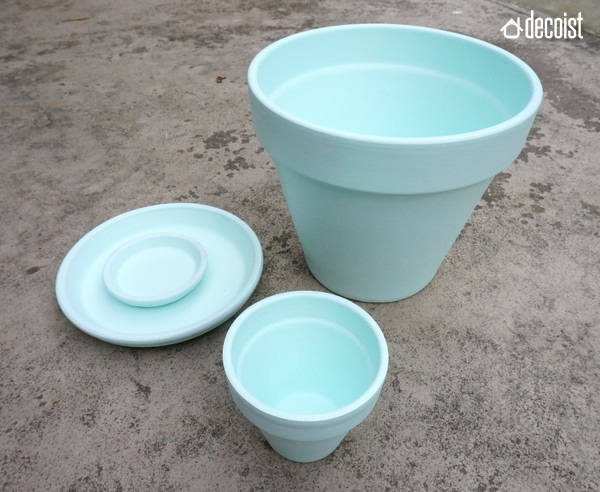
Don’t forget to paint the saucers! Side note: You don’t actually need to paint the entire inside of each pot, as the dirt will be covering the majority of the terra-cotta interior. I’ll often paint a couple of inches down from the top, but for this project, I felt like painting the whole interior. Plus, it made for a prettier picture, right?!
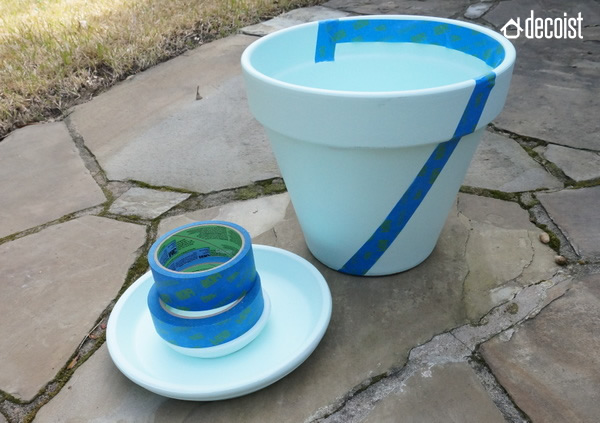
Step 3: Use painter’s tape to create the design of your choice.
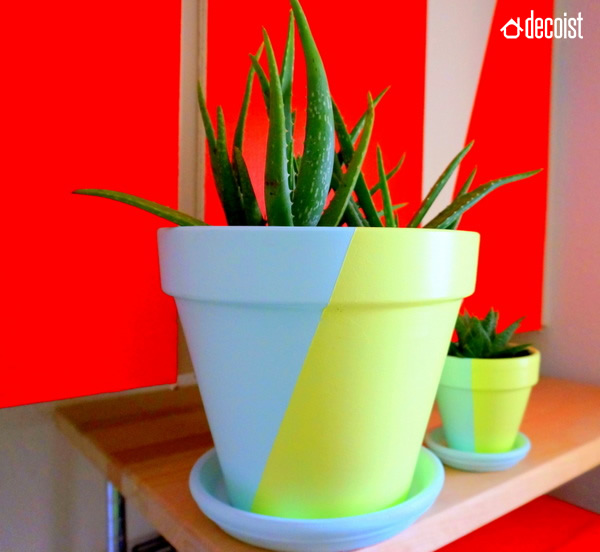
Make sure the paint is completely dry before adding painter’s tape to the mix. When it came to adding the lime green paint, I opted for a simple dual-tone design: two shades of paint and two sections for each pot. I taped diagonal lines in two places (halfway around the large pot), so there would be blue and green sections that were approximately the same size. For the small pot, I used vertical lines rather than diagonals. I also put some painter’s tape along the inside of the pot to guard against splotchy brush strokes.

Then I let the painting fun begin! Things got a little messy…

FYI, newspaper isn’t the best bet for a surface protector. The ink transfers to the pots if any wet spots make contact with the paper. I learned that the hard way, but it was nothing I couldn’t fix with a little touch-up! Speaking of touch-ups…
Step 4: Remove the painter’s tape and touch up your newly painted pots.
I love painter’s tape. I use it quite often. Yet every time I make use of this wonder supply–no matter how precisely I apply the tape–there are stray marks where the paint bleeds over to the other side of the design. Don’t sweat it! That’s what touch-ups are for!

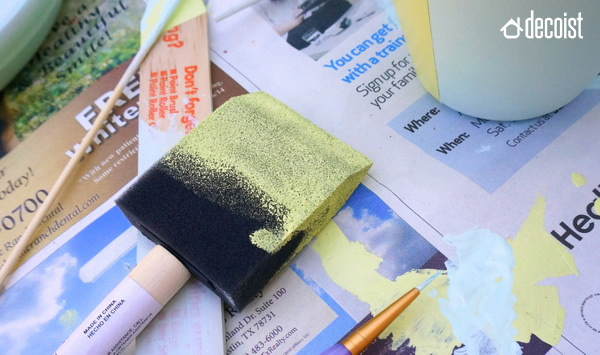
I used a foam brush for larger splotches and a tiny brush (shown below, at the right) for more detailed touch-ups where the colors blended. Cover stray brush strokes, and add paint to any area that didn’t get full coverage the first time around.
Step 5: Add the plants.
Yes, it’s time to get planting, folks! Again, make sure the paint is completely dry before moving on to this step. Add the dirt and plants, then water away…

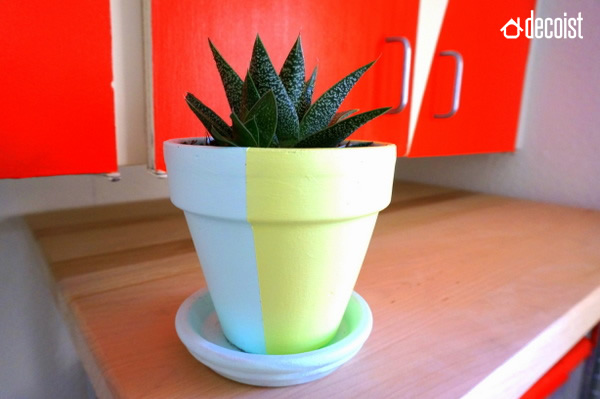
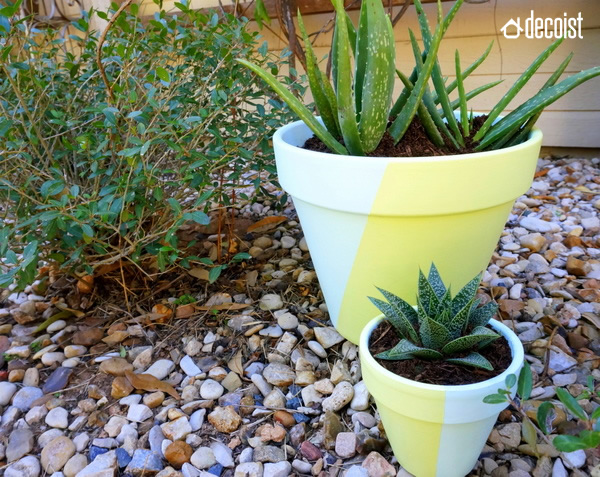
Don’t the succulents add the perfect touch to these painted pots?! There’s something refreshing about the blue and green color scheme when the deep green of the plants is added to the mix:

Display the pots outside for a vibrant dose of color in your yard…

…or bring them indoors for an unexpected dash of two-tone style. Below we see an image from my newly made-over laundry room. Later this week, I’ll take you through that process and show you how a few easy updates can give this practical space an updated look!