We know that photos can be an amazing source of design inspiration, so this article may contain affiliate links that will direct you to a particular decor item. Clicking on a link may result in a portion of proceeds being paid to www.decoist.com
Supply List:
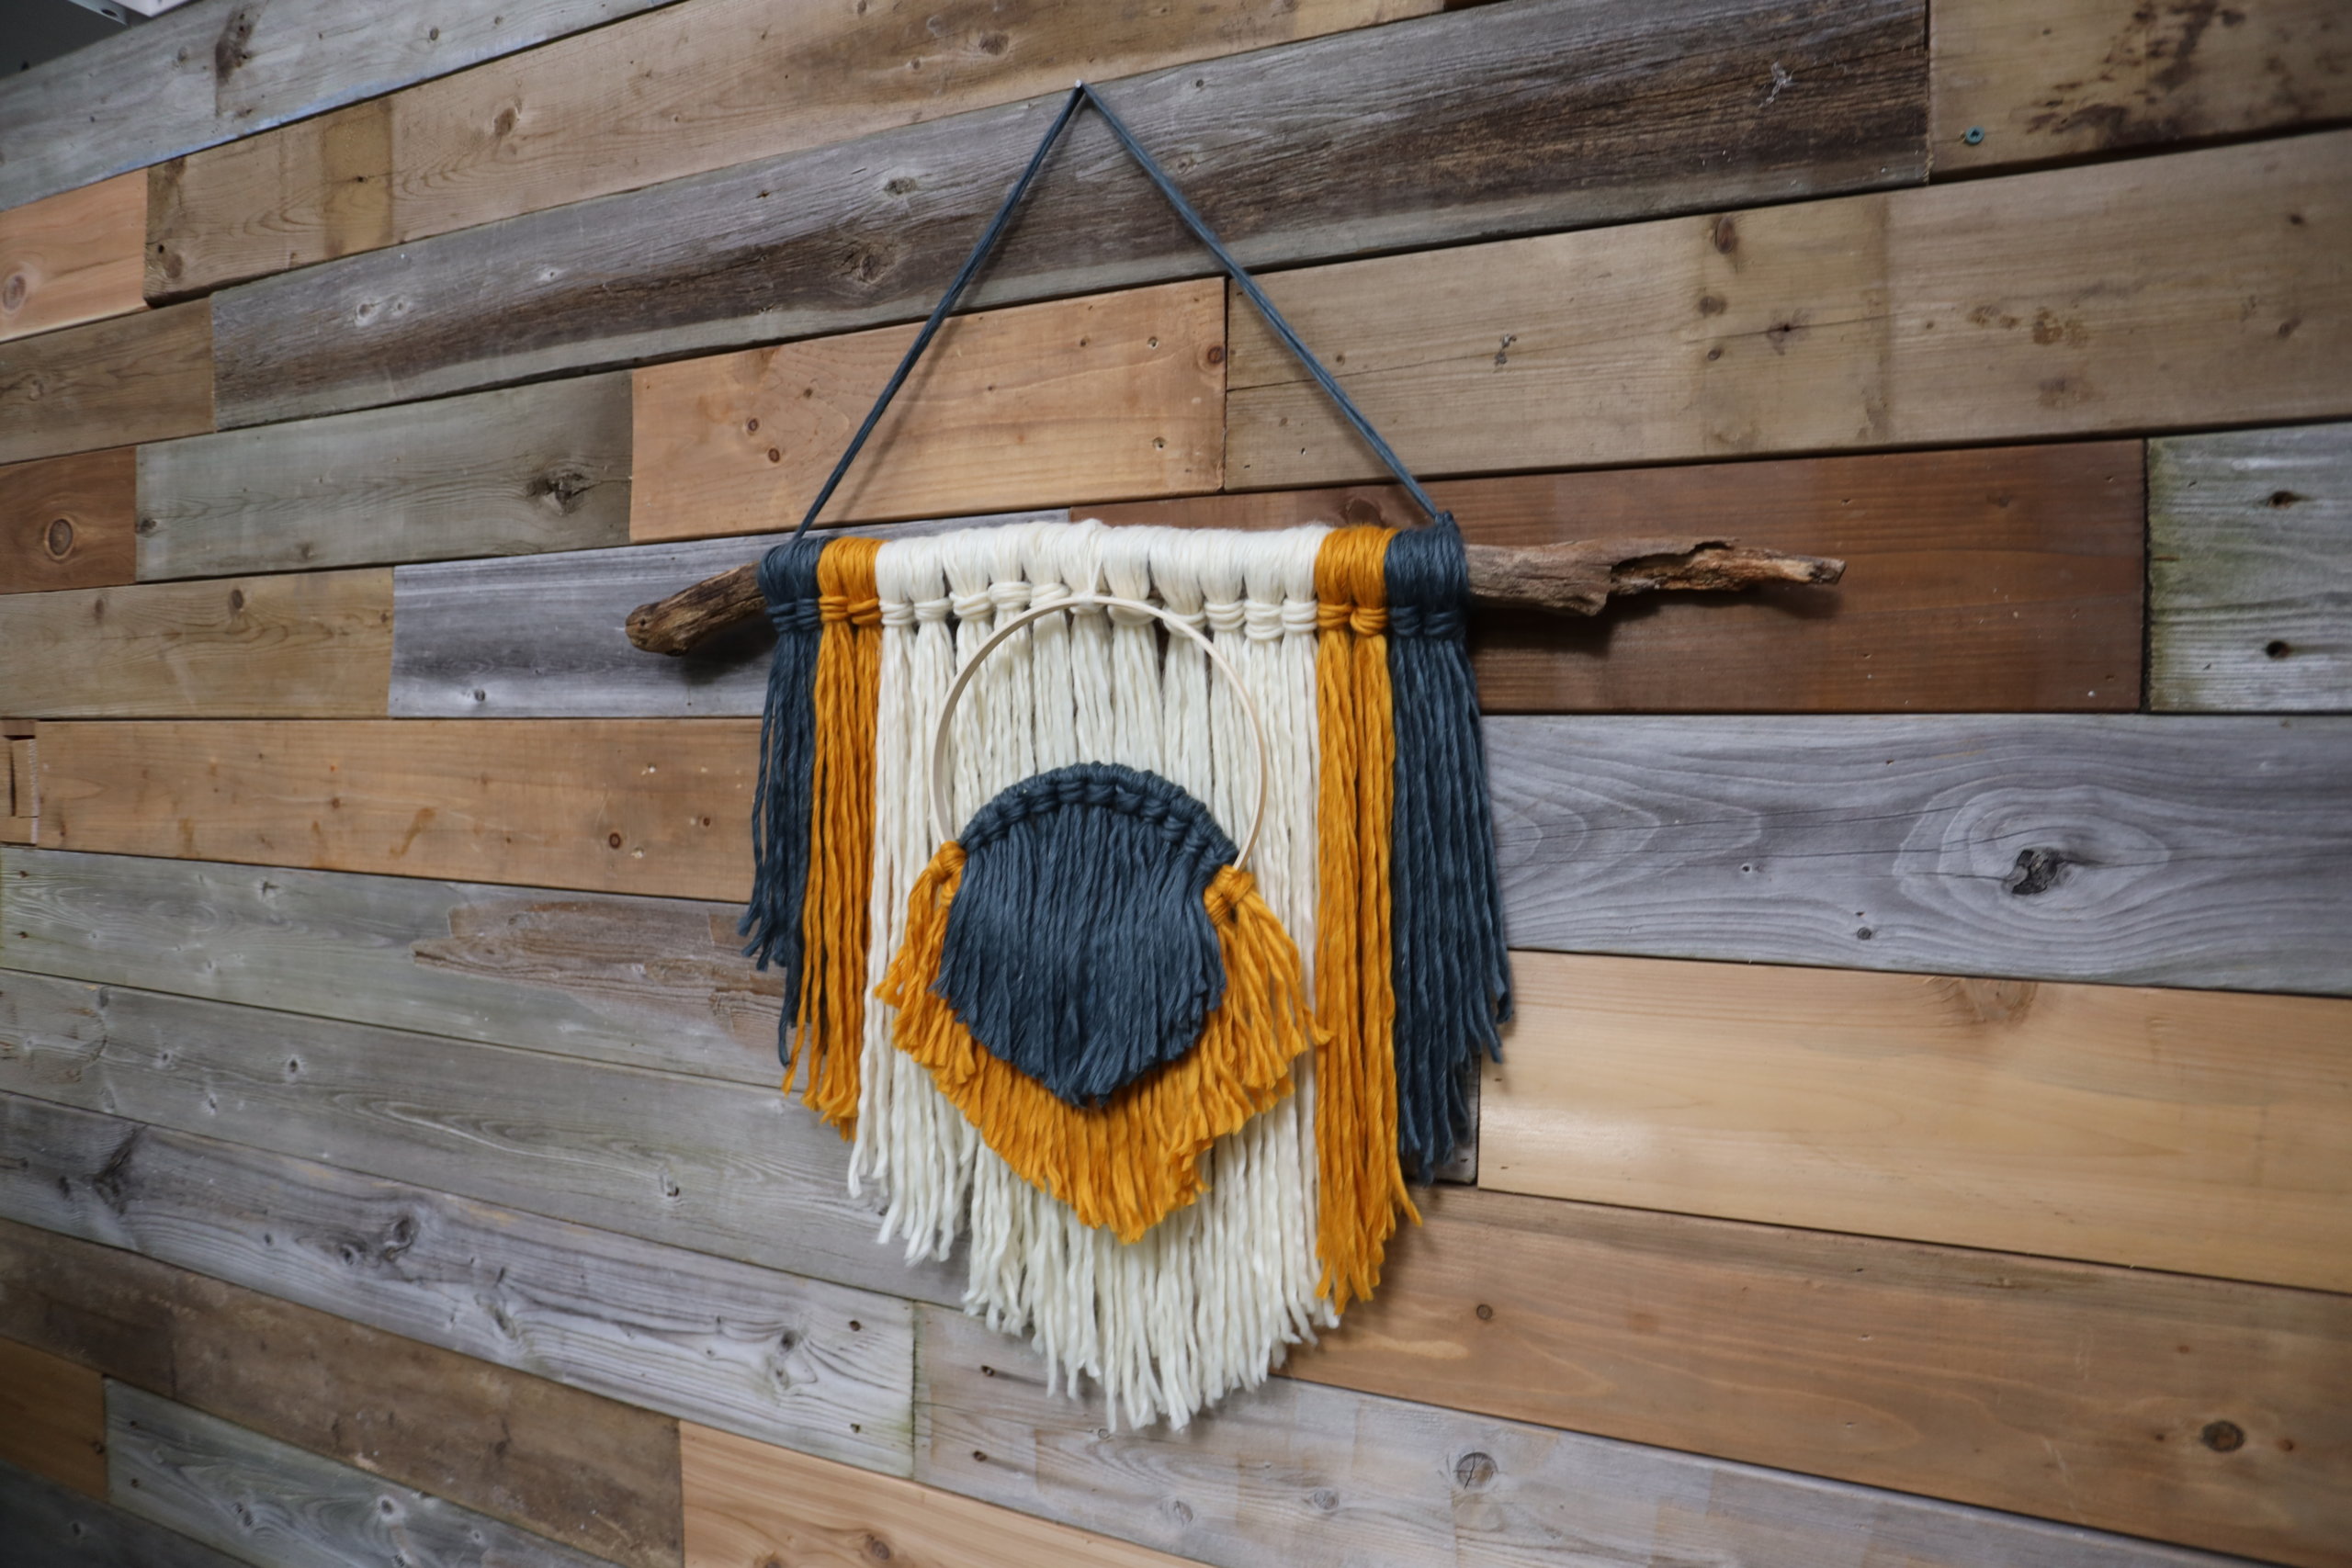
- EcoCosy Thick Yarn
- We chose cream, yellow, and grey-blue for our craft.
- Stick, driftwood, or dowel cut to roughly two feet
- Embroidery hoops — two hoops, 6-8″
- Scissors
Step 1:
The first thing you need to do is measure out your yawn. Place one end of your first yarn color against your stick or driftwood, measuring out until you have your desire length. The first color you choose will be the longest pieces. Once you have the length you want, double up the yarn then cut it.


PRO TIP: We made our cuts much longer than they needed to be, knowing we can trim away the excess length at the end, whereas you can’t add length once you’ve made the cuts.
Step 2:
Measure out your pieces in your other two colors of yarn. We used 66 cuts of cream yarn at 86″ long, 36 cuts of yellow yarn at 54″ long, and 24 cuts of grey-blue yarn at 38″ long.
Step 3:
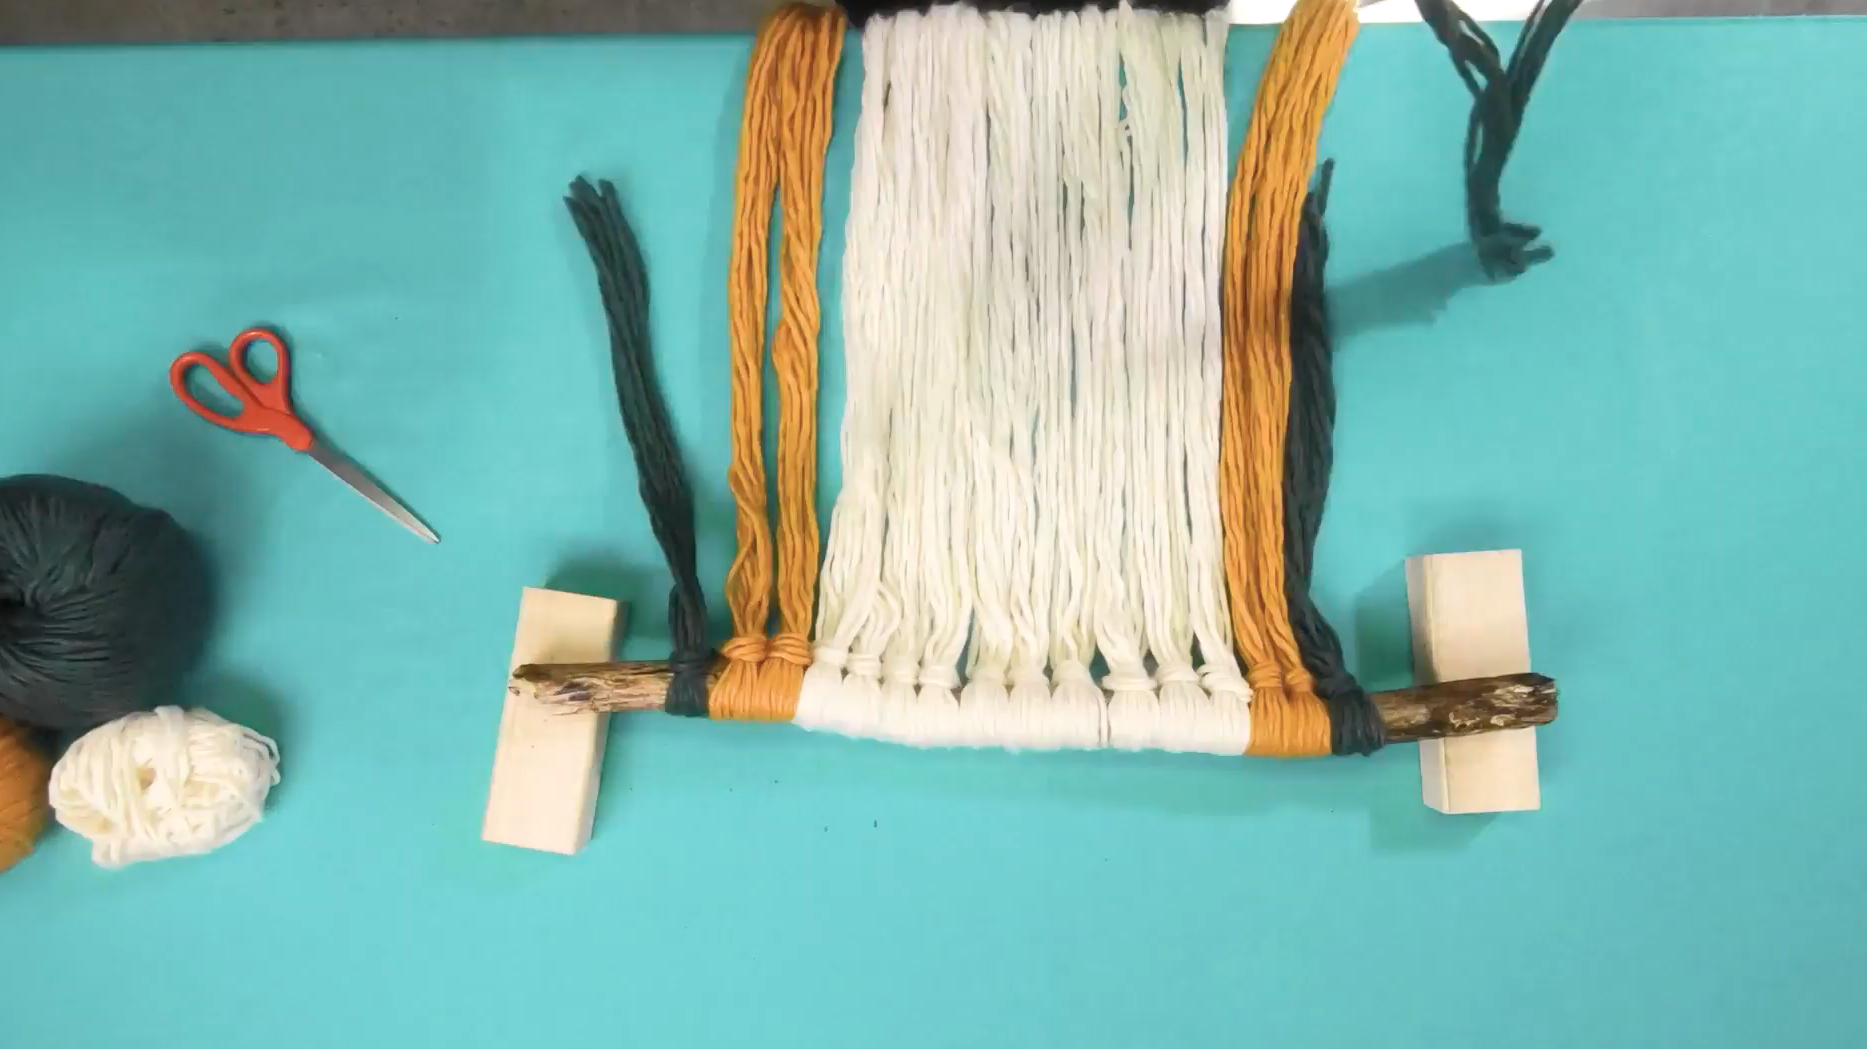
Separate your doubled-up cuts in sections of six to keep the texture of the tassels thick when it’s hung up. You should have approximately 11 sections of cream yarn.
Step 4:
Starting with your cream yarn in the center of your wood, secure the first section to your stick by placing the loop under, then pull the ends under the stick and through the loop to tie it around.


Step 5:
Repeat the process with the remaining sections of cream yarn, working from the center outwards.
Step 6:
Once the cream sections are secured, tie two sections of yellow yarn on either side of the cream using the same knot and tassel method, followed by two sections of the grey-blue yarn.

Step 7:
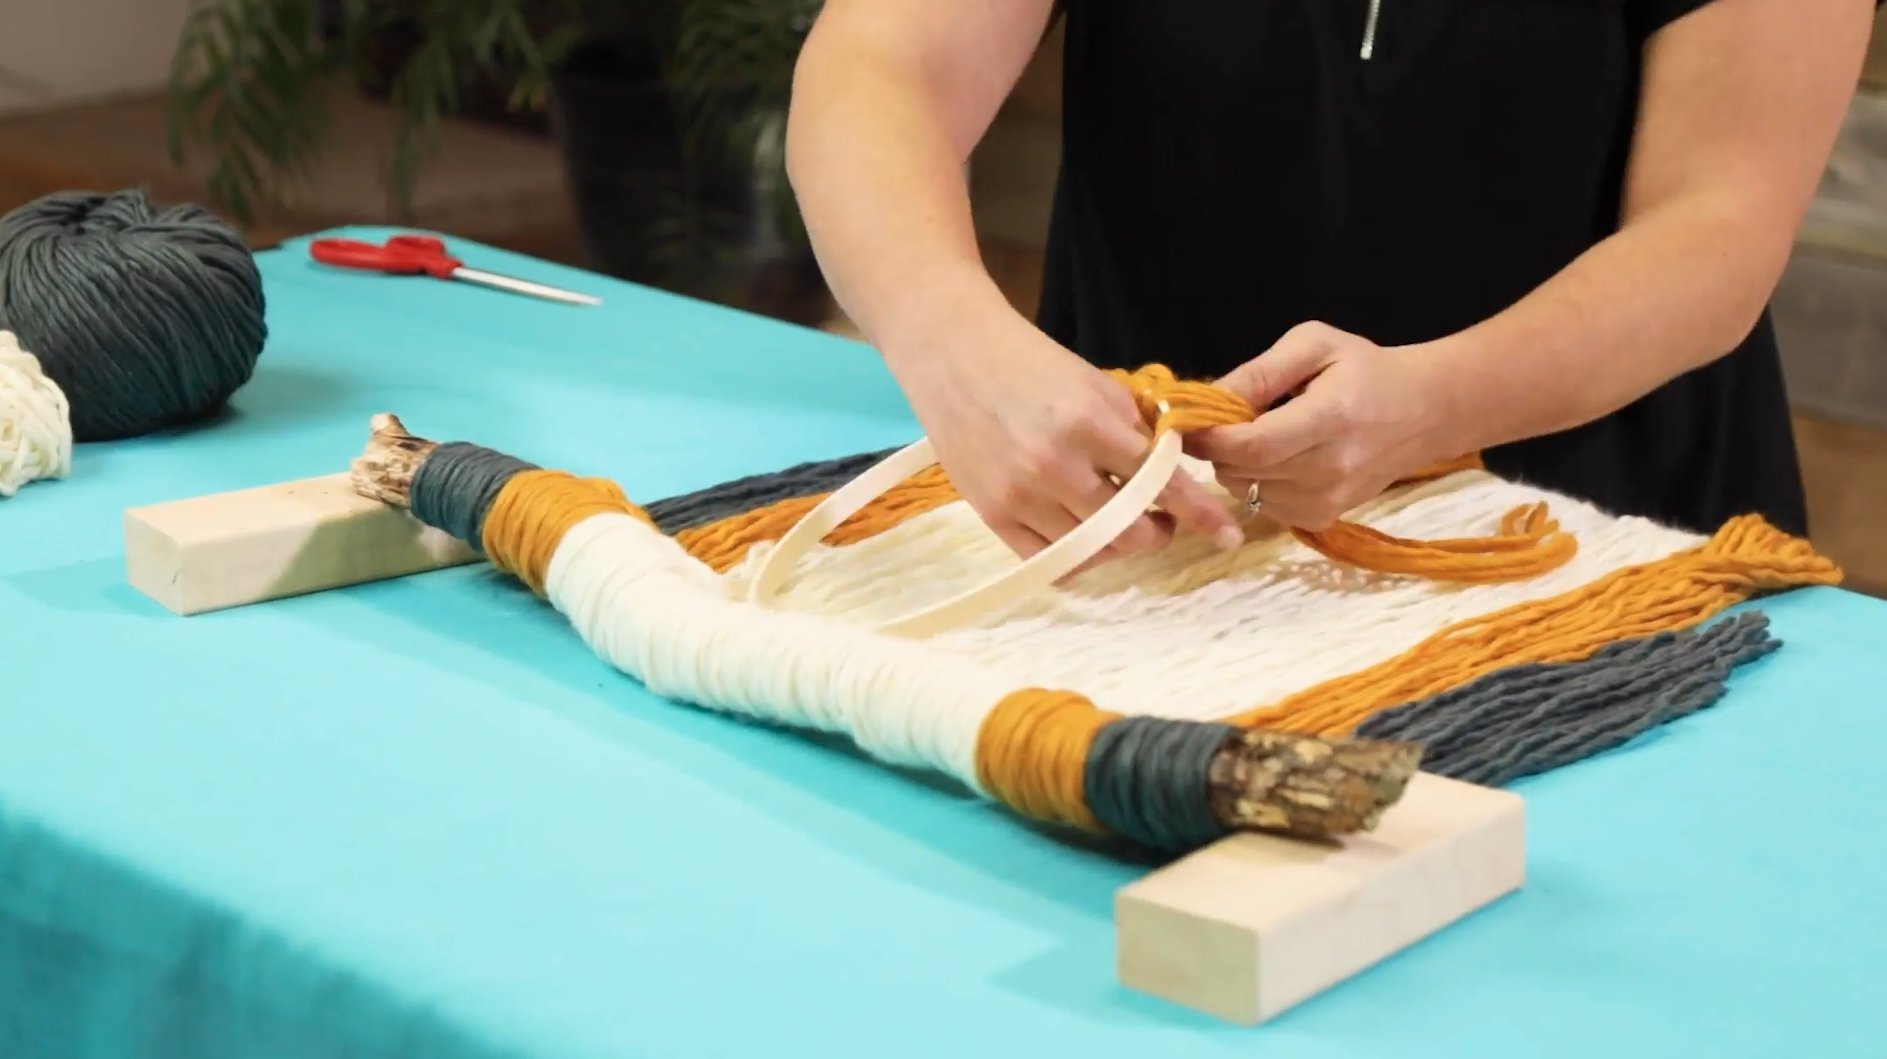
Now that the back layer is tied, take one of your embroidery hoops and secure it to the center of the stick using a small piece of cream yarn.
Step 8:
Separate the remainder of your yellow yarn into sections of four, then fold them in half. Continue the knot and tassel process, securing all the yellow sections to the hoop working from the center outwards.

Step 9:
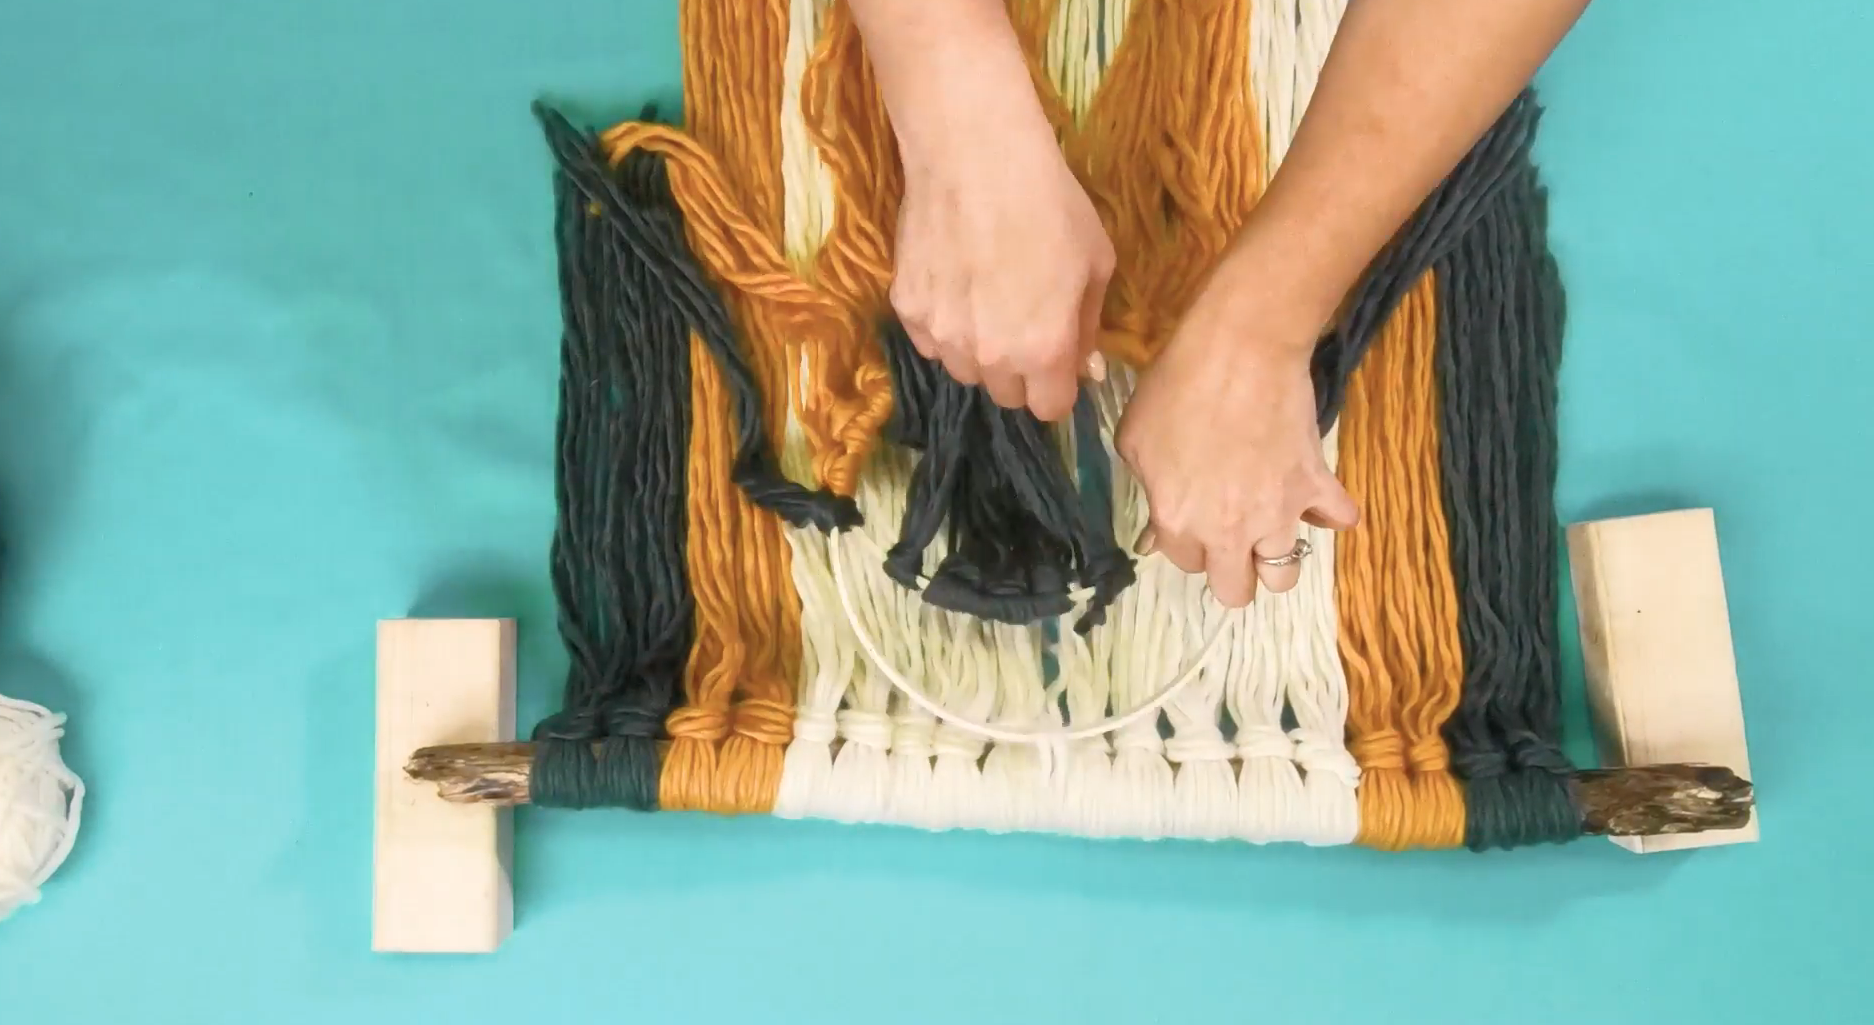
Take the second embroidery hoop and lay it underneath the first one. Line the hoop up so the top of the second hoop sits in line with the center of the first hoop. The bottom half of the second hoop she be tucked in behind the yellow tassels from the first. Use one section of grey-blue yarn on both sides to tie the two hoops together.
Step 10:
Tie the remainder of your grey-blue yarn onto the top half of the second hoop, so the tassels hang down on top of the yellow tassels.

Step 11:
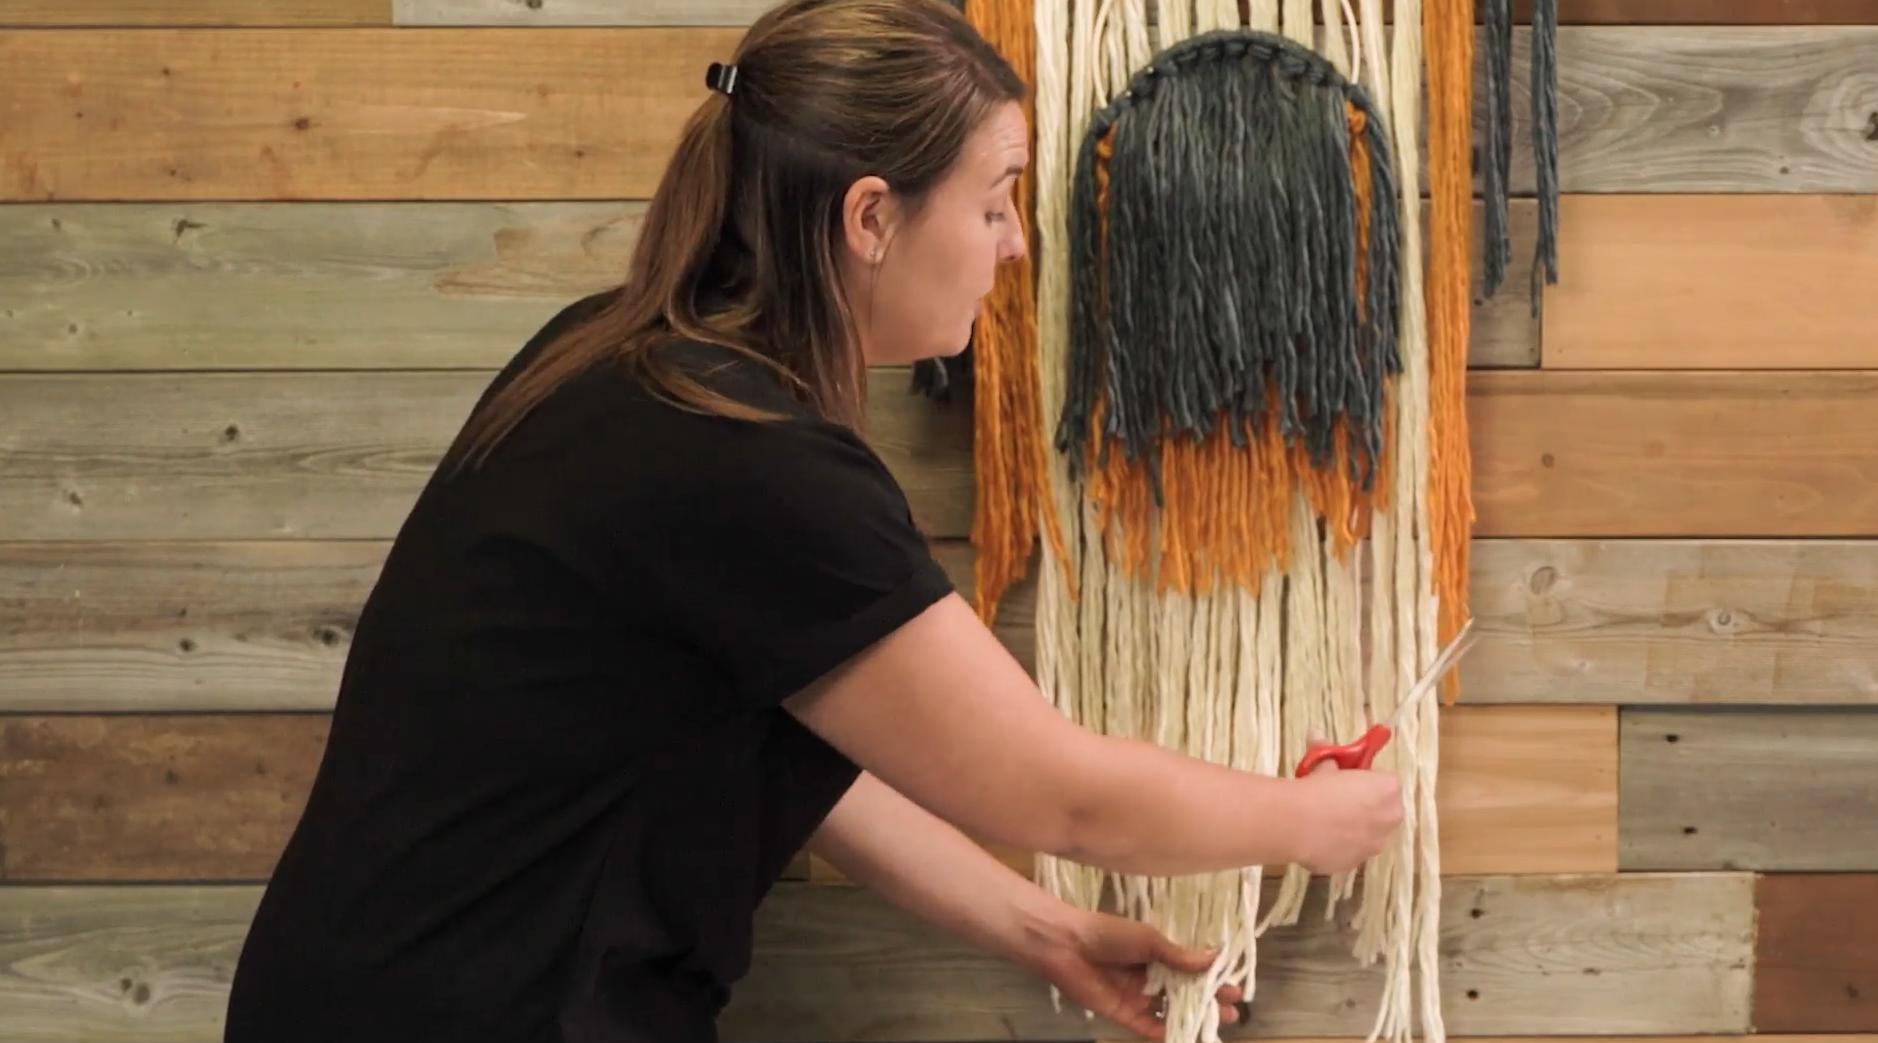
In order to hang the stick, take one long piece of yarn and tie it around both ends of the stick. Use your hammer and nails to hang your macrame piece.
Step 12:
After you’ve hung your piece, go along and tighten all of the knots on each tassel, adjusting them as you go so everything hangs properly.
Step 13:
Once you’ve tightened all the knots, it’s time to trim the ends. Use your scissors to trim the bottom cream layer into a point, starting from the bottom center and cutting upwards.

Step 14:
Repeat the same trimming pattern on the top two layers, trimming and adjusting until you’ve reached a design length you’re happy with.

And there you have it! Your knot & tassel hanging wall decor is complete, and ready to be shown off to us on Facebook, Pinterest, and Instagram!


