DIY Winter Wonderland Centerpieces That Are Easy And Elegant
by June Steele
| Published 12/7/20 (Updated 12/10/20)
We know that photos can be an amazing source of design inspiration, so this article may contain affiliate links that will direct you to a particular decor item. Clicking on a link may result in a portion of proceeds being paid to www.decoist.com
Decorating your house for Christmas is something that many people look forward to every year, but unless you want to look like you’re living inside Santa’s village, you might want to opt for some more winter decorations rather than full-on festivities. These DIY winter wonderland centerpiece vases are an easy, elegant decoration that you can use to decorate your home even after you’ve taken your Christmas tree down. These winter centerpieces can be customized to reflect your holiday spirit, or you can keep them as a more neutral decoration that looks good on your coffee table all winter long!
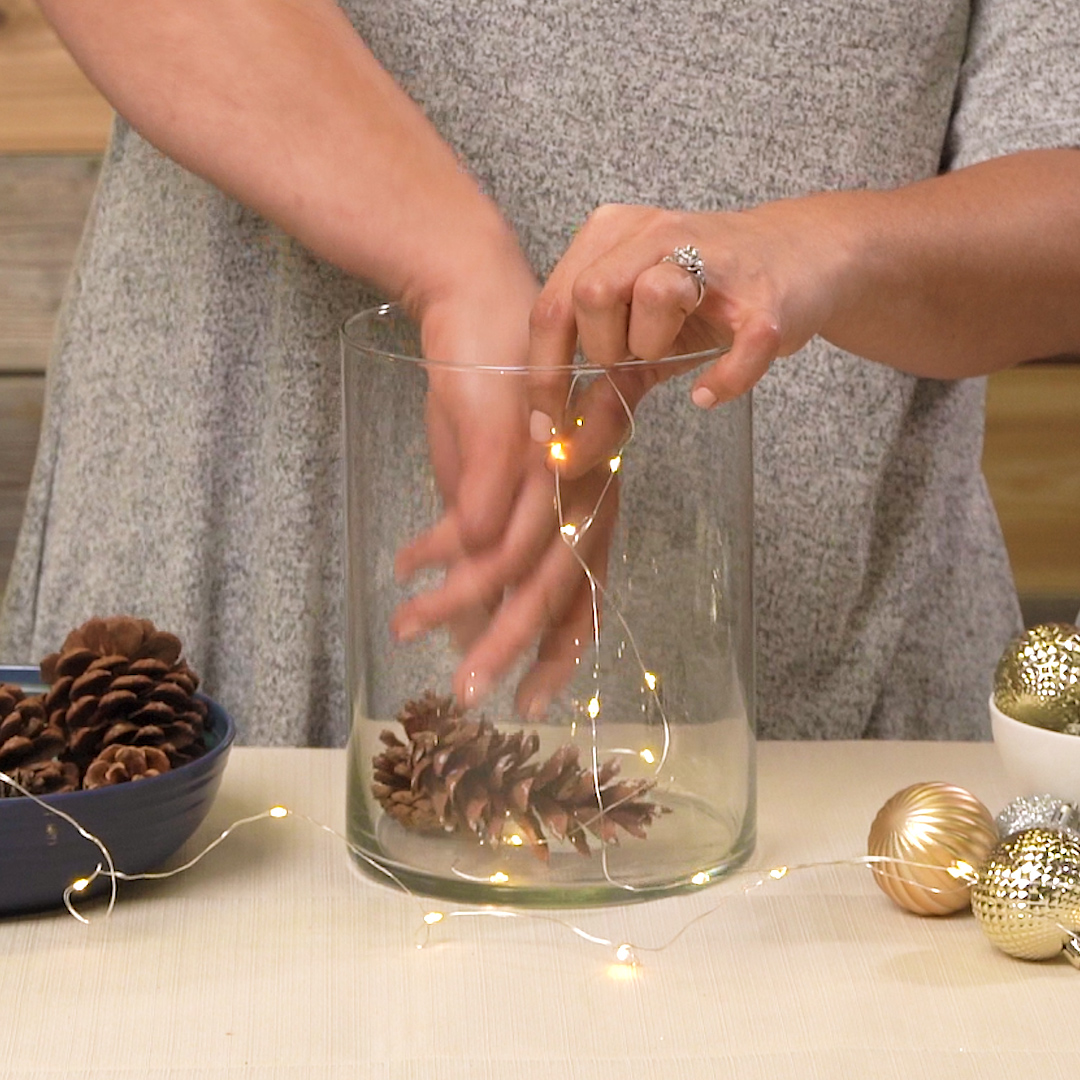
Unfurl your fairy lights, finding the end of the string. Wrap the end around your hand a couple of times, then place the wrapped portion of the lights in the bottom of your cylinder vase.
Step 2:
Grab some of your large pine cones and Christmas ornaments, layering them over the fairy lights resting on the bottom.
Step 3:
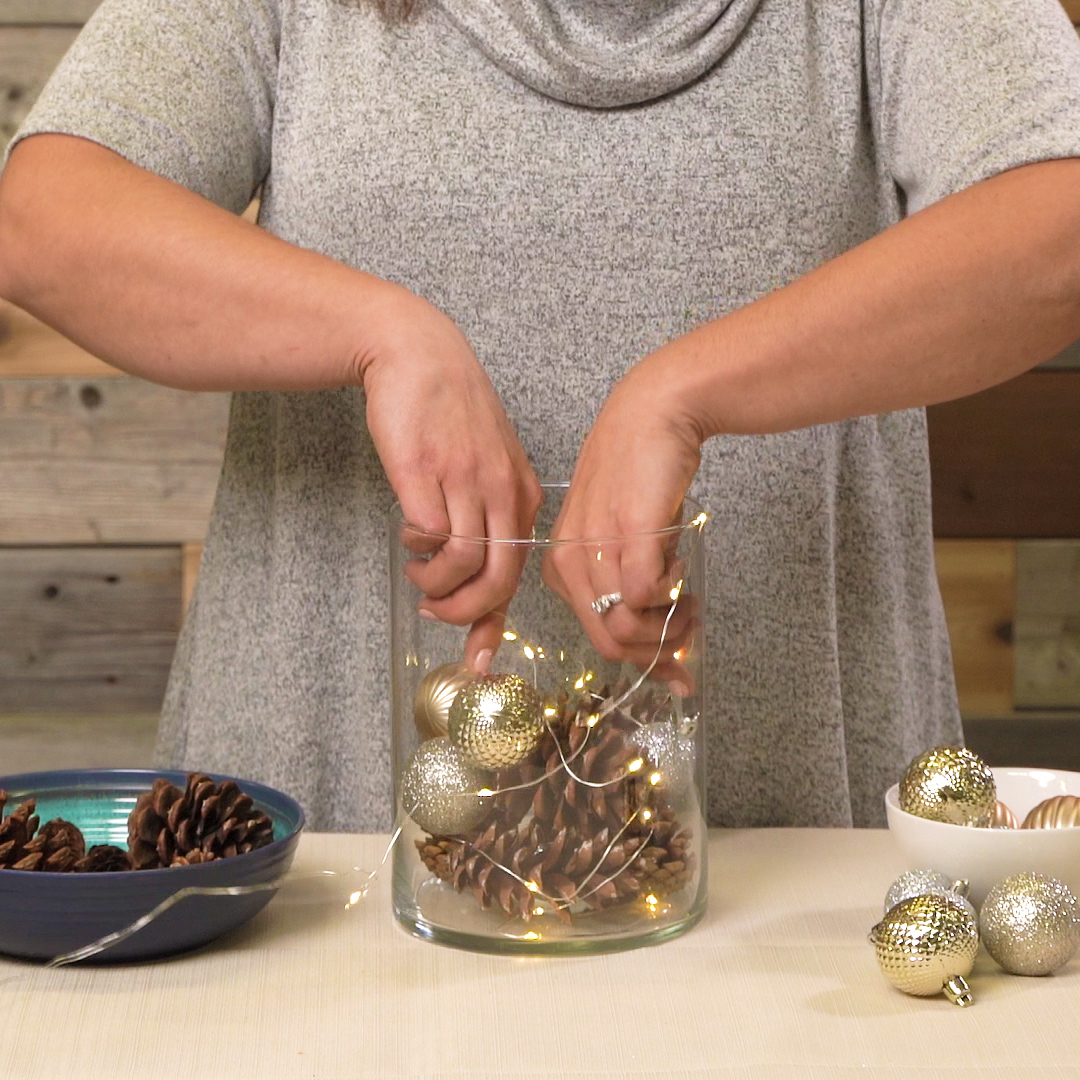
Once the first layer of pine cones and ornaments is in, wind the string of lights in a circular motion over top.
Step 4:
Add another layer of large pine cones and ornaments, winding another circle of lights over that layer once it’s finished.
Step 5:
Alternate between layers of decorations and lights until your vase is filled.
PRO TIP: Gentle wiggle the vase once you’re finished to allow the Christmas balls to settle into position.
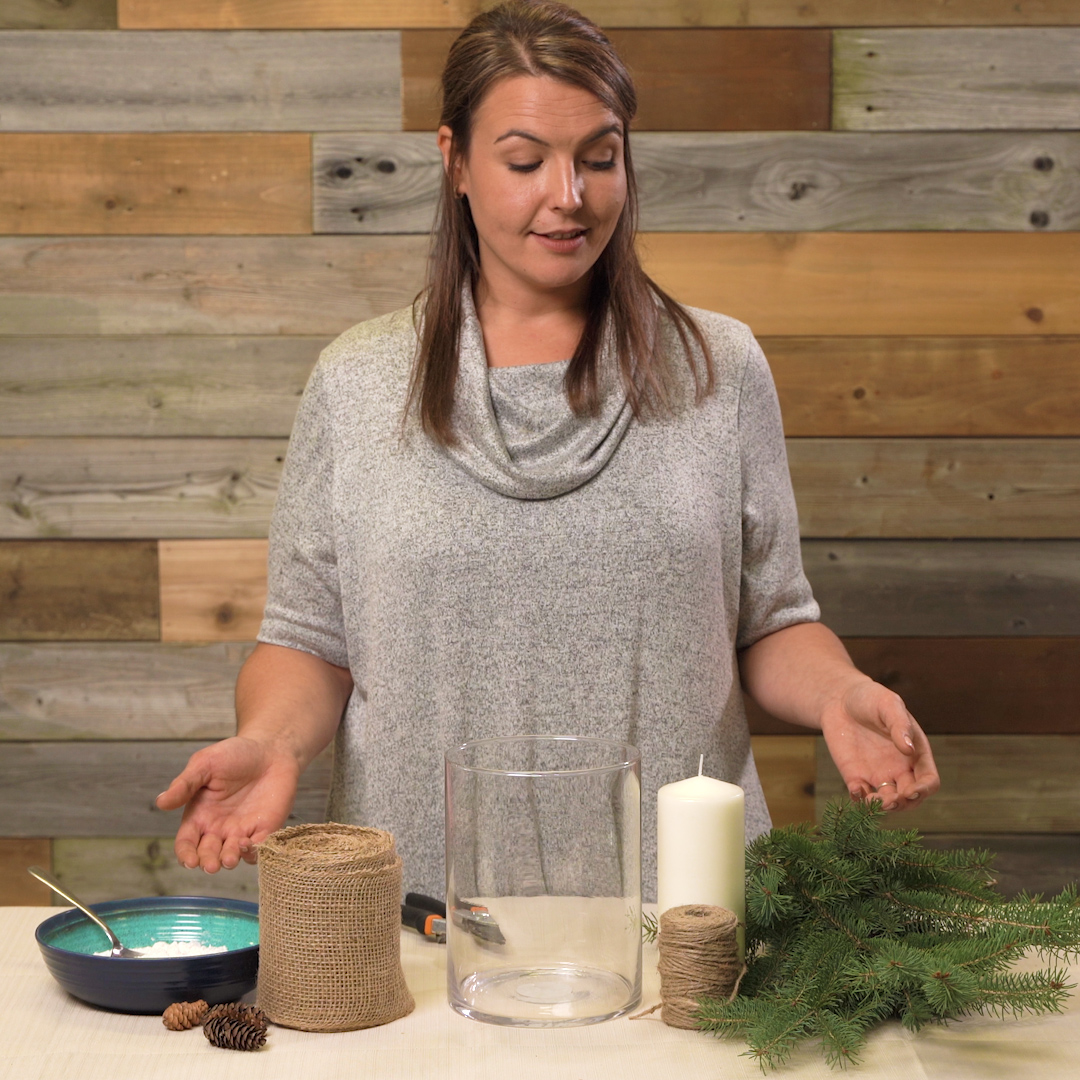
Step 6:
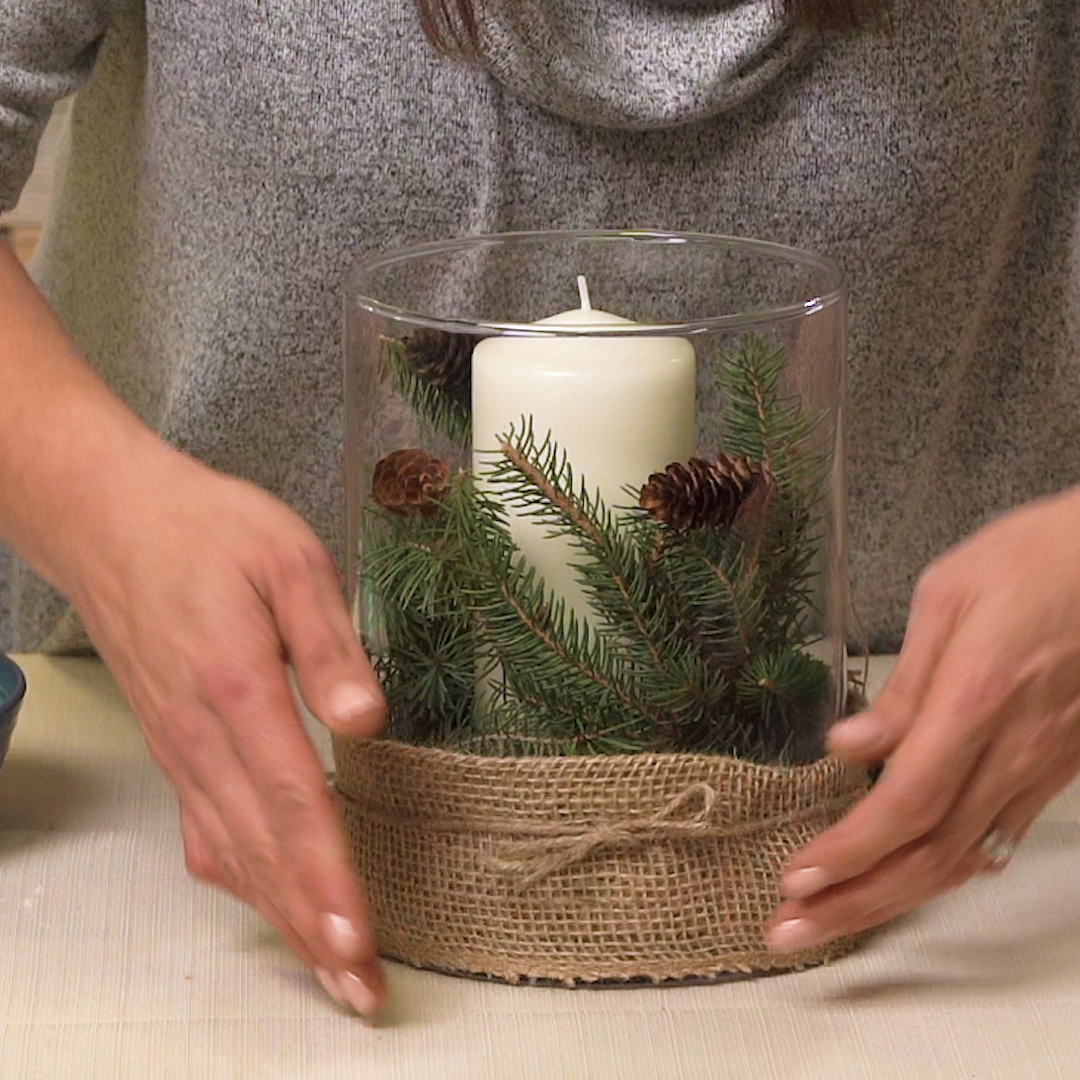
For your second vase, we’re going to use the remainder of your supplies. Start by putting your candle at the center of your vase.
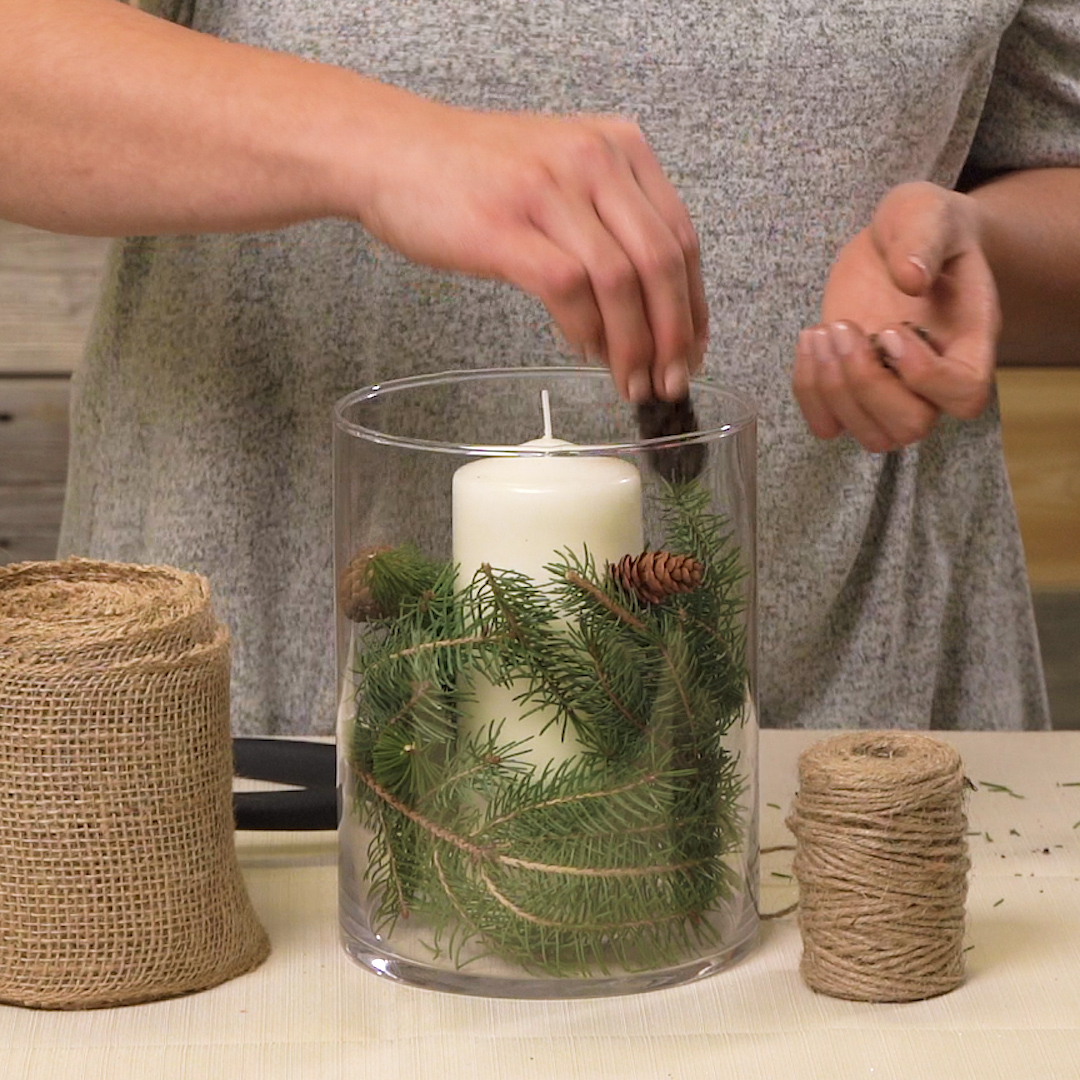
Step 7:
Use your evergreen clippings to surround the candle inside your vase, filling the vase halfway to 3/4 of the way full.
Step 8:
Place your small pine cones in your vase among the evergreen branches, using them to fill in some of the emptier spots.
Step 9:
Now you want to measure out your strip of burlap that will wrap around the exterior base of the vase. Once it’s wrapped, use your twine to secure it in place, tying it in a bow.
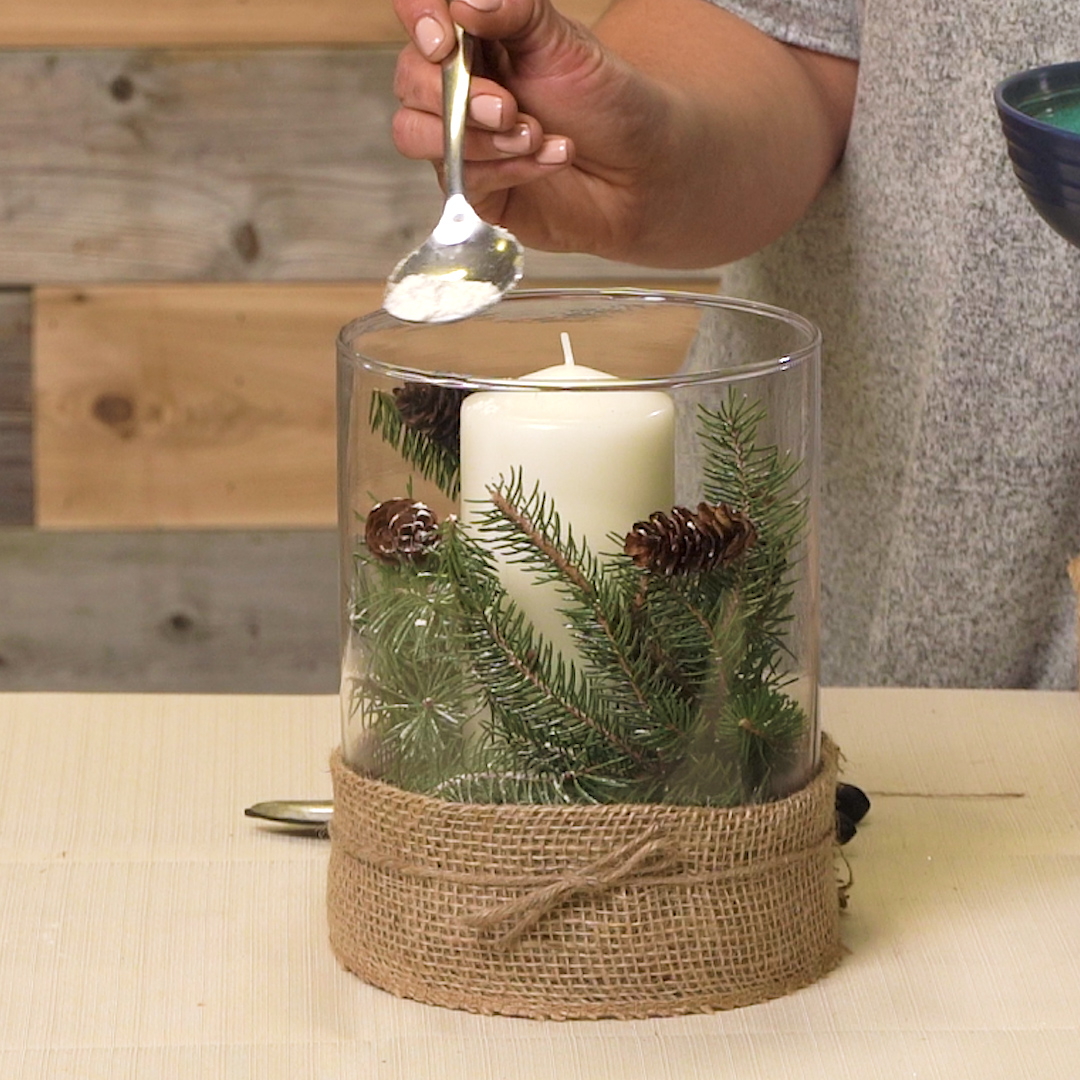
Step 10:
Take your flour or fake snow and sprinkle it into your vase to add the effect of a light dusting of snow over the branches and pinecones.
Now that you’ve finished your centerpieces, you can set them up in any room in your home that’s in need of a little extra winter decor! Don’t forget to share your diy winter centerpieces with us on Facebook, Pinterest, or Instagram too.