We’ve all seen the extravagant floor-to-ceiling brass mirrors adorning the halls of Parisian palaces and the walls of design lovers everywhere. You’ll find them in the mirror selfies of the Hadid sisters and hanging in the lobbies of luxurious European hotels. They are associated with the Parisian decor trend and offer a timeless decor piece to your collection if you manage to find one while thrifting. Here are some reference photos to spark your inspiration:


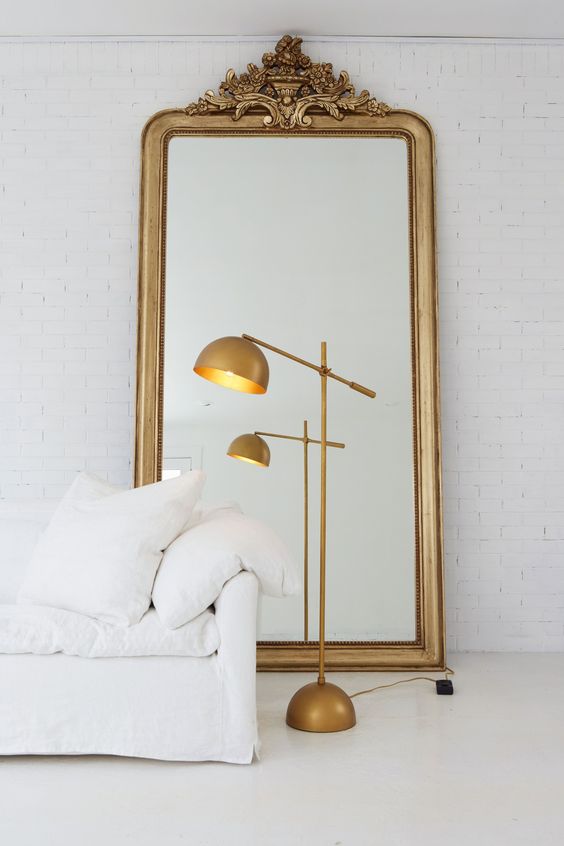

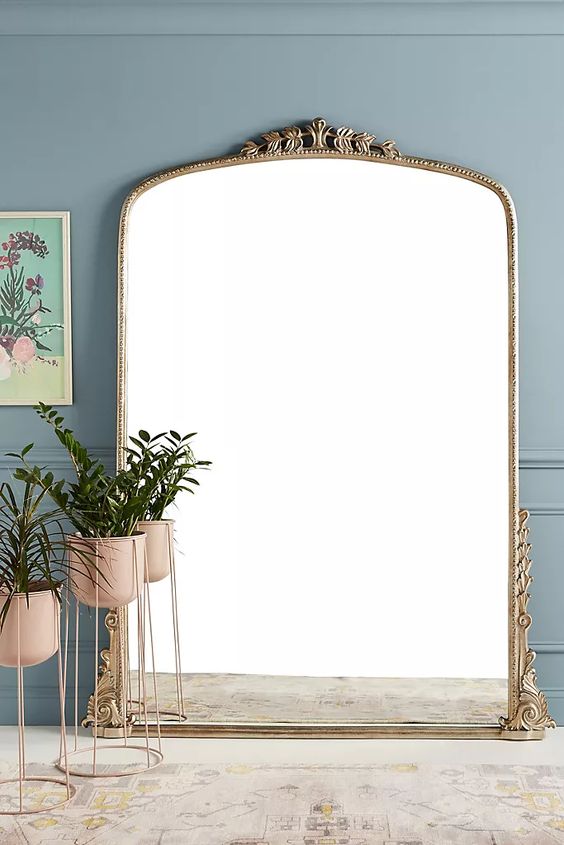
While we understand the vintage trend is not for everyone (some design enthusiasts prefer to leave the past in the past), for those of us who appreciate the resurgence in antiques, there is a ton of inspo to choose from right now. Do some minor Pinterest research on vintage brass mirrors before you jump into this project, keeping in mind things like whether you want to hang or stand the mirror, which size you’re after, and whether you prefer an oval or rectangular shape. For this project, we went with a rectangular version.
Since it’s less realistic to splurge on the magnificent brass mirrors to hang on the walls of your functioning home, we went ahead and designed this affordable, easy to assemble, faux version that is a bit more practical to fit in your space. Using supplies from the craft store and the dollar store, you can create a DIY version of the mirror that is sure to trick even the most skeptical eyes scrolling through your feed. It’s truly amazing what a few coats of spray paint and some clever staging can do, this project is designed to show you how to accomplish it. Check out our supply list to find out what you’ll need and where to get it!
Supply List

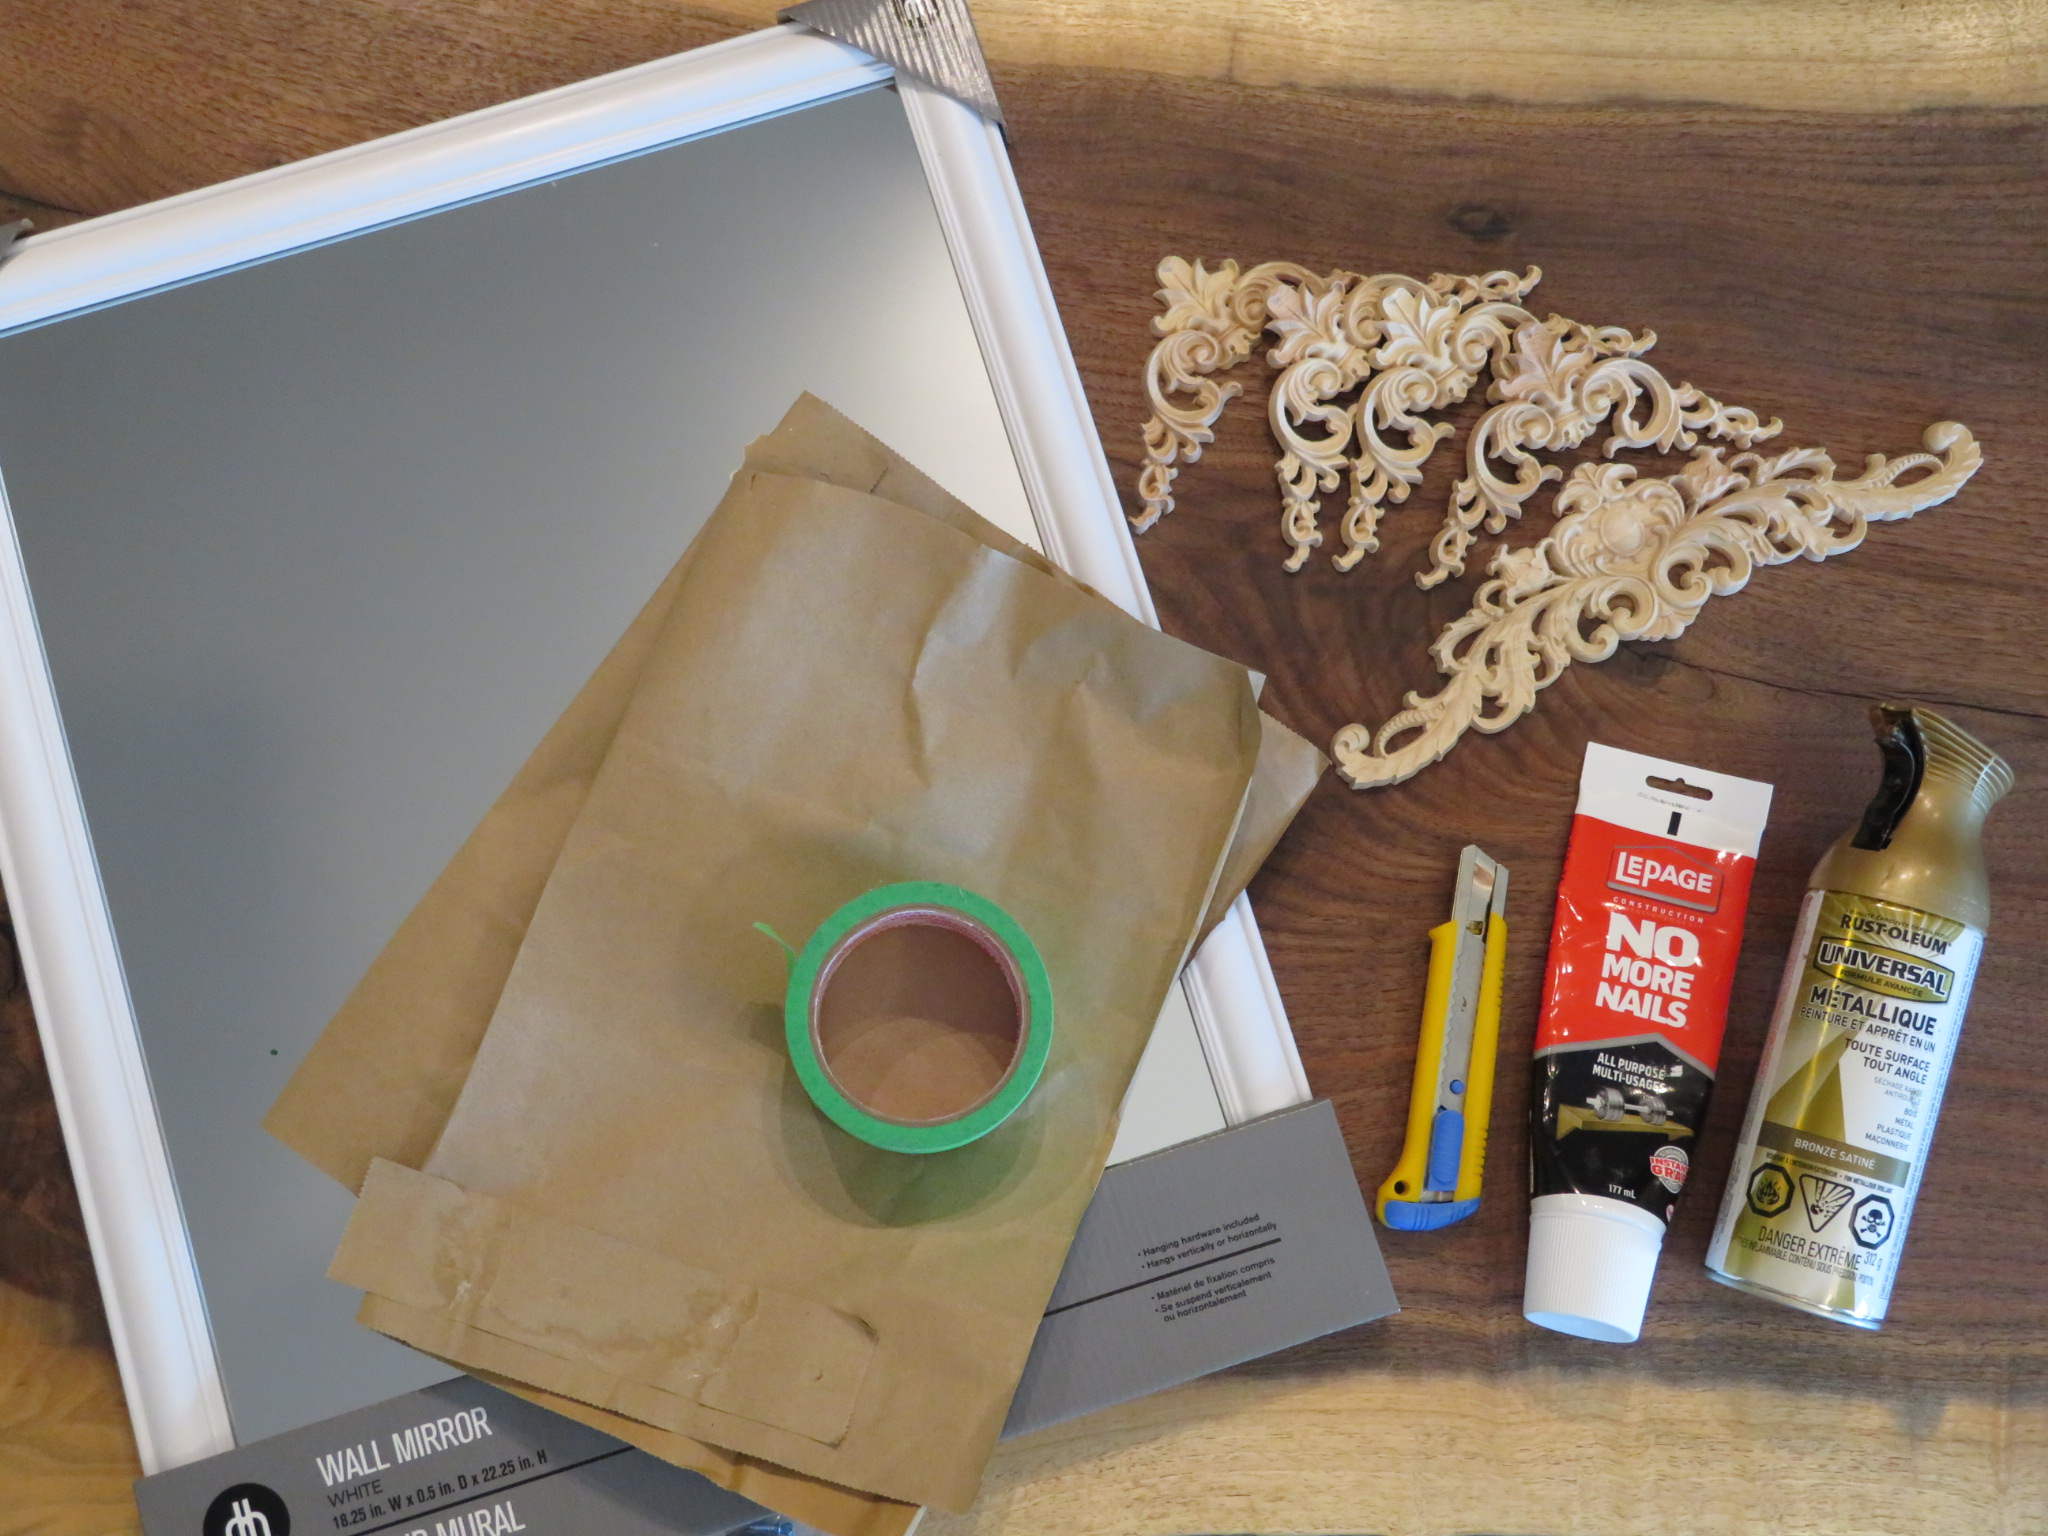
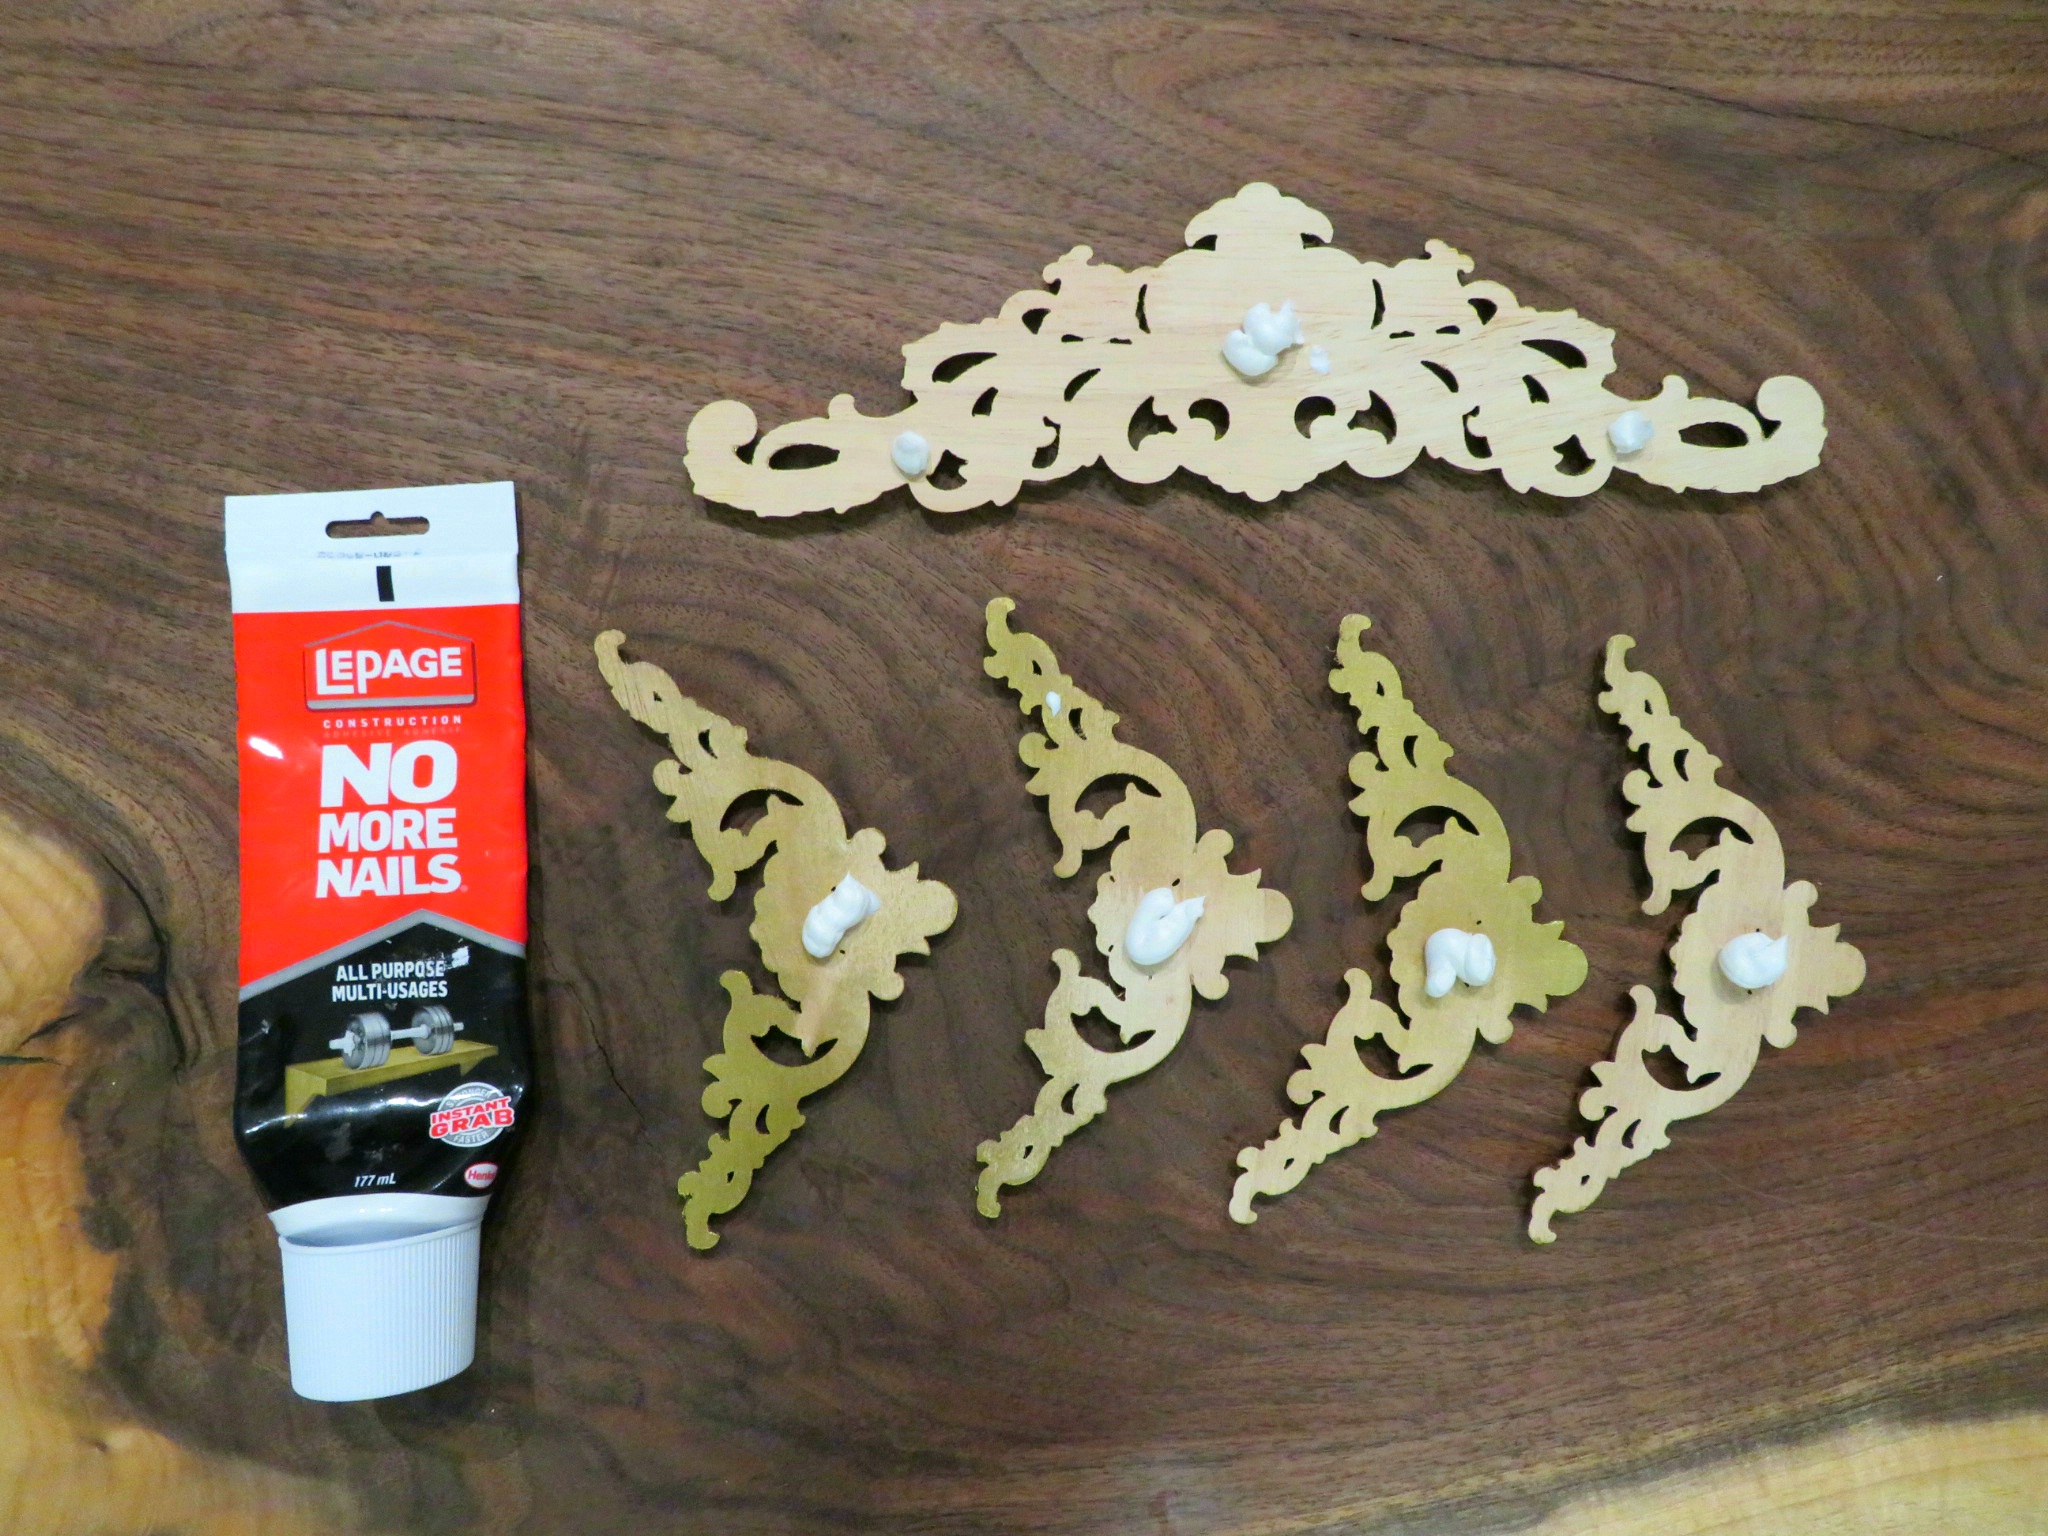
- Wooden decals or appliques (4 corner pieces and one flat onlay)
- Oval or rectangular framed mirror (repurposed or new)
- Brass-gold spray paint (we used Rust-Oleum Metallic)
- Painters tape
- Newspaper or cardboard
- Wood glue (we used LePage No More Nails)
- Utility knife
Once you have everything you need to get started, clear yourself a workspace and prepare somewhere for your spray paint to dry before beginning.
Step 1
Prepare your mirror for spray painting the frame. Cover the entire glass mirror surface using cardboard or newspaper and painter’s tape to seal the edges. Always spray paint in a ventilated area, outdoors is best, with minimal wind to avoid overspray issues.

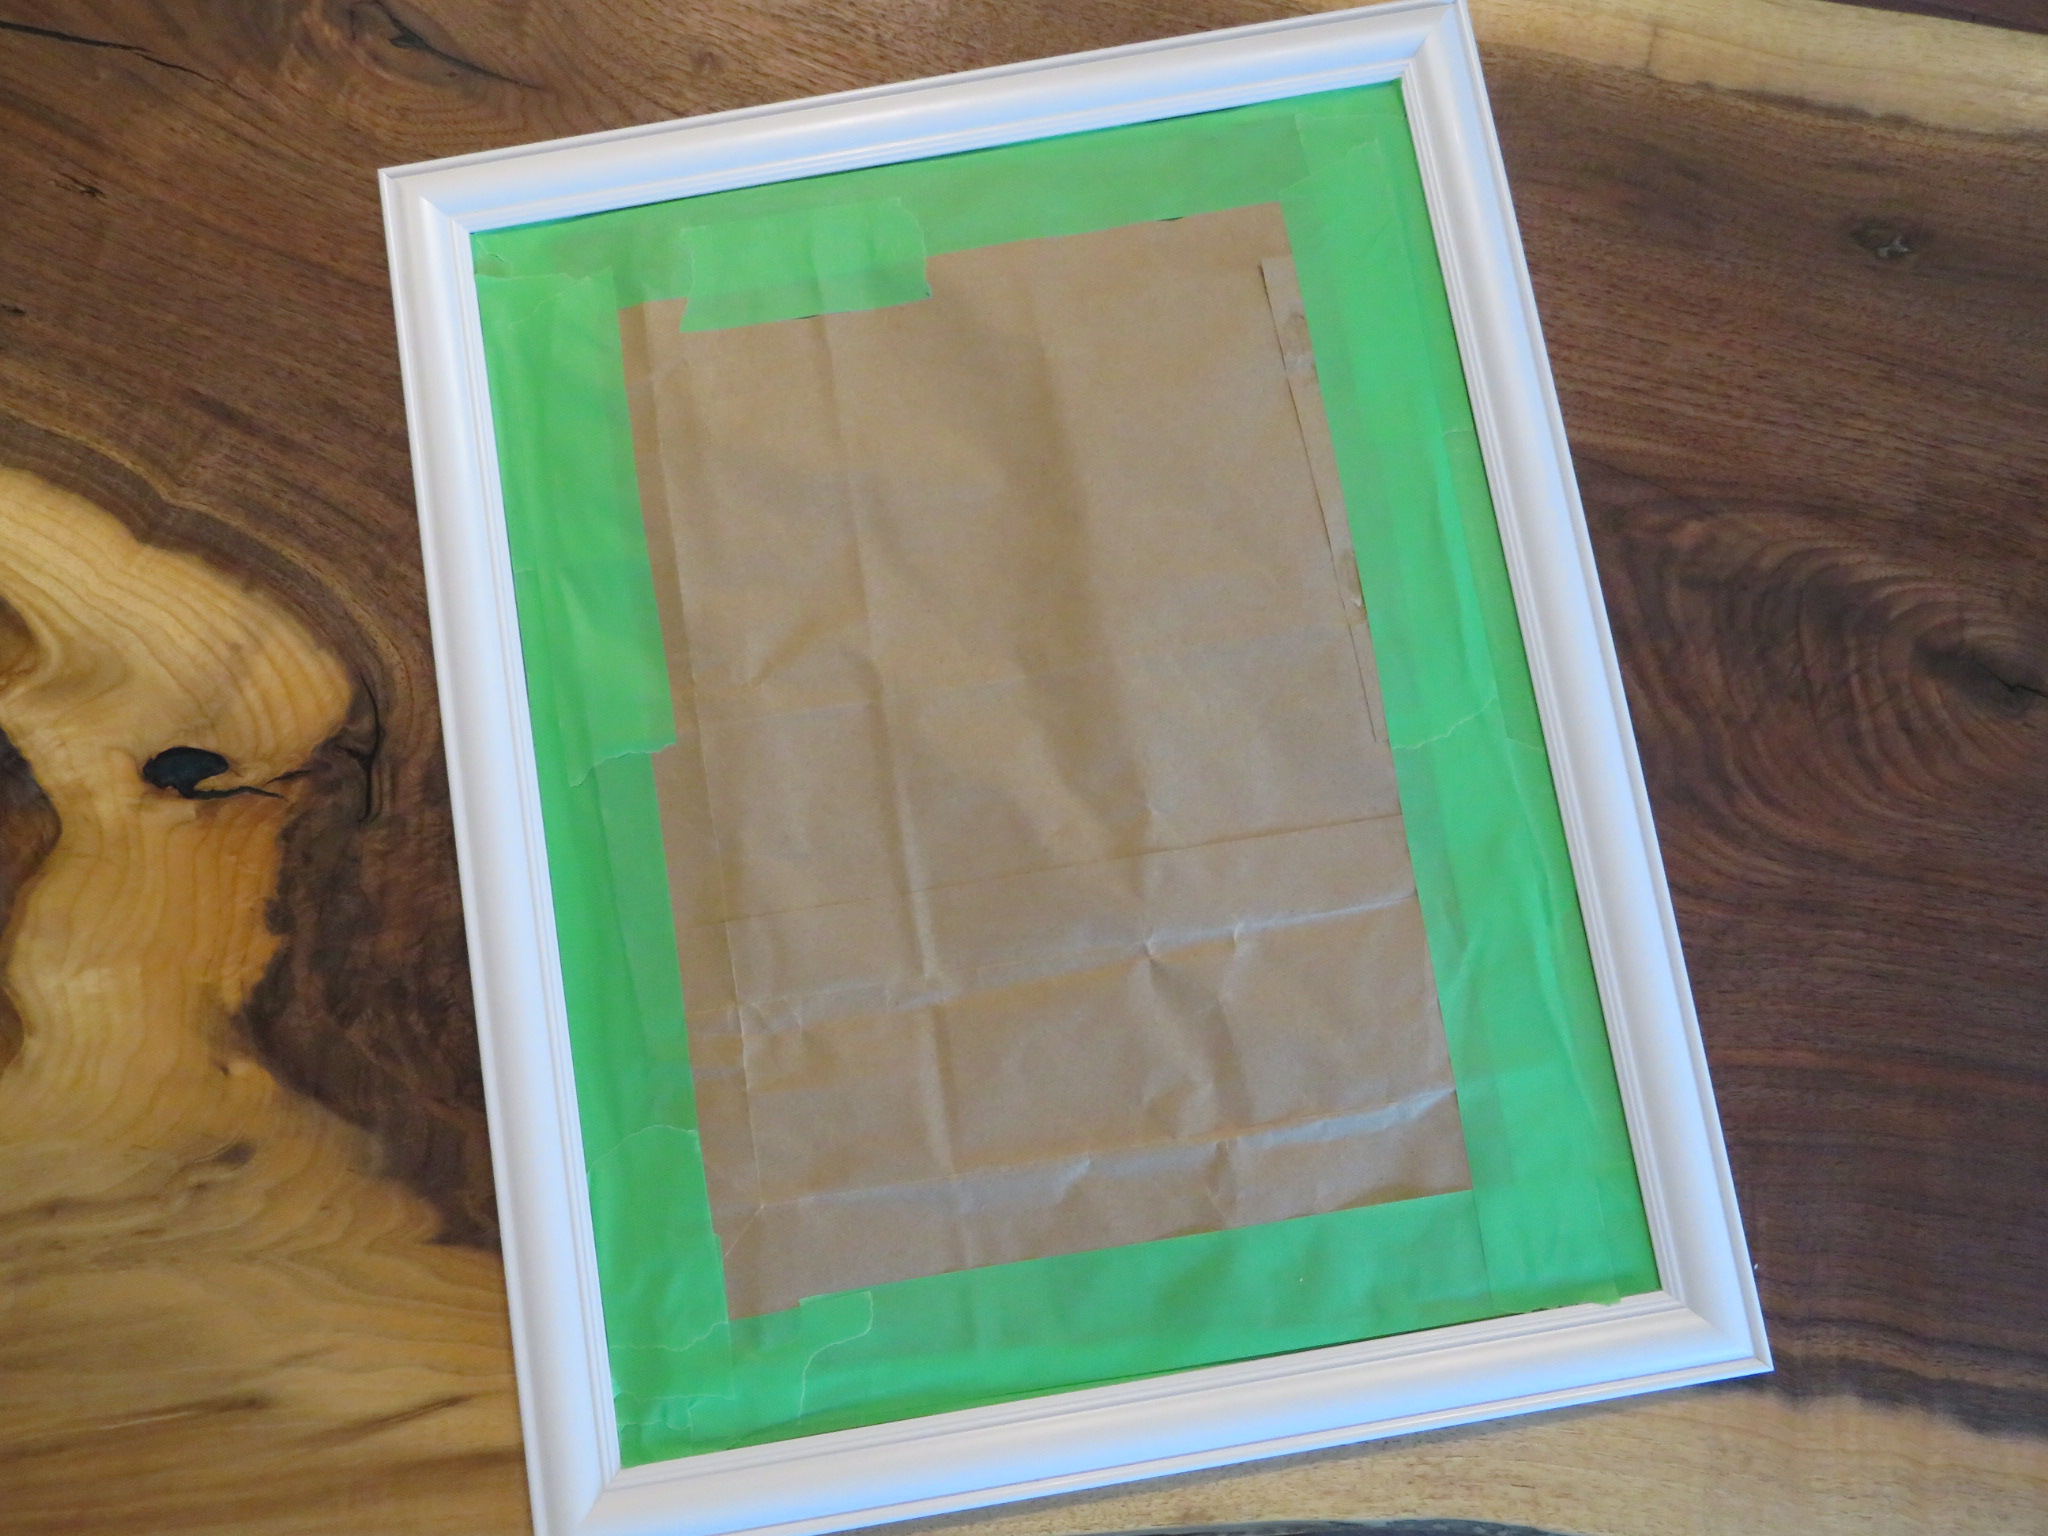
PROTIP: spray paint is tricky to seal out of spaces and it will find its way into the tiniest crack in your paper. If you end up with paint mist on your glass mirror, don’t panic. Use the flat edge of a razor blade to gently scrape the paint splatter off the glass surface
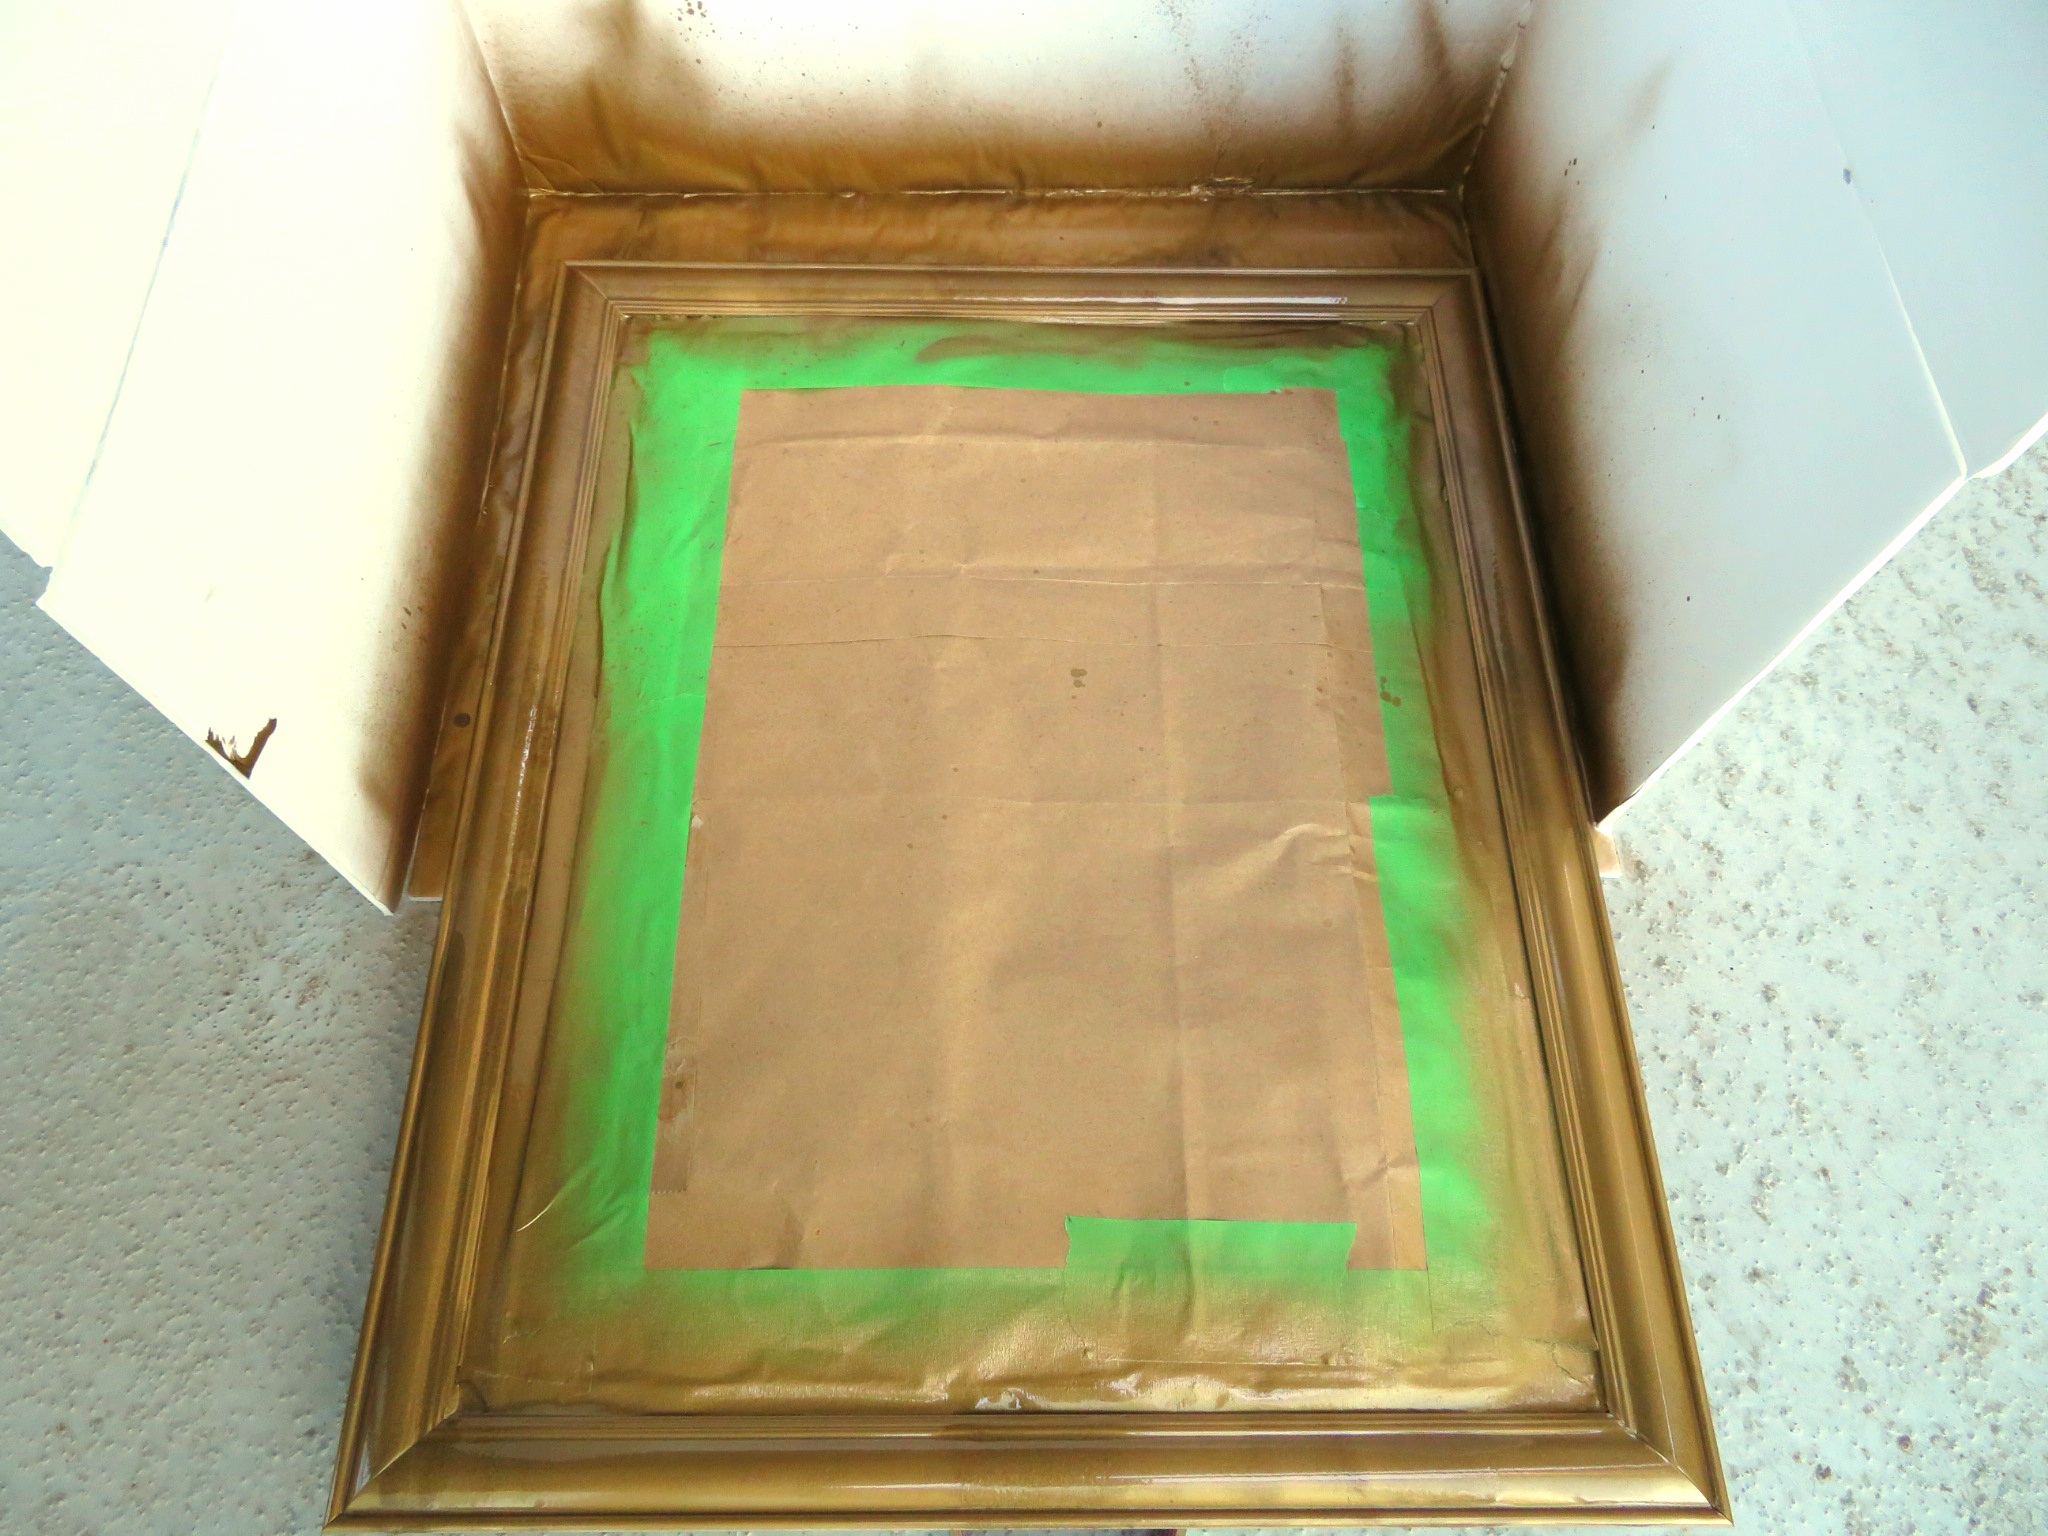
Step 2
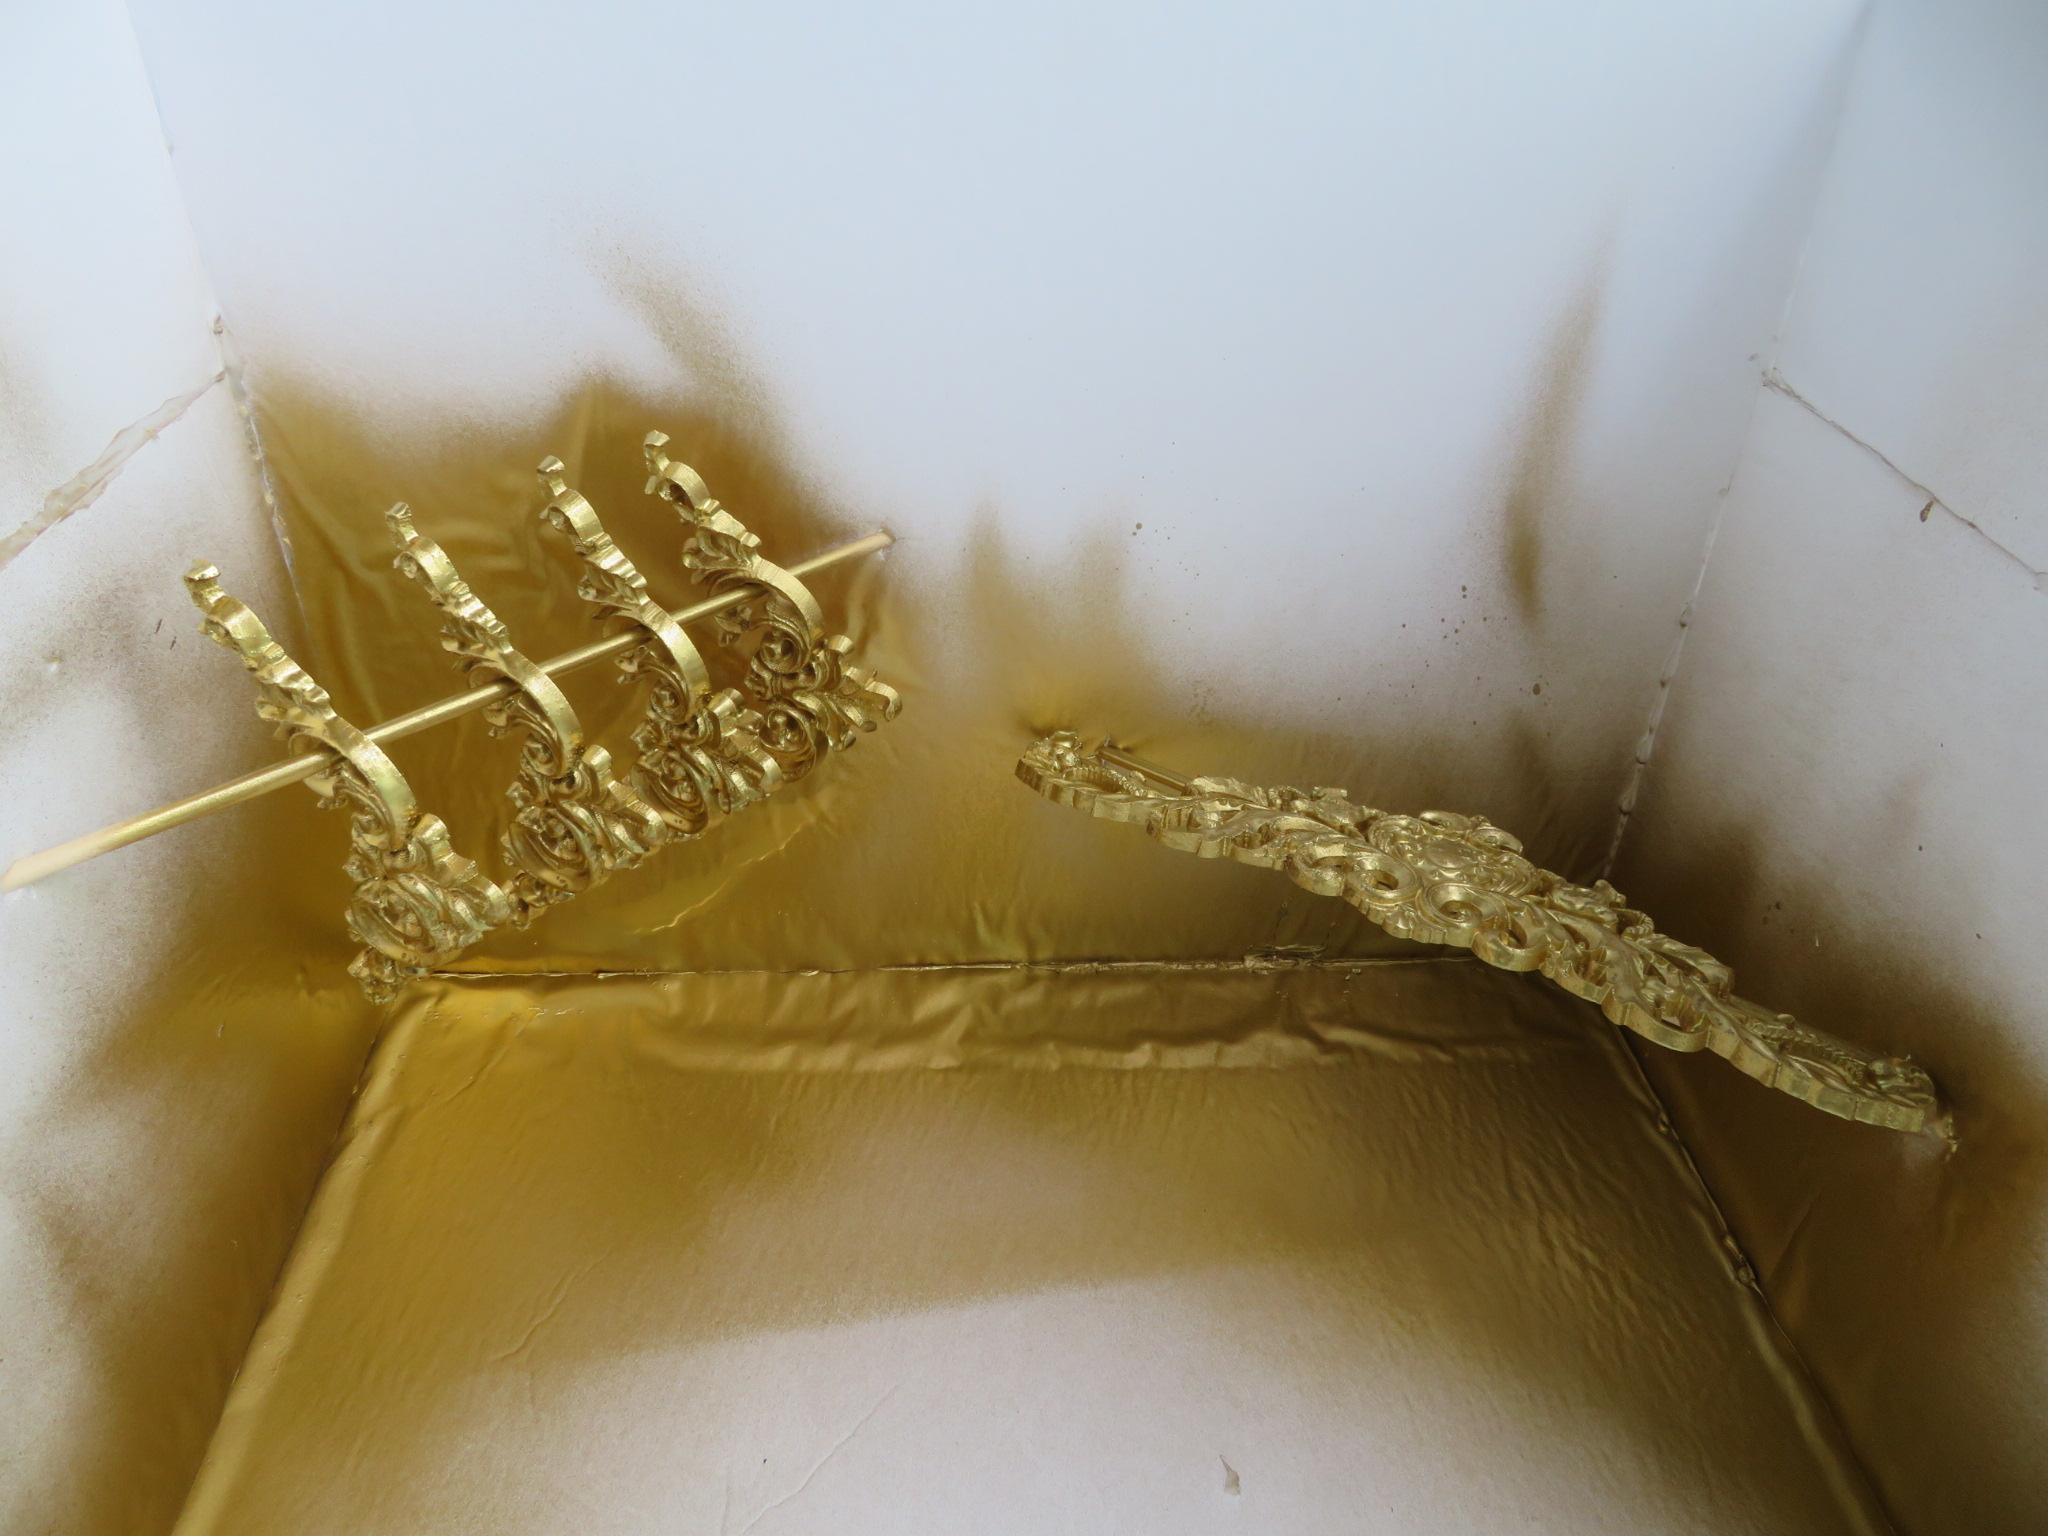
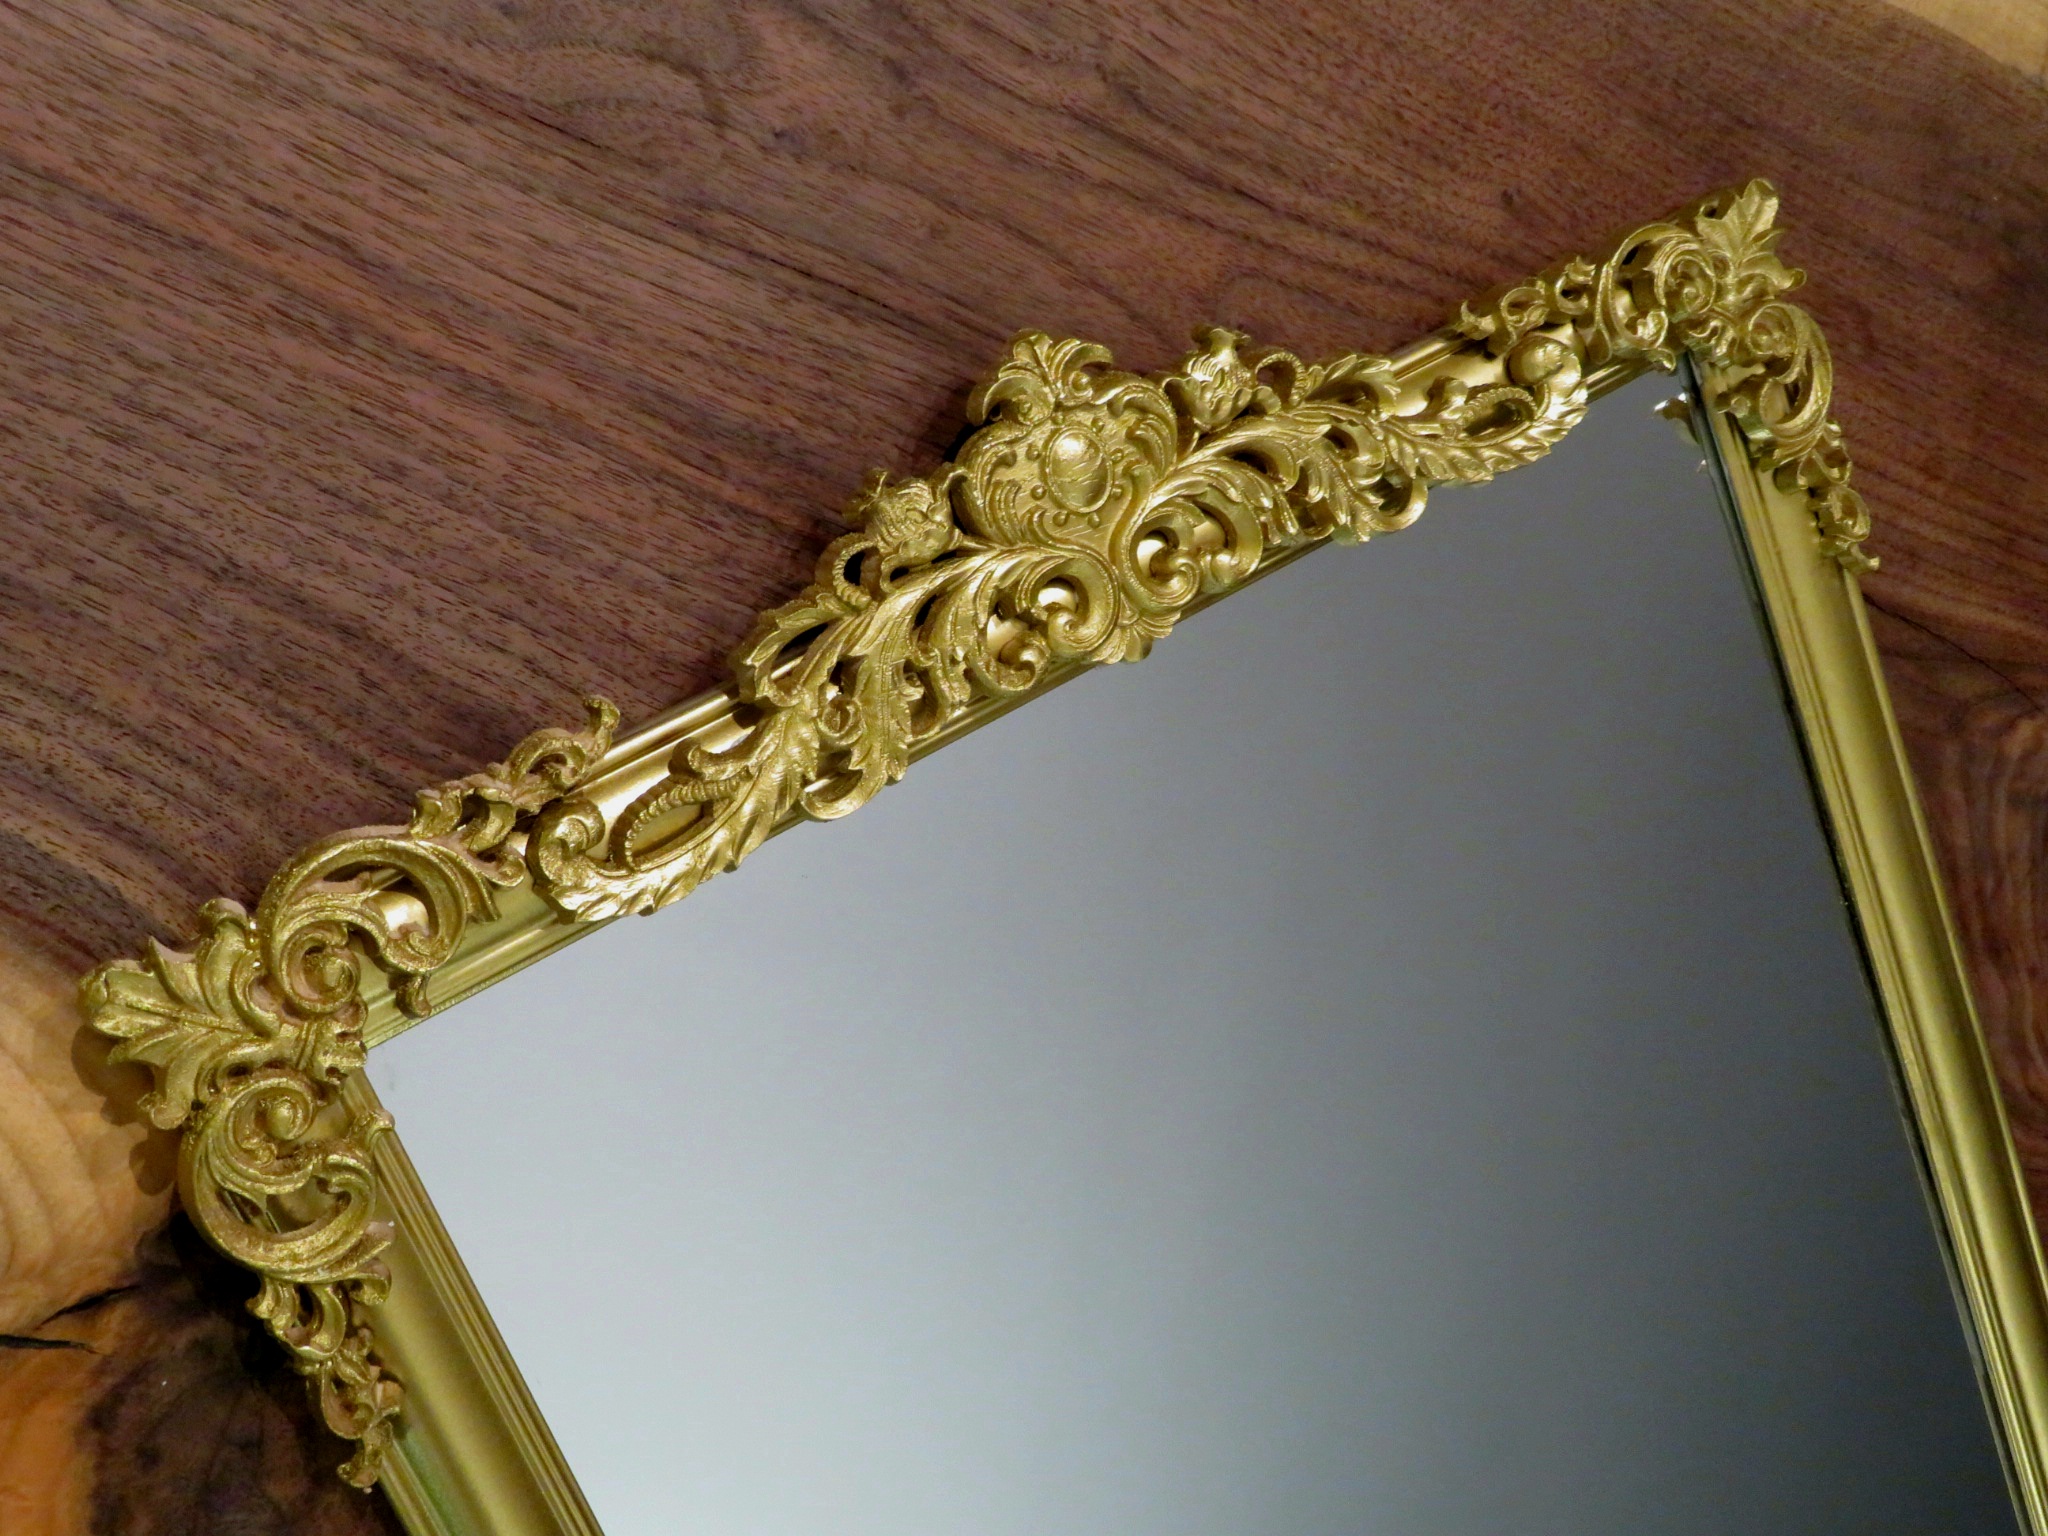
Spray an even coat of paint onto the exposed mirror frame and set aside to dry. Repeat the process with the wooden appliques and be sure to coat the paint evenly, spraying at a distance of about 15-20cm. Set the painted pieces in a dry, warm place away from pets and dust until the paint has time to dry completely.

PROTIP: wear rubber gloves and use wooden dowels or multi-purpose tongs to move the wooden pieces around after they have been painted to avoid getting wet paint on over yourself. Tongs are a DIYers secret weapon when it comes to painting tiny things.

Step 3
The next step is to loosely arrange the wooden decals to be sure you have them where you want them. After you have a vision, go ahead and spread the wood glue across the back of the painted wooden pieces.

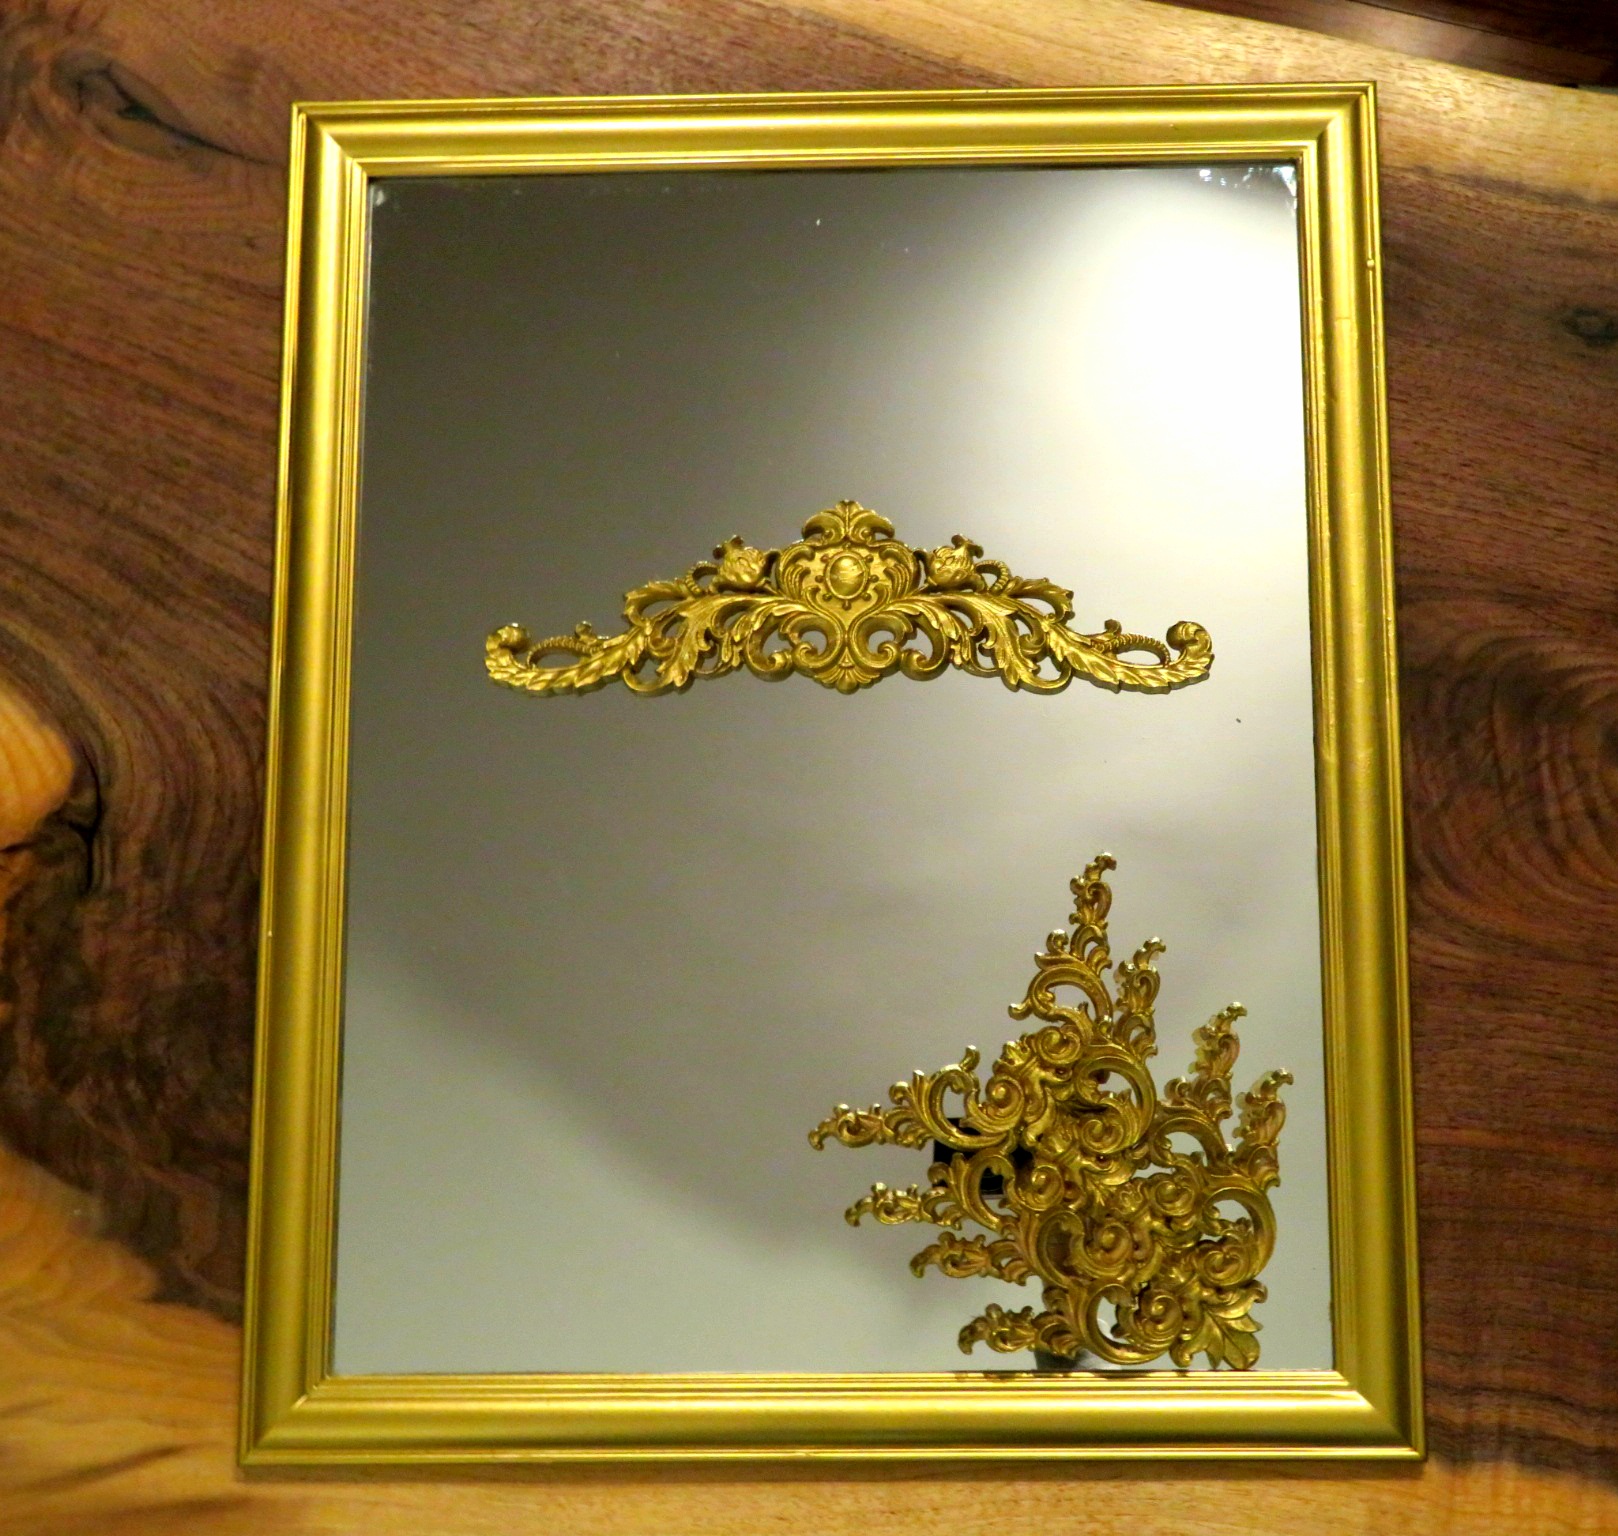

Step 4
Arrange and place your glued decal pieces on the mirror frame. Allow adequate time for the project wood glue to dry before hanging or staging your mirror. If any excess glue is visible after the onlays are placed, use a damp cotton swab or paintbrush to clean up the extra glue before it dries.


Step 5
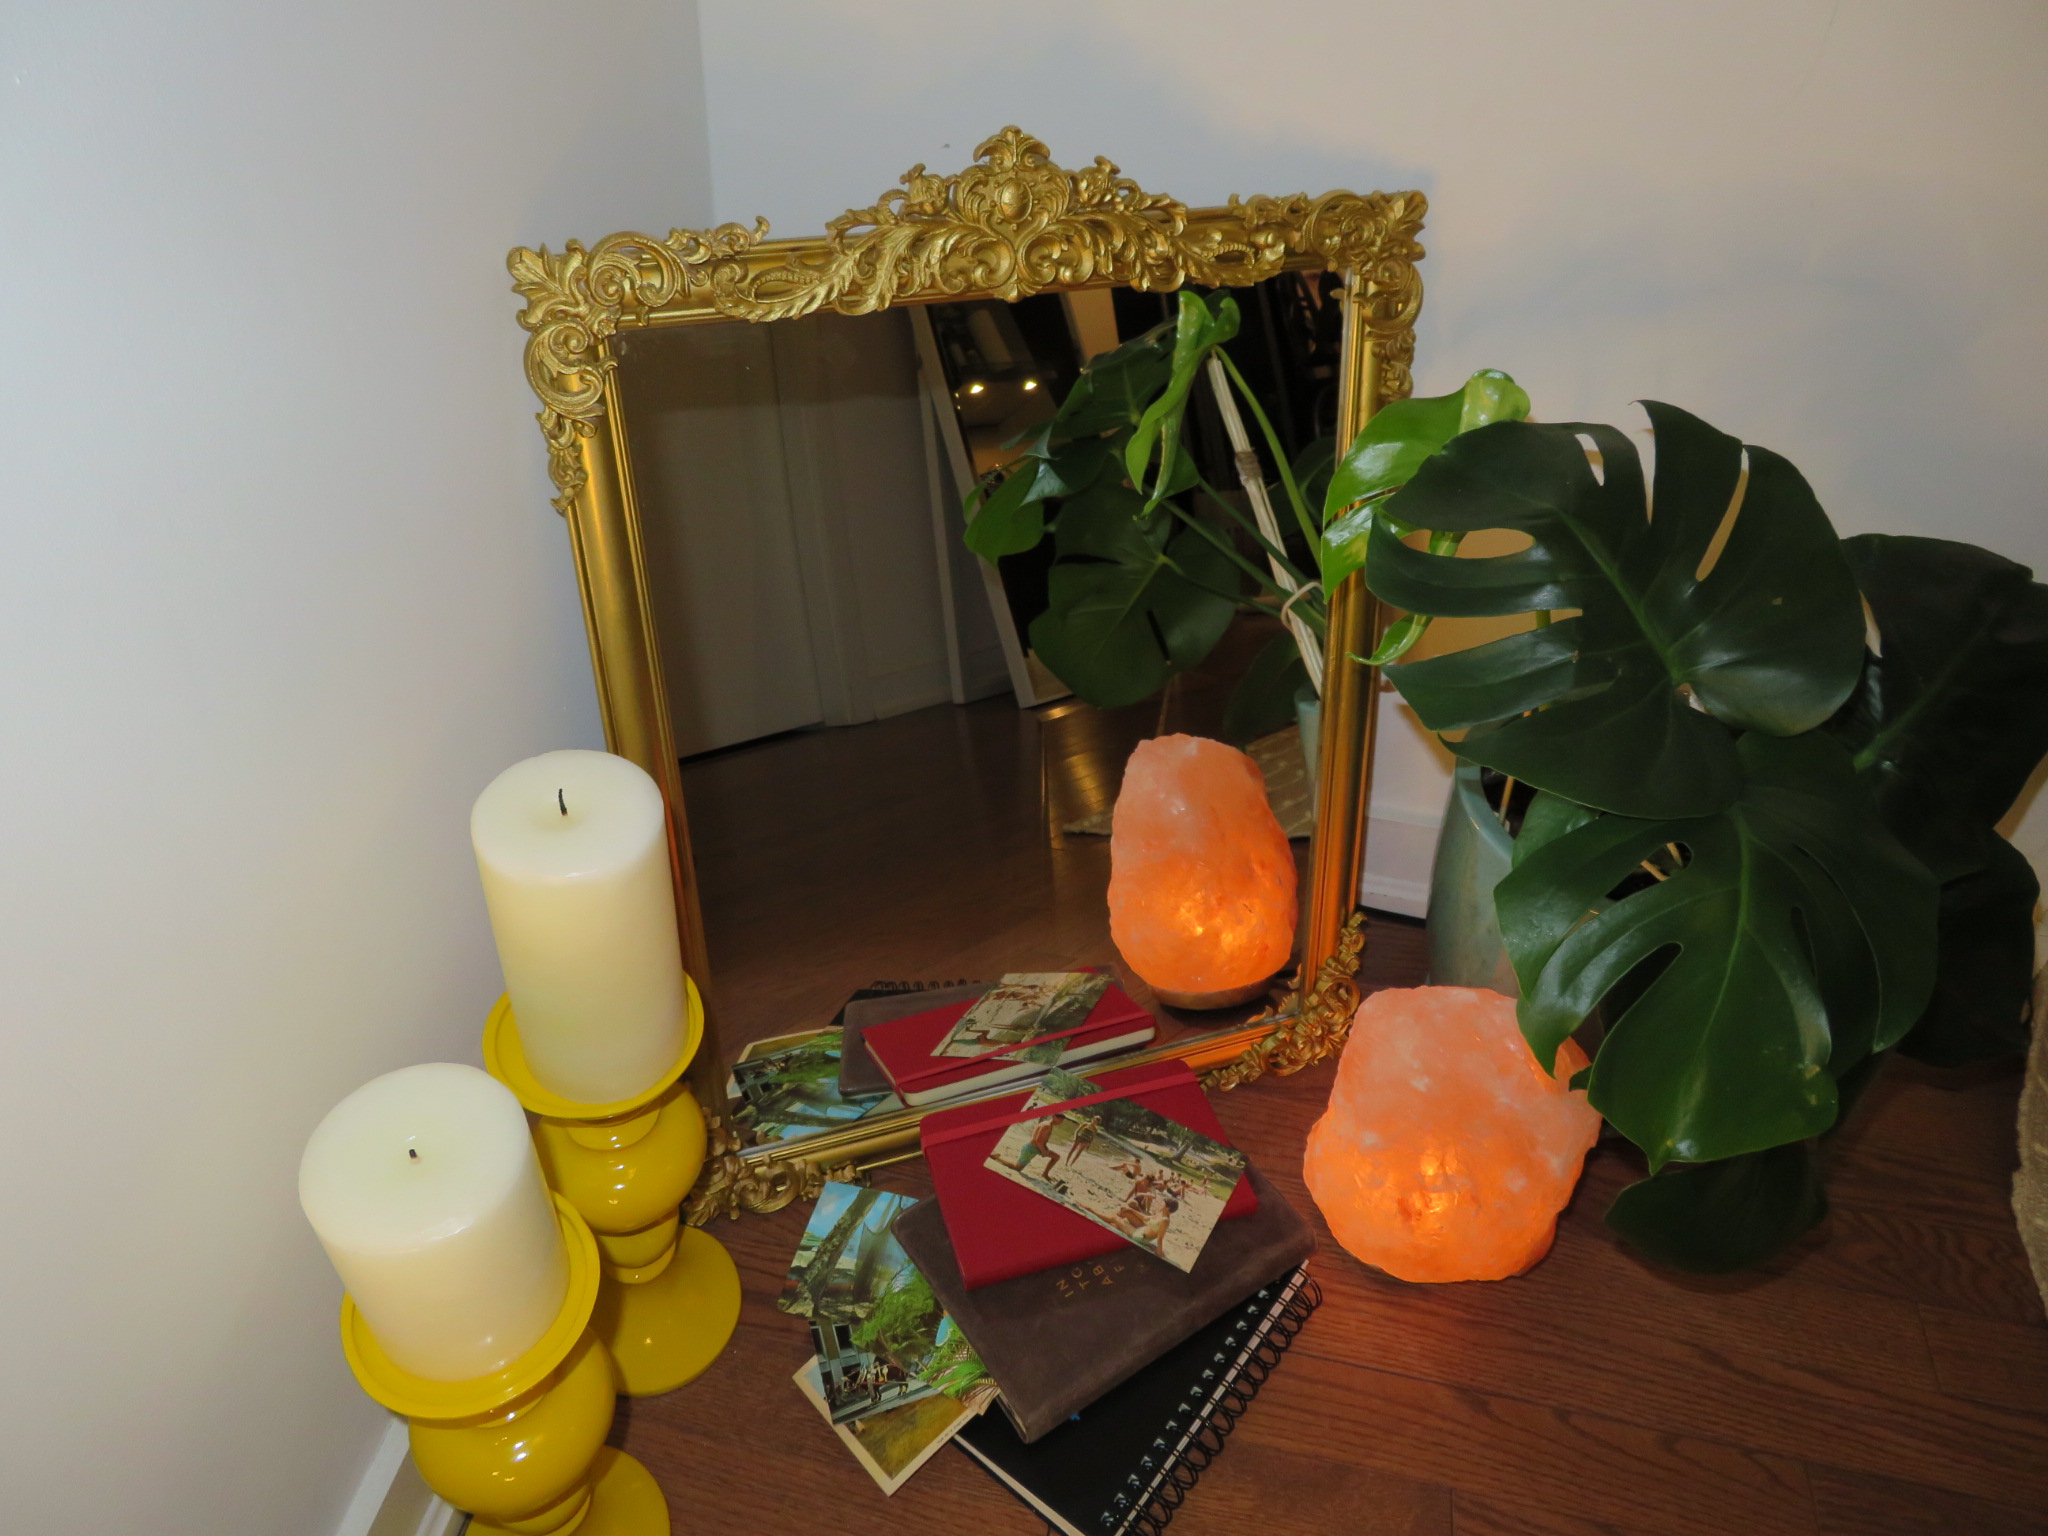
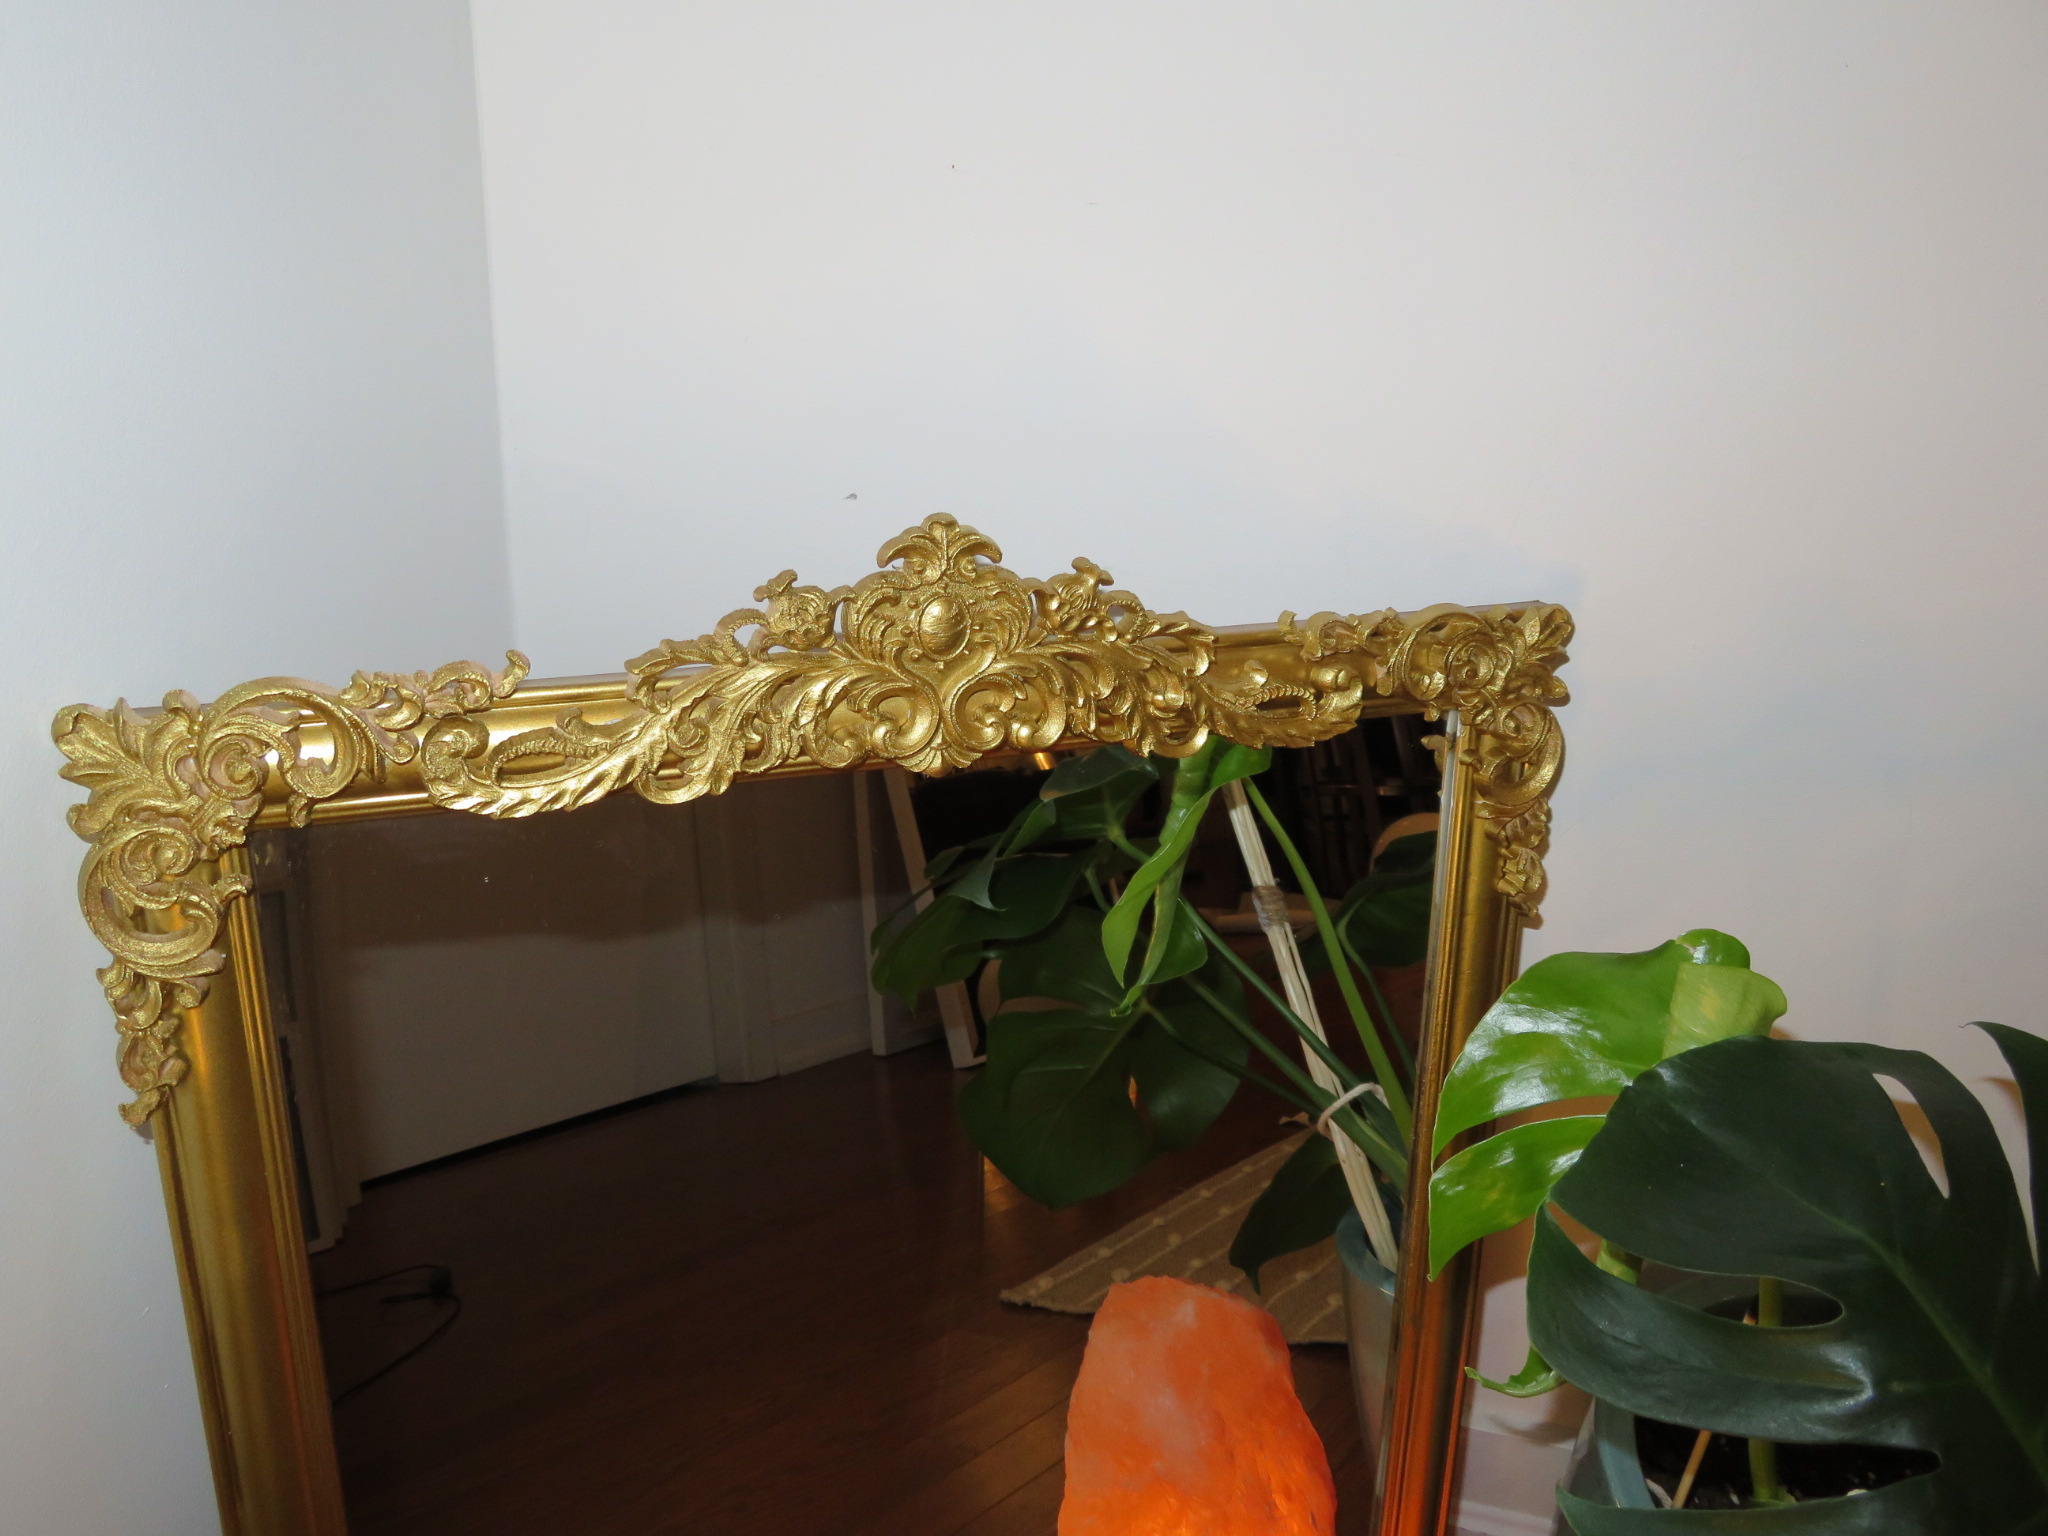
Stage and snap a photo of your new piece! We chose to stage ours with some vintage postcards and paintings collected at a local antique shop, some plant life, and a salt lamp.

This cost effective project is fairly low maintenance and can be completed within a limited working space. The assembly does not require any major tools and is held together by a bonding wood glue. The end result is a lightweight mirror that is especially perfect for hanging in apartments or rental spaces. It does not have the weight of a traditional brass mirror and therefore preserves your walls from the damage necessary for large supports.

Now that you’ve completed your vintage inspired DIY mirror, it’s time to compliment your new piece with other vintage inspired pieces to help it blend in to your space seamlessly. We think it would look great in a bathroom set up or at a makeup vanity station in a bedroom, but we would rather see where yours ends up. Show us how and where you style your DIY vintage inspired mirror by snapping a post-project selfie, and don’t forget to share it with us on our Facebook, Pinterest, and Instagram!

![Backyard Landscaping Trends [10 Inspiring Ideas!]](https://cdn.decoist.com/wp-content/uploads/2021/04/Fire-Pit-in-Backyard-28968-270x180.jpg)