We know that photos can be an amazing source of design inspiration, so this article may contain affiliate links that will direct you to a particular decor item. Clicking on a link may result in a portion of proceeds being paid to www.decoist.com
Creating the perfect porch decor is a must for any homeowner and one of the best seasons to do it is for autumn. There’s nothing like walking down the street and seeing pumpkins, hay bales, and gorgeous flowers set out for all to enjoy. But creating a porch display that is visually interesting can take some effort so we at Decoist want to make it easier with these DIY fall wooden crates. Not only are they easy to build but they add height and dimension to your porch display. As an added bonus, they can be moved inside for the winter and double as storage.
Supply List:
- 12 pieces framing lumber – 1-inch x 3-inch
- Cut six of them to 24-inch length and the other six to 10-inch length
- 4 pieces hobby wood – 1-inch x 2-inch cut to 9 1/4-inch length
- 1 rough pine wood board or shelf – 12-inch x 24-inch
- Sandpaper – 60 and 80 grit
- Stain or paint of your choice – we chose Minwax in Espresso
- Wood sealer – we love the Minwax Ployurethane in clear satin
- Acrylic paints colors of your choice
- Paintbrushes
- Nail gun/brad nailer
- 1-inch brad nails
Step 1:
Cut your wood pieces to the correct lengths and sand any rough edges of your wood using an 80 grit piece of sandpaper. We’ve provided the ratios we used but you can cut them to whatever length you want.
Pro Tip: If you don’t have a table or miter saw, head down to your local hardware store and grab the dimensional lumber you require. If needed, ask the staff to cut them to size for you.
Step 2:
Next, use two scrap pieces of wood to create a 90-degree angle jig. This will create a frame that will allow you to set the other wood pieces correctly. Place your first 10-inch wood at the top corner of the frame. Place a scrap piece of wood or another spacer beside the 10-inch piece then add another below. Continue doing this until you have three 10-inch pieces lined up.

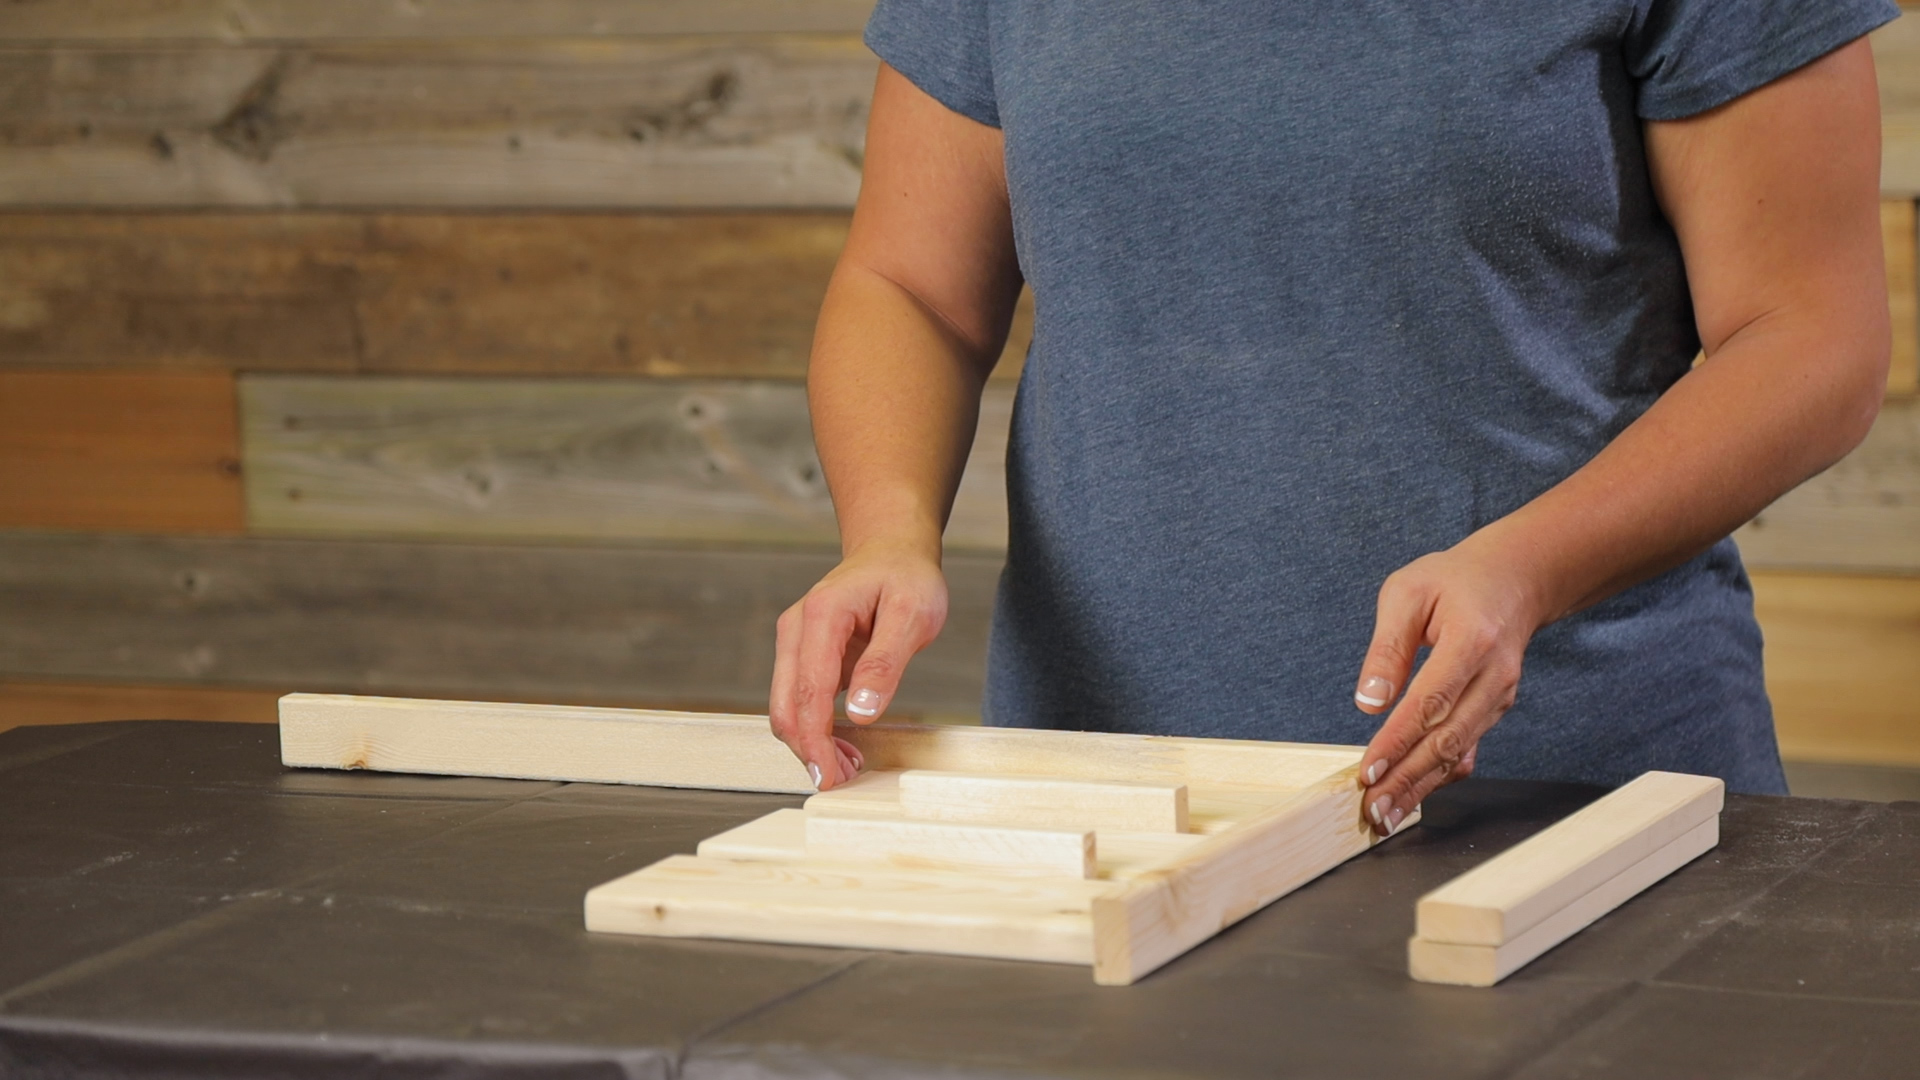
Step 3:
Create a side brace. Take your 9 1/4 piece wood and slide it along the top of the 10-inch pieces. Nail them into place using 1-inch brad nails. Place two nails for each piece for an extra secure finish. Now that you have a little palette, repeat this same process to make the other side piece.
Step 4:
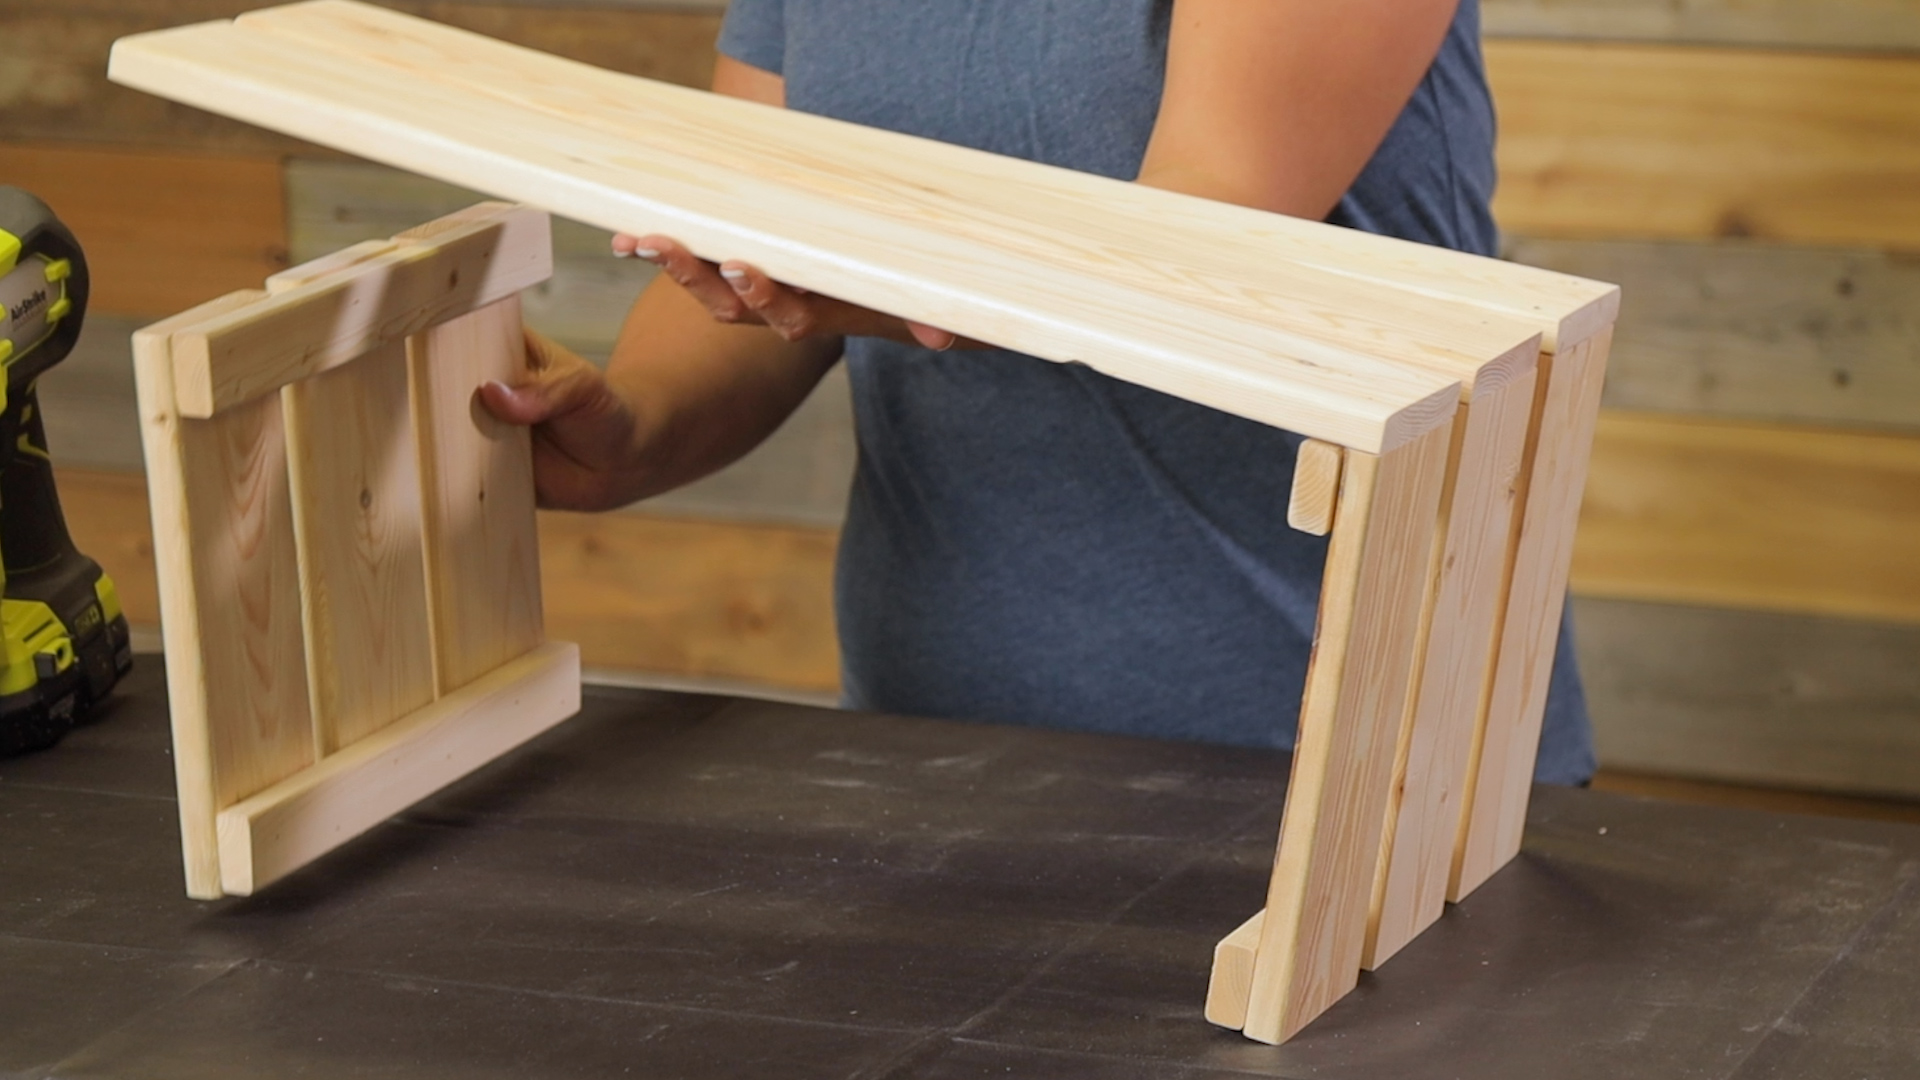
Now it’s time to take your 24-inch long wood pieces to connect the side palettes. Match the 24-inch board with a 10-inch piece then nail it in. One attached, flip the board over and attached them to your other small palette. Finally, make a box by nailing the final 324-inch wood boards to the bottom. Now, you should have a bottomless crate.

Step 5:
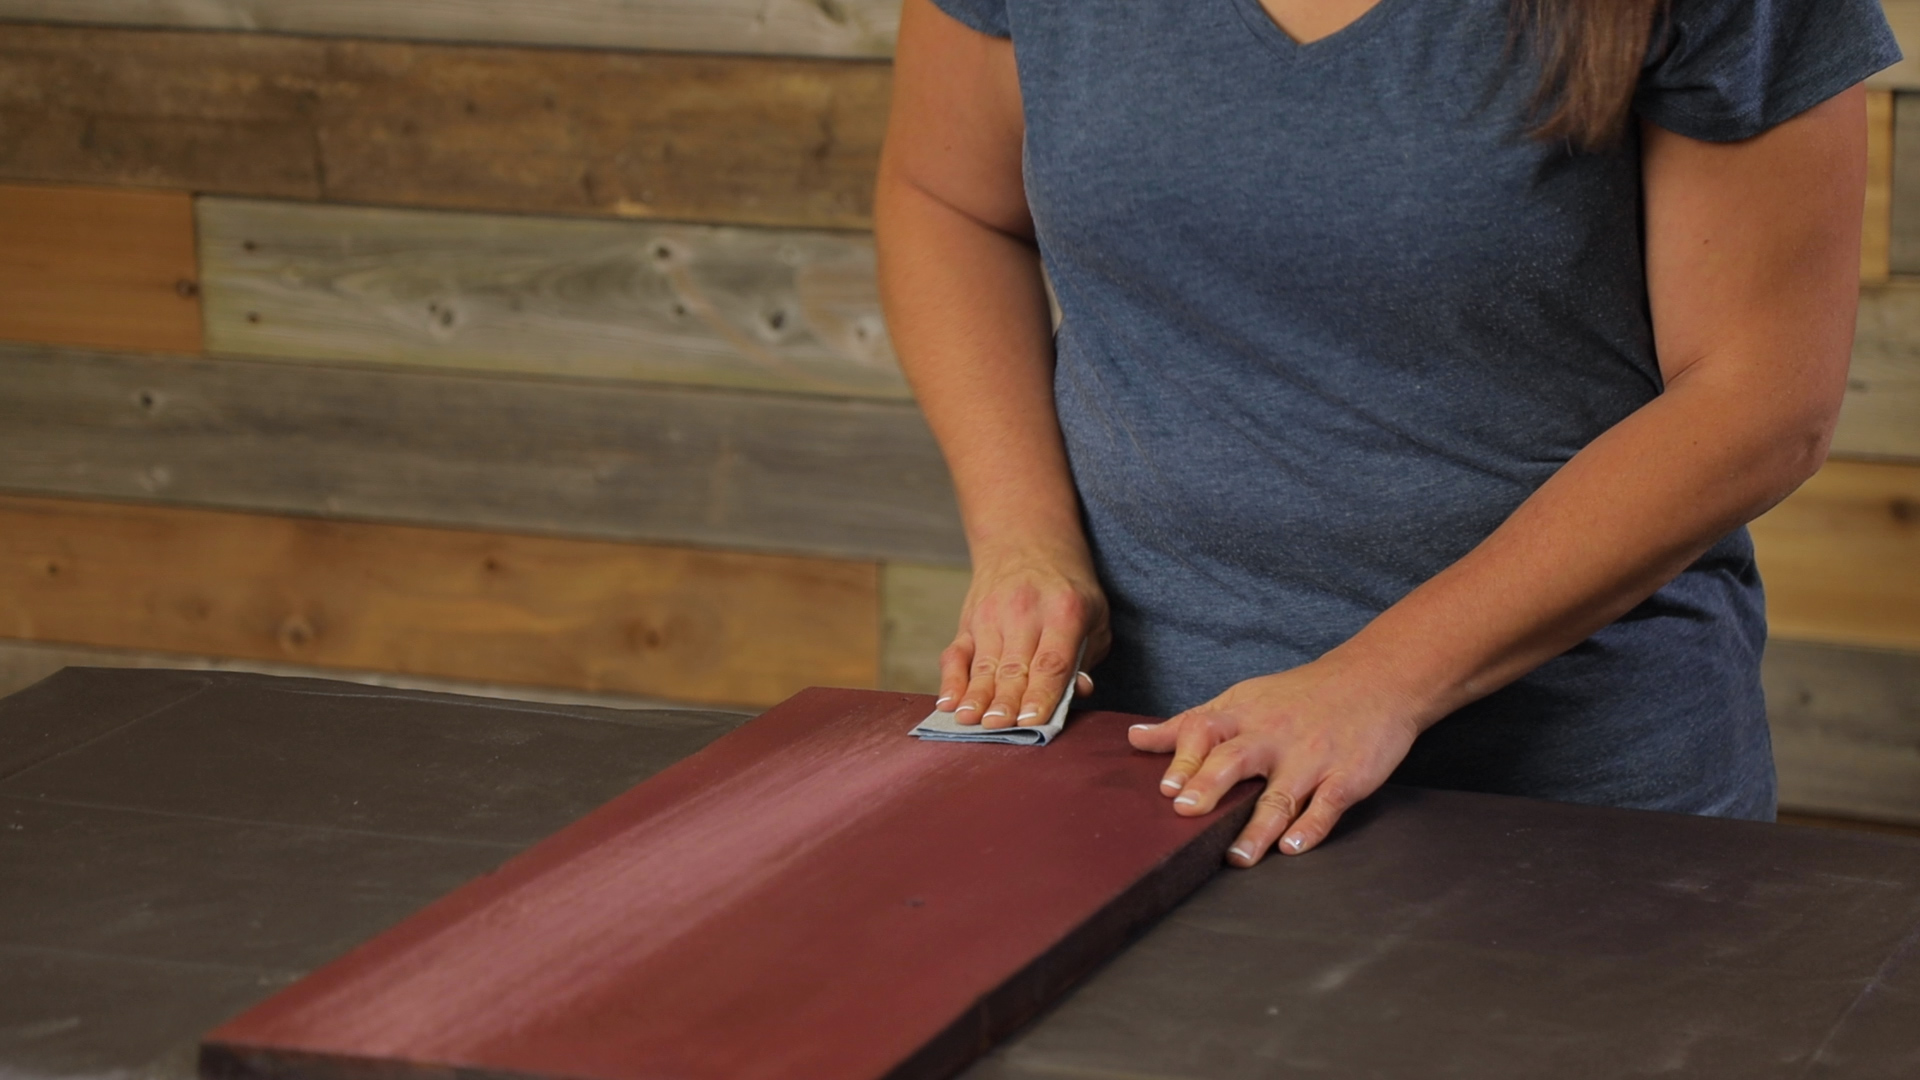
Make the base. Sand the 12-inch x 24-inch board using 3M sandpaper then seal using Minwax Ployurethance in clear satin. Then you’re free to paint the board whichever color you choose. We decided on a lovely burgundy and mustard yellow pallette.
Pro Tip: For a more rustic look try our scratch-painting technique. Use a 60-grit piece of sandpaper and scratch into the paint surface until the natural wood grain and color comes through.

Step 6:
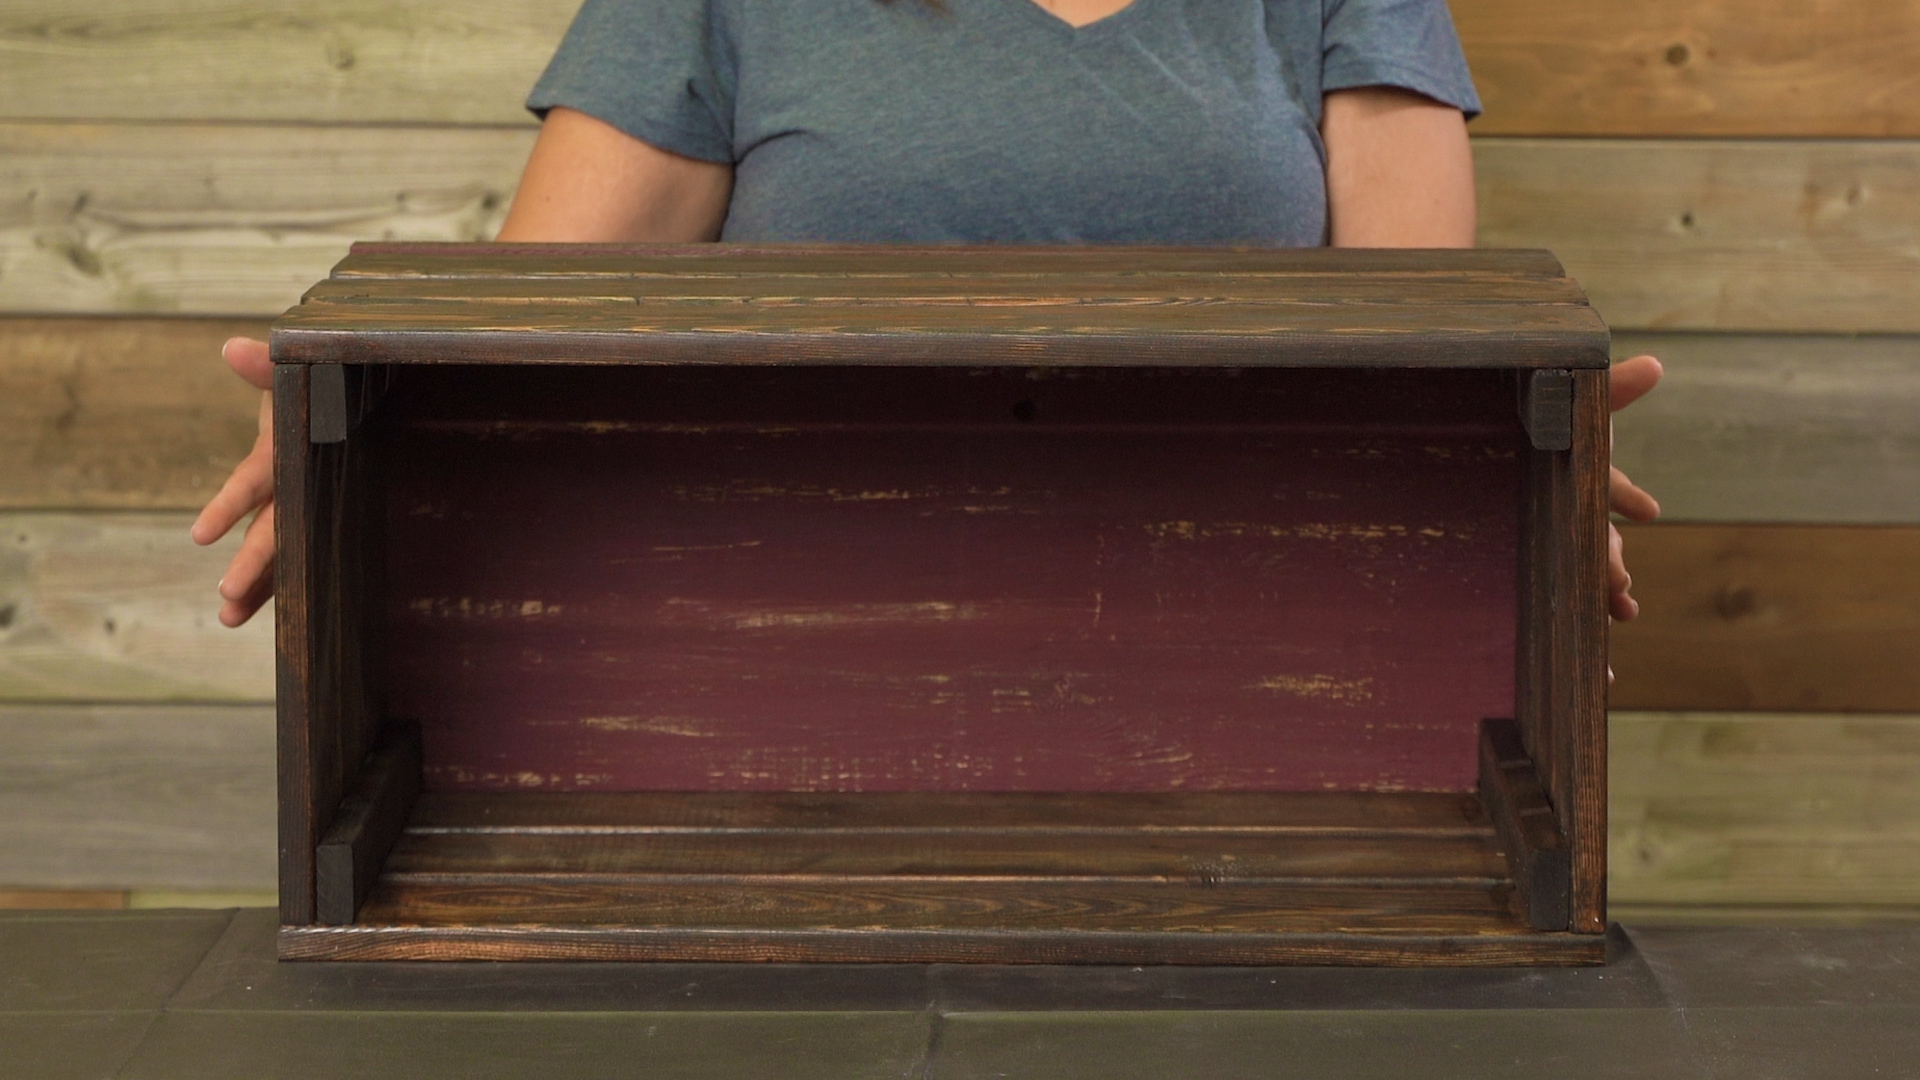
Stain the wood of your crates. We used the Minwax stain color Espresso but you can use whatever will best compliment your porch decor.
Step 7:
Attach the base by placing it paint side down on top of your crate. Line up the corners and secure it into place using your nail gun and 1-inch brad nails. Now that it’s complete it’s time to set up your porch decor!

You can change the dimensions of the wood pieces to create different size wood crates or make multiple of the same size. Compliment the decor using festive pumpkins and gourds and seasonal flowers. Show us how you styled your DIY fall wood crates by connecting with us on Facebook, Instagram, or Pinterest!


