We know that photos can be an amazing source of design inspiration, so this article may contain affiliate links that will direct you to a particular decor item. Clicking on a link may result in a portion of proceeds being paid to www.decoist.com
The peaceful summer nights may be coming to an end but that doesn’t mean you can’t have warm fairy light lanterns in your home year-round. While fairy string lights can be a cheap and simple accessory, the hard part is finding the perfect lantern to show them off in. Don’t worry though, we at Decoist have created a DIY lantern that is simple, chic, and easy to customize to whatever your decor style is!
Take a look at how to craft your own DIY fairy light lanterns and read below for step-by-step instructions, quick product links, and pro-tips.
Supply List:
- 1/4 cup water
- 1/2 cup cornstarch
- Large bottle of Elmer’s Clear Glue
- Roll of yarn — You can choose whatever color you want! We chose coral color yarn for one lantern, a crisp white yarn for our second lantern, and jute twine rope for our third lantern
- Balloon
- Fairy string lights — This six-pack is battery-operated, comes in multiple color options, and has a 7ft or 10ft option depending on the size of your lantern and how bright you want it to be! We chose the warm white in the 7ft length.
- Large bowl and fork
- Pencil
Step #1:
Start by preparing your glue mixture. Use a fork to mix 1/4 cup of water, 1/2 cup cornstarch, and the entire bottle of glue in the large bowl. Make sure it ends up with a smooth texture. You want the cornstarch the be completely dissolved and for the mixture to have no white lumps.
Pro Tip: We used Clear Elmer’s Glue to ensure that the color of our yarn didn’t change


Step #2:
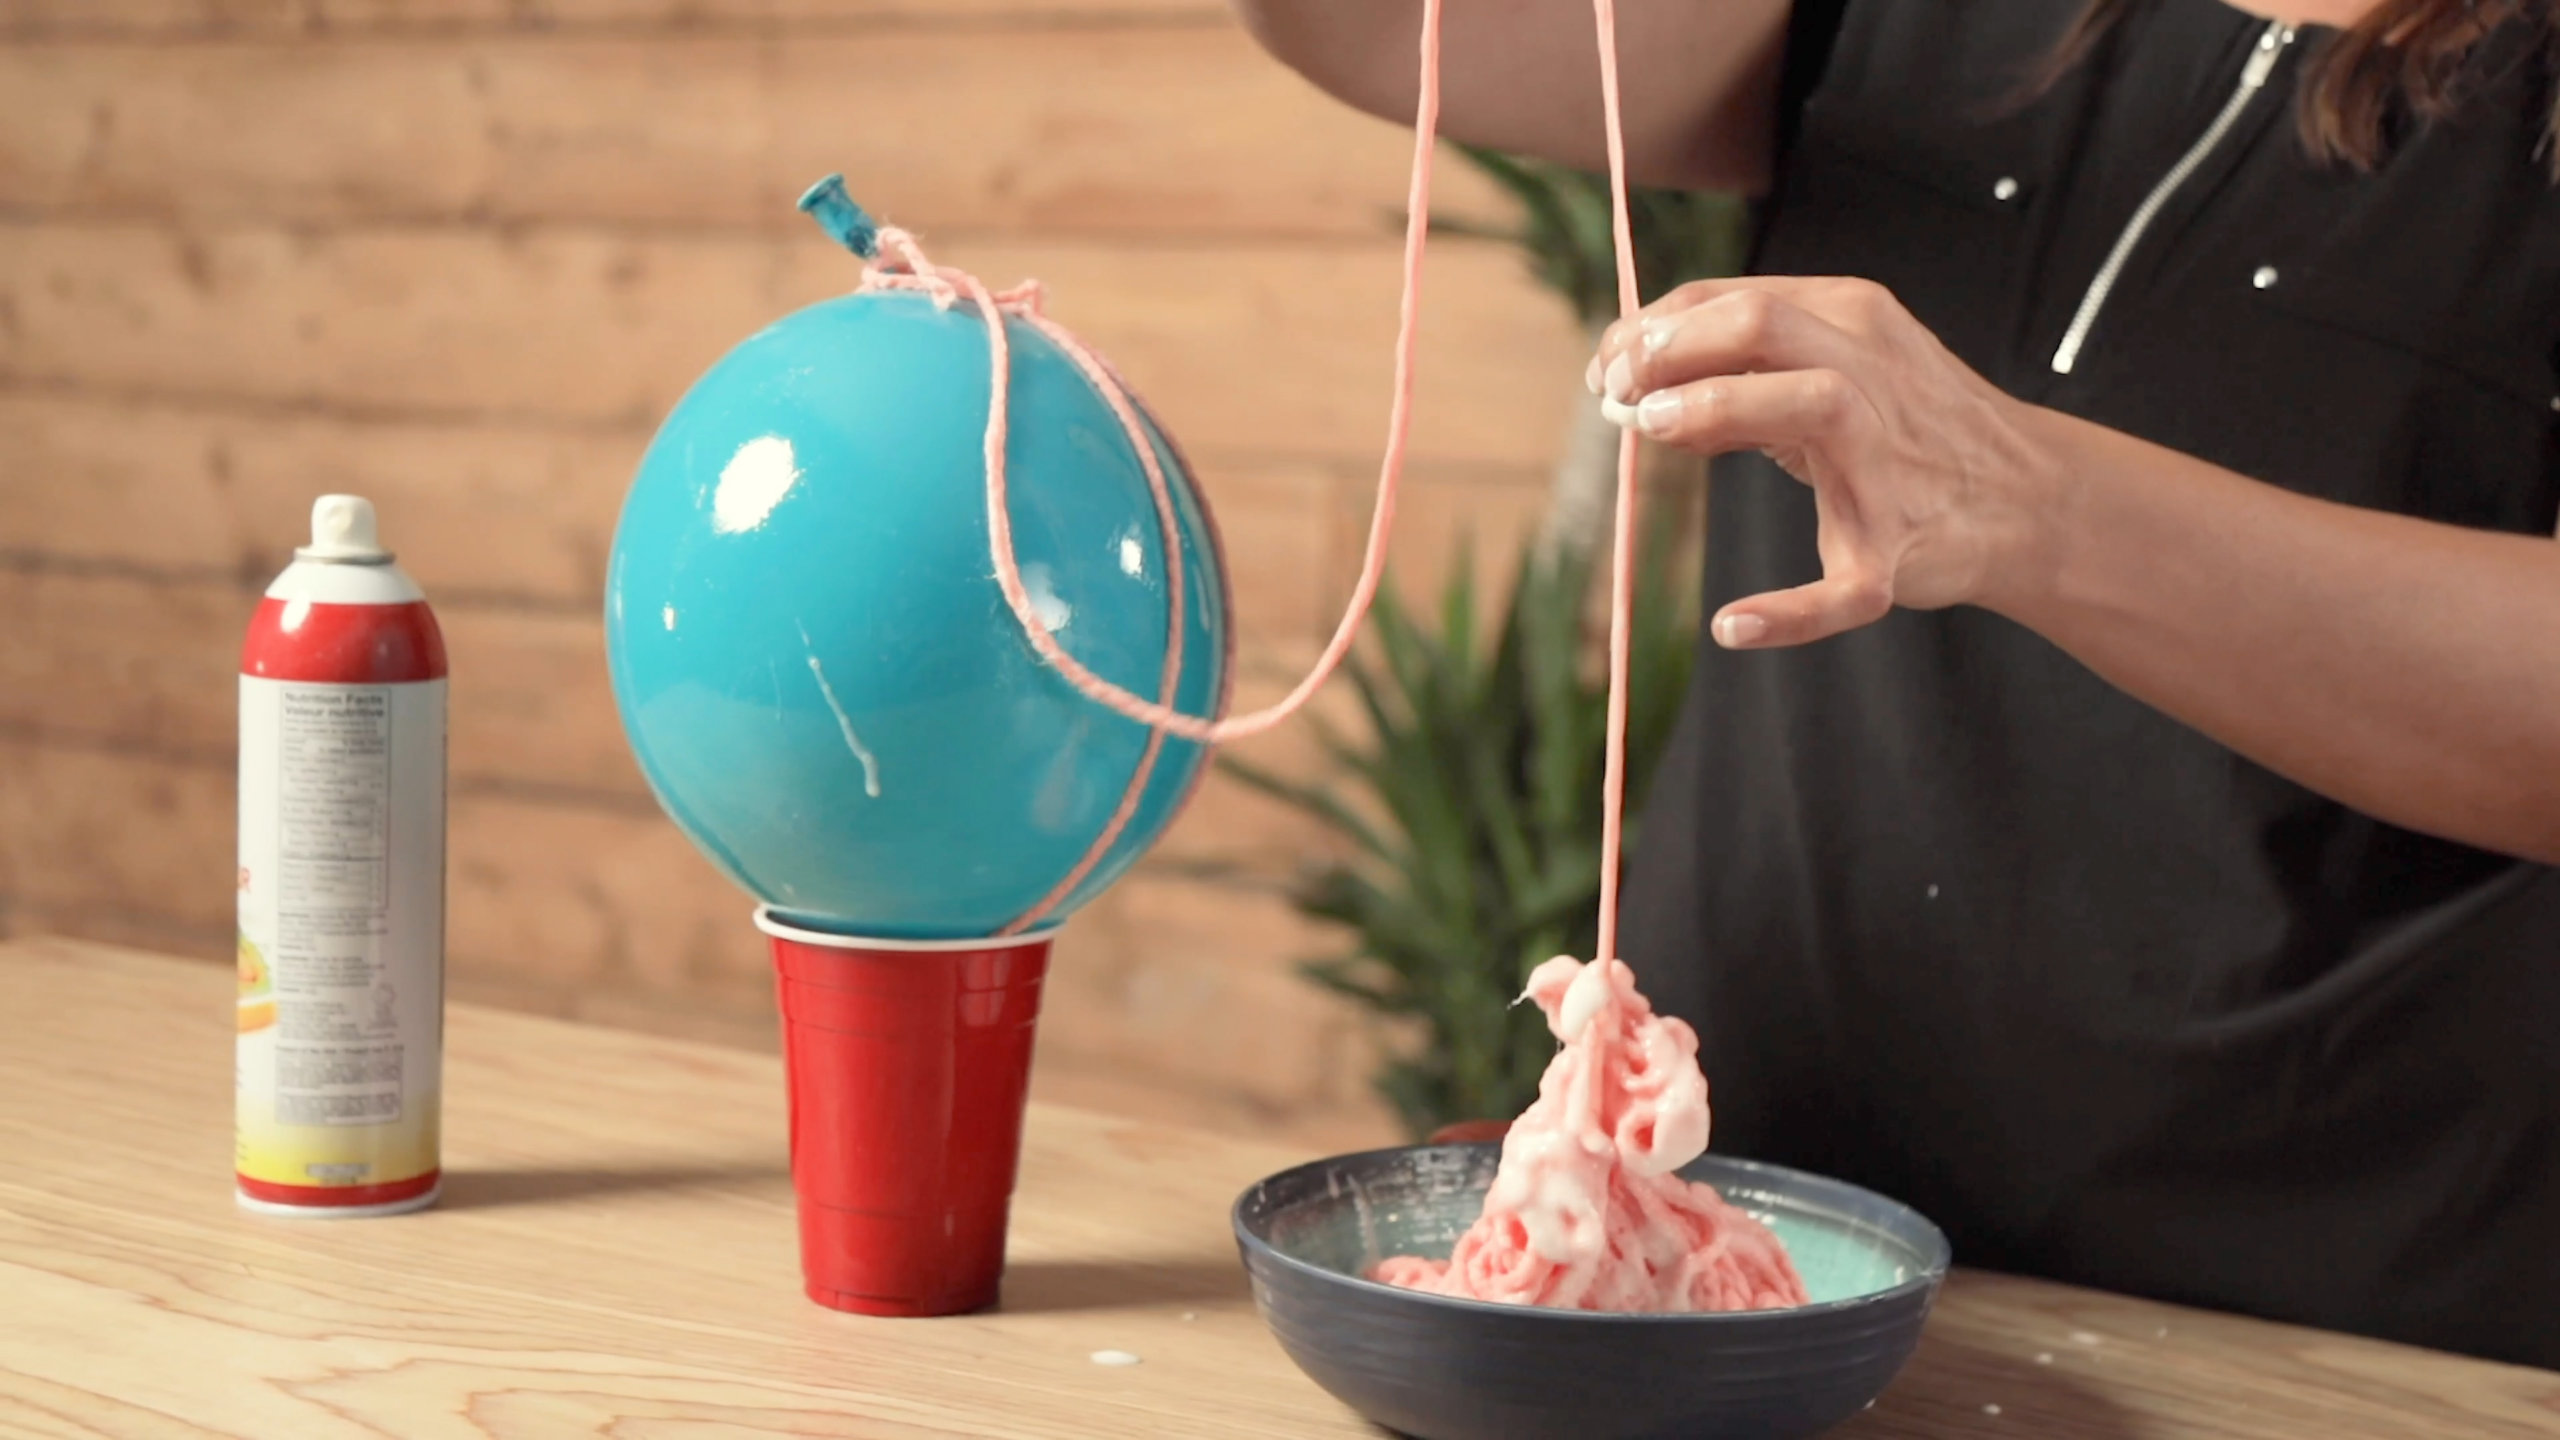
Take your balloon and blow it to the desired size. Once it’s the size you’re comfortable with for the lantern, spray the balloon with PAM cooking oil or cover with vaseline. This will ensure that the string doesn’t stick to the balloon. When the balloon is covered, place it on top of a plastic cup with the tied-end facing up.
Step #3:
Unwrap your ball of yarn and submerge it entirely in the glue mixture for a few minutes—we used a coral color yarn, a crisp white yarn, and jute twine rope for our three lanterns. Once all the yarn is covered in the glue mixture, tie one end of the string tight around the top of the balloon.

Step #4:
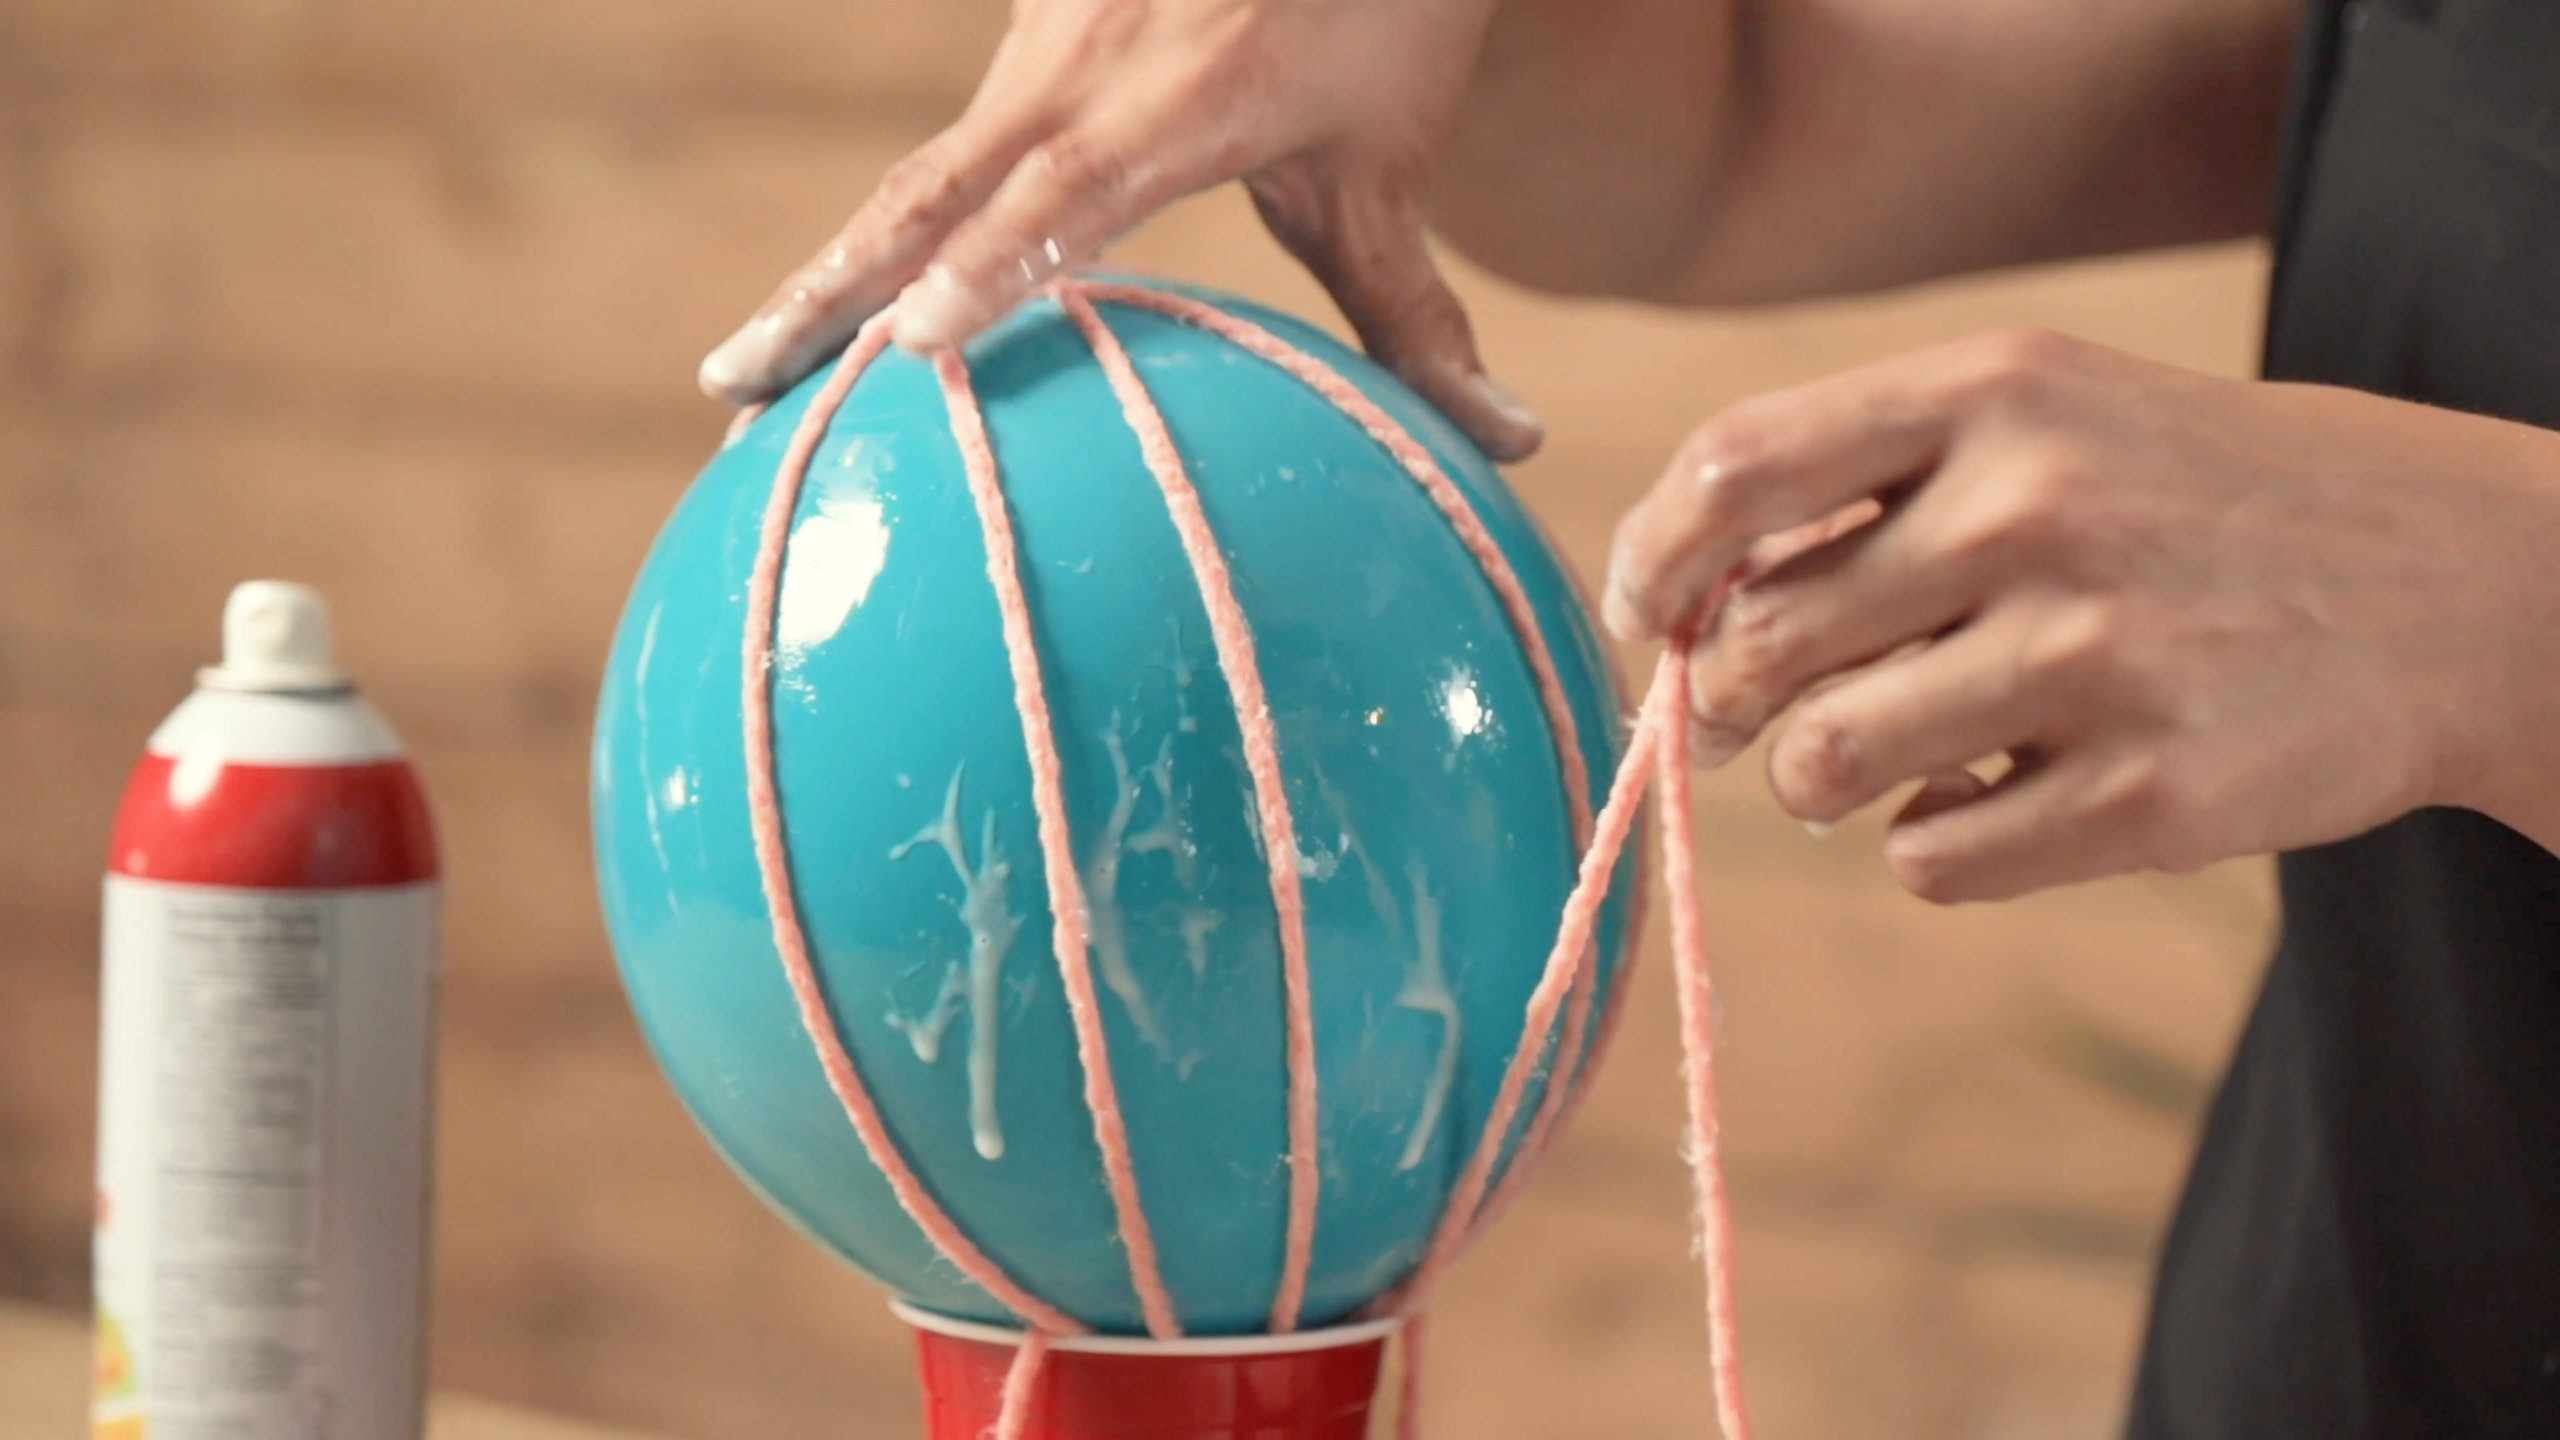
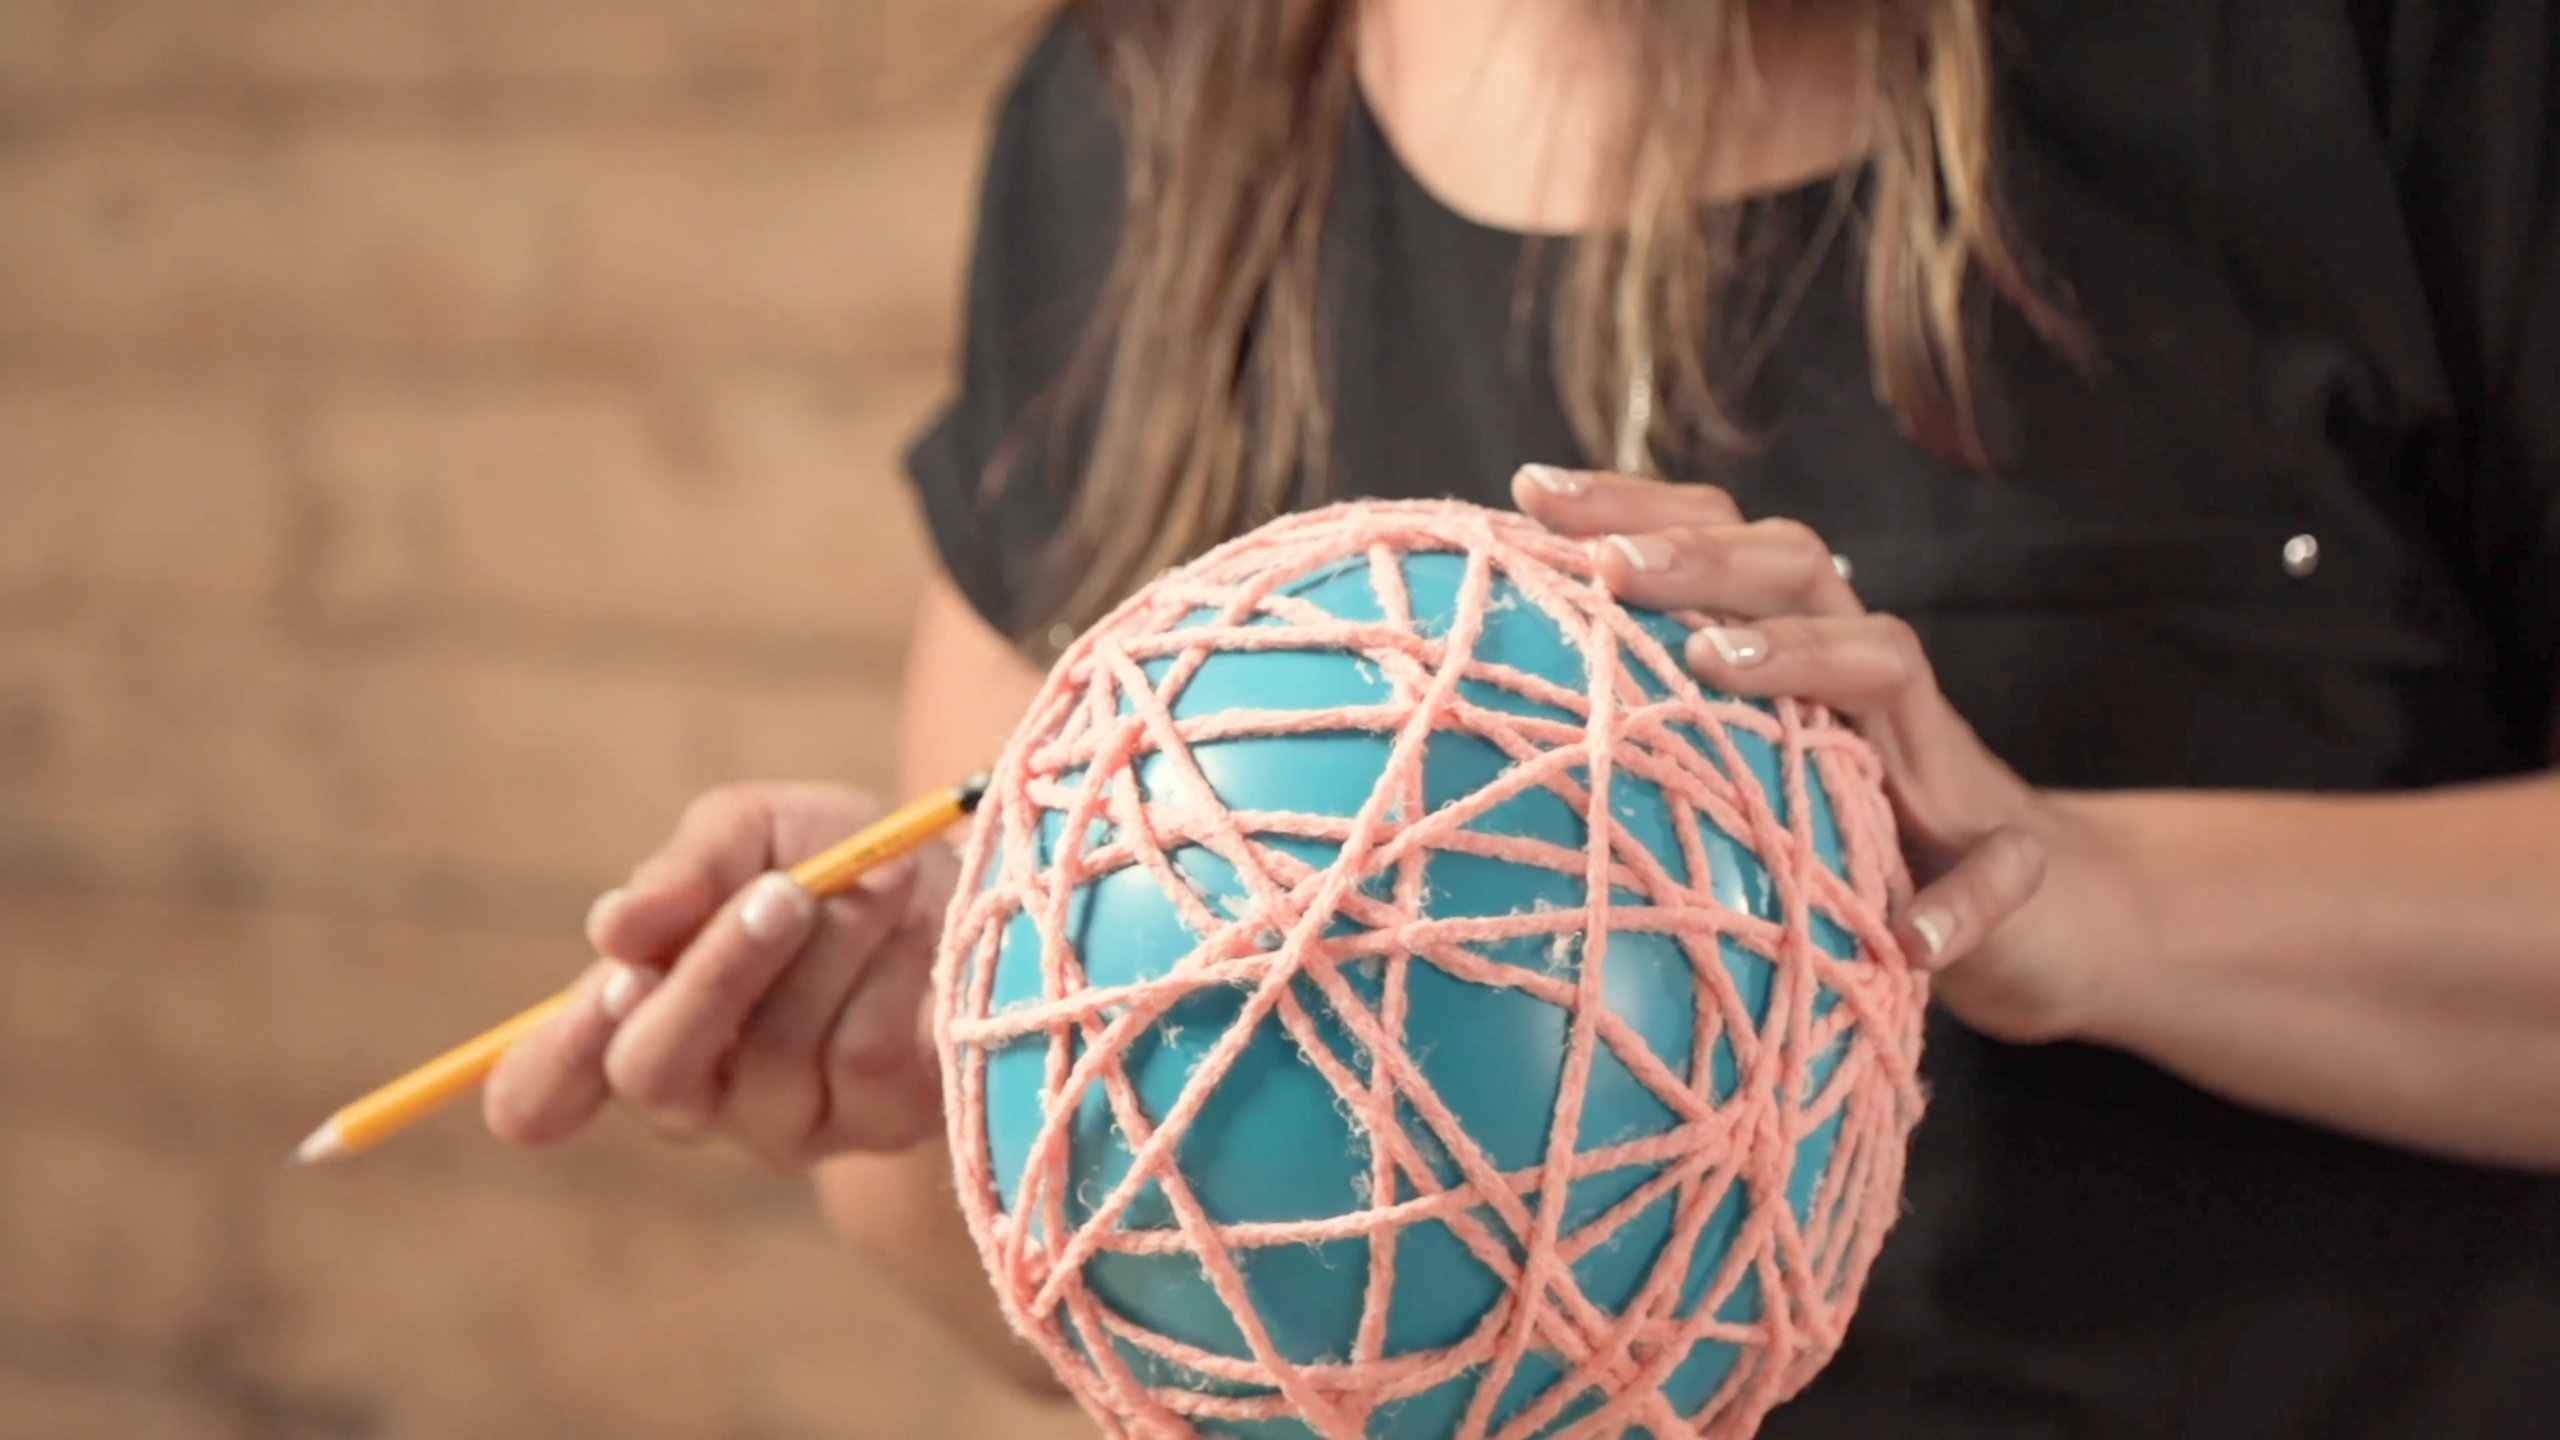
Begin to pull lengths of the string out of the glue mixture while wiping off any excess glue. Start by wrapping the yarn 5-6 times vertically around the balloon. Once you’ve finished your vertical wrapping, place the balloon back on the cup and spin the balloon as you wrap horizontally, diagonally, or any whichever way you please!
Pro Tip: You might be tempted to switch between vertical and horizontal wrapping at first, but a few vertical wraps to start will give your lantern extra stability. You can also circle the balloon mouthpiece a few times for extra support.

Step #5:
Let the yarn and balloon dry for 24-48 hours.
Step #6:
Once dry, gently poke the balloon through the lantern holes using the rubber eraser end of your pencil. This will help to separate the yarn from the balloon. Once you’ve separated the yarn and balloon enough, then go ahead and POP! the balloon.

Step #7:
Pull out the pieces of broken balloon and then, using an Exacto knife, shave off any pieces of dried glue hanging from the lantern.
Step #8:
Insert your fairy string lights through the lantern and enjoy! These can even be made into pendant light shades. Simply make sure to leave a hole large enough for a pendant kit like this set or four matching ones from Amazon to go through. An Edison bulb will add an extra vintage feel. Then you can hang it over your kitchen table, island, or any room in the house!
Pro Tip: Create a circle with one end of your fairy lights. That will stop them from poking out the other side as you feed the lights through.

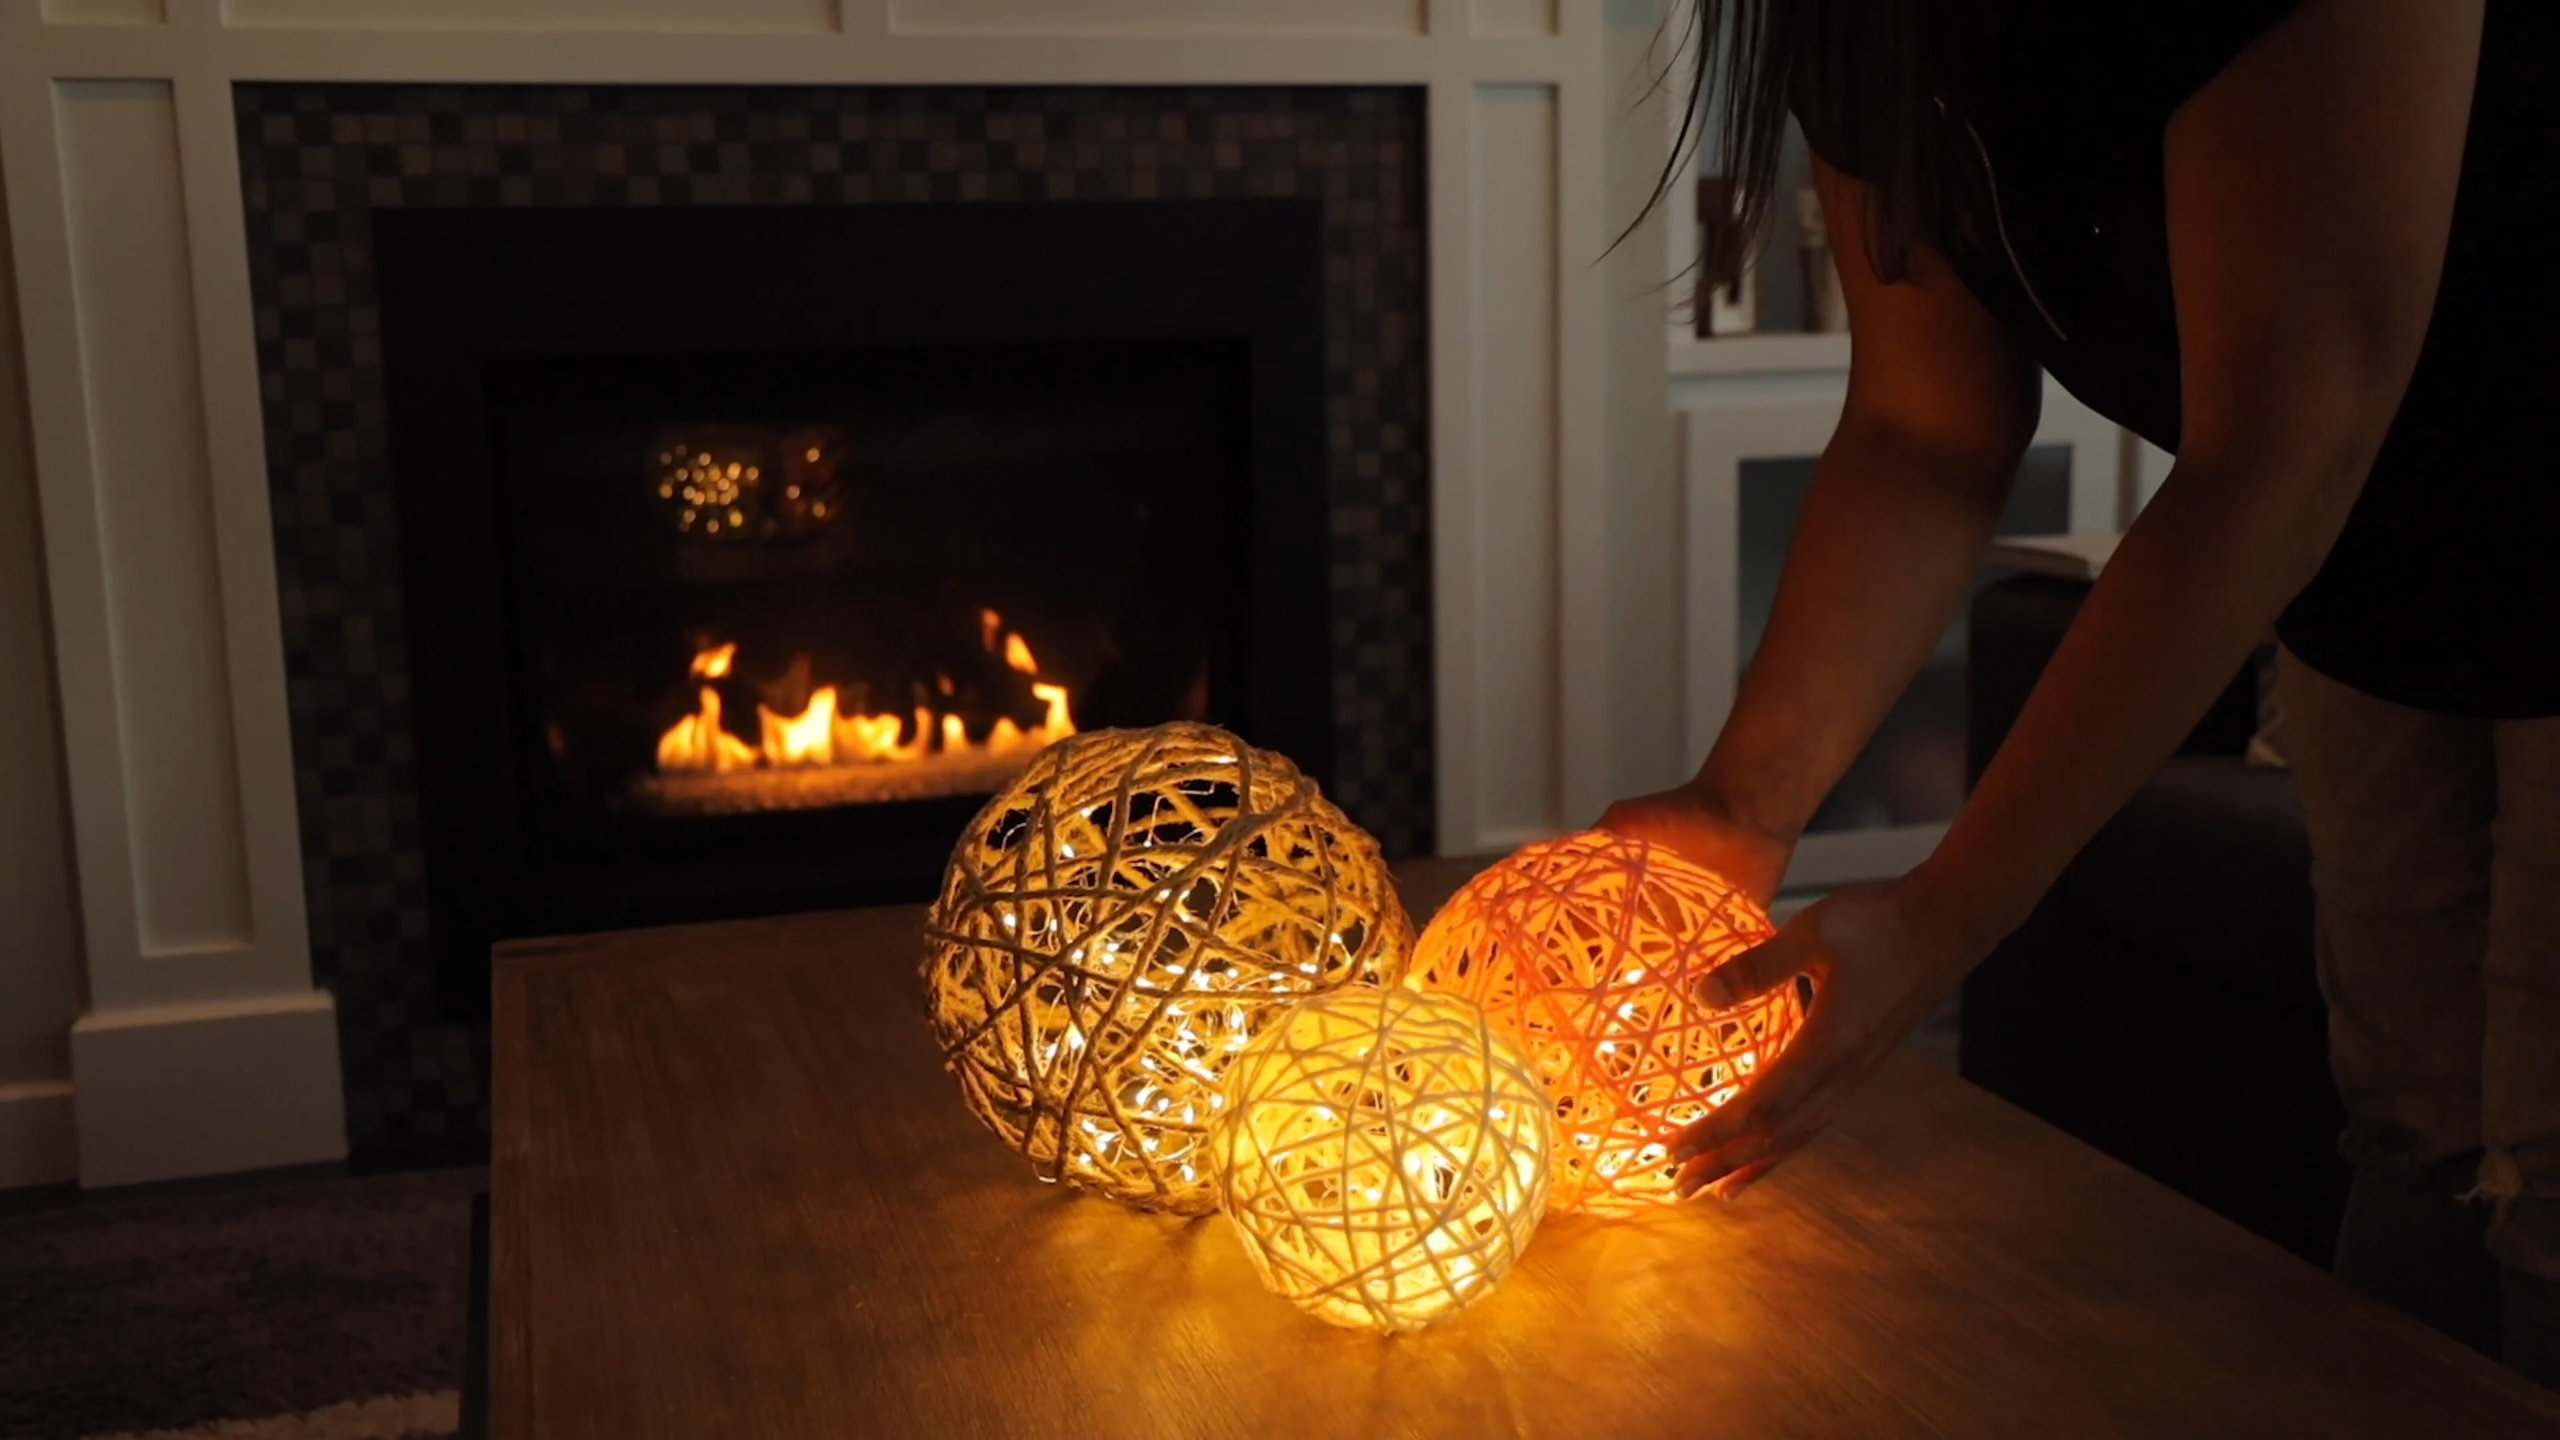
These round lanterns can be hung inside or outside, laid on the ground to illuminate a path, or placed on a bookshelf or fire mantle. For extra protection outside, spray the entire lantern with a clear Rustoleum lacquer spray. Share where you decided to place them in your home by connecting with us on Facebook, Instagram, or Pinterest!


