We know that photos can be an amazing source of design inspiration, so this article may contain affiliate links that will direct you to a particular decor item. Clicking on a link may result in a portion of proceeds being paid to www.decoist.com
Having unique and fun Christmas decorations around your home helps to get you in the festive spirit, but it can be expensive to outfit your home with seasonal decorations. If you’re searching for a festive DIY project this season, look no further than this easy DIY Christmas coat hanger snowflake. This winter decoration is the perfect ornament to display on your front door and it will cost you less than $20 to make. It’s also a great festive project to create with your children this holiday season!
Supply List:
- 16 white children’s clothes hangers
- Children’s hangers will create a snowflake approximately 28″ wide. Adult hangers would make a snowflake approximately 34″ wide.
- 16 zip ties
- Snowflake decals and decorations
- Hot glue gun & hot glue sticks
- Command hook
- Scissors
- Rustoleum cream color spray paint
- The spray paint is optional, for those who want can’t find white hangers or simply want to paint their snowflake before adding decorations.
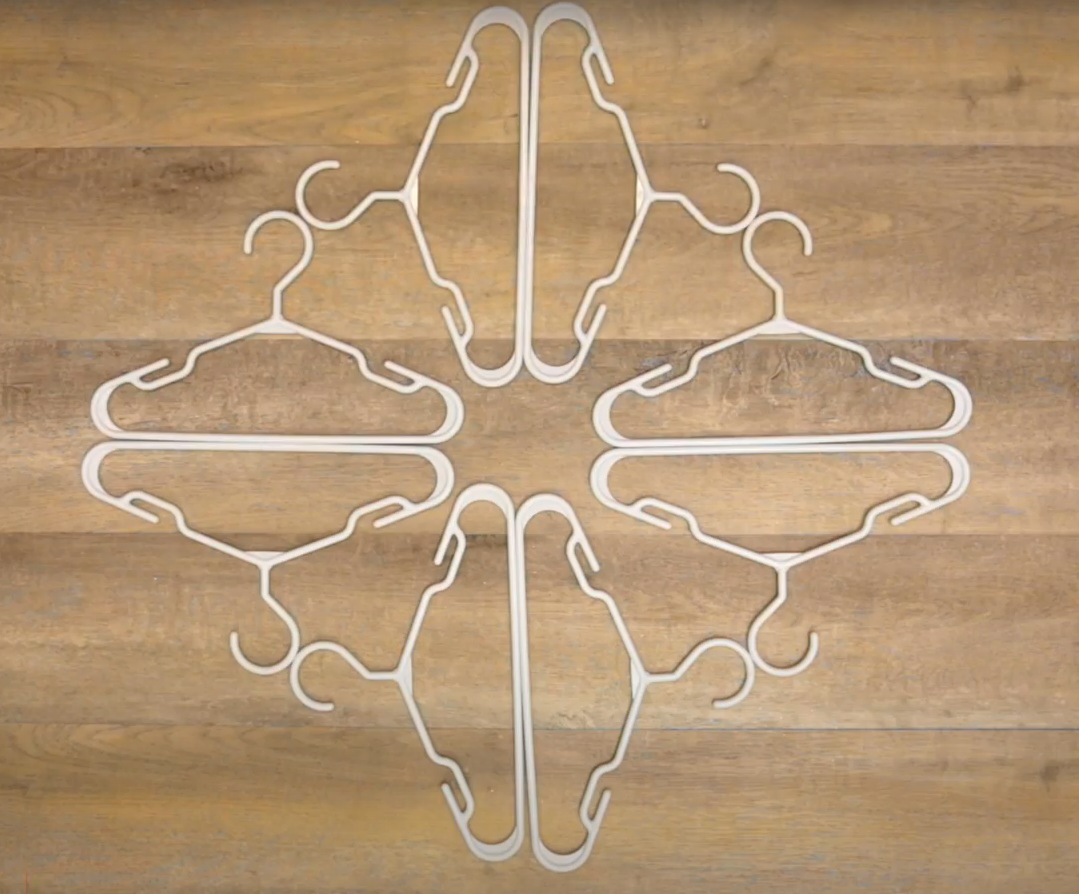
Step 1:
Start with eight of the hangers, dividing them into pairs and matching them up along the straight edges. Make sure the hooks are pointing in the same direction.
Step 2:
Lay the four pairs of hangers down to start the snowflake formation, with the hooks of each pair touching each other.

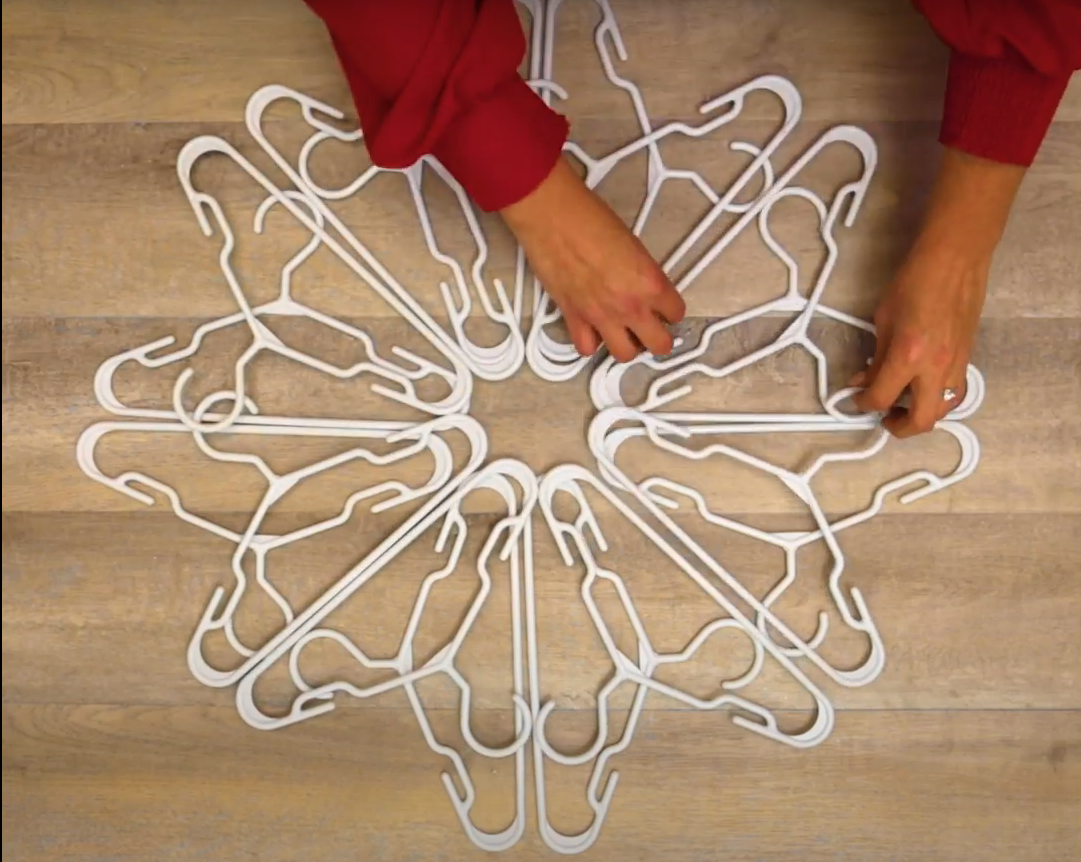
Step 3:
With the remaining eight hangers, pair them up in the same way and lay them overtop the existing formation. Stagger them over the first set of hangers so you create eight points for your snowflake.

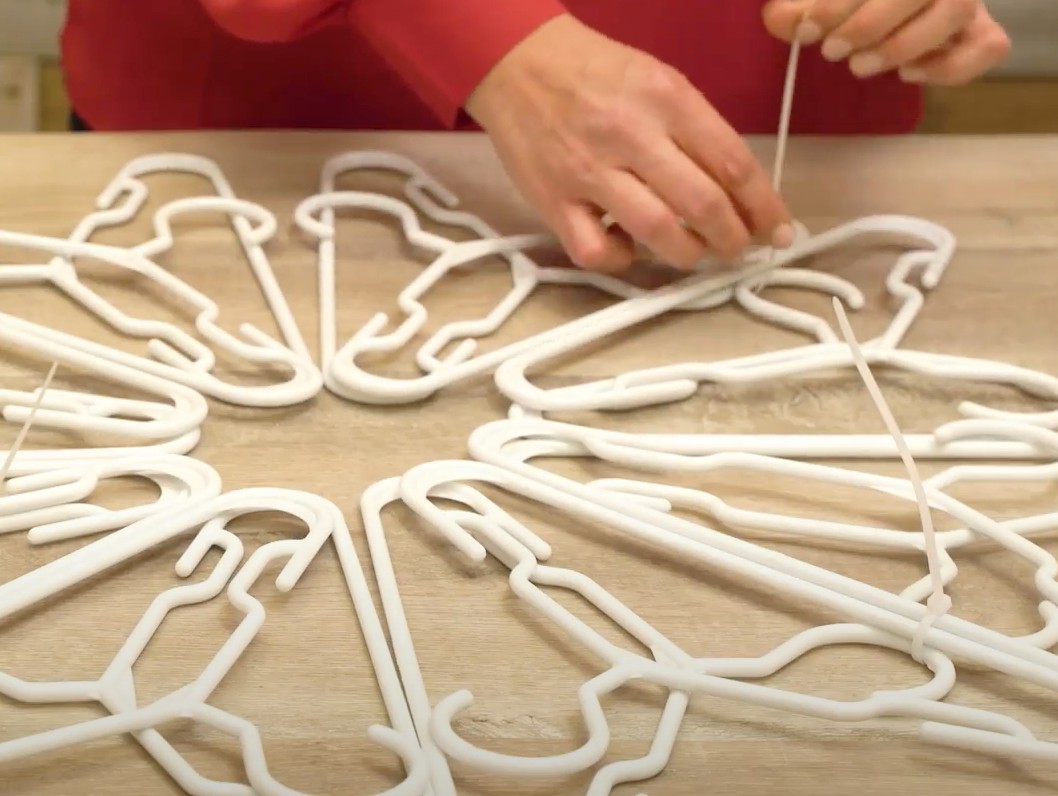
Step 4:
Once you’re happy with the pattern, use your zip ties to start securing the snowflake. Place the zip ties at the top of the straight lines, going under the overlapping pieces. Don’t pull too tight when placing the first few zip ties.
Step 5:
Place the zip ties at the bottom of the straight edges as well. You’ll need to play around with the positioning of the zip ties before pulling them all tightly. Pay attention to the shifting of the hangers as you’re tightening each zip tie so you don’t have unwanted overlaps.

Step 6:
Once you’ve tightened the ties and your snowflake is in formation, trim the excess of the zip ties.
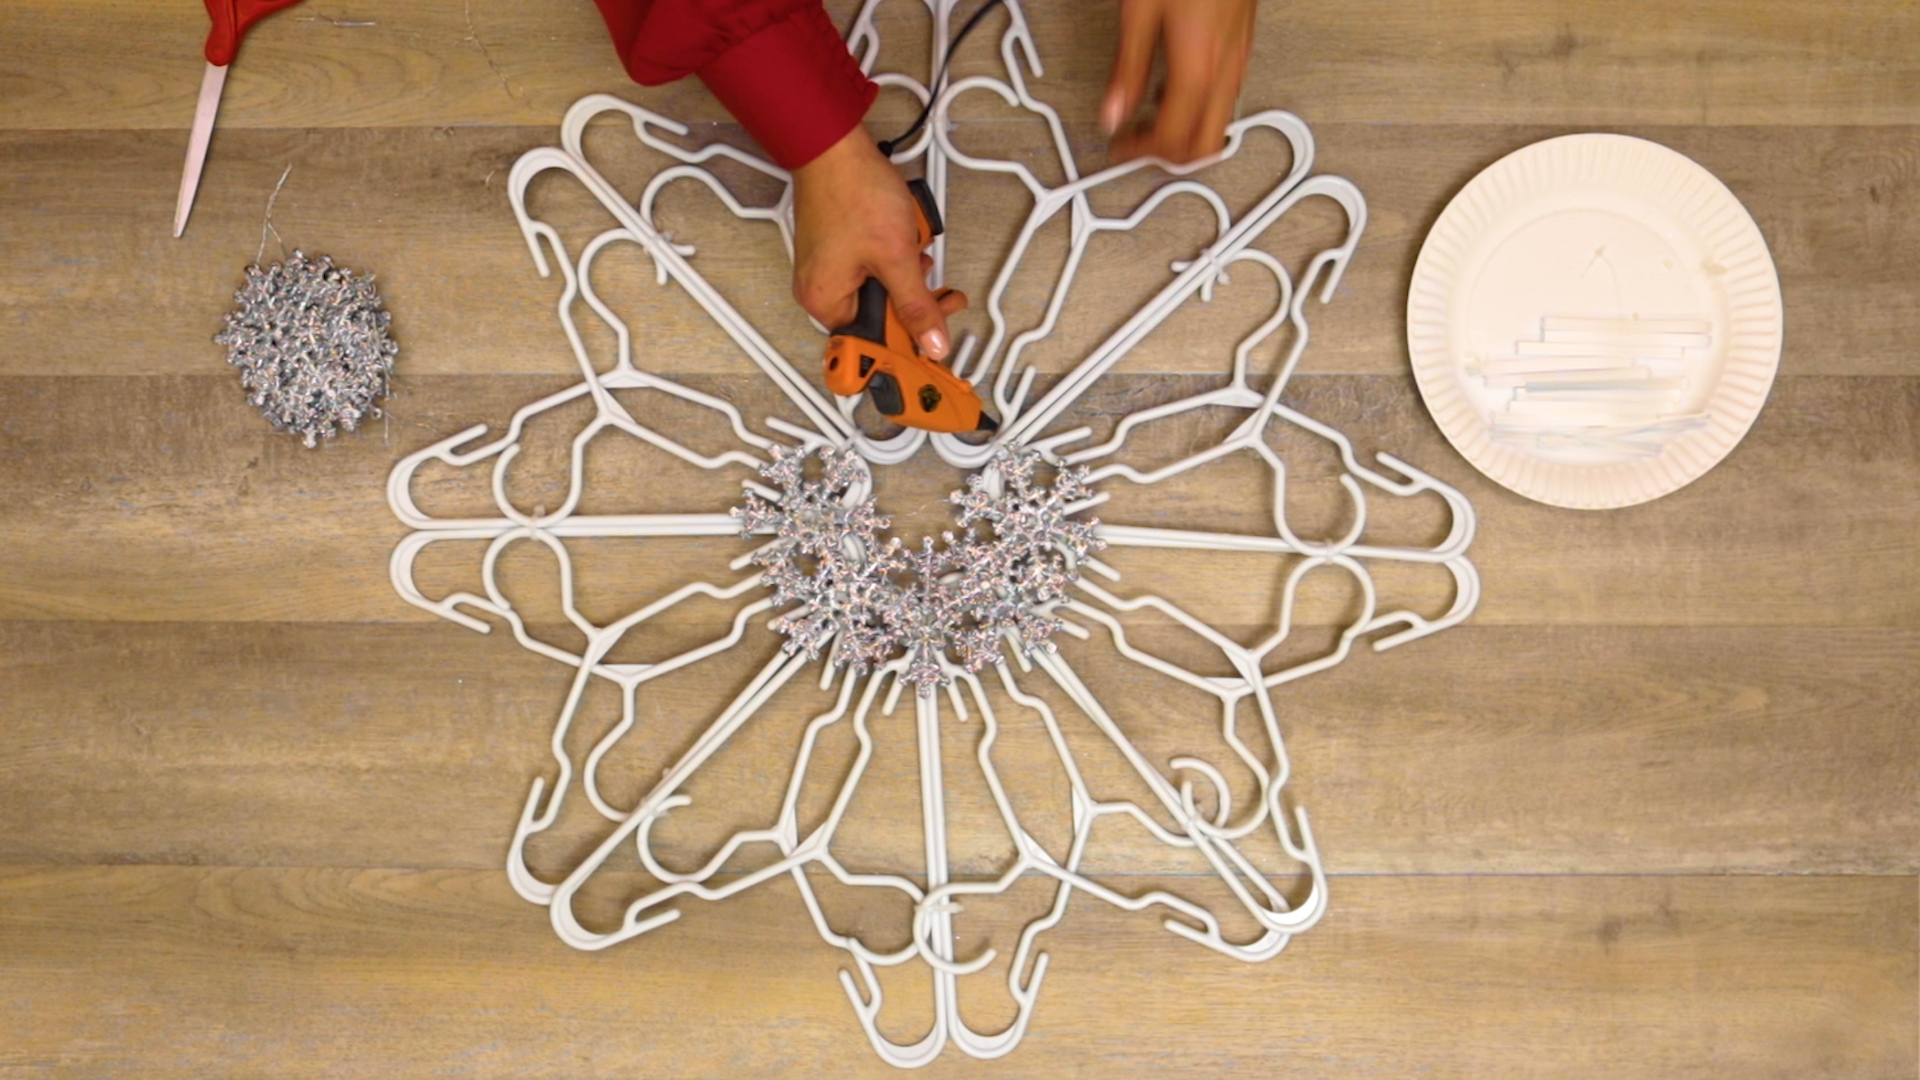
Step 7:
Now it’s time to decorate! If you want to, you can use the Rustoleum cream color spray paint to paint your hangers. If not, move forward with the decorating process. We found snowflake ornaments at the dollar store that came with silver snowflakes of varying sizes which we used to decorate the hanger snowflake, using hot glue to secure everything.

Step 8:
Hang your snowflake on your front door or someone inside your house using a command hook or another fastener.


Even if you’re not a fan of the cold weather, this is one snowflake you’re guaranteed to be happy about seeing every day. Be sure to share your festive creation with Decoist on Facebook, Instagram, or Pinterest too.


