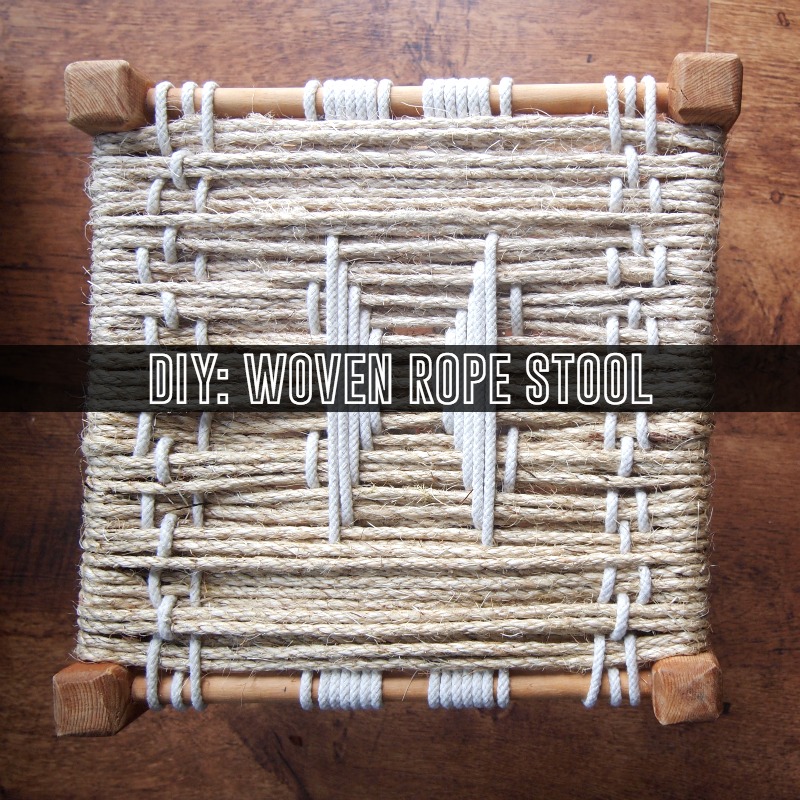
Every living room needs a little comfort, and one of the easiest ways to bring in a little cozy is to make sure you have a spot to put your feet up! That’s why today I’m bringing you a DIY woven footstool that is both stylish and full of texture – two elements that are also essential to any well decorated room!

Getting Started
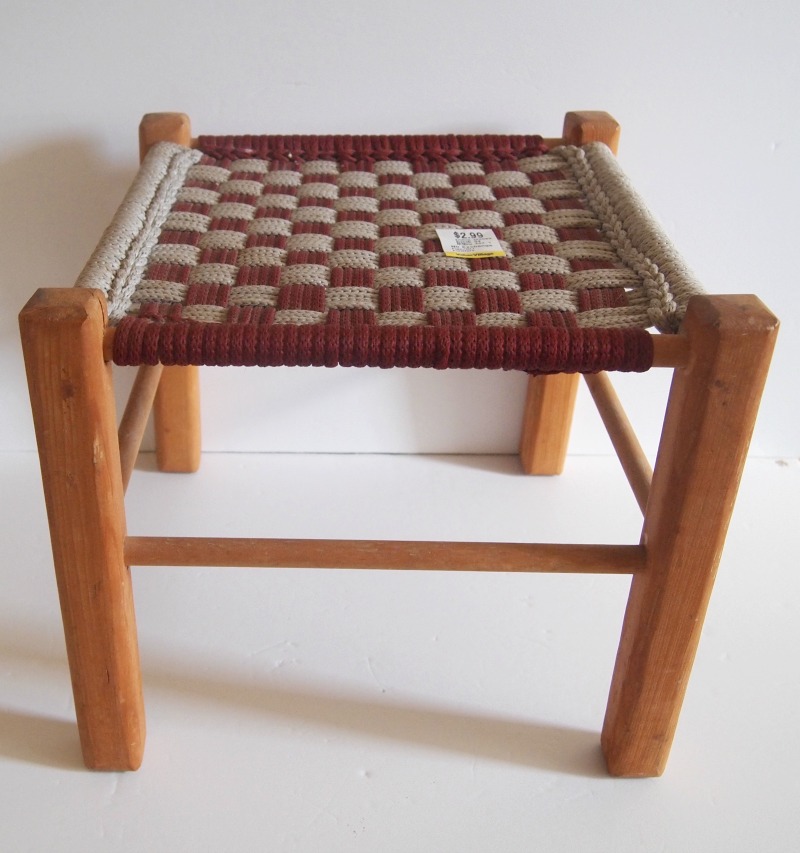
This particular stool is made from a thrift store find. I got this little $3 footstool, which was so far from cute! I instantly knew I could transform it into something special, though.

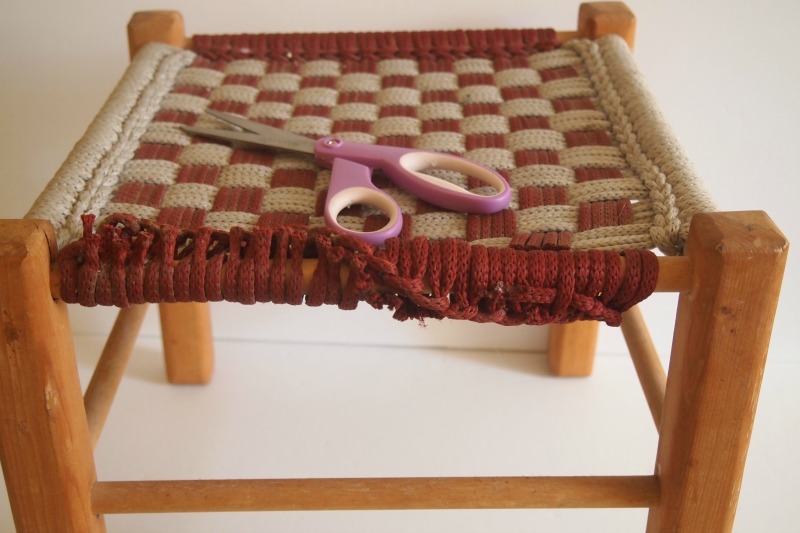
First, I removed the old, dirty rope. Seriously not a fun job, you guys, but it had to be done!

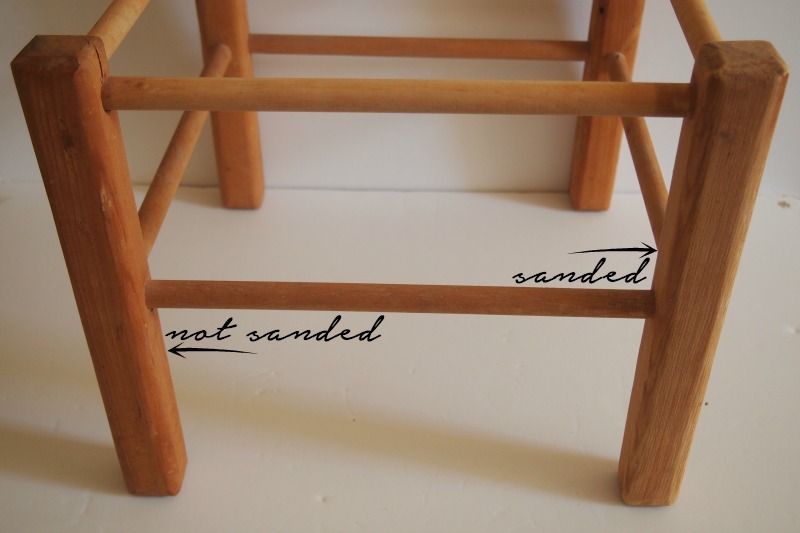
Now depending on what you work with, you may want to sand/stain/paint your stool frame. I chose to lightly sand mine for a more rustic look and to get some of the old stain off since it didn’t look so nice anymore and it was little too orange for my taste.

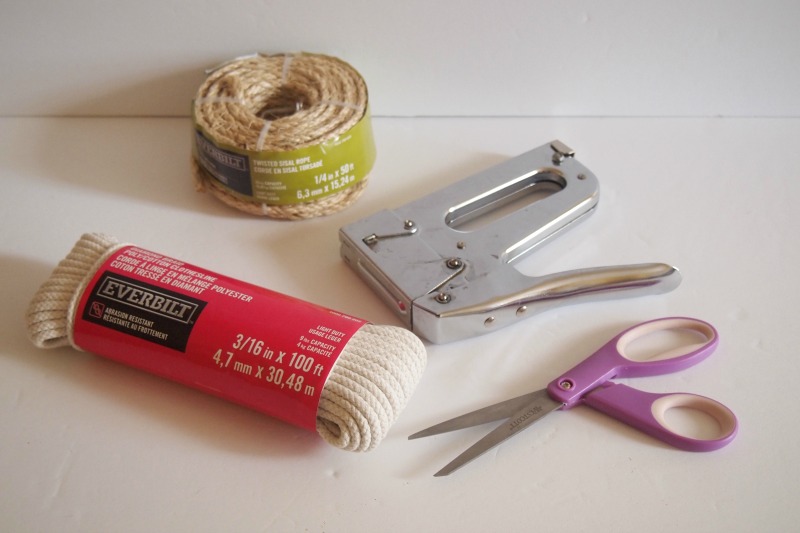
Now you can get started with your materials. Here’s everything you’ll need (plus the actual stool, of course!):

Let the Weaving Begin
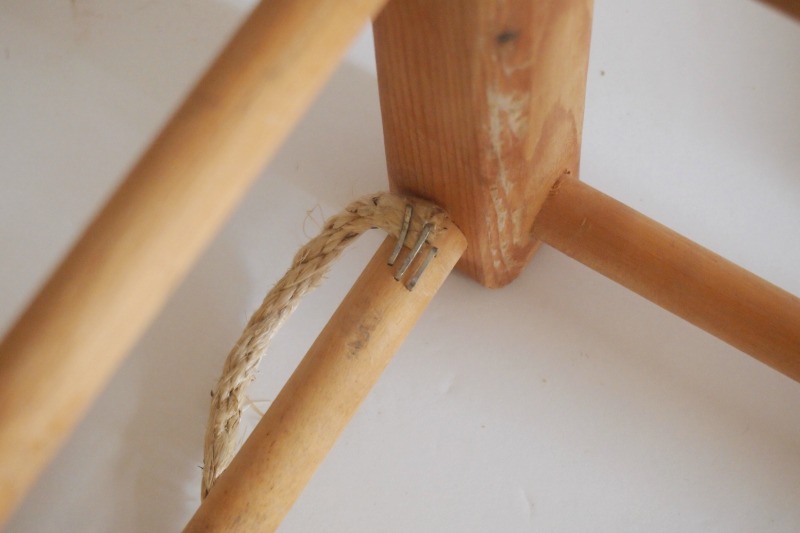
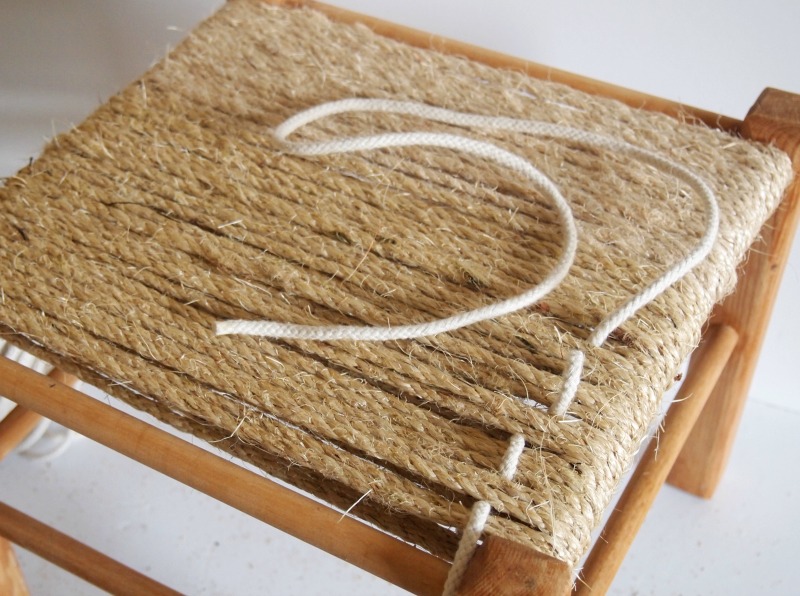
Ready to start stapling and weaving? Alright. Step one is to staple the end of your rope to the bottom of the stool like this:

Now start wrapping the rope around the top of the stool and pull tightly as you go. It’s important to keep the rope taught and close together as you wrap.

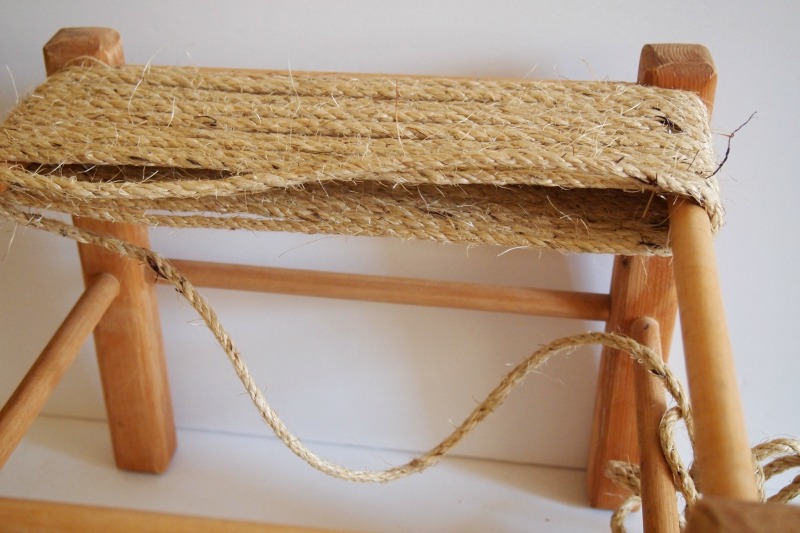
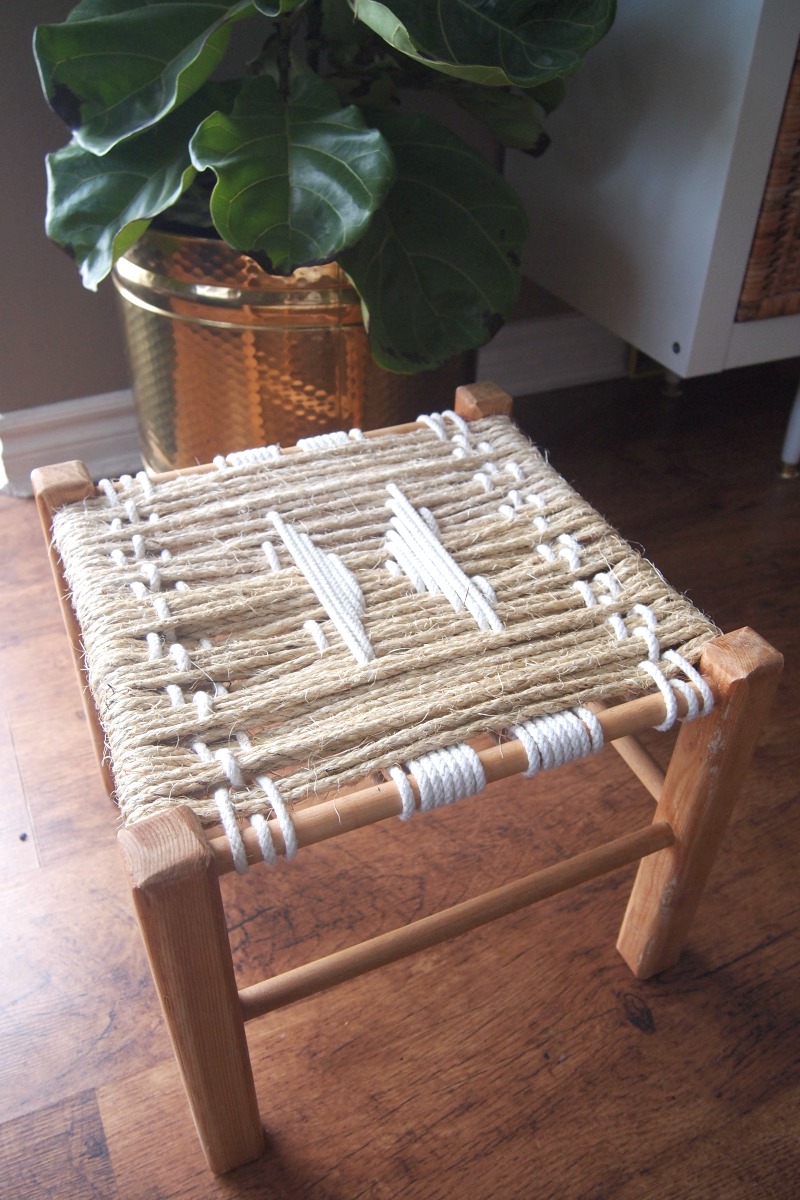
Once you get to the end, remember to staple again as you did in the beginning and check that the rope was tight all the way along. Now it’s almost time for the design!

The pattern for this stool is pretty simple and will completely depend on how many rows of rope you have. For the border pieces, just skip every 2-3 rows and weave top to bottom.

The middle part is where it gets slightly trickier. You’ll want to find the middle, then weave it so that the white is on top for about 12 rows (more or less depending on the size of your stool).

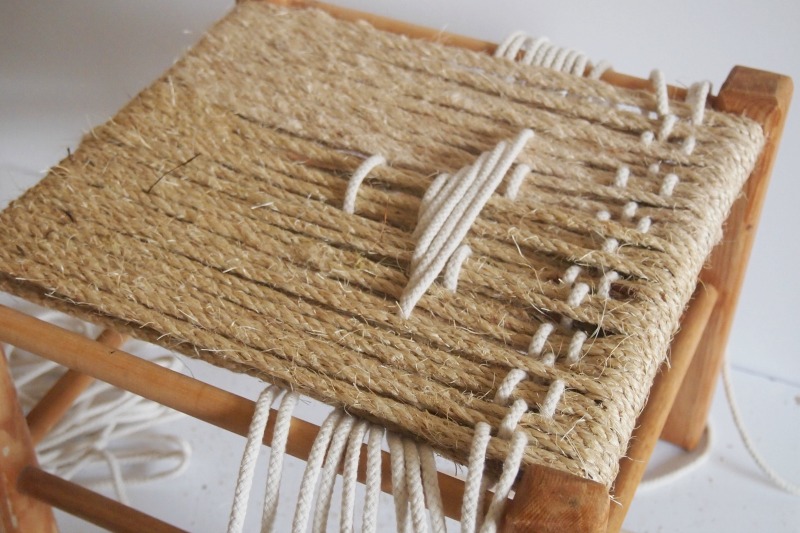
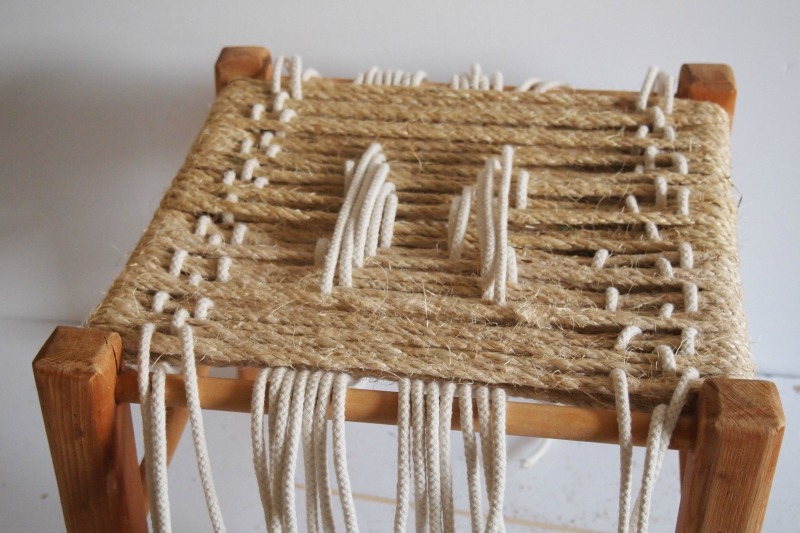
Decrease by 1-2 rows as you get closer to the center then add one more detail to the outside of the design (if you so choose).
Repeat everything on the other side.

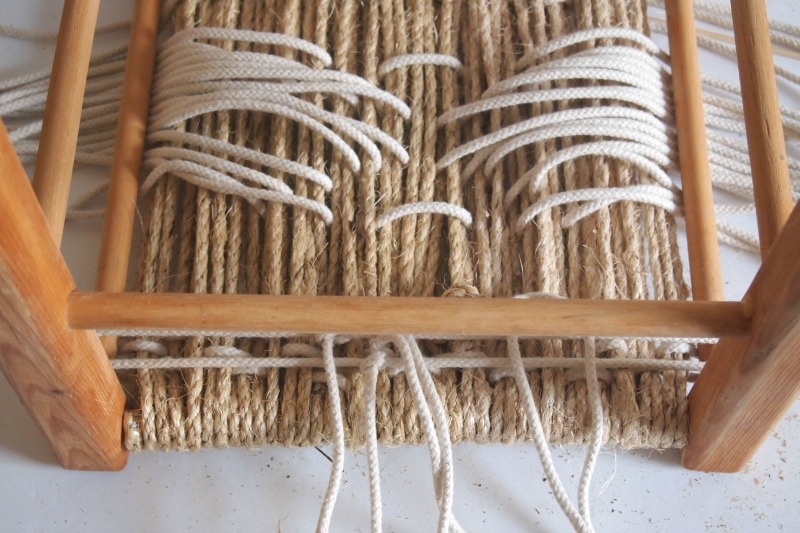
Now you can flip your stool over and tie all of the white rope tightly!

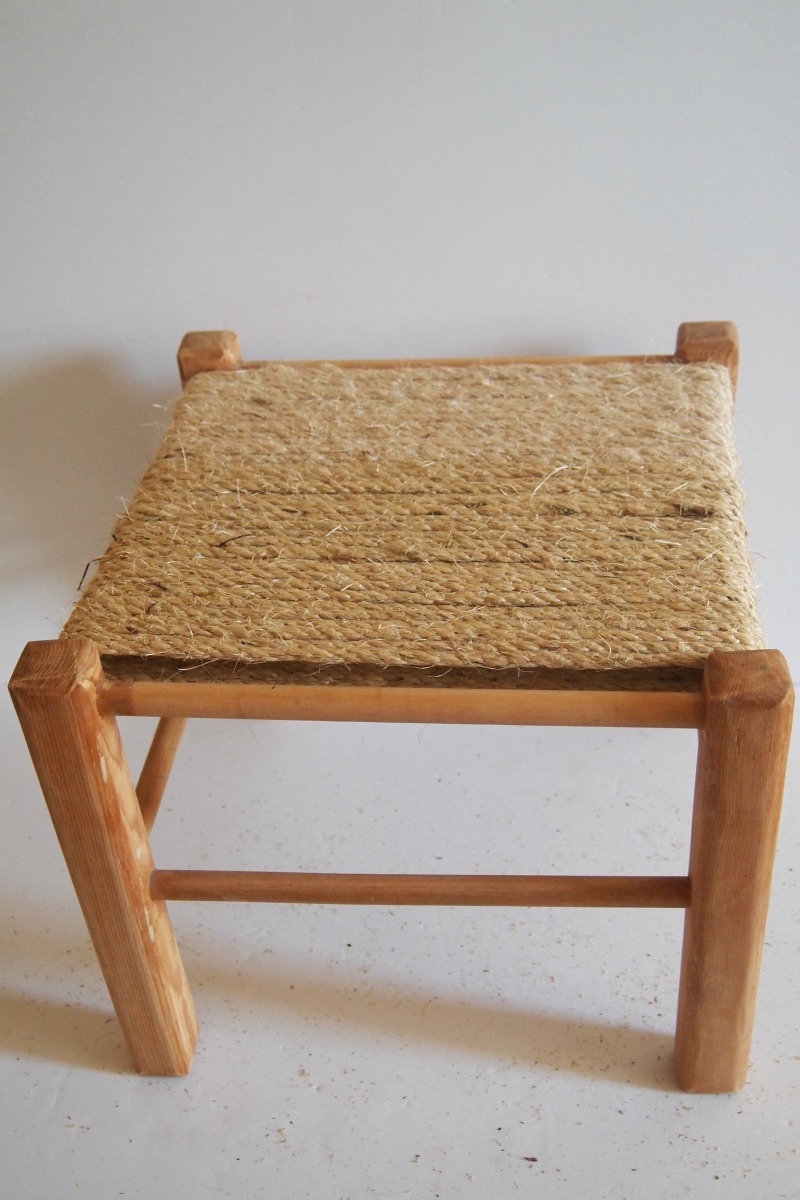
At this point you are completely finished and you can now flip your stool over and put up your feet!!

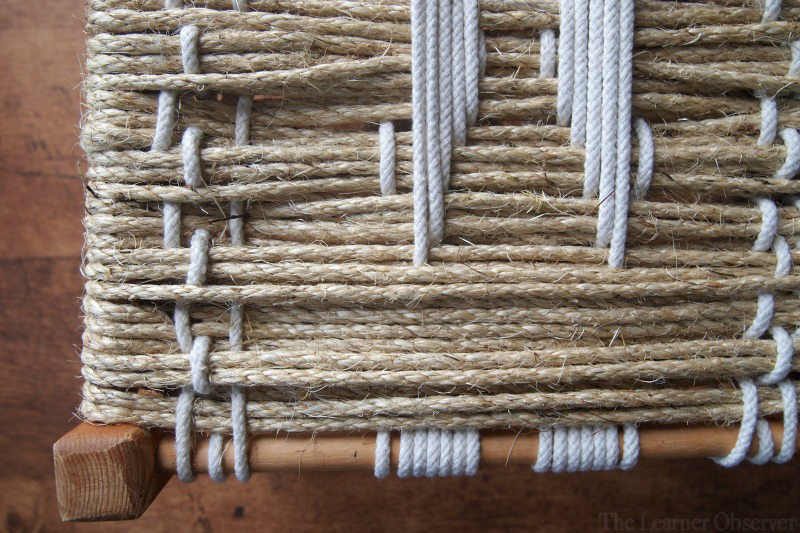
Here is a close-up of the design so you can see how I counted the rows a little better! You can also space the rows of white rope as closely or far apart as you wish. There’s no right or wrong here – you’re the designer!

Stool Styling Tips
And now you get to style your brand new textured woven stool as you wish! I happen to love it in a rustic modern living room, paired with whites and greys for a neutral look.

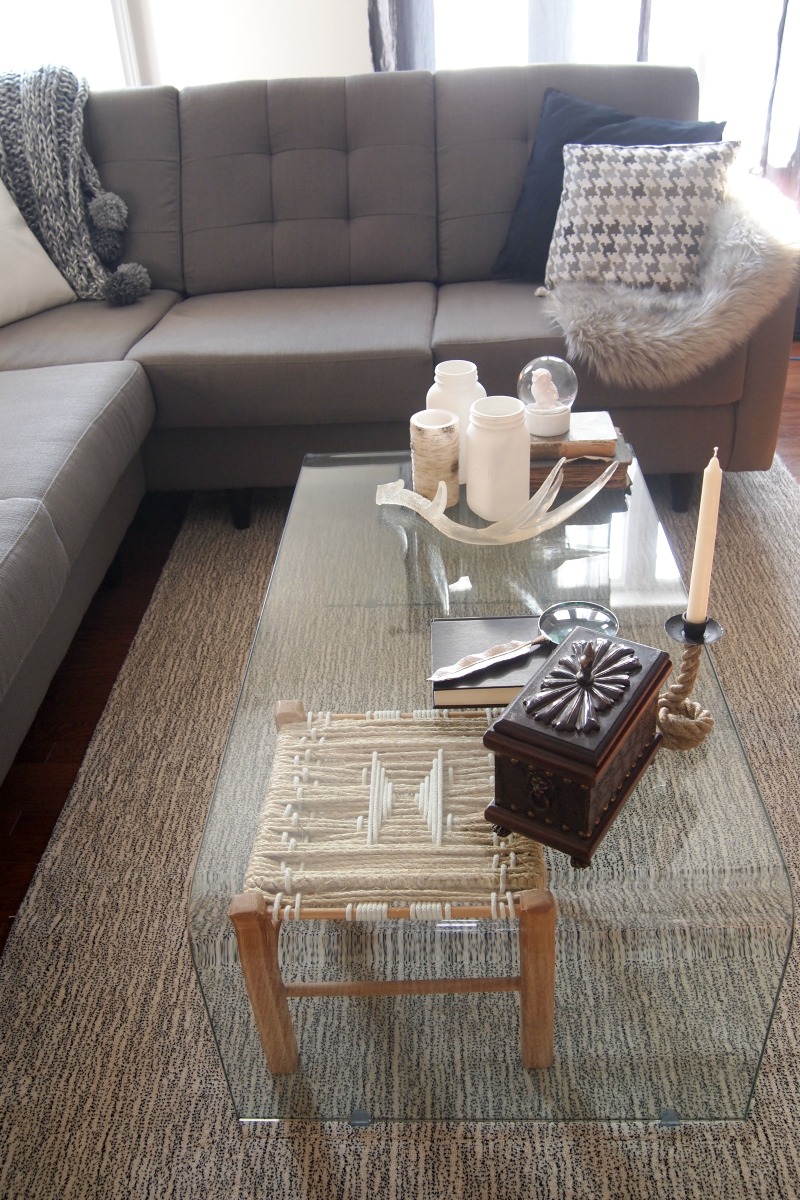
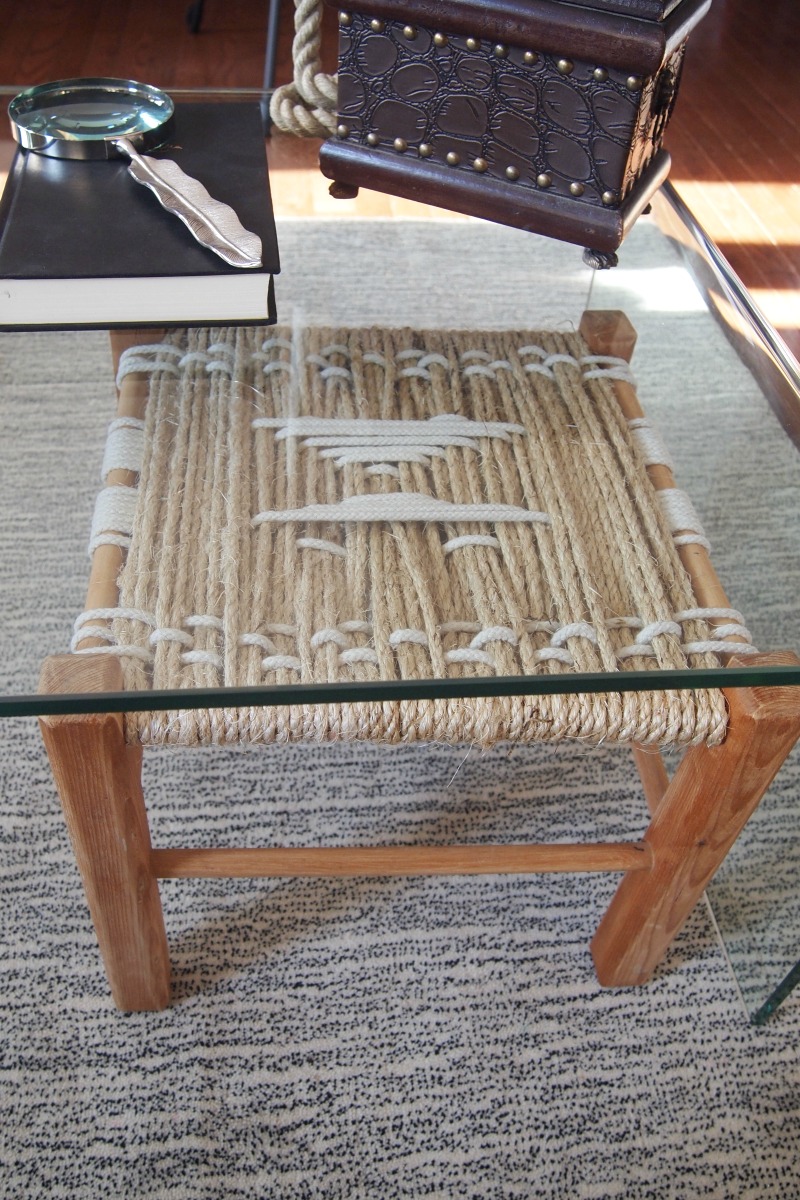
Do you love the contrast of smooth and rough textures with the coffee table and the stool? Pairing it with other rustic elements can bring the whole look together – a set of faux antlers, old books, and a rope candlestick! Here’s a closer look with a leather-wrapped box and a magnifying glass – a little old world charm with a rustic stool.

Would you try this kind of makeover on an old stool? Do you feel more confident trying something like this now? I can assure you, it’s worth the effort and the learning curve!


