In the spirit of making your own art (as has been seen already here on Decoist last week with those Picasso-inspired portraits), I thought I’d share one more way you can make some cool and personalized art for your home, or, you know, for a friend!
If you happen to have some art around your house you’re no longer particularly fond of, this is the perfect project for you. If you don’t, no big deal – there are always thrift shops or yard sales, or your parents’ basement! Here’s an idea to make art you DO love!


Let’s start at the beginning, shall we? Here’s what you need to make this happen:

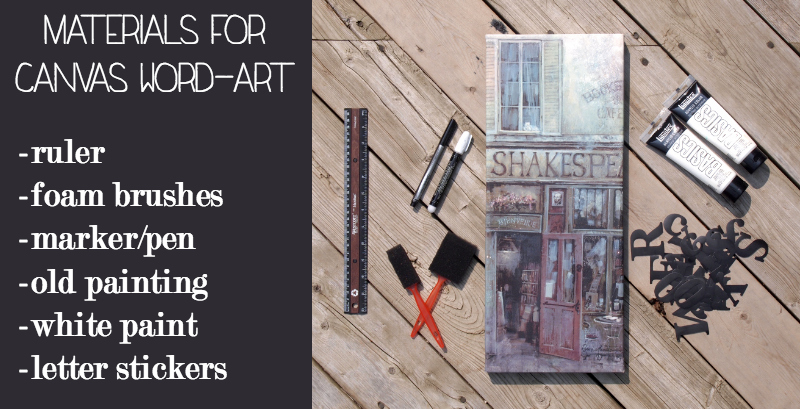
Style and Size
You don’t need too much paint (you’ll see just how much shortly), and just one foam brush is fine. I just wasn’t sure which size I’d use. As for the letter stickers, any craft store sells a huge variety of these in different sizes, so take your pick! I went for a very classic font and large letters that were 5 cm tall. Here’s where that measurement comes in handy:

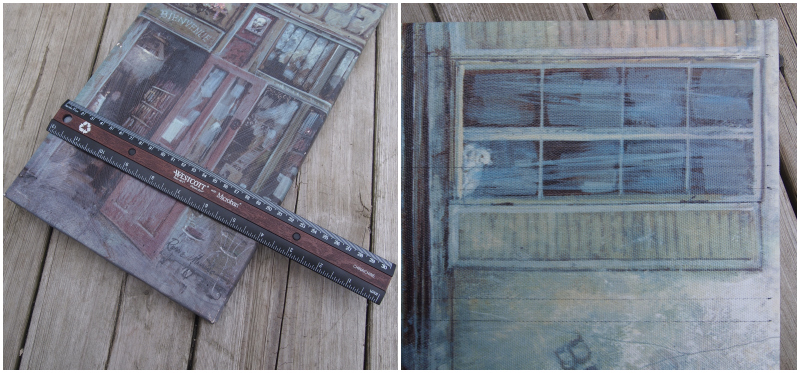
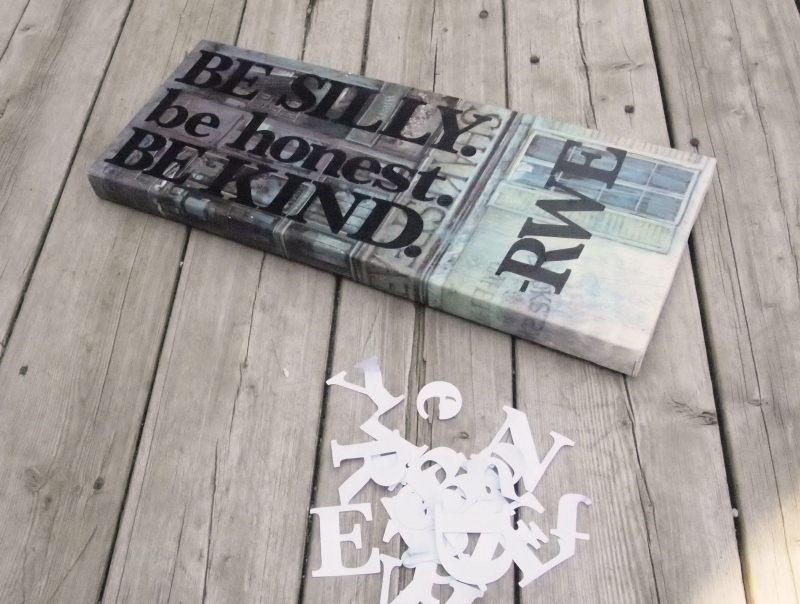
Measure your canvas, do a little math and figure out how you want the spacing to work. I measured the space between each line as well so it would all be very symmetrical. Don’t feel that you need to do this – sometimes asymmetry is best! Be sure to lay out your letters on the canvas before committing to sticking them down!

This step will give you an idea of how much space you’re going to use. I guess I should also mention this: pick a quote, saying, name, date… the possibilities are basically endless! Now you’re ready to stick!

The Sticking Point
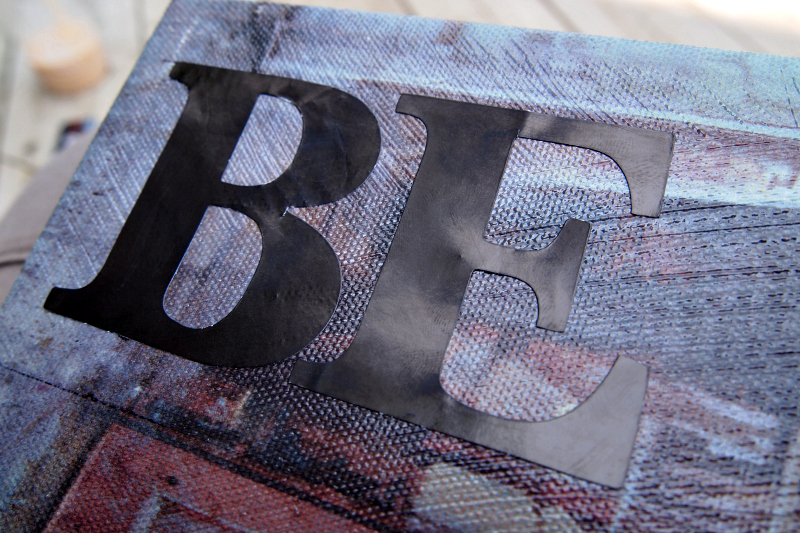
At this point, depending on the type of canvas you have and the stickers, you should be able to move the letters around a bit. Make sure to step back and look at your work from a distance from time to time to make sure things are lining up.

Also, don’t worry about the lines that are drawn on the canvas because you won’t be able to see them once this is over. Just make sure that whatever pen or marker you use isn’t too thick. At this point, you just need to make sure there are no bubbles in the stickers and the edges are secured.

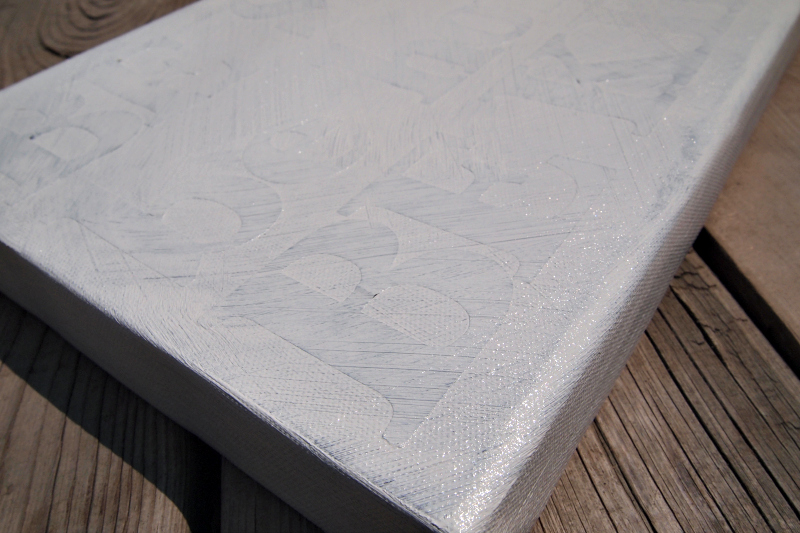
Now you’re ready for the fun part! Paint! You don’t need much. I used two squirts and that was enough to spread all over the canvas, including the sides.


Using your foam brush, put on a fairly thick and textured coat. The canvas I used already had a slight texture, so the paint I used added to that effect for an authentic canvas-y look.

Cut & Craft
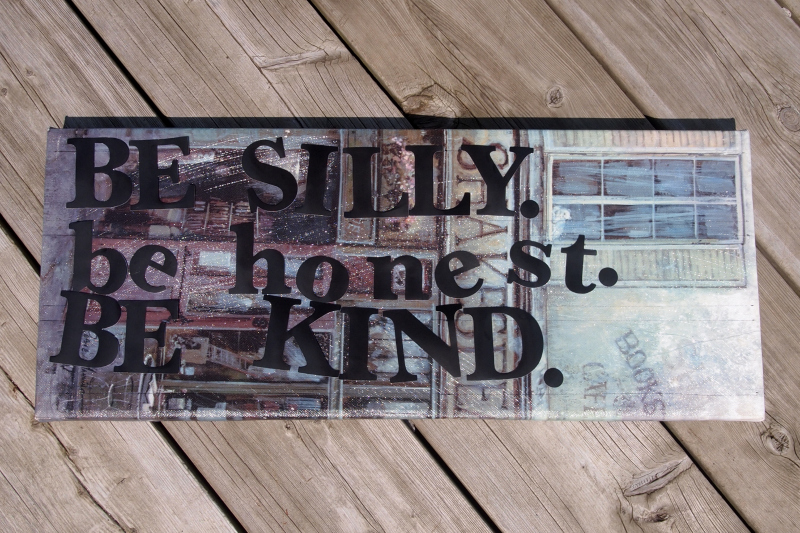
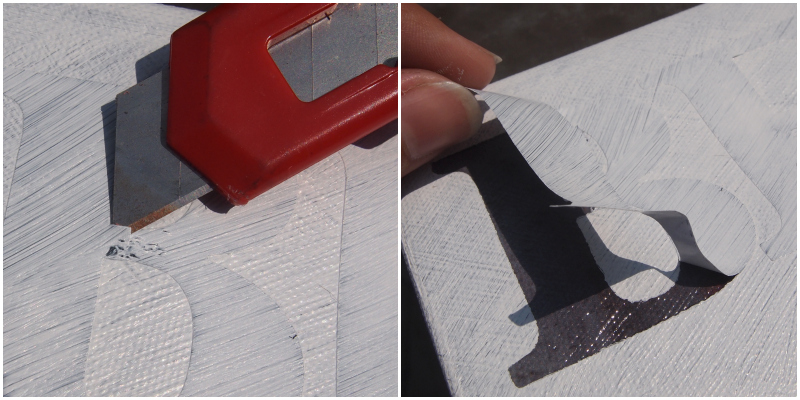
Let your canvas completely dry. Don’t worry if you can still see the painting underneath your white paint. This is all part of the look and remember, it doesn’t have to be perfect! Next, you can remove the stickers. Do so carefully, using a sharp knife to pull them up.

Dare I say it? After this, you’re done! That’s it! No more work! Just stand back and admire your work.

Here is a close-up, so you can see how the texture works, and that the lines are sharp, but not perfectly so. From afar, however, you can’t tell.

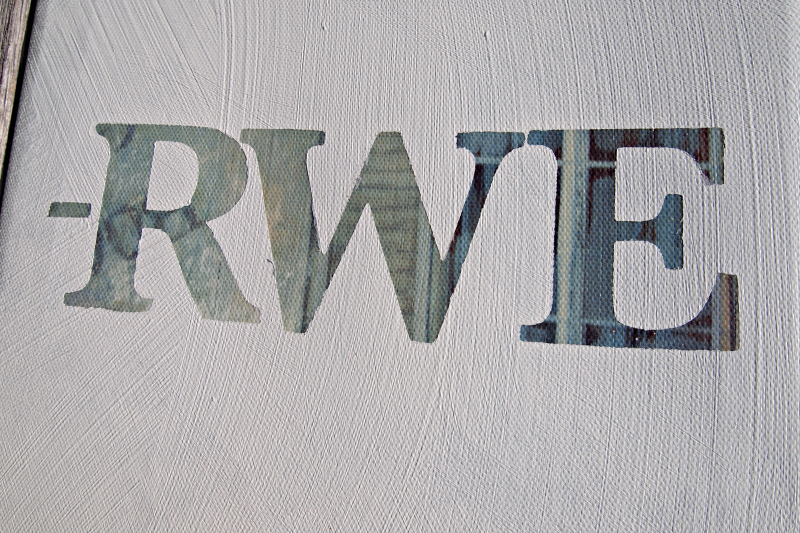
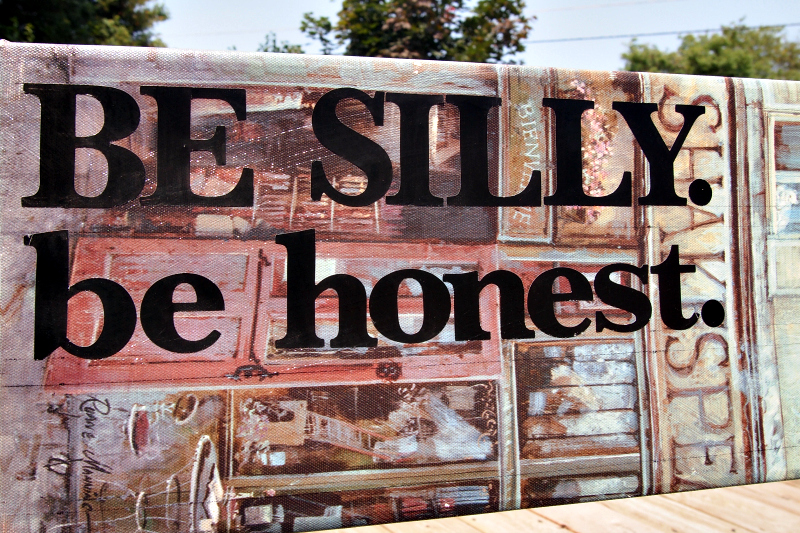
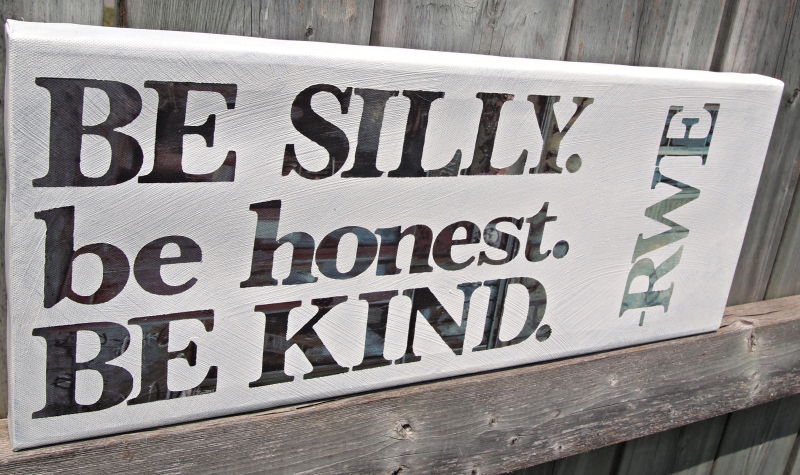
The quote I chose, by the way, is by Ralph Waldo Emerson, which is why the initials RWE are on the side of the canvas. I figured having the author’s initials was important, because you want to give credit where it’s due, right?
Here’s a full visual tutorial and flashback of the process for you:


So what special words would you put on a canvas? Or perhaps you have a date you’d like to remember? Whatever it is, grab a few stickers and some paint and get to work! You won’t regret having a little personalized artwork around you.


