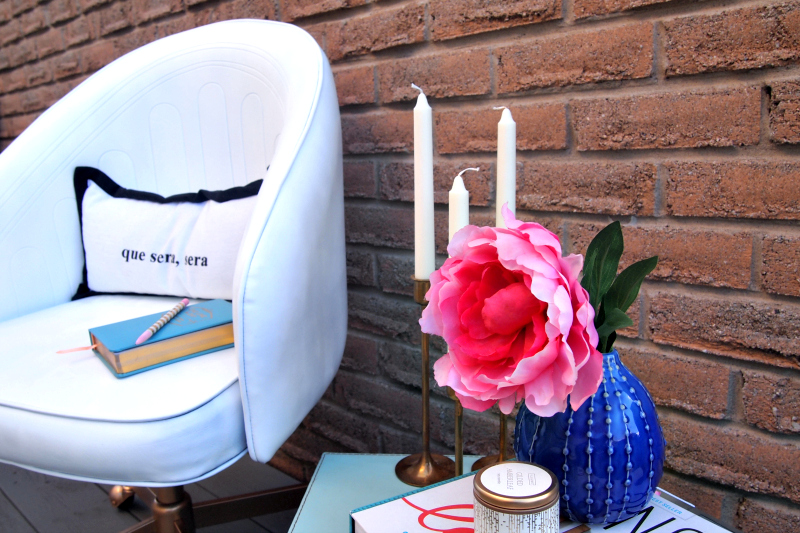
It’s that time of year when the back to school frenzy is coming to an end, students are settling, and you might actually be able to pretty up your office ‘just because,’ as opposed to ‘because you have to’! The office chair happens to be a sometimes overlooked member of the office family, because it goes behind the scene stealer: the desk. I think we need to bring the spotlight back to the chair!
Now let me ask you a question. Did you know you can paint leather? I know, I know… It sounds crazy! It’s true, though. And I did it, so there’s your proof right there!

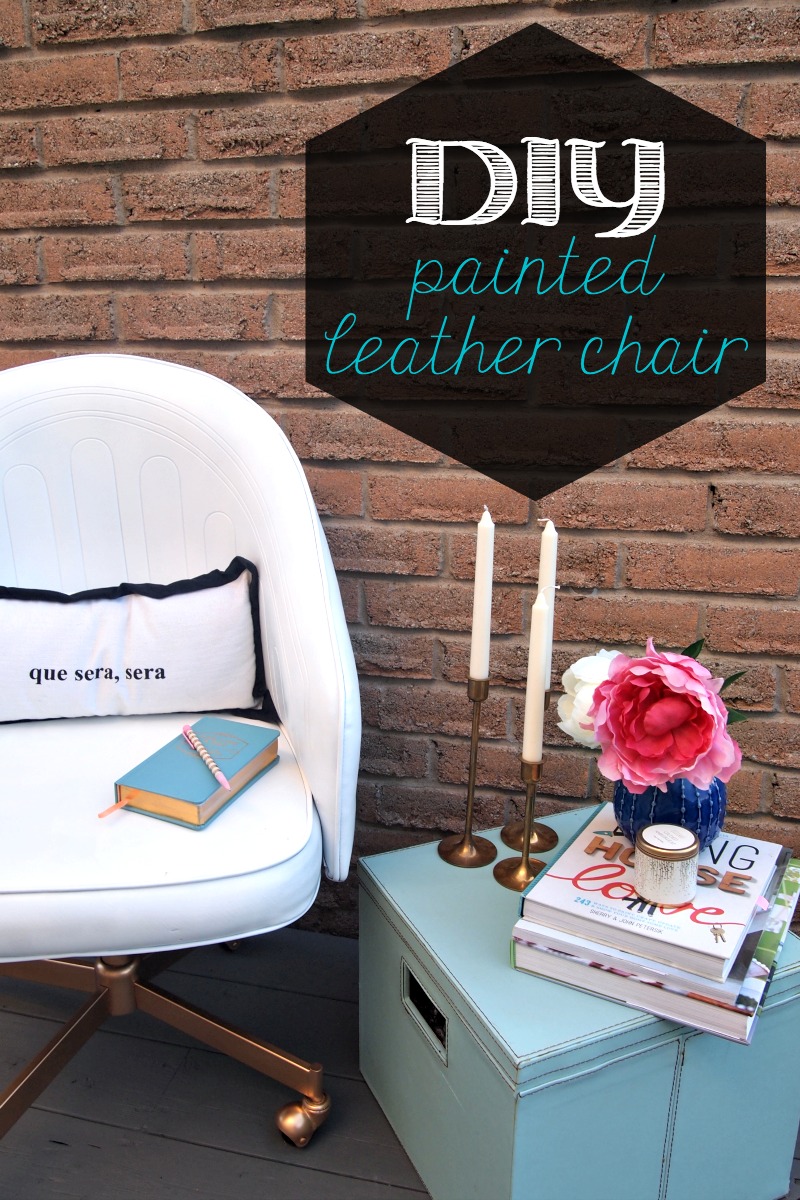
A New Lease Of Life!
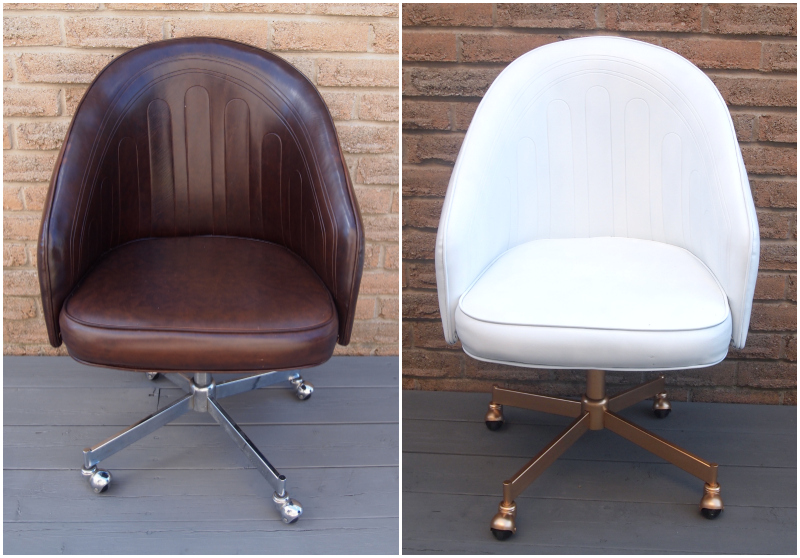
This whole project was surprisingly easy considering it only took a few cans of paint, some tape and a screwdriver! You’ll need to start with a chair, of course. This one was a thrifted find, and it had an unfortunate patchy brown leather all over it, not to mention the rusty base! You can do this with any leather or vinyl chair, though, so if you happen to already have one, or even find a brand new one at a great price you’d like to makeover, this is your chance!
Here is the chair I was lucky enough to find!

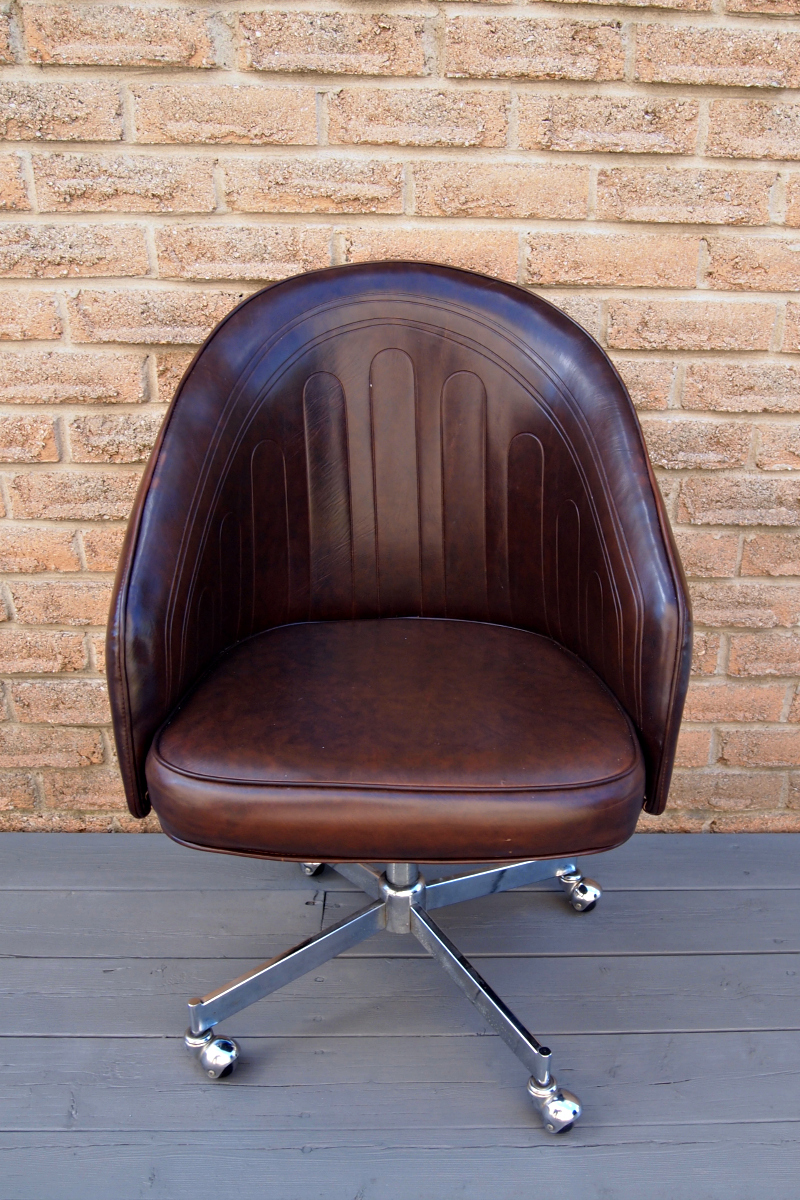
The shape of the chair, though, is so perfect and the embossed leather was irresistible. It’s a classic mod design that I just couldn’t leave at the store, you know?
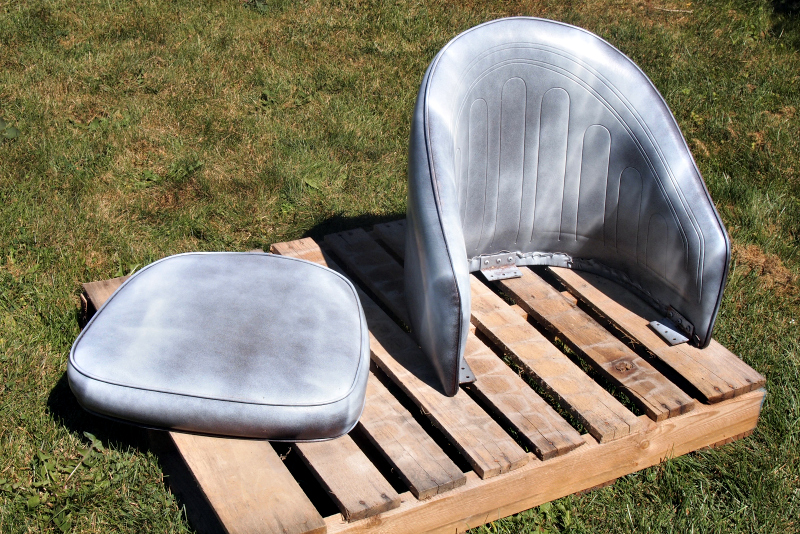
I took the chair apart and got started. This one was simple – a few screws in the back and along the base.
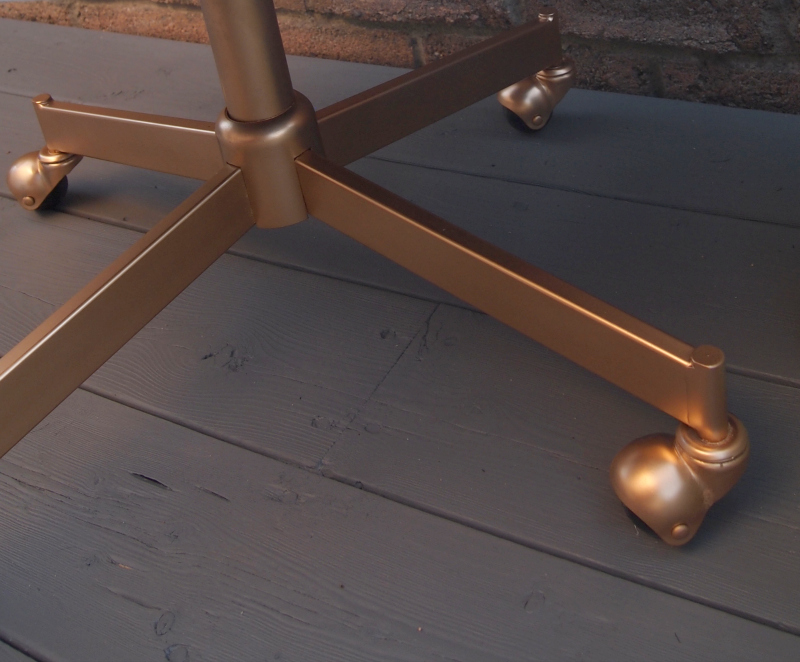
For the base, I used gold spray paint. Almost all spray paints meant for the outdoors will have some sort of rust-proofing on them, so it’s perfect for a rusty base like this! I taped the wheels first, so that they would remain black, and then I got to work!


The rest of the chair was also taken apart, and I applied about 3 coats of leather/vinyl paint to it. You can find this stuff anywhere auto paint is sold, and the paint really works! It also really stinks, so proper ventilation is a must! Here is coat #1:

Simple and Stylish Makeover
Not too impressive, but after a few more, and you get a lovely new chair! Before bringing the chair indoors, let the paint dry for a few hours because the smell of the paint will linger for hours otherwise!

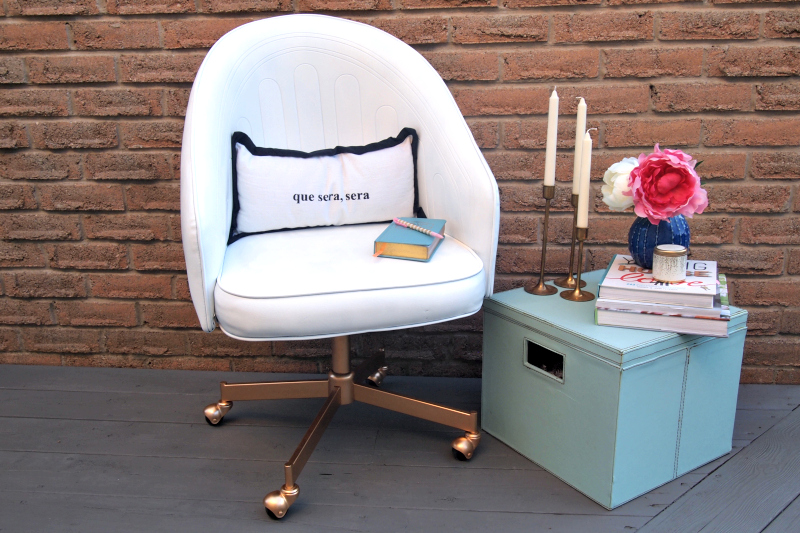
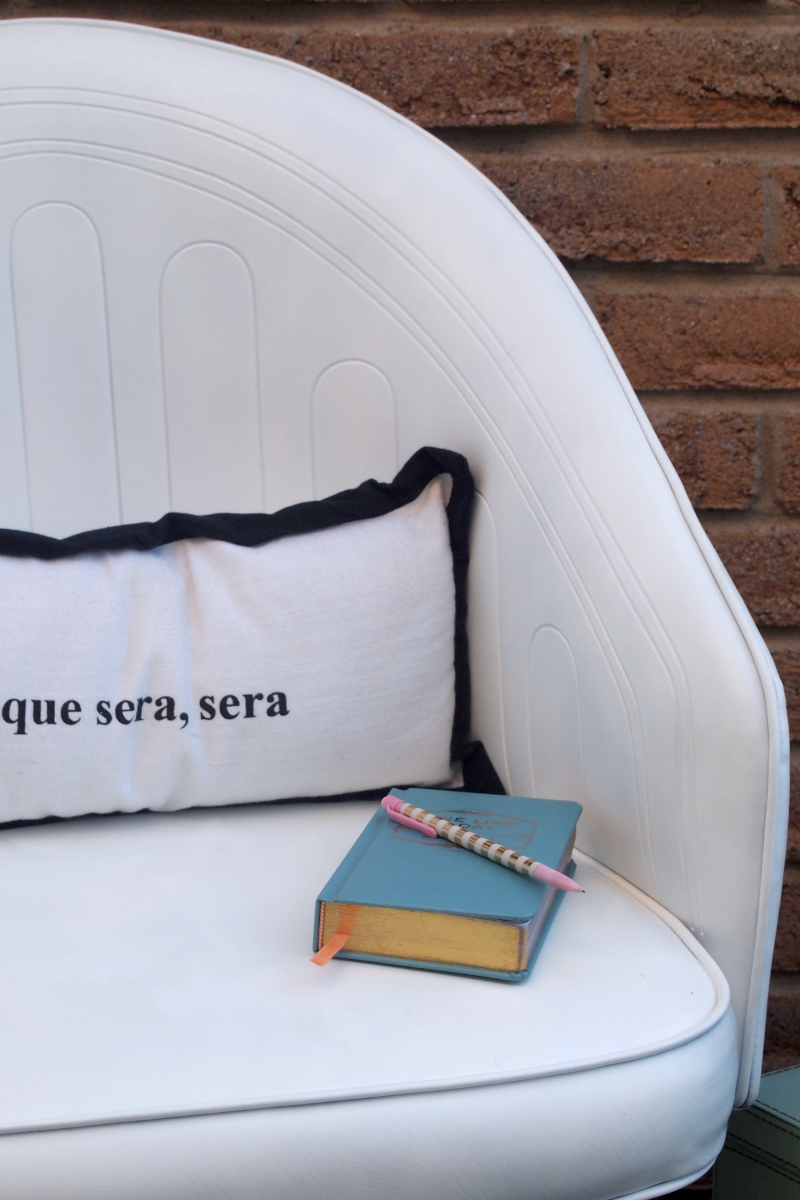
Not too bad, right? It looks brand new, and like it just came out of a catalog. The leather is smooth and the paint feels really natural on it, even bending with the chair when someone sits on it. You can start using the chair within a couple days of painting, and it’s safe to touch within about 15 minutes, which is quite impressive!

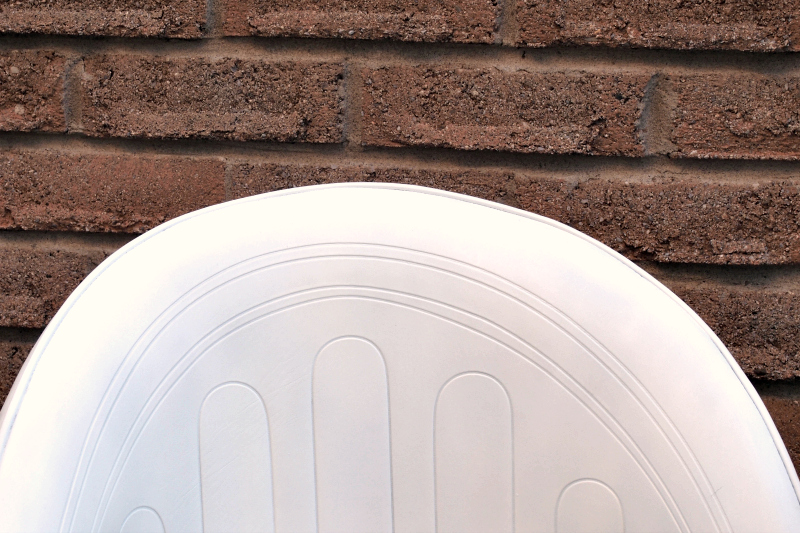
The embossed areas were filled in really well. This is thanks to applying many light coats of paint so that none of it dripped or got too thick!

The before and after is probably my favorite part, because the transformation is pretty great! That gold is lovely and not too flashy, which I love!

Here’s a closeup of the gold so you can see what I mean. It’s almost matte, unlike the previous chrome-plated coating on it.

It’s almost a shame this chair will be tucked behind a desk! I just might have to pull it out in case we ever need any extra seating around the house – this chair is too fabulous to be hidden!

Have you ever attempted to paint leather before? Would you consider taking the plunge and trying something this daring? Take it from me – you won’t regret it!


![Backyard Landscaping Trends [10 Inspiring Ideas!]](https://cdn.decoist.com/wp-content/uploads/2021/04/Fire-Pit-in-Backyard-28968-270x180.jpg)