Candy never tastes so good as when you can pay for it with a mere stack of pennies. Which is why dollar menus taste so delicious. They’re comprised and based on the one hundred penny statute. Whatever delectable entrees or snacks you are purchasing, it is a patriotic privilege to use this copper currency as we pay homage and tribute to our beloved sixteenth president. Flipping the coin in the air hoping it will land in our palm heads up as we call out for this side we include this one cent in many facets of our lives. So why not our homes, too?
Why not take our spare change and salute the past president of the United States with unique copper penny flooring? It’s a great hands-on project, relatively affordable, beautifully eclectic and did I mention warmly inviting and invigorating with its copper hue?


Get a good’s night sleep, because working with pennies has never been so labor intensive!
Step 1: Clear the runway…our guest of honor, copper, is here to stay. Remove base molding through the entire perimeter of the room. Once all is evacuated measure the room mass to determine the quantity of materials needed.
Step 2: Even out the floor. Sand down irregularities and bumps. Fill in the valleys with masonry materials like hydraulic cement. If you have wood based flooring then you’ll want to deal with a joint compound. Either way say goodbye to a tidal wave of unevenness.
Step 3: Clean the runway. Grease? Oil? Dirt? Dust? Banish them away with a mild degreaser detergent, followed by a thorough and detailed rinsing. Let dry. But don’t take a breather. Nope. I warned you this would labor intensive. Start sorting your pennies. Shiny. Dull. A mixture of them, whatever suits your fancy.
Step 4: Not only does this project keep the memory of a historic patriarch alive, it will reinforce the fond sticky memories of childhood. For next you’ll cut squares of self-sticking fiberglass, all to the exact same measurements. Keep them as standard tiles measurements: 6”x6” or 12”x12”. Taking the measurements you made earlier you can figure the total amount of squares needed and if any need corners cut or halved.
Step 5: Sticky side face up, start placing the pennies on your fiberglass squares. Row by row, lined up against the edge, the round ridges touching their fellow Lincoln heads. Keep applying the copper circles on your fiberglass squares until filled up.
Step 6: Using a chalk snap line measure both the length and width of the room snapping your chalk line to form a checkered grid pattern for your cut squares, in sizes either 6”x6” or 12”x12”, in accordance with what you have cut your fiberglass to.
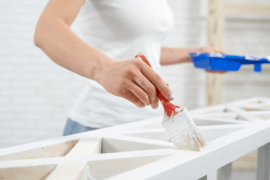
Step 7: Starting in the back of the room apply an epoxy-based clear adhesive with a paintbrush to the inside area of your chalk lined square. Place your copper penny tile in place and firmly press down in the center, apply pressure in all four corners to guarantee maximum adhesive. Moving to the left and right and outward continue to paint a thin layer of your epoxy and firmly placing your tiles down. Allow up to six hours of drying.
Now dear worker bee, now you may take a break and allow your eyelids to droop as visions of copper sugar plums dance in your head as Lincoln joins the stormy brigades of inequality.
Step 8: All right, sleepyhead. You can now mix your grout and water in a bucket and spread over the penny tiles with smooth even strokes using a rubber grout float. More is less as you can wipe away any access, which will better enable you to fill in all crevices.
Step 9: 72 hours later…. Now that the grout is set we focus on the finishing touch: The glaze that will polish ol’ Abe’s head in gleeful precision. Mixing a clear two-part epoxy sealer with UV blocker to prevent yellowing-carefully following the package instructions- pour a coating over your tiles and grout. Spread this concoction consistently.


Another 72 hours later, 24 cups of coffee and an entire season of LOST and all those hard earned pennies will look pretty electrifying as your floor. Next time you are offered a penny for your thoughts, pull out your smartphone and proudly share your DIY copper penny floor picture. Be sure to enlarge and zoom in, even going so far as to let them hold the phone in the palm of their hand. Yes, your labor and your thoughts are undeniably worth more than a single penny.
(Images from AlpenTile)