Watch how to build your own hexagon box shelves and read below for the supply list and pro-tips.
Supply List:
- Six wood pieces: 8″ x 5.5″
- One wood piece: 14.5″ x 5.5″
- One wood board: 4ft or longer
- Sandpaper: this pack from 3M comes with both the 60 and 120 grit you’ll need
- Painter’s tape
- Wood/carpenter’s glue
- Wood filler: the color-changing version from Elmer’s shows you which spaces were missed
- Wood stain: we used the Carbon Gray Varathane Stain
- Clear coat spray finish: we used Tremclad Clear Satin Rust Paint but Krylon Rust Protector is a great alternative
- 1″ brad nails
Tool List:
- Brad nailer
- Circular saw
- Palm or hand sander
- Hammer
- Measuring tape
- Putty knife
- Foam stain brush
- Pencil
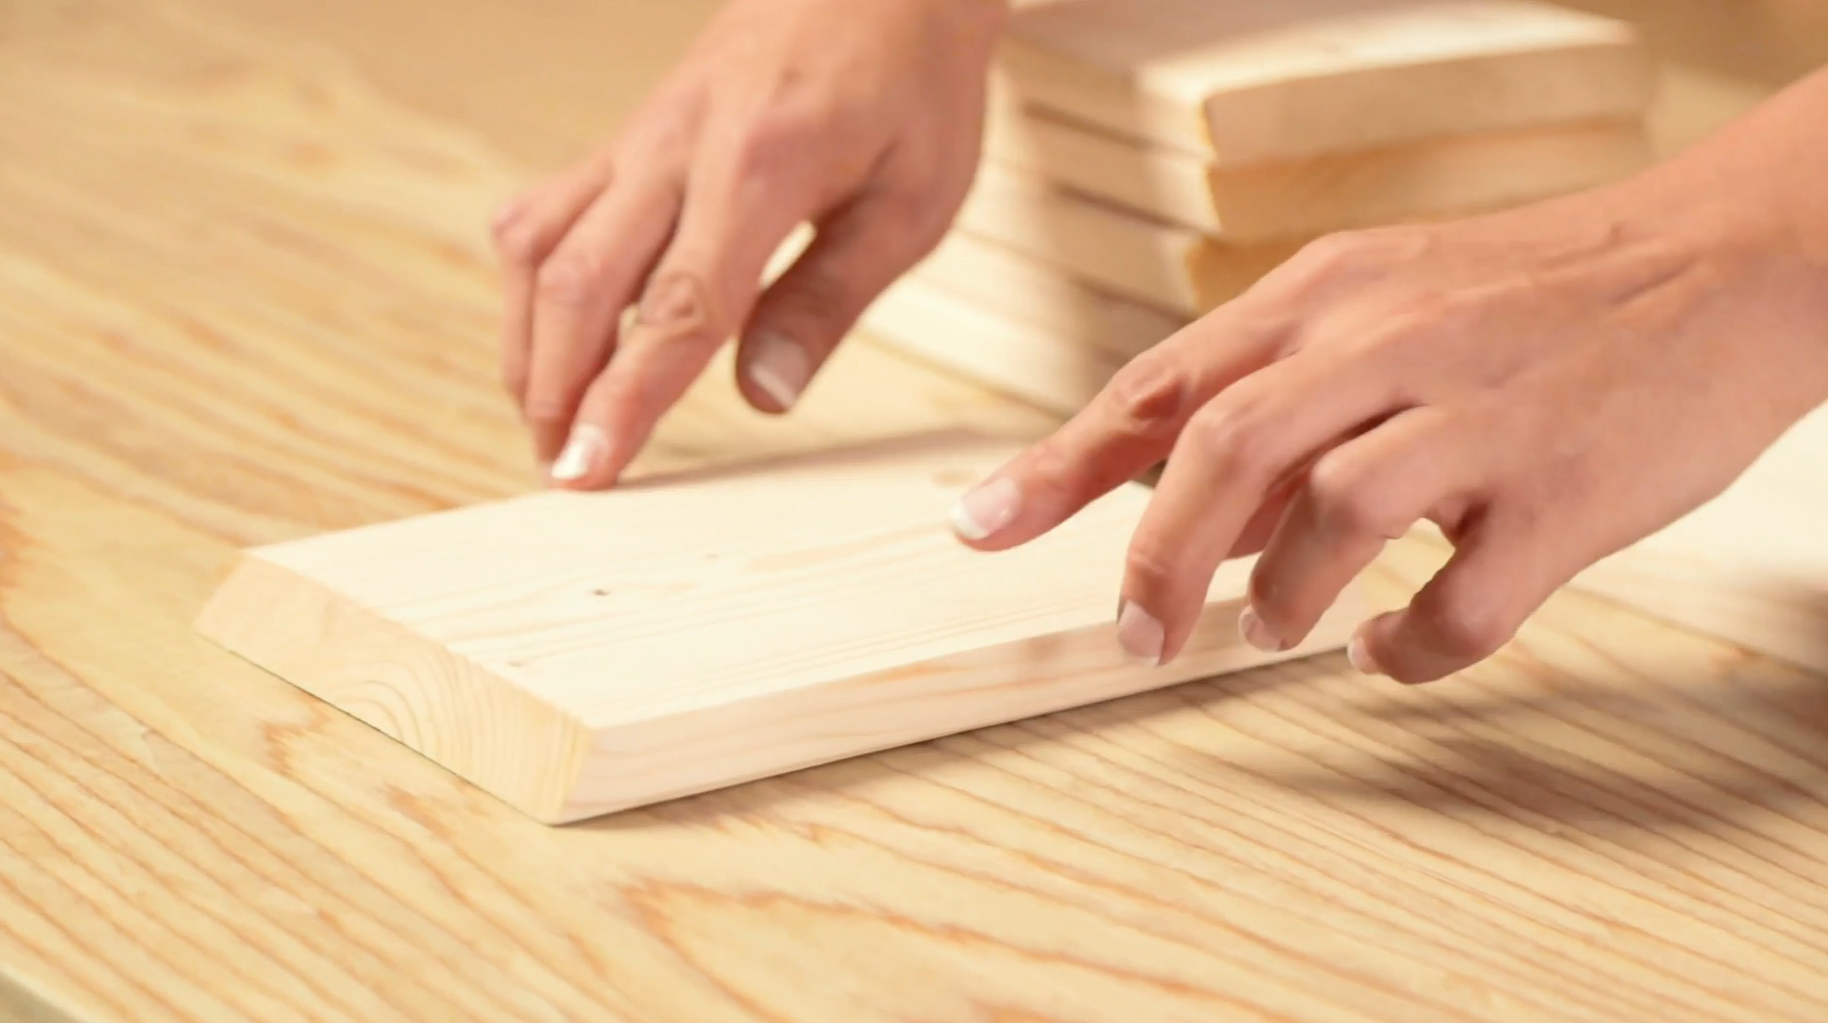
Step #1:
Begin by cutting the angles on your wood pieces using a circular saw. Try to avoid warped wood and pieces with curves or holes. You want all seven pieces should have 30° cuts.

Step #2:
Using a 4ft board or anything sturdy, place all six 8″ pieces belly-down in a straight line. That means the shorter sides should be face-down. Once all the pieces are lined up, use long pieces of your painter’s tape to connect them all. When all the wood pieces are taped together, pull the board toward you then flip forward—now, when you take away the board, the pieces should all be belly-up.
Step #3:
Spread your wood glue evenly on the 30° cuts using a zig-zag movement.
Pro Tip: Use your finger to spread a tiny bit of wood glue on the edges of the wood beforehand. This will help seal the edges and make it easier for the overall glue to stick.
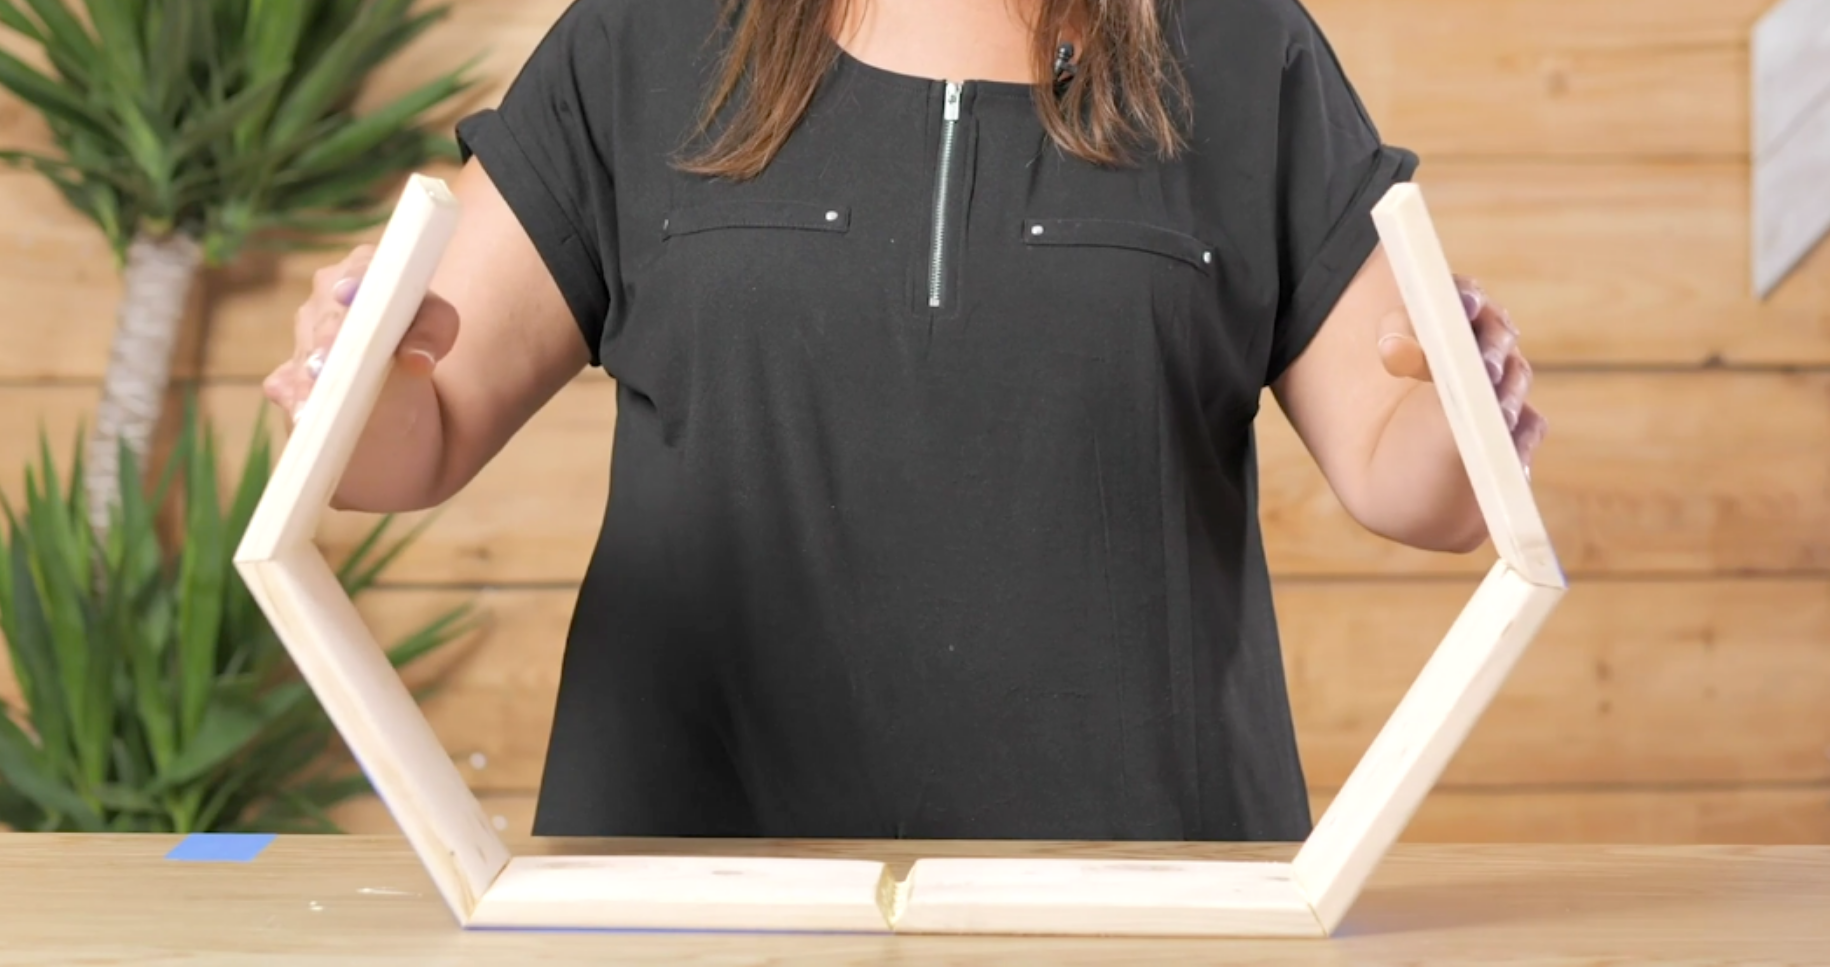
Step #4:
Now for the fun part. Set aside a long piece of painter’s tape (you’ll need it in a second when your hands are full). Firmly grip the end pieces and fold them until they meet at the top. Then flip the hexagon on its side and secure it with the long piece of painter’s tape. Wrap your entire hexagon 2-3 more times with tape and set it aside to dry.

Step #5:
Once the glue is dried, unwrap the tape and use 1″ brad nails to secure each angle on the shelf. You’ll want to use 2-3 brad nails per side. Then fill any gaps using your wood filler and a putty knife. Sand off any dried glue and wood filler then wipe down the entire hexagon with a damp cloth. Finally, spray a clear coat sealer on the entire hexagon.
Step #6:
If you love a natural wood look, then you can skip right to step #7 to insert the middle shelf. If not, then first you’ll have to stain the wood. Mix your chosen stain well—we used the Carbon Gray Verathane Stain—then, using a foam brush, go with the grain and brush back and forth. Make sure to catch any drips along the side. Let the stain dry overnight then apply a final clear coat to finish.
Pro Tip: Let the stain sit for a few minutes then use a clean rag to wipe it off—if you want to go a shade darker wait for the first coat to dry completely.
Step #7:
Insert your middle shelf. Lay the hexagon on its side and using a hammer or rubber mallet, lightly tap the shelf into place. No glue is required for this step.


Step #8:
Hang on your wall and showcase your style! Combine as many hexagon shelves as you want for a cool honeycomb look, or just feature one on its own.

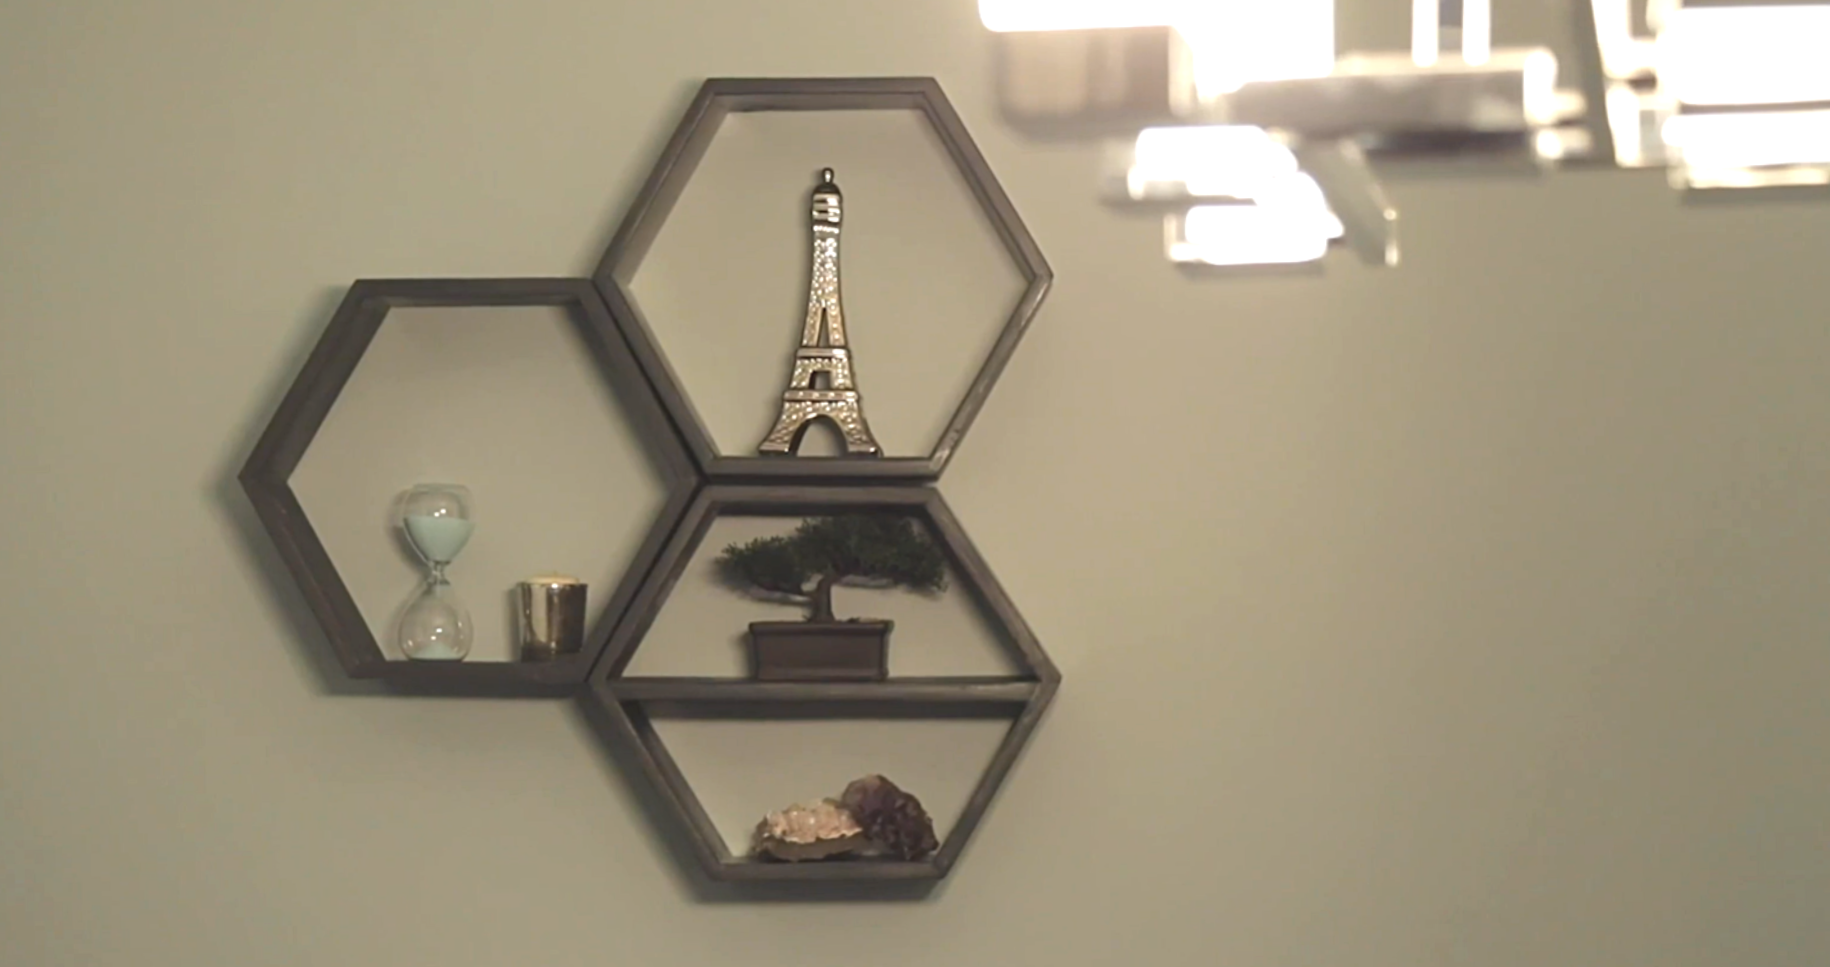
We’d love to see your completed hexagon box shelves. Share them with us on Facebook, Instagram, or Pinterest!