We know that photos can be an amazing source of design inspiration, so this article may contain affiliate links that will direct you to a particular decor item. Clicking on a link may result in a portion of proceeds being paid to www.decoist.com
Finding the right piece of art to complement any room in your home can be a challenge, especially if you’re on a budget. Rather than searching through countless stores for the perfect painting or photo to tie your room together, you could create your own! With Decoist’s DIY tutorial on how to make a modern pendulum painting, you’ll be responsible for creating the amazing artwork that all your guests marvel over when they come to visit.
Supply List:
- Canvas of your choosing — we chose to go with three
- Rust-Oleum latex Charcoal Paint – or any acrylic paint
- Paint brush or foam roller
- Plastic cups
- Twine or rope
- Scissors
- Tape — masking or painter’s variety
- Can of paint
- Empty can and paint separately is also an option
- Drill
- Drill bits — ¼”, 3/16”, and 1/8”
- Ceiling hook, brace, or drop ceiling
- Painting tarp
Step 1:
Start by painting the canvas a background color using your brush or foam roller and paint. We chose to use three canvases to create triptych art, you may choose however many you’d like. Art Mind’s multi-surface acrylic paint is a good choice for the background because it has good coverage.
Step 2:
Once the background is ready, it’s time to pick the colors for your painting! We chose a cream, a light blue, and a warm yellow to pop over the dark background.
PRO TIP: Consider using a primer to create your design. Primers are typically thinner than regular wall paint so it will flow smoothly out of the can. Primers are often less expensive as well.
Step 3:
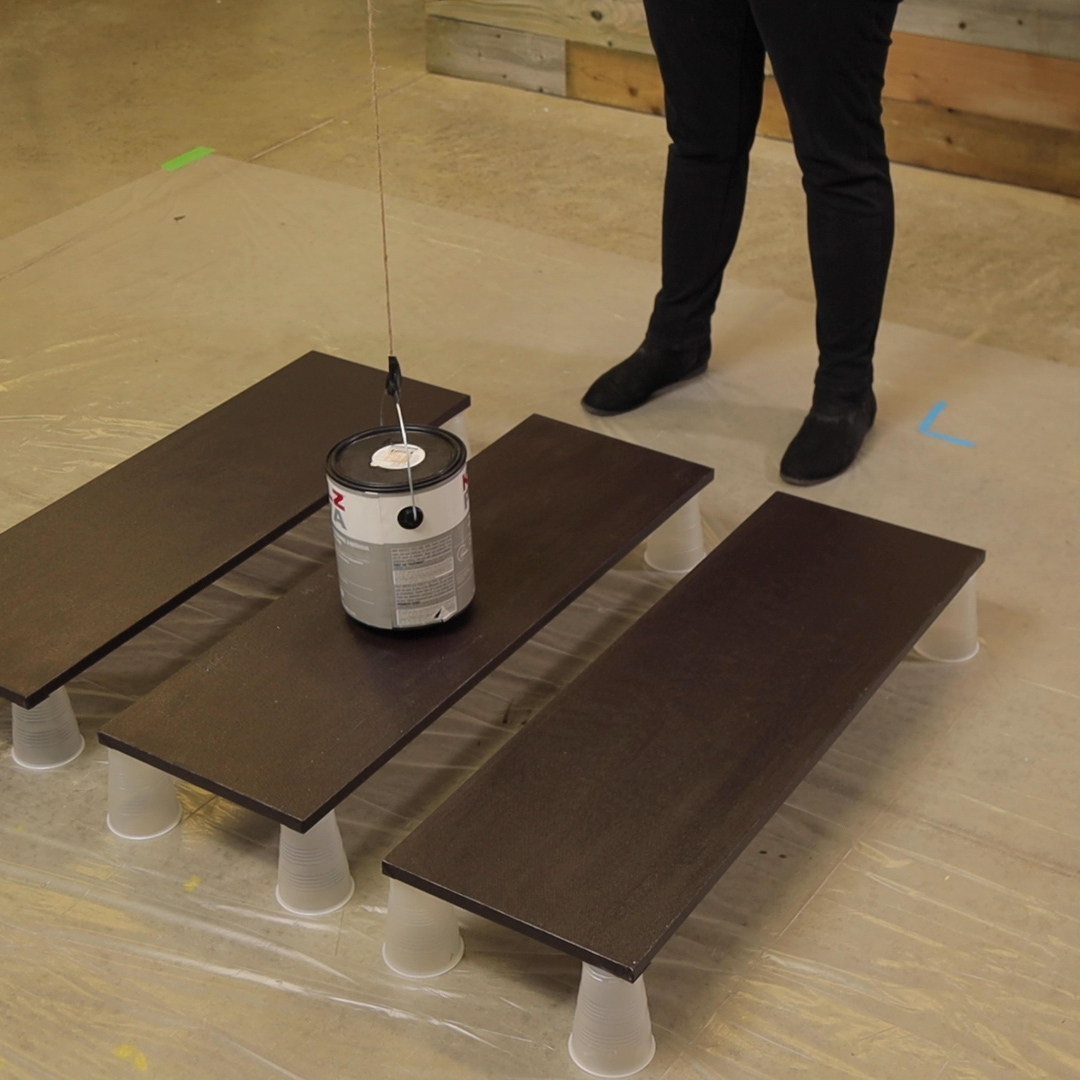
Use the plastic cups to elevate your canvas, making sure your painting tarp is spread out on the ground beneath it. Attach your paint can to the high strength rope and hang it above your canvas using a command hook, brace, or drop ceiling tile.

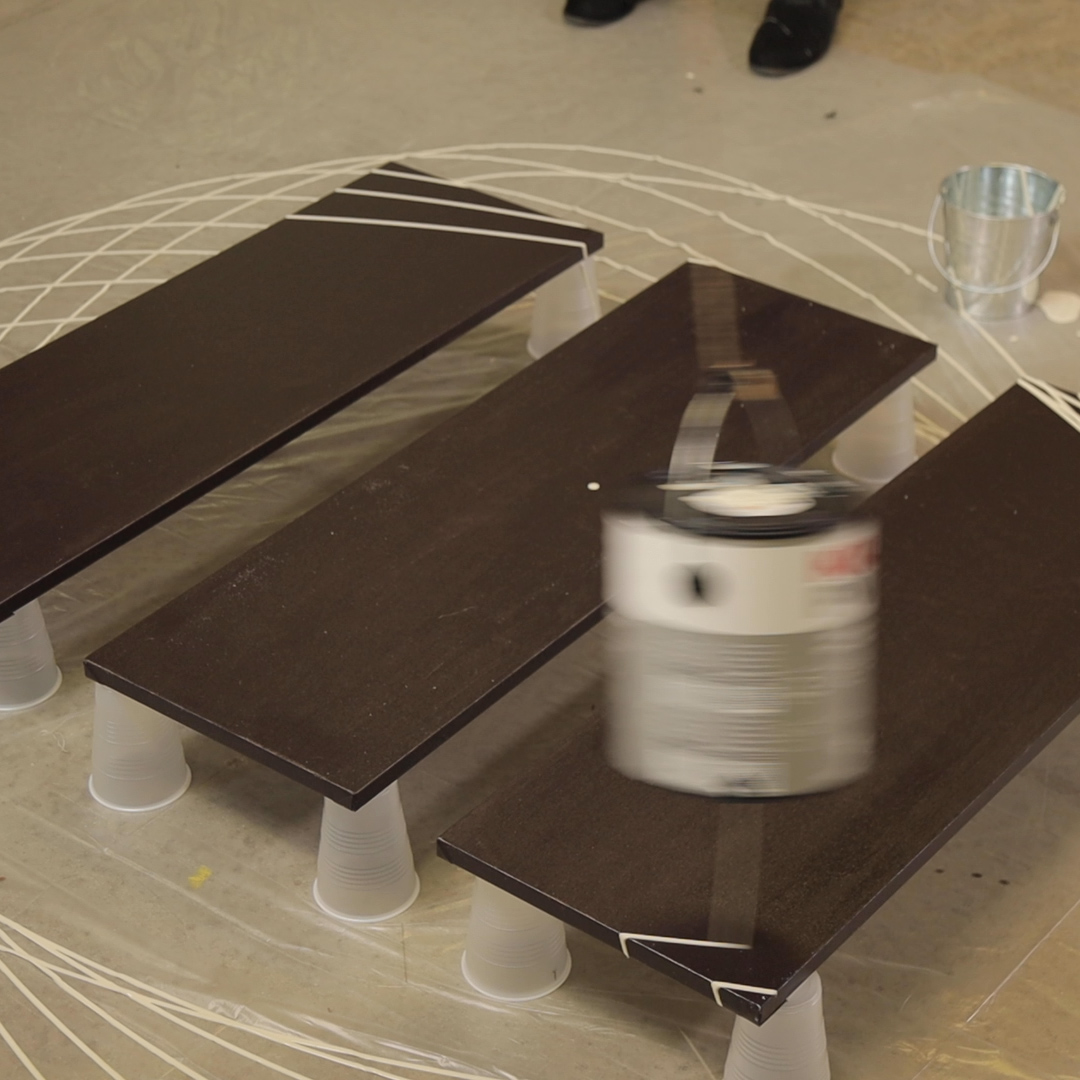
Step 4:
Practice swinging the paint can over the canvas before you start. By pushing the can straight forward you will create thin oval shapes. If you want every edge covered with paint, start with a wide motion.
Step 5:
Once you’ve practiced the movement, it’s time to get started. You’ll need a piece of painter’s tape and your DEWALT cordless drill. Using the 1/4” drill bit, flip the can upside down and drill a hole into the center. Put the painter’s tape over the hole before you flip it right side up.

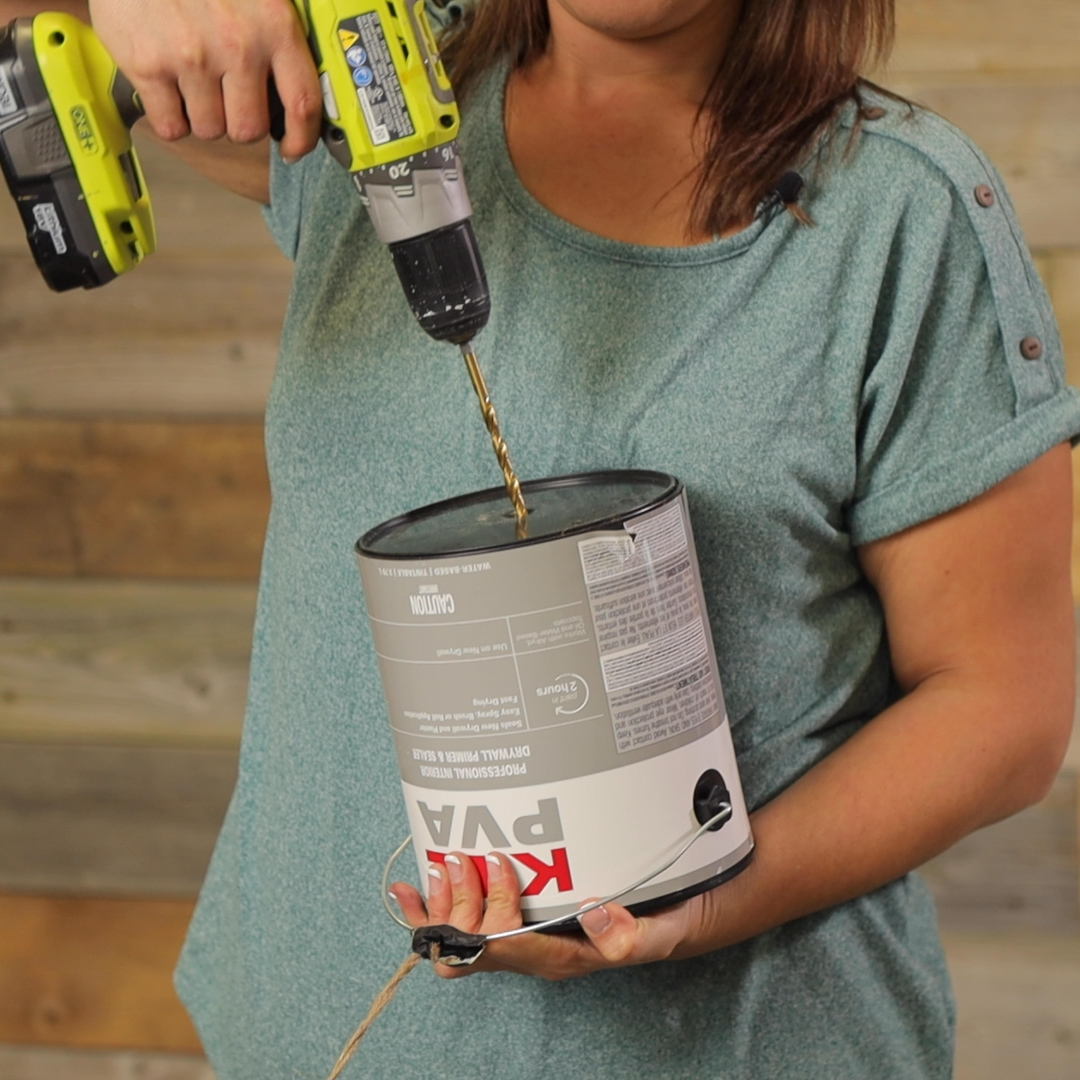
Step 6:
Drill one hole into the top of the paint can as well for air flow.
Step 7:
If your can doesn’t already have paint in it, now’s the time to place your chosen paint color into the can.
Step 8:
Position the can at your starting point and remove the painter’s tape, pushing the can straight forward to start swinging.

PRO TIP: When catching the can, wait until it has swung away from the canvas, and use a clapping motion to catch the can.
Step 9 (Optional):
If you’re working with more than one color, you can swap out the cans and colors when you feel you have enough of one.
Show us how your pendulum painting turned out by sharing with us on Facebook, Instagram, or Pinterest!


