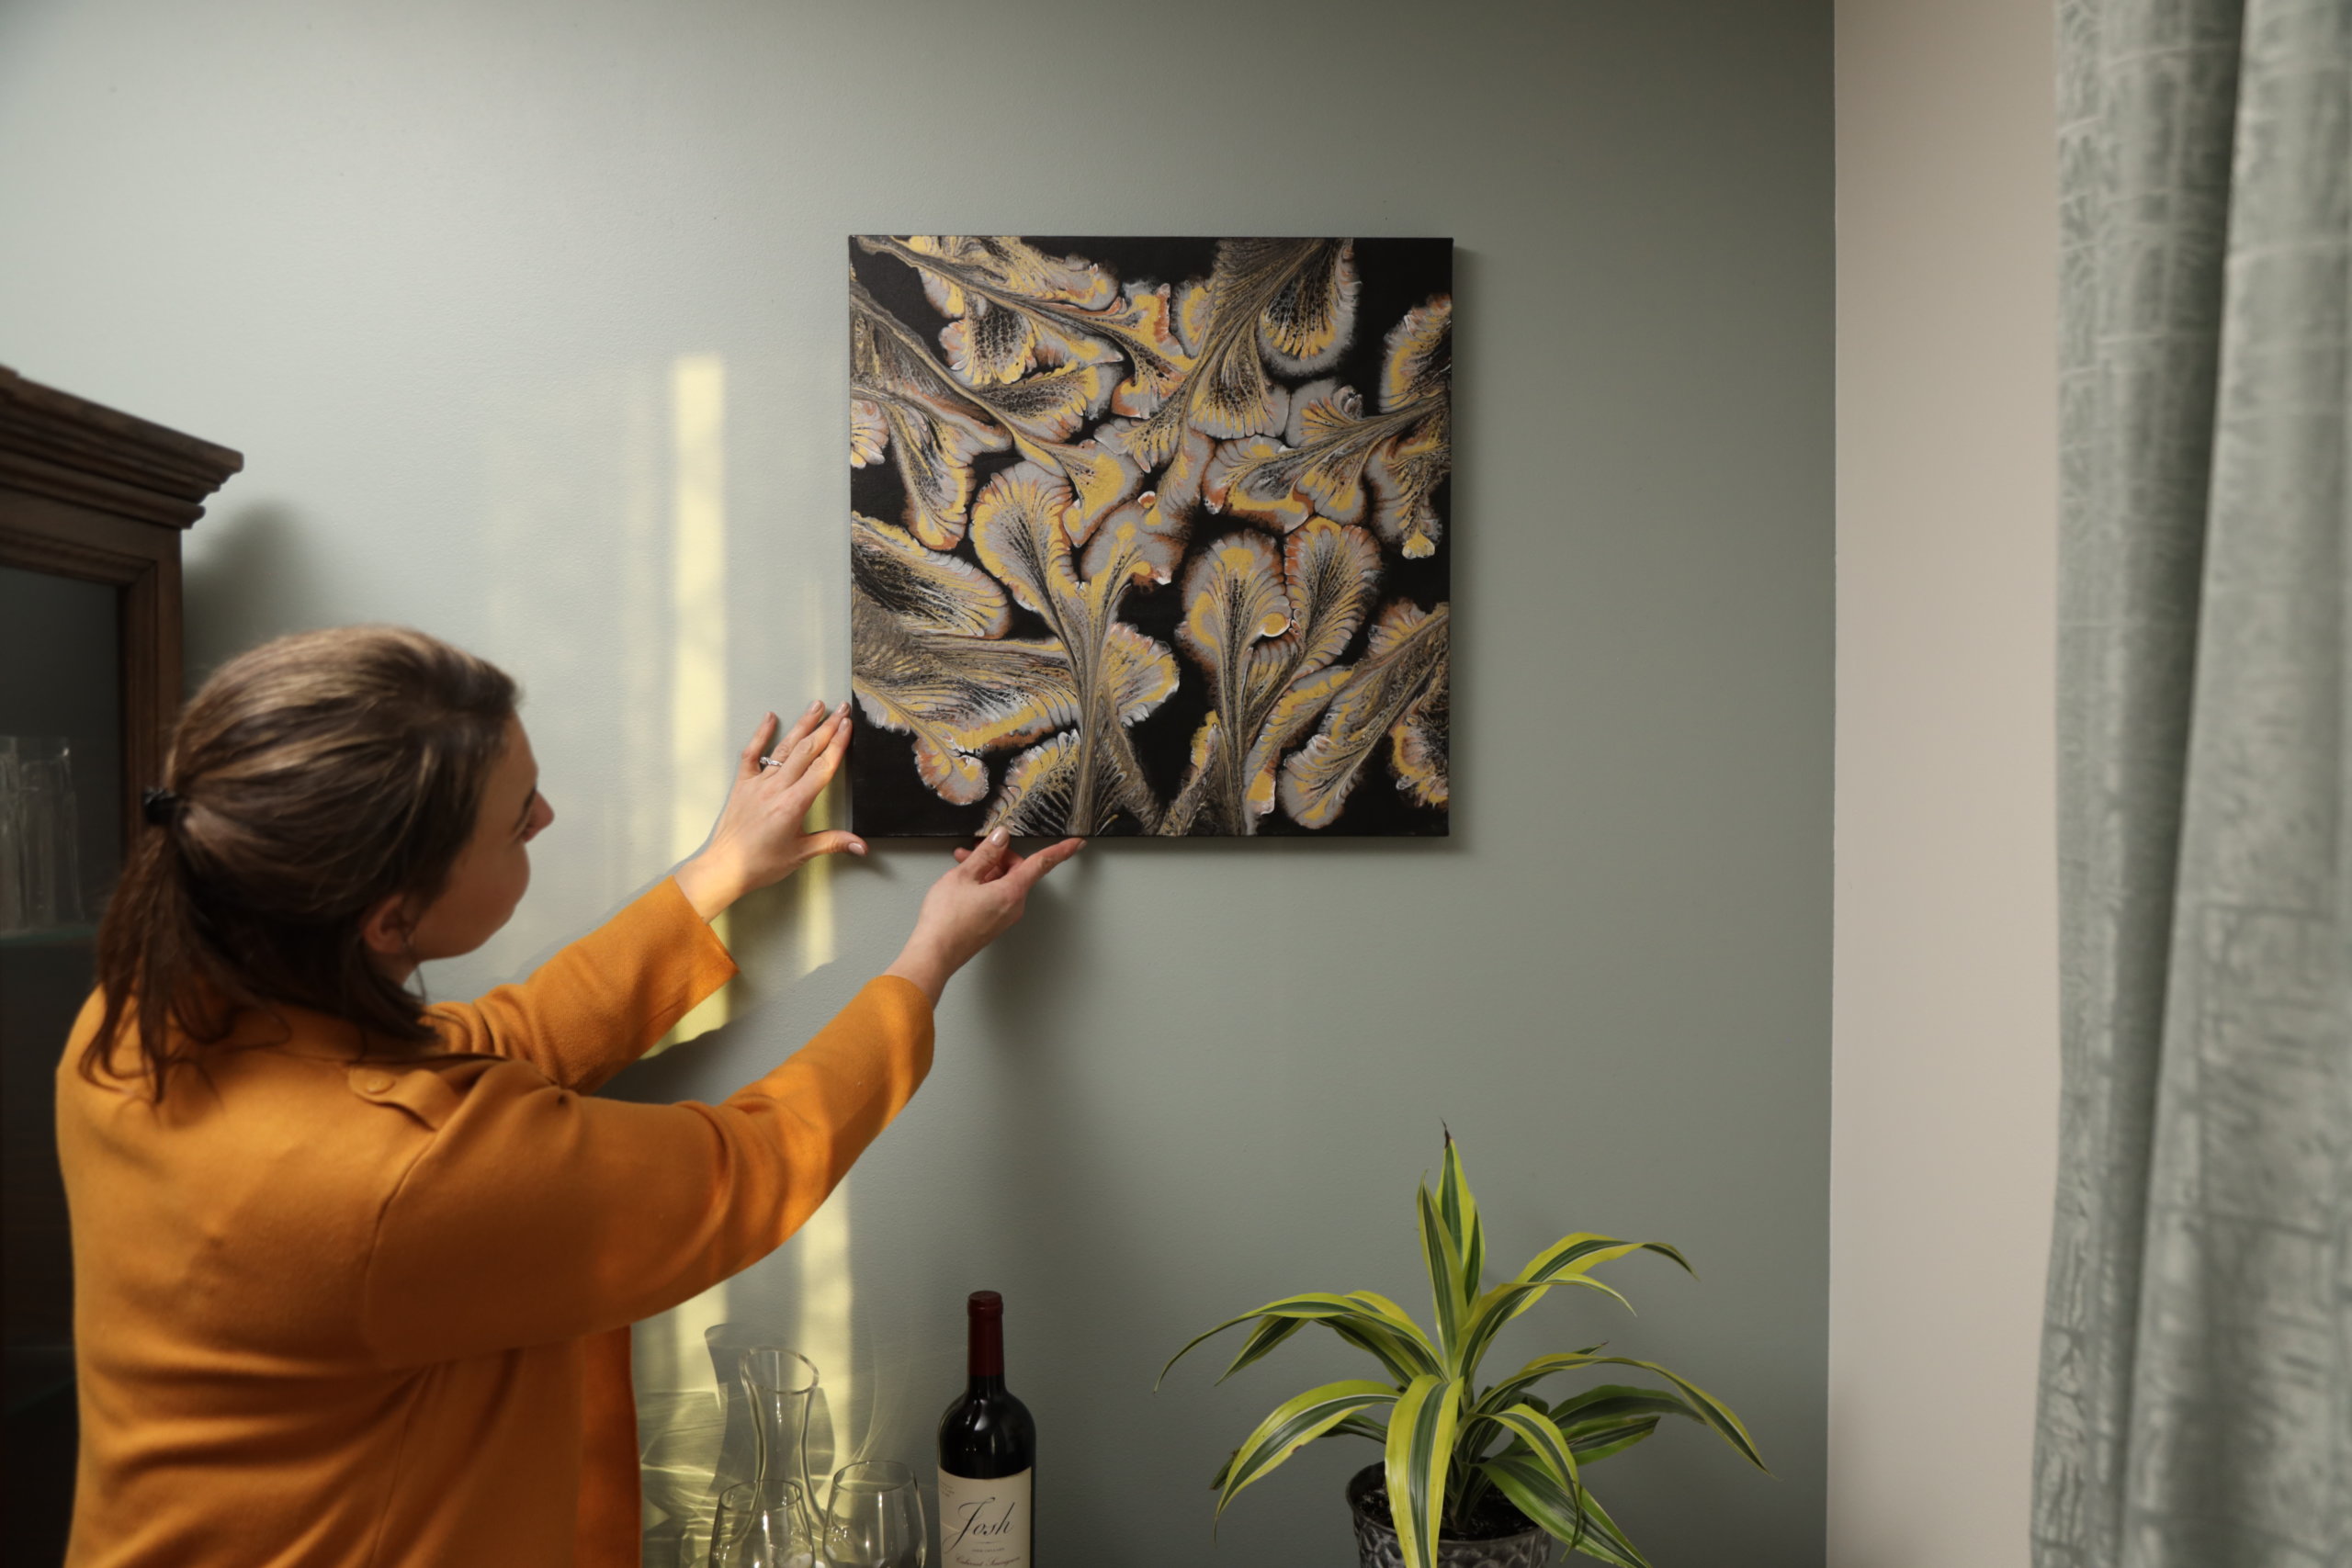
Acrylic Pour String Pull with Mardi Gras beads:

Supply List:
- Blank canvas
- Painting knife
- Acrylic paints
- We chose gold, rose gold, white, black, and silver.
- Multiple strands of Mardi Gras beads
- Floetrol
- Water
- Stir sticks
- Plastic condiment bottles
- You’ll need one for every paint color you’re using.
- Silicon oil & torch (optional)
- Thumbtacks (4)
- Gloves
- Scissors
Step 1:
Mix your acrylic paints with floetrol. Add water to the mix as needed until you reach the perfect consistency. The mixture should drip like honey.
Step 2:
Transfer your paints into the condiment bottles.
Step 3:
Place a thumbtack on the back of each corner of the canvas frame to help the paint pour over the edges and keep it from sticking.
Step 4:
Pour a generous amount of black paint onto the canvas and spread it out evenly using the painting knife.
Step 5:
Cut the Mardi Gras necklaces so they become long strings of beads
Step 6:
Lay the beads onto the canvas in loops and swirls, leaving the end of each string to hang off the side of the canvas. Make sure the strings don’t overlap.
Step 7:
Once the beads are on the canvas, start pouring your paint colors over the beads. Follow the pattern you’ve laid out with your bead strings, layering the paint in whatever order you want.
Step 8:
Grab the end of one of the bead strings and slowly pull it off the canvas. Repeat for all the strings.
Step 9:
If you chose to use the silicon oil in your paint mixture, now it’s time to use the torch to create a cell reaction. Use the torch over your paint on the canvas, popping the air bubbles as you go.
Step 10:
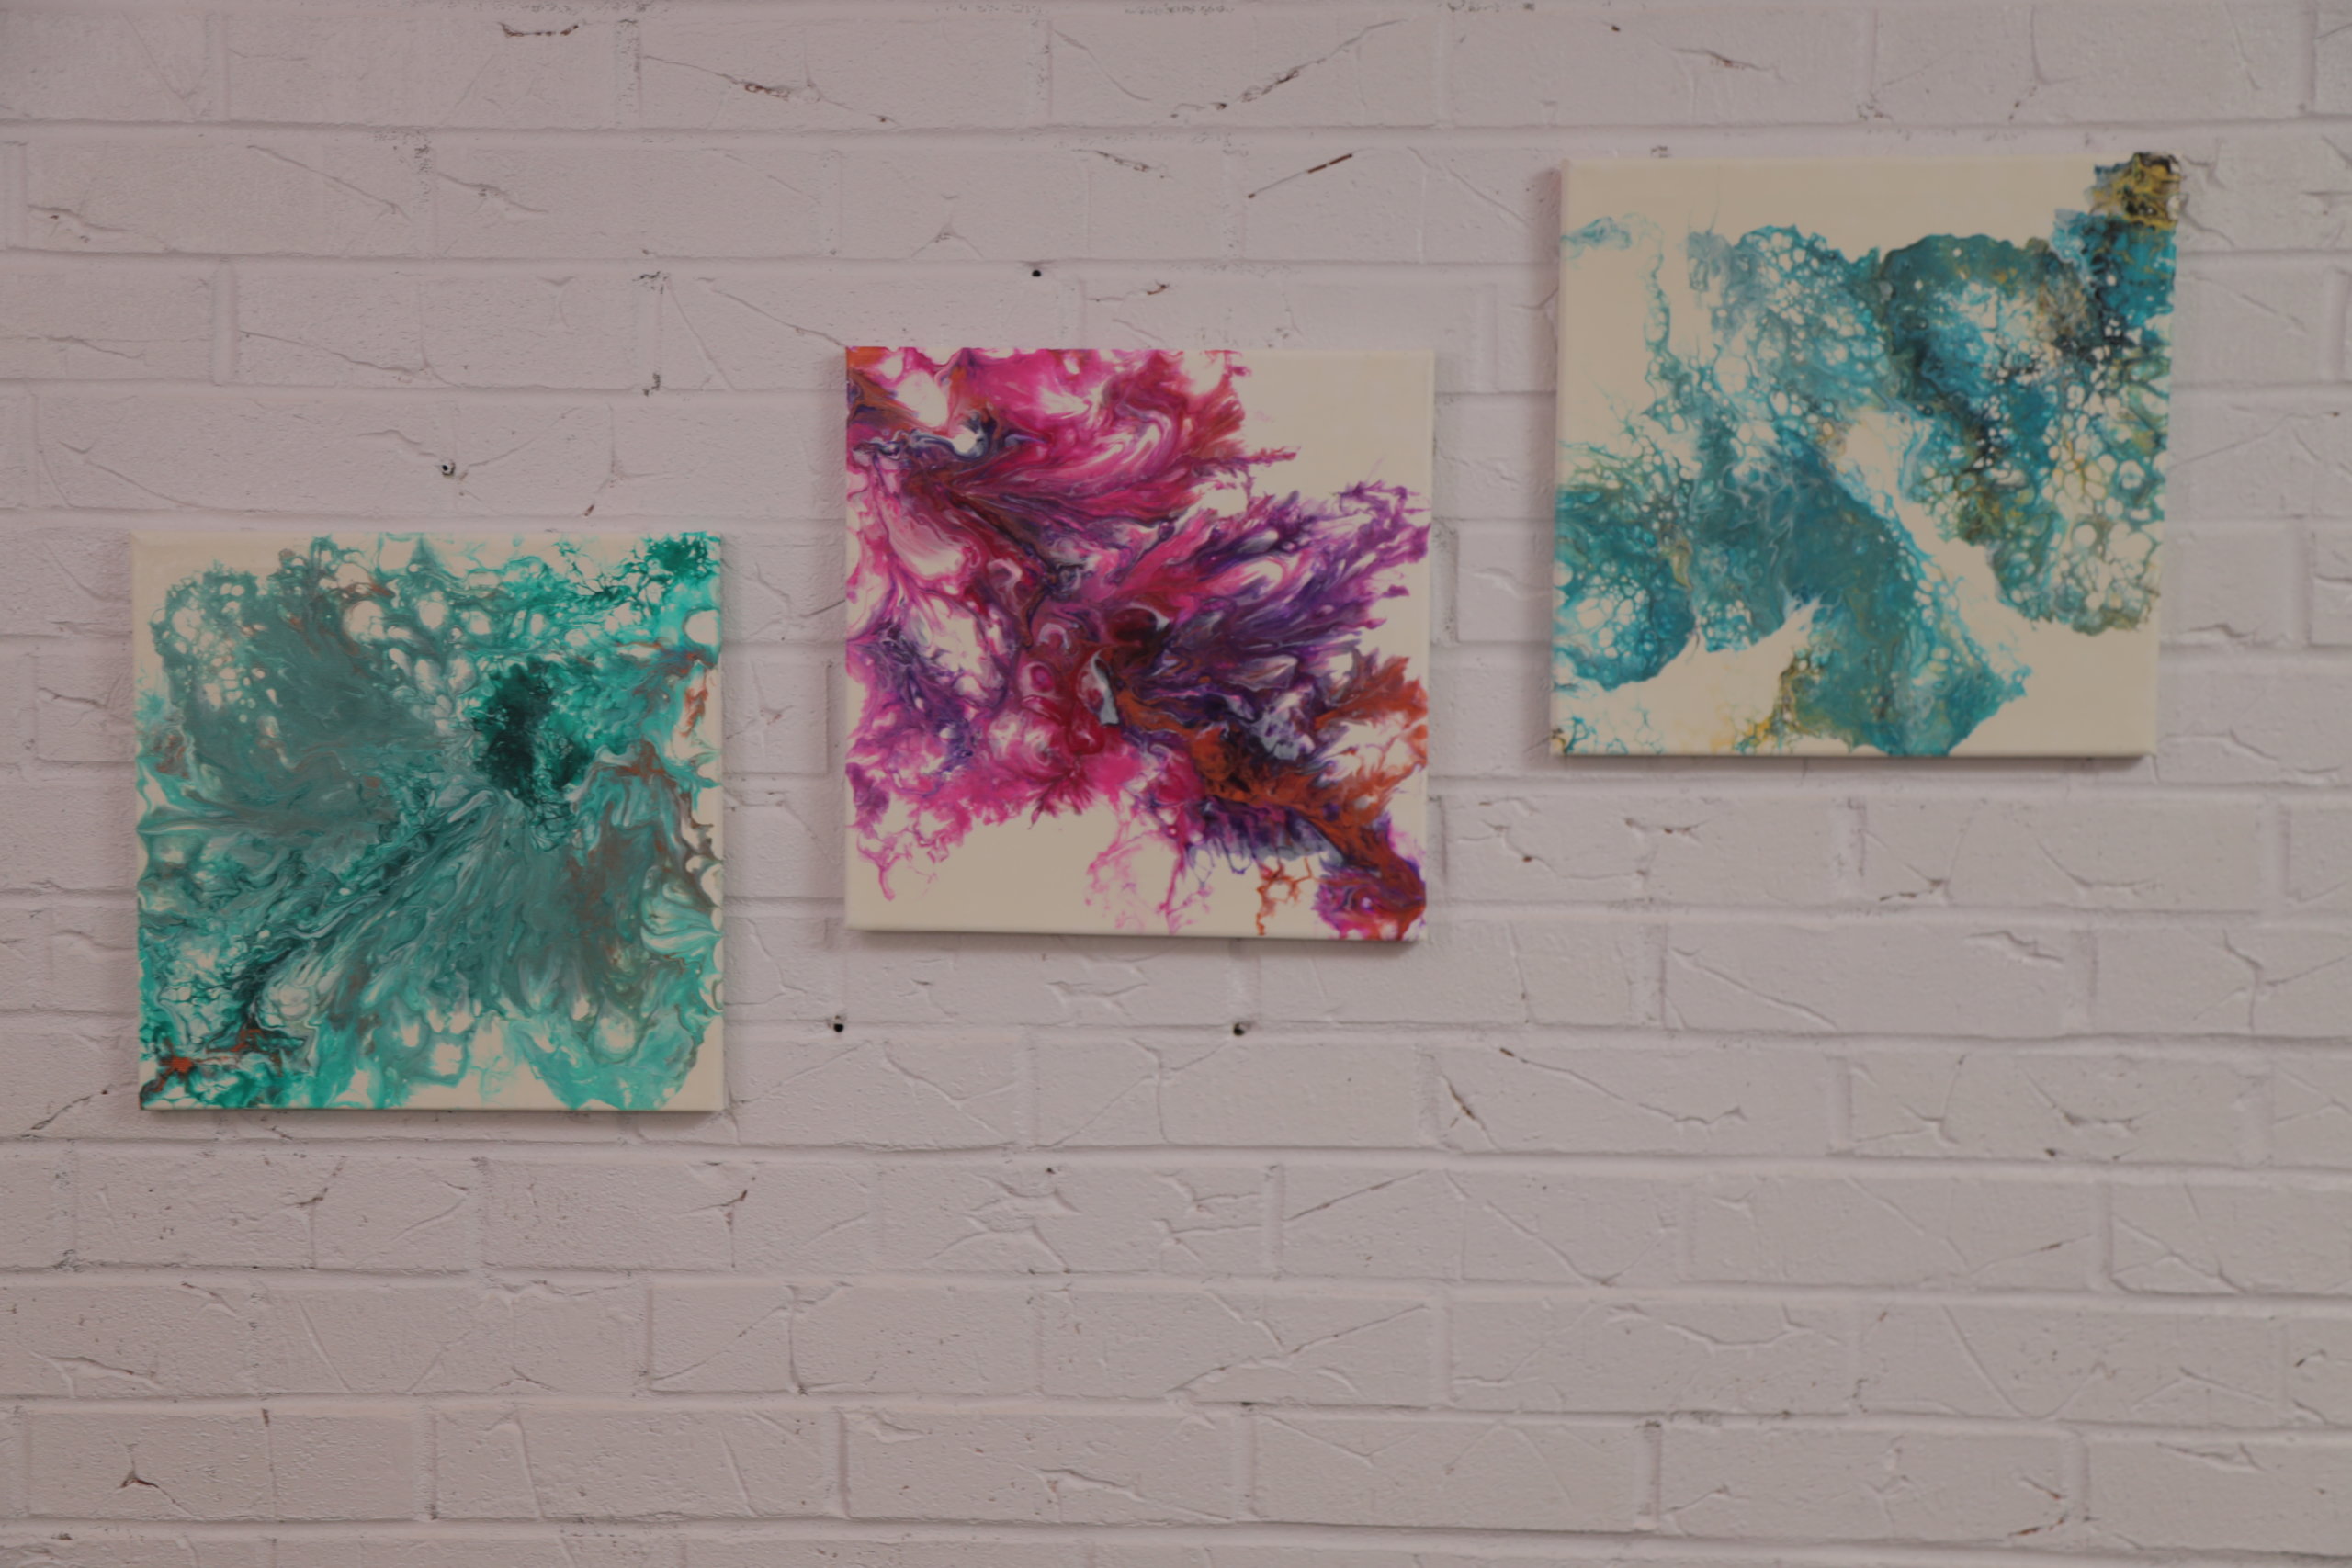
Let the canvas dry for at least 24 hours before hanging it up.
Hair Dryer Art using the Dutch Pour Technique:

Supply List:
- Canvas
- Acrylic paints in various colors
- We chose to use turquoise, copper, white, black, and blue.
- Floetrol
- Silicone oil & torch
- Water
- Thumbtacks (4)
- Blow dryer
- Stir sticks
- Clear plastic cups
- Gloves
Step 1:
The first thing to do is to mix your paints in plastic cups, using equal parts of acrylic paint and floetrol for each color. If the mixture is too thick you can add a little bit of water. The paint mixture should be the consistency of honey, sticking to the stir stick as you stir but still able to drip off.
Step 2:
Add two drops of silicon oil to each of your paint colors. Rather than stirring the oil, you want to dab it down into the paint with a stir stick.
Step 3:
Flip over the canvas and place the thumb tacks into the four corners of the canvas frame. This will help the paint flow evenly over the sides.
Step 4:
Start by pouring the white paint onto the canvas, then use the hair dryer to blow the paint over the canvas until the surface is completely covered in white.
Step 5:
Put on the gloves and use your fingers to spread out the white paint so it reaches to the edges.
Step 6:
Pour the paint mixtures in thin lines across the canvas. You want all the colors of paint to be layered and touching each other.
Step 7:
Using a medium/low setting, hold your hair dryer 2 to 3 inches above the surface of the canvas and use the dryer to push the white paint all in one direction over the colors, the blow it back the other way. Continue moving the paints until you have your desired design.
PRO TIP: If you’re struggling to move the paint in smaller sections or certain areas of the canvas, use your mouth to blow the paint around to give yourself more control.
Step 8:
Grab the torch and use it to pop any air bubbles left from the silicon oil.
Step 9:
Leave your canvas to dry in a dust free area.
Acrylic Paint Pour Table Top using the Flip Cup Technique:

Supply List:
- Gladom table from IKEA
- Clear coating epoxy resin
- Acrylic paints in white, black, and gold
- Plastic cups
- Floetrol
- Water
- Silicon oil & torch
- Tarp
- Painting knife
- Masking tape
- Large plastic cup or container
- Gloves
- Lighter
Step 1:
Mix the three acrylic paint colors in plastic cups with floetrol at a ratio of 6:1 for floetrol and paint. Mix for at least two minutes each.
Step 2:
Grab your larger plastic cup or container and make a hole in the bottom of the cup. You can use a lighter to soften the plastic and poke a hole using something like a screw driver.
Step 3:
Cover the hole you just made with a piece of masking tape.
Step 4:
Pour each of your flow paints into the large container, layering the paints so they form noticeable rings as you fill the cup.
Step 5:
For the trickiest part of this craft, flip the surface of your table upside down and place it on top of the cup. Hold the cup and tabletop tightly together, flipping them back over so the cup is on top.
Step 6:
Pour the remaining white paint around the surface of the table while the cup is still in the center. Use the painting knife to spread it towards the edges.
Step 7:
Remove the tape from the plastic cup to let the airflow, then slowly remove the cup from the table.
PRO TIP: Move the cup in a circular motion while you life to help mix the paints.
Step 8:
Tilt the table top to help the paint flow evenly until it pours over all sides.
Step 9:
Remove the air bubbles using a torch or a lighter. The torch will also help intensify the cell reaction in the flow paint.
Step 10:
Let the tabletop dry for 24-48 hours in a dust-free area.
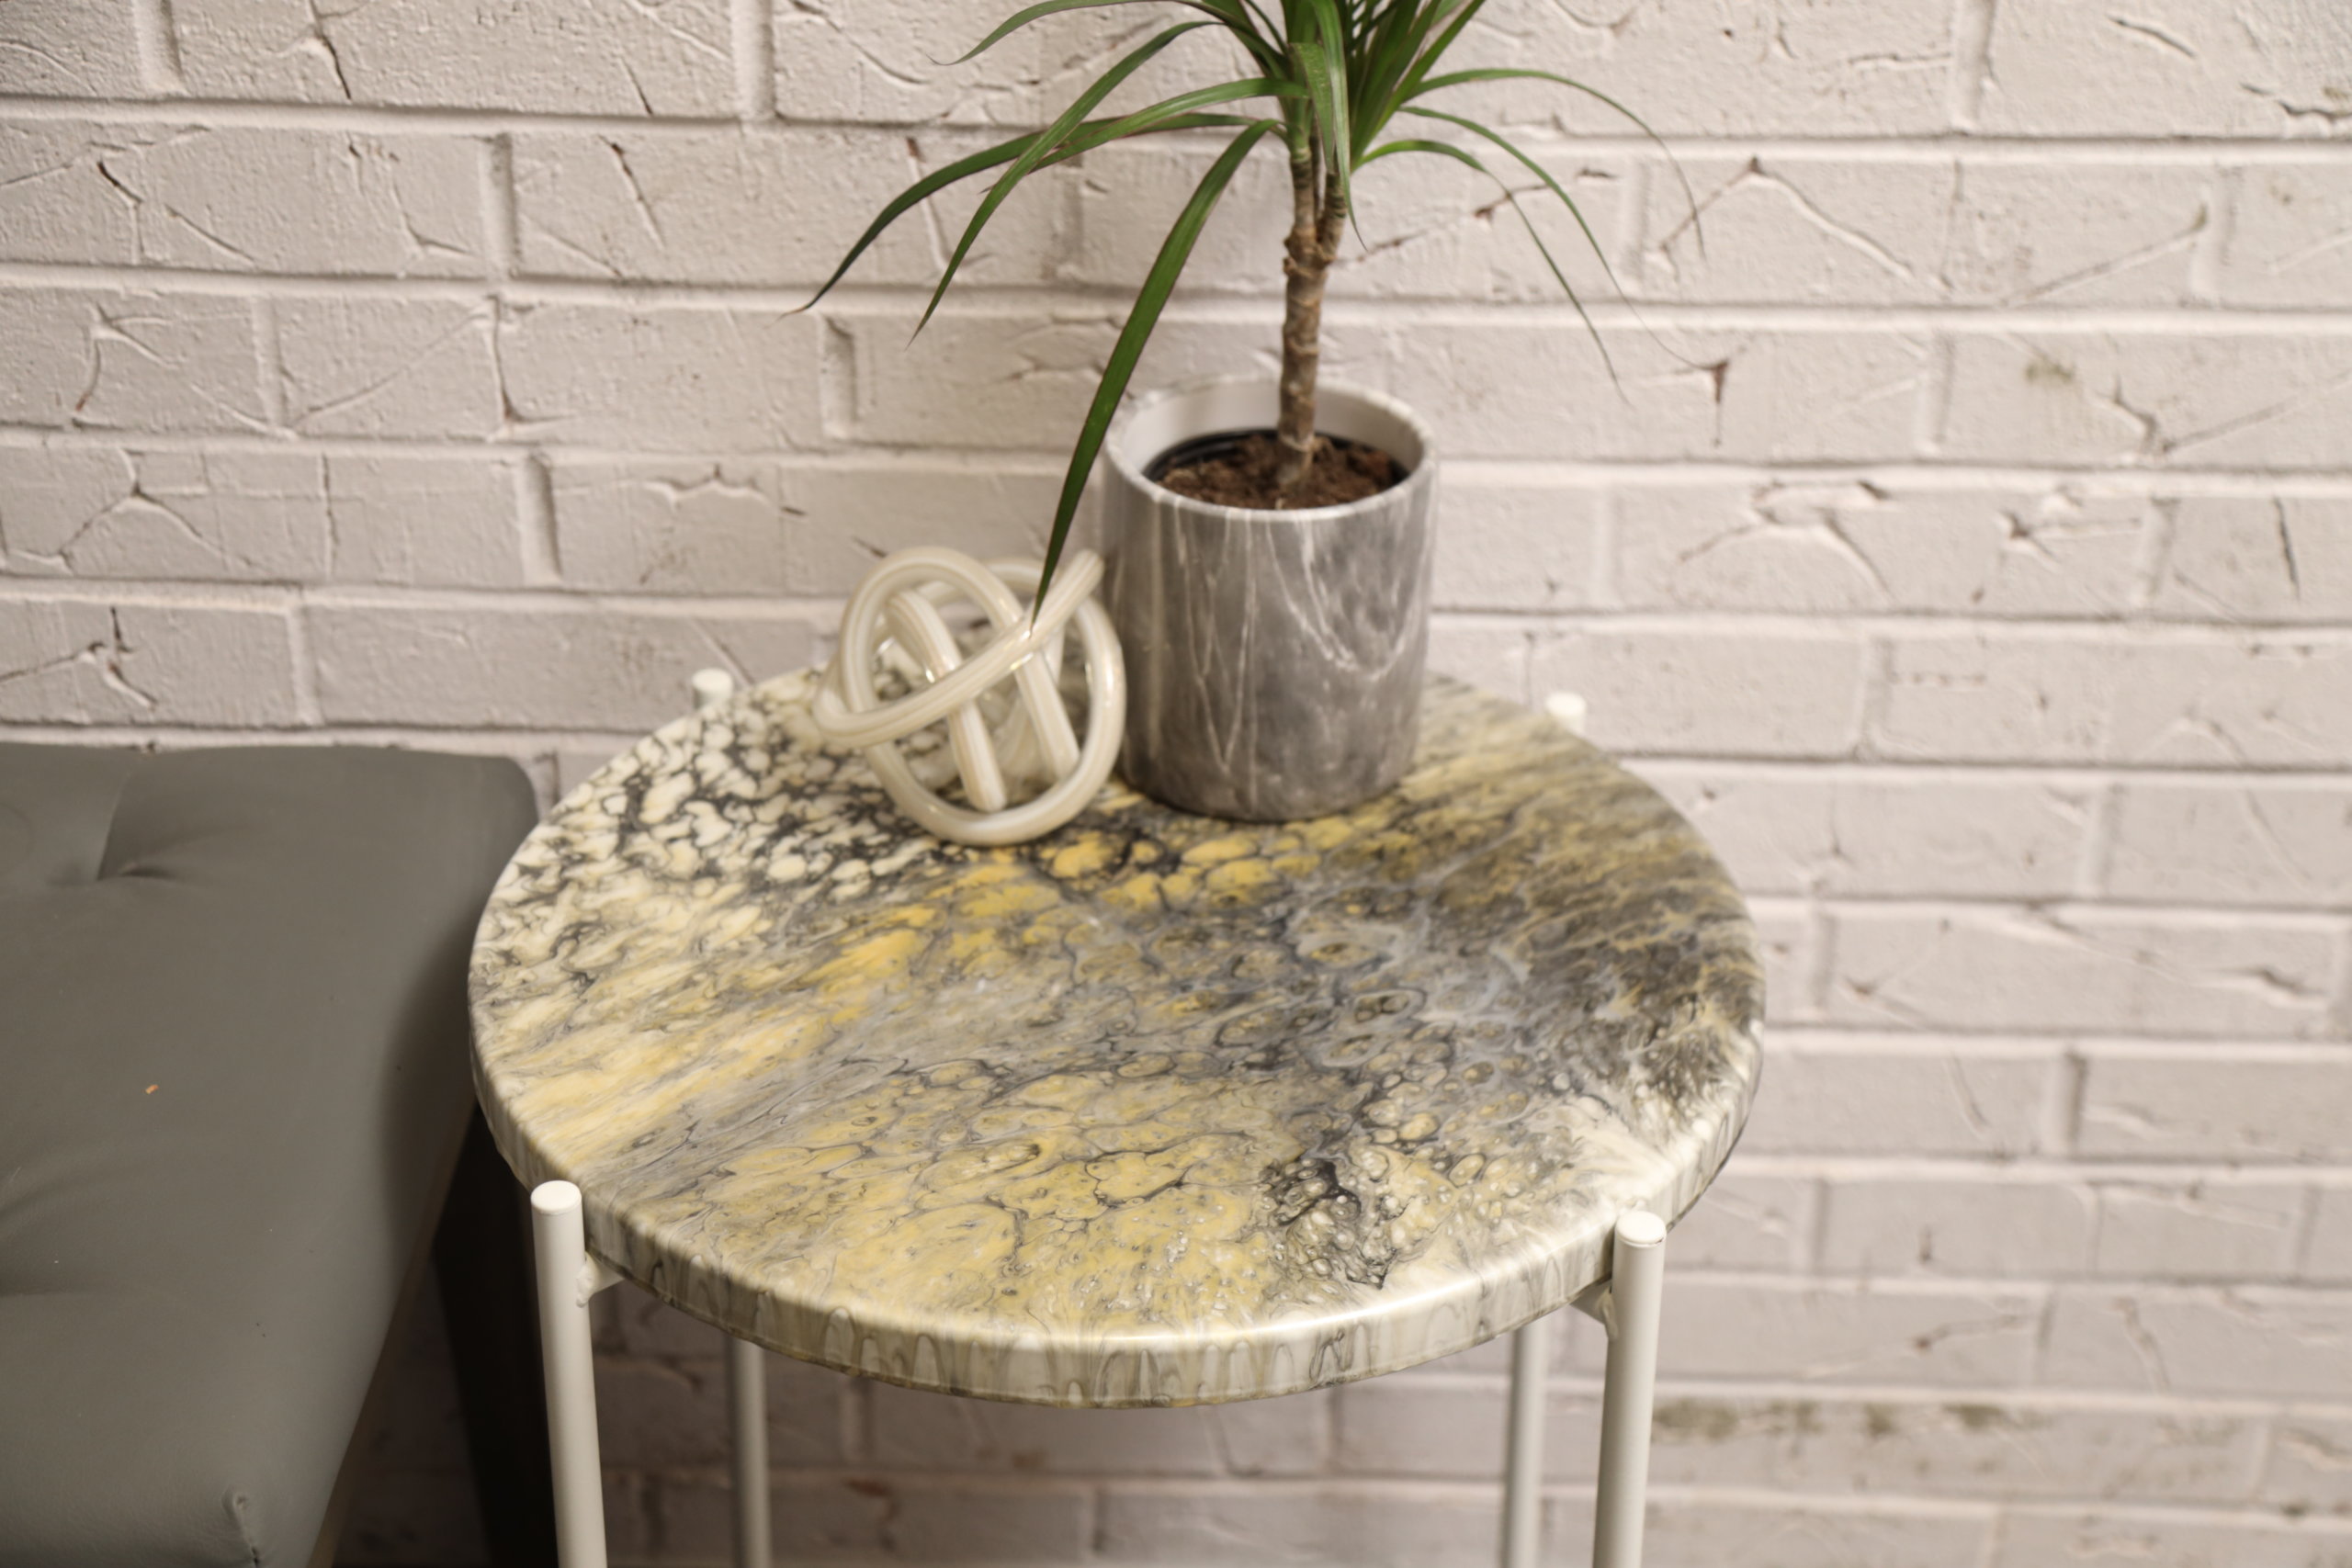
Step 11:
Come back once your table top has dried to see your final design! The paint will have continued to flow as it dried, creating new patterns that may not have been there when you first left it.
Step 12:
All there’s left to do is cover the table in a clear coat to protect it and make it shine. Mix the resin and hardener together for about 5 minutes, then pour the resin onto the surface and use your gloved hands to spread it out evenly.
Step 13:
The resin will continue to flow and drip over the edges for approximately 30 minutes so make sure you keep an eye on it and wipe away any drips that may form along the bottom rim. You’ll want to wipe those off before they harden.
Step 14:
Place the tabletop back onto its metal frame and you’re finished!
Once you’ve completed your paint pour projects, we’d love to see what you created! Share them with us on Facebook, Pinterest, and Instagram.


