We know that photos can be an amazing source of design inspiration, so this article may contain affiliate links that will direct you to a particular decor item. Clicking on a link may result in a portion of proceeds being paid to www.decoist.com
While you spend a lot of time and effort decking the halls of the interior of your home, you don’t want to forget about the decorations that go on the exterior either! Why settle for just a few strings of Christmas lights when you could emanate the festive spirit with these DIY giant Christmas ball decorations? You weren’t using all those rubber exercise balls lying around your house anyway, so you might as well turn them into beautiful hanging ornaments that will spruce up your front porch! These giant DIY Christmas ball decorations can be hung up, or they can be arranged on the ground. Whichever way you choose to display them, you’ll see that ornaments don’t have to stay on your Christmas tree.
Supply List:
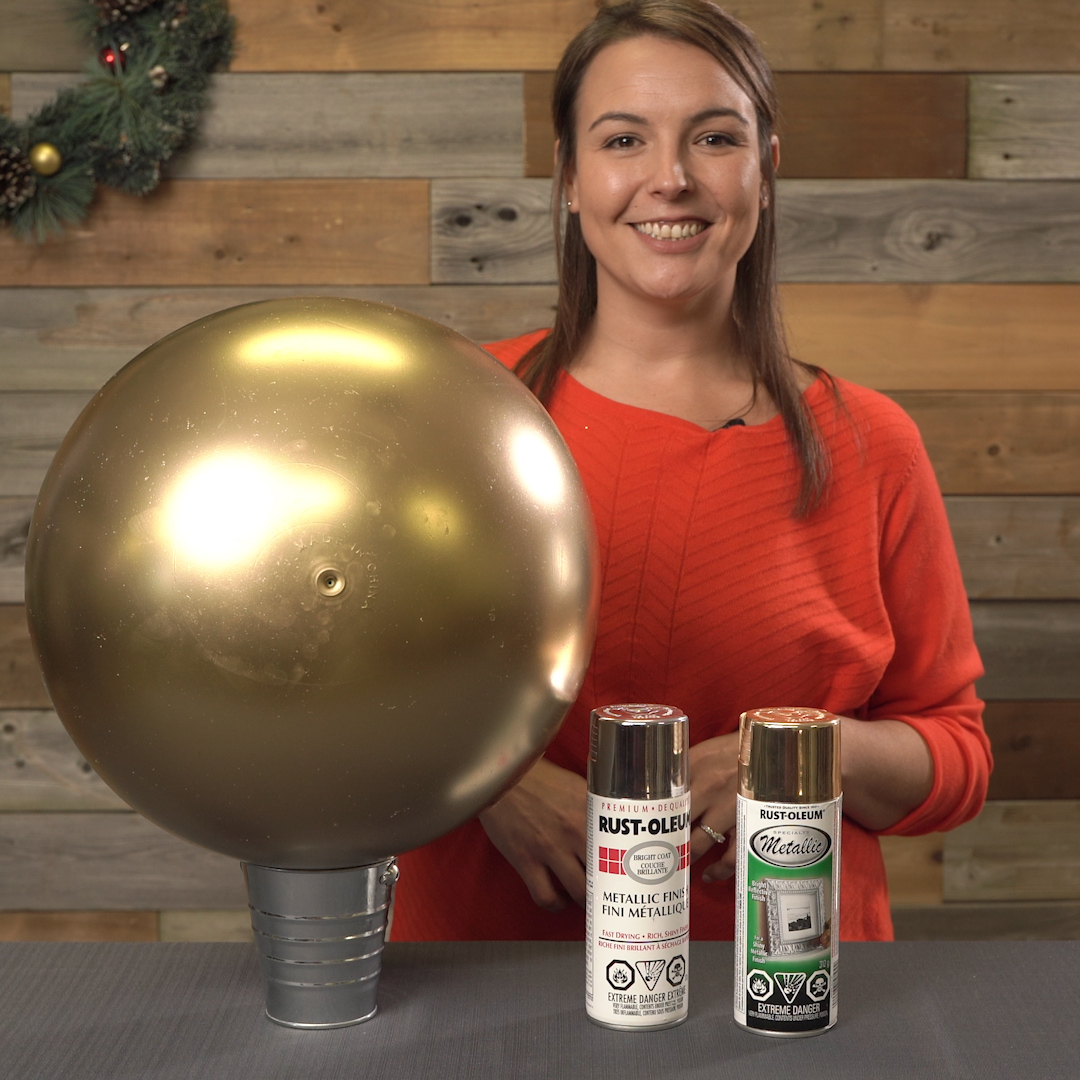
- 12″ Rubber exercise balls
- E600 super glue
- Rust-Oleum Speciality Metallic spray paint in gold & silver
- This specific spray paint is best because of the formula, which will give you a shiny mirrored effect for your ornament.
- Hot glue gun & glue sticks
- Deli cups
- One for each ornament you’re creating
- Gem embellishment sheets
- Snowflake decals
- Foam brush
- Elmer’s glue or regular craft glue
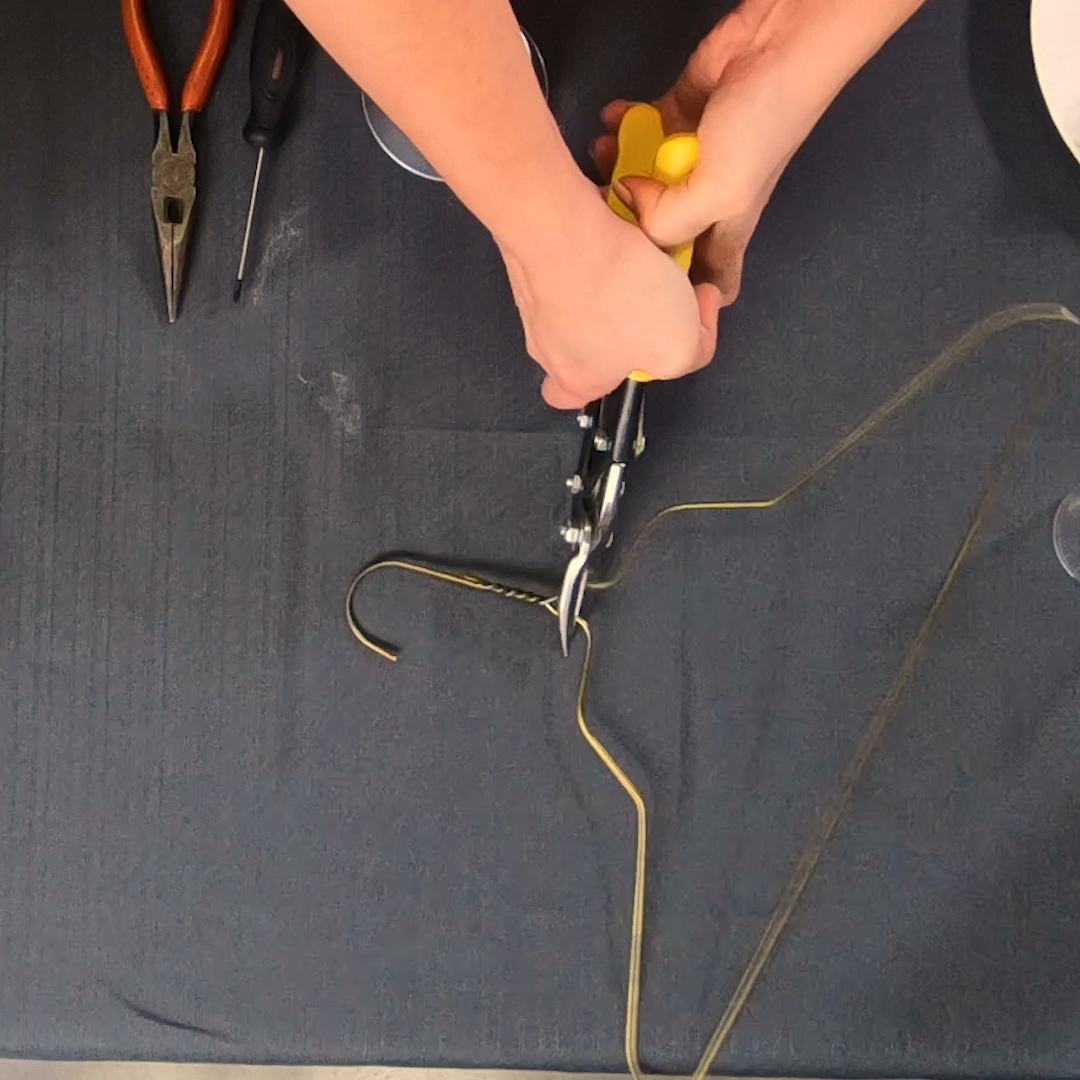
- Wire coat hanger
- Wire cutters
- Exacto knife
- Needle nose pliers
- Fishing line
- Outdoor protective spray or gloss
Step 1:
Place the rubber exercise ball on a surface that will stabilize and elevate it. Elevating the ball on a plastic bucket, empty coffee can, or Tupperware container will keep it from rolling away and make it easier to paint.
Step 2:
In a well-ventilated area, spray paint your rubber ball gold using your Rust-Oleum spray paint. Make sure the surface is completely covered, then allow it to dry for a few hours. Flip over the ball and spray paint the opposite side, covering completely.

Step 3:
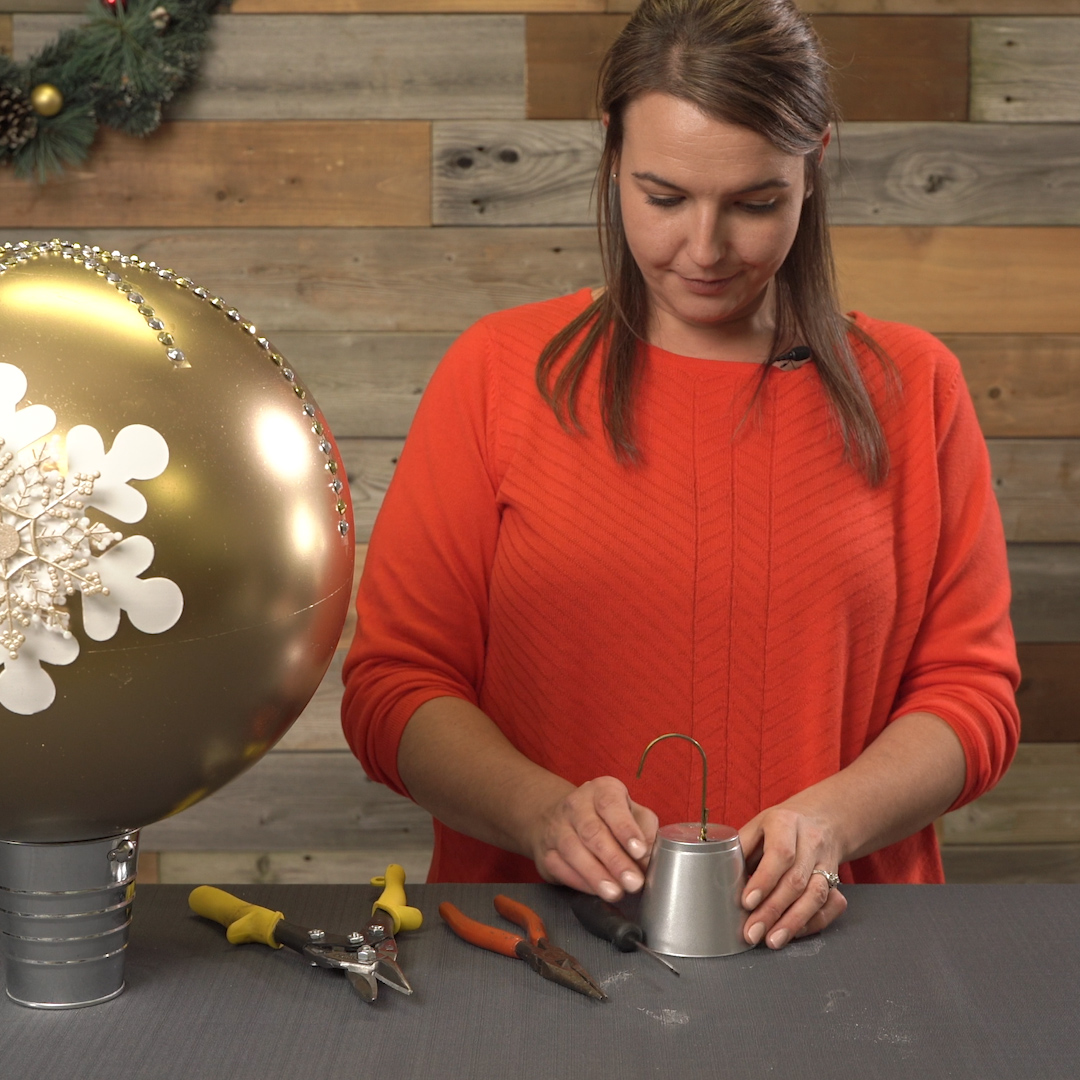
While the ball dries, spray paint the deli container using your silver Rust-Oleum spray paint. This will be the top part of your ornament.
Step 4:
As the parts of the ornament are drying, use your wire cutters to cut off the top hook part of your wire coat hanger. Take the time to prepare your decals as well, cutting them into strips and prepping the snowflakes.

Step 5:
Poke a hole into the top of the deli cup once it’s dry and feed the metal hook through the small hole. Use your pliers to bend the metal sideways inside the cup to secure the coat hanger. For extra support, use hot glue to secure the hook on the inside of the deli cup.

Step 6:
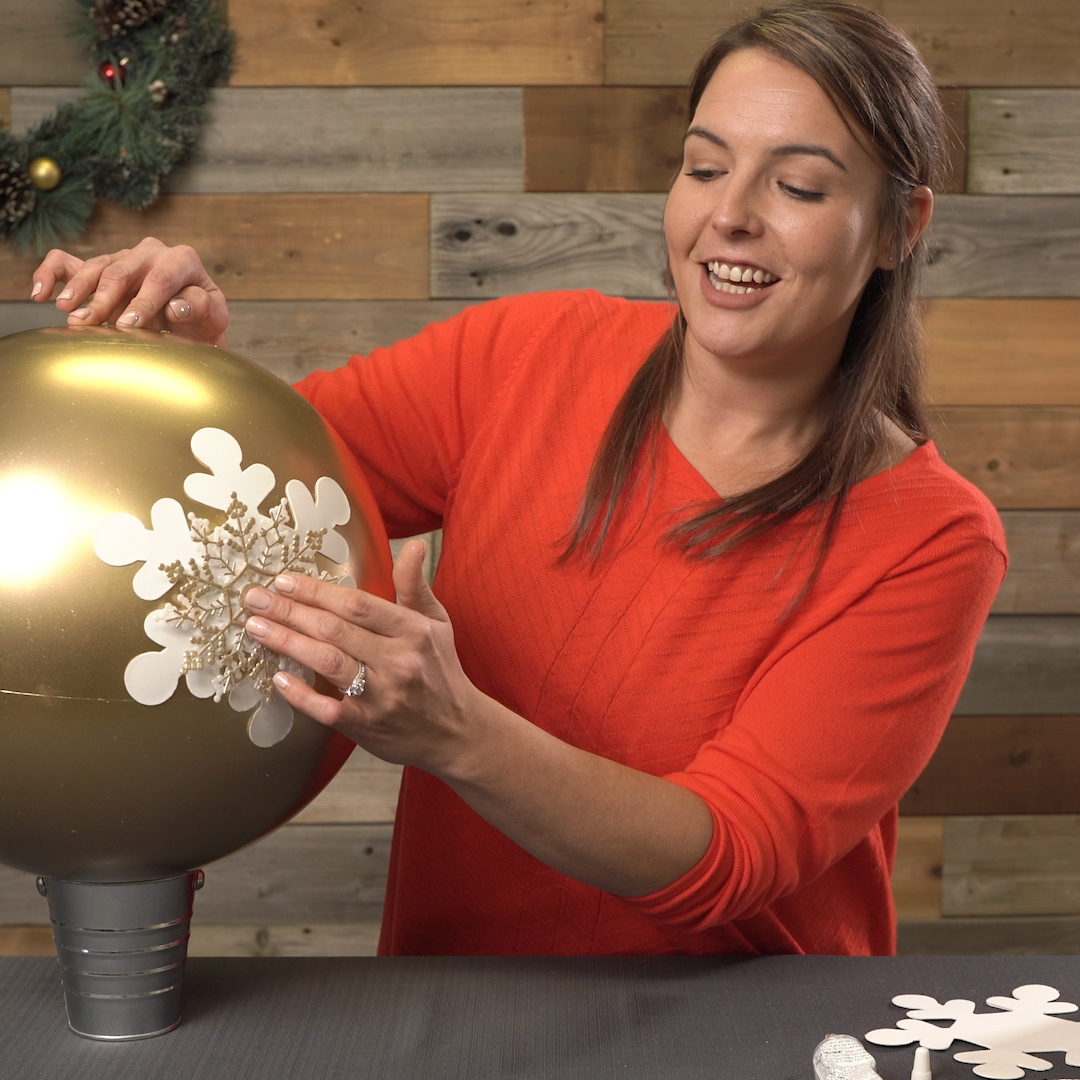
Use your foam brush and regular white glue to begin applying your decorations to the ornament, starting with the foam cut-outs. Be sure to push out any air bubbles using the foam brush as you apply the cut-outs.

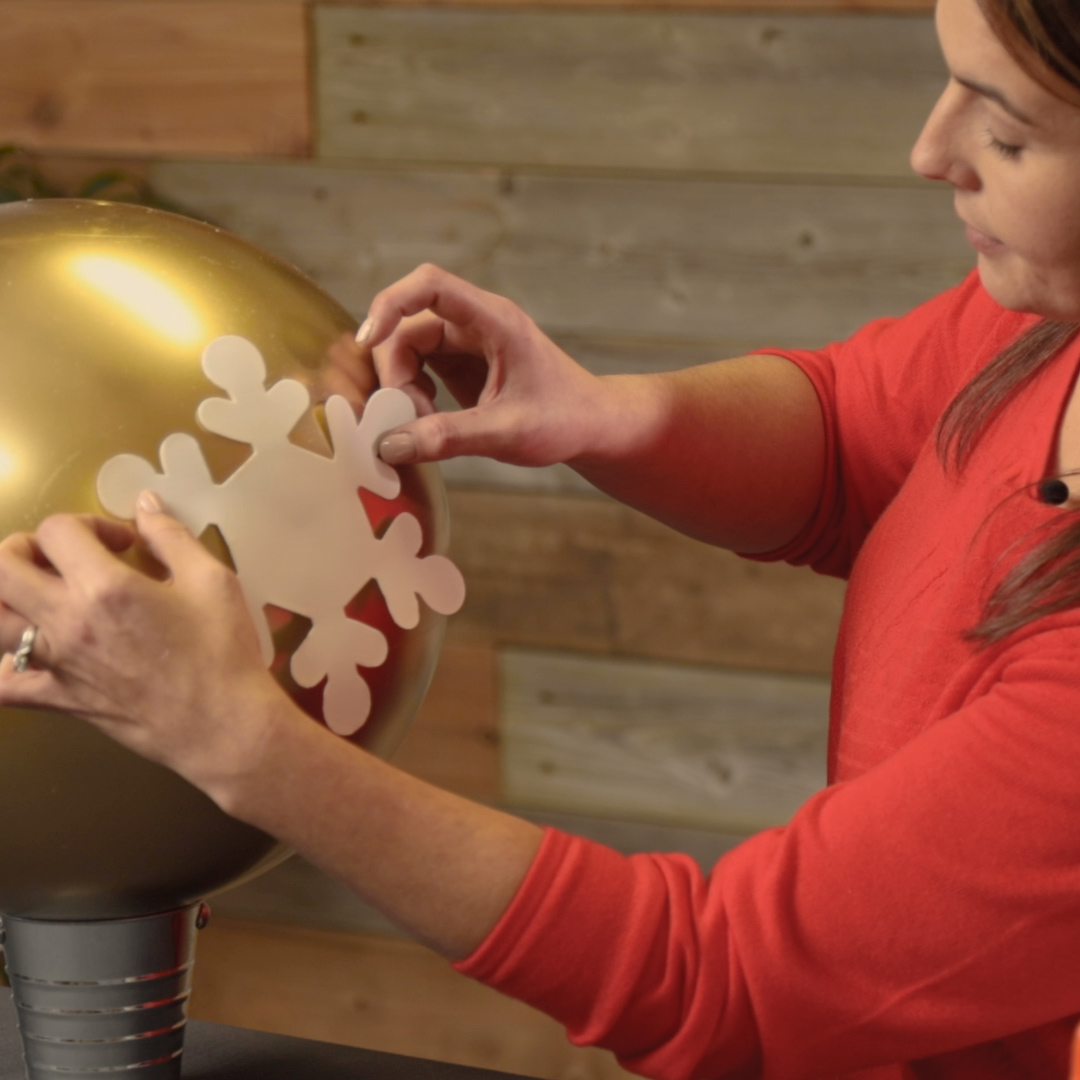
PRO TIP: The crafting glue does a good job of sealing the foam to the ornament surface without having to use more expensive glues like superglue or a hot glue gun.
Step 7:
Use the E600 super glue to attach 2 of the small plastic snowflake decorations. It’s important to use superglue for the plastic decorations so it doesn’t crack or break in cold weather.

PRO TIP: When applying the plastic snowflakes, it’s best to use both superglue and hot glue to attach it to the ball. The hot glue allows it to stick to the uneven, rounded surface of the exercise ball, and the super glue gives it the extra strength hold for when it’s outside.
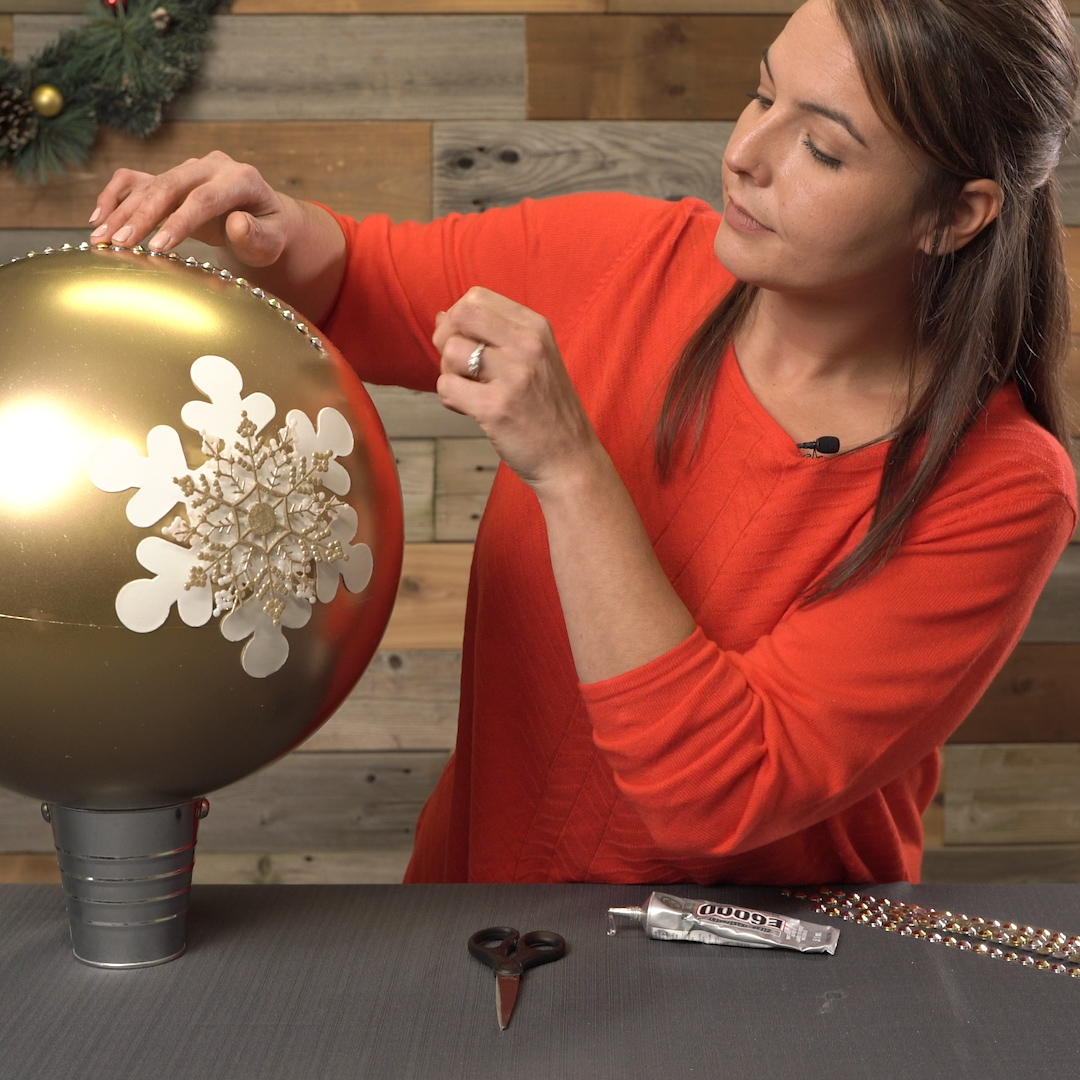
Step 8:
If you haven’t already, cut the adhesive gems into strips, then drape them over the top of the ball, sealing them down with the E600 super glue. The gems should be shorter on the front face so they don’t overlap the snowflake.

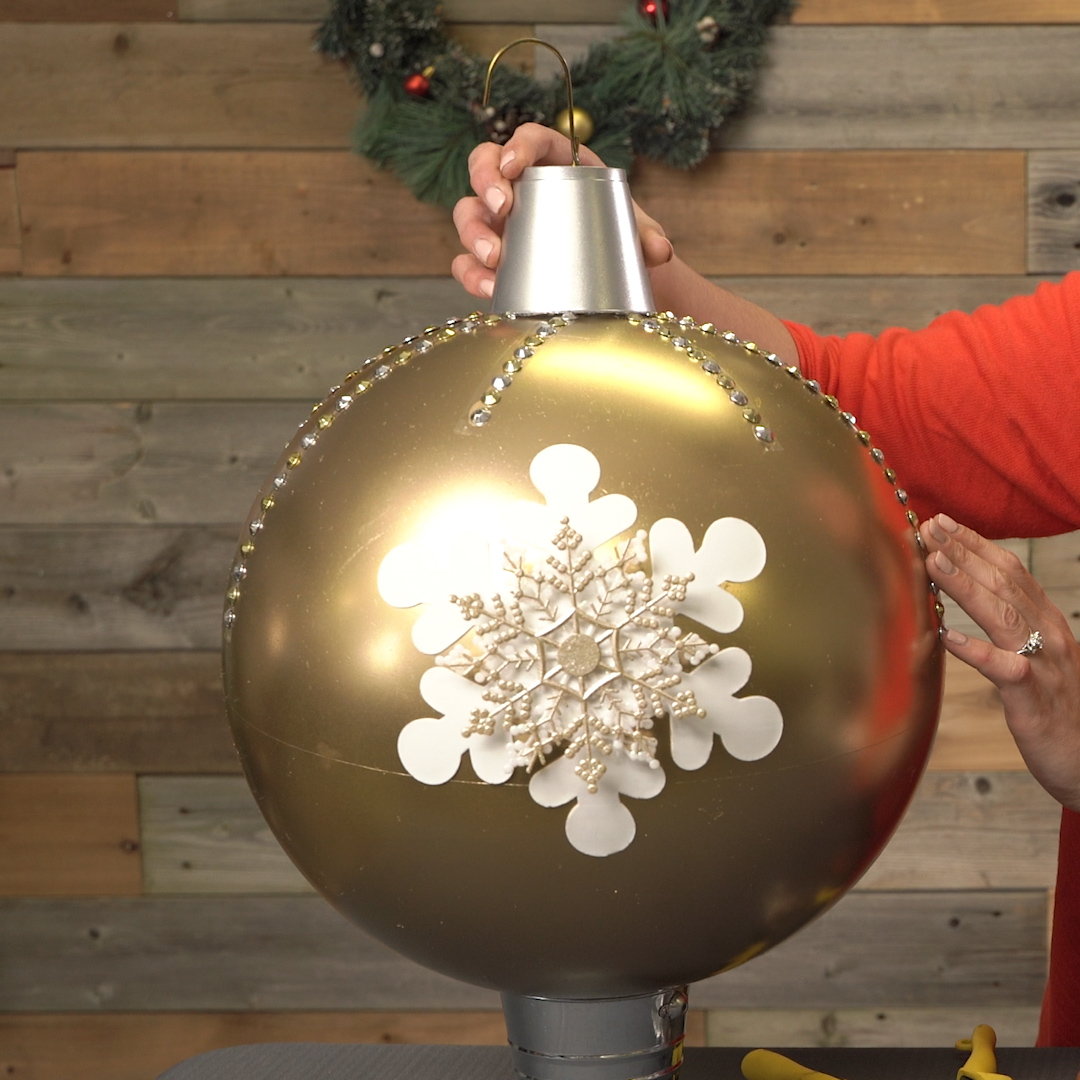
Step 9:
Time to attach the top hanging part of your ornament! Using the E600 super glue, secure the painted deli cup to the center top of the ornament.

Step 10:
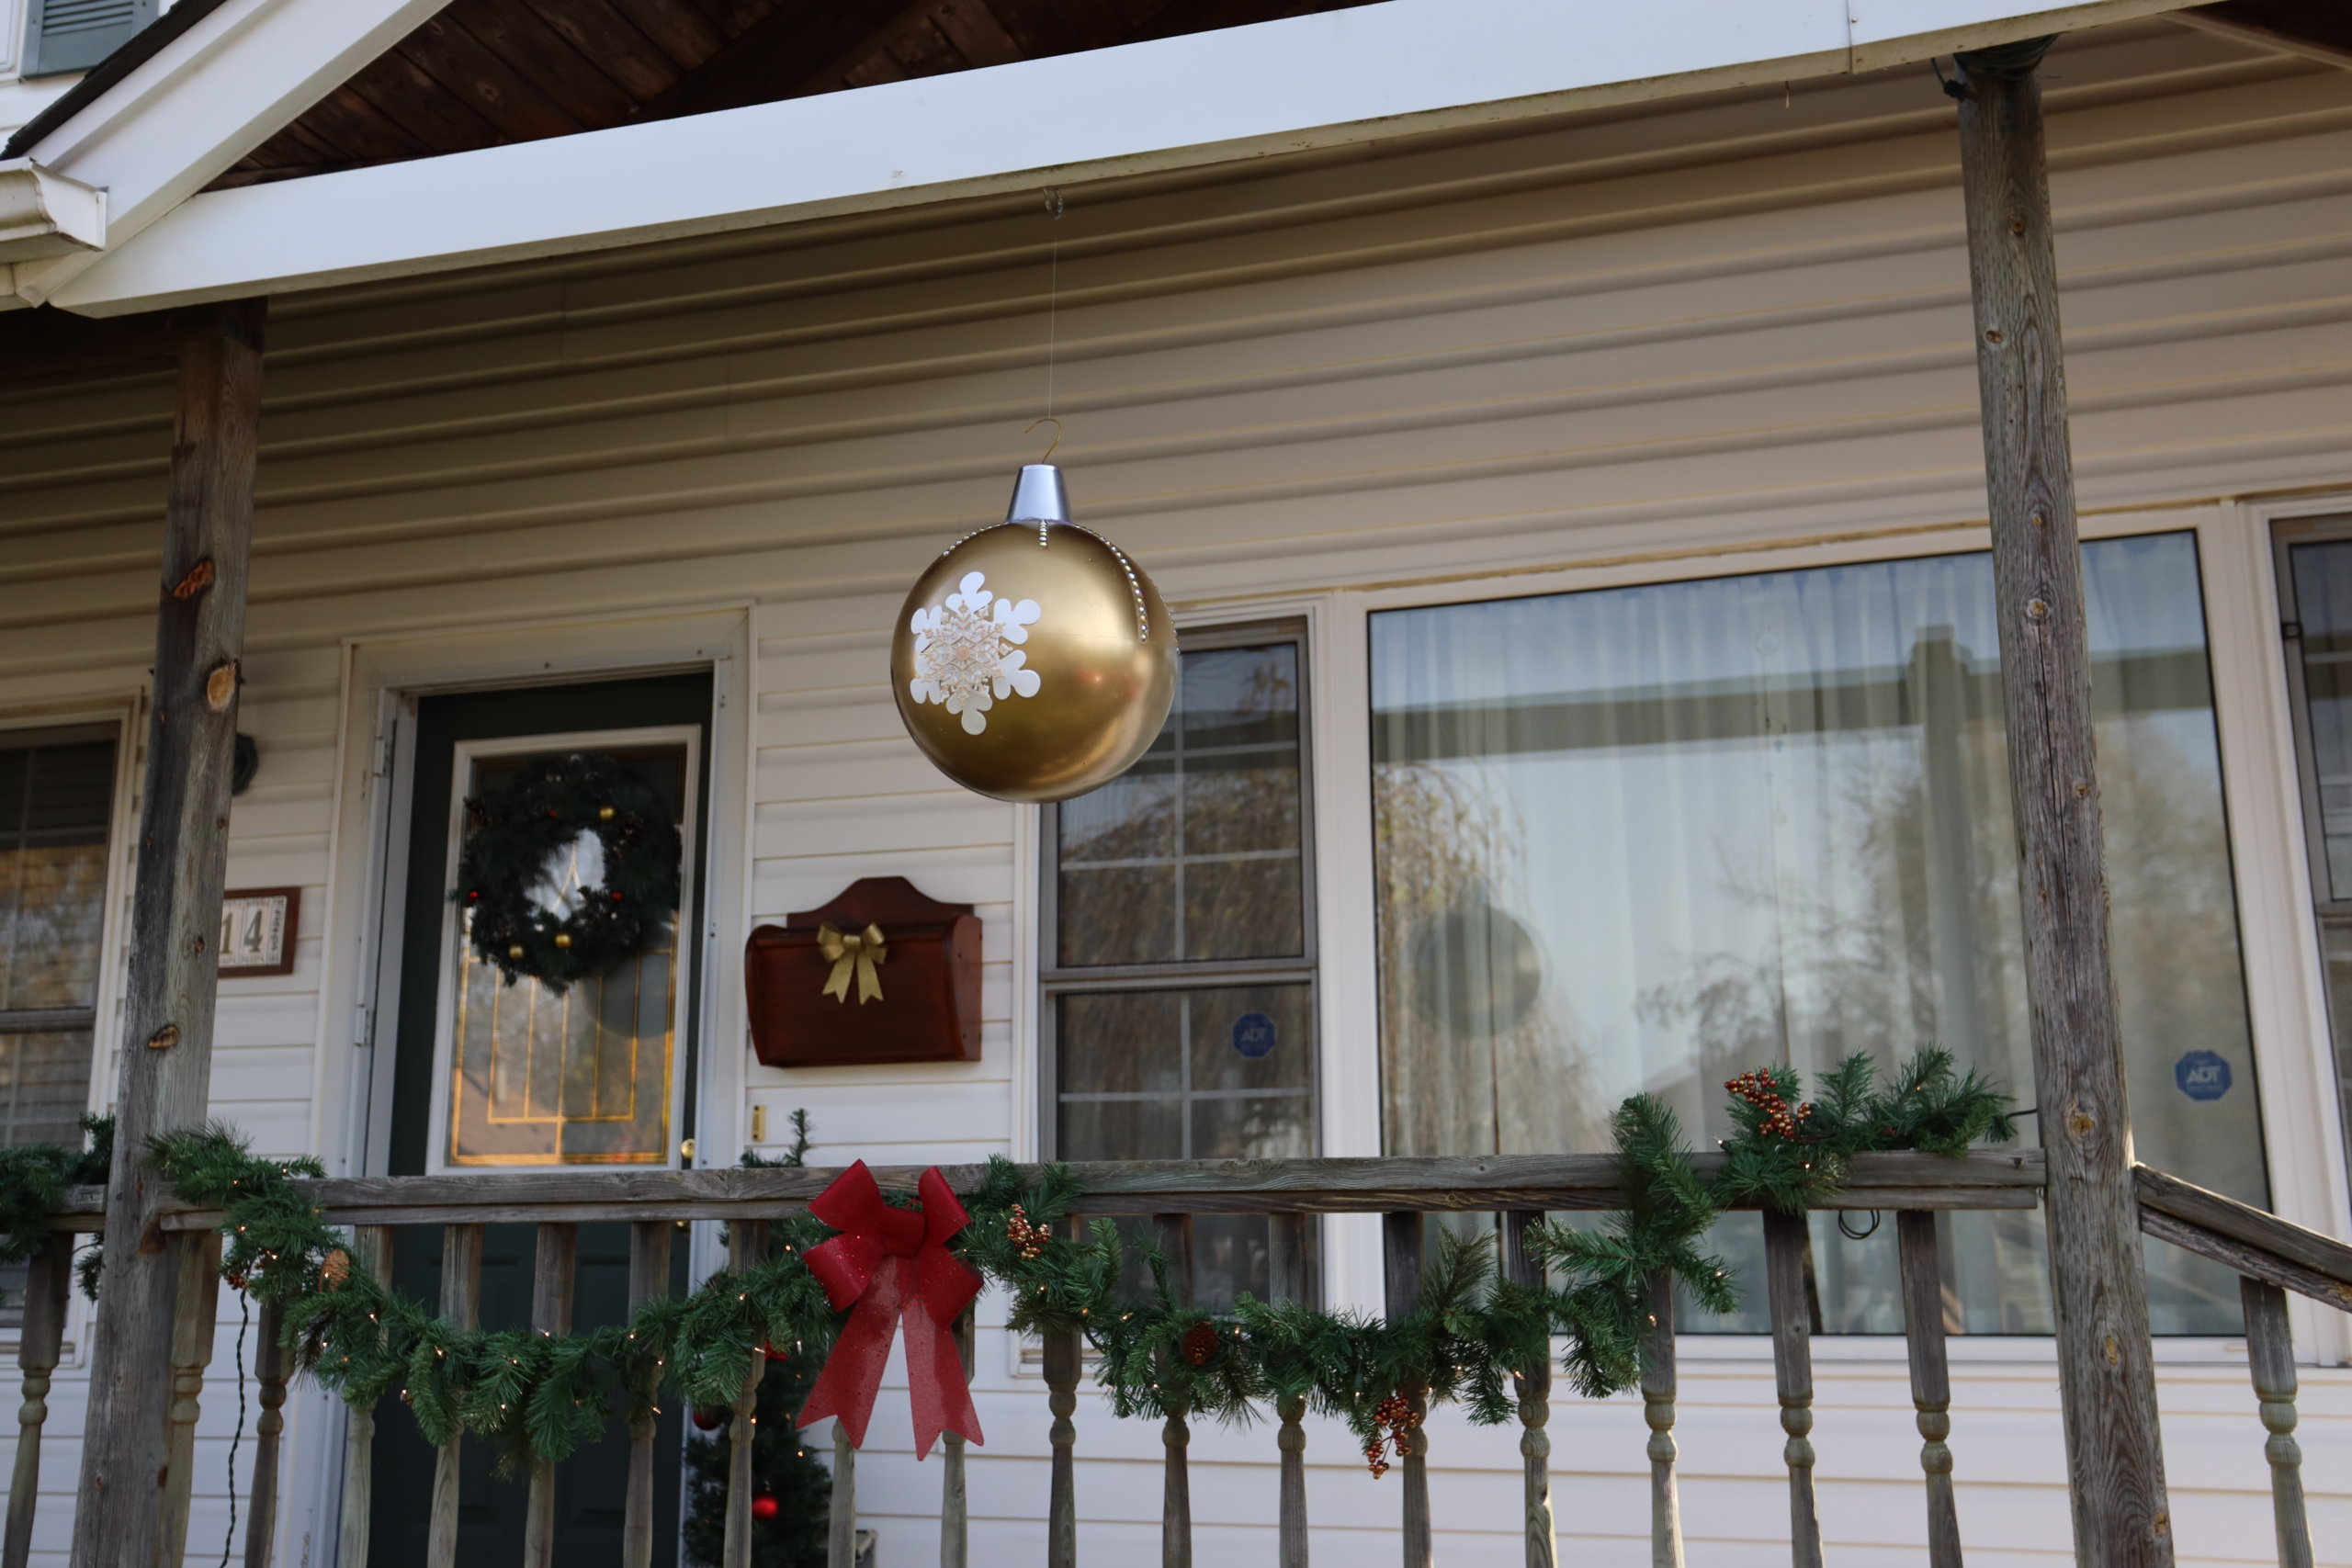
Once you’ve allowed all the glue to set, finish off your craft by spraying the entire ornament with an outdoor protective clear coat.
Step 11:
Using fishing line or another weatherproof string, hang up your ornaments for you to enjoy and all your neighbors to admire!

Now that you’ve hung your ornaments, the best way to spread Christmas cheer is to share it with us on Facebook, Pinterest, or Instagram.


