Halloween is right around the corner – now that it’s officially October we can say that, right? I say yes!
Now the thing with Halloween decor is that it tends to be orange or black or both! It’s a little too obvious, right? Yes! I think it should be able to blend in with your existing decor, and if you happen to decorate with orange and black, then I guess you don’t need this DIY. If you’re like me and orange and black are nowhere to be found (together) in your house, check this out!

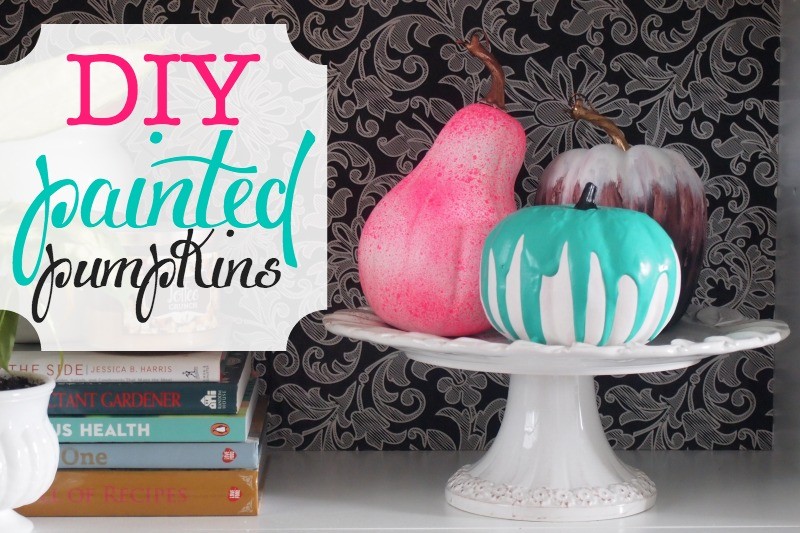
These are surprisingly easy and inexpensive to make, so if you change your decor next year, you can make more in different colors! I, of course, had to include a touch of metallic tones in there.
Its All About Color!
Sharpie paint or spray paint in gold & copper, paintbrushes, and acrylic paints.

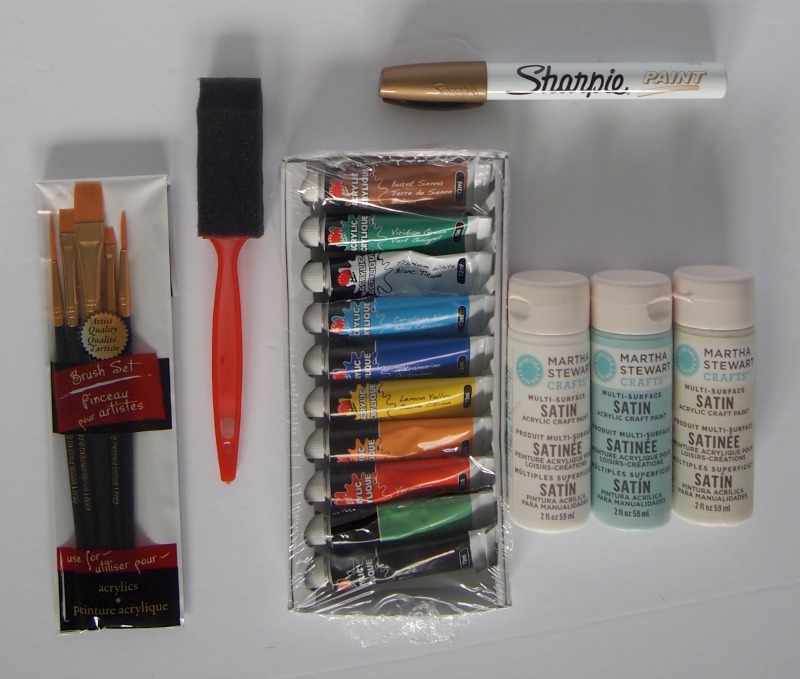
Of course, you’ll also need some pumpkins! I got these plastic ones very inexpensively, though you can also get real pumpkins and paint them – just make sure you throw out the real ones after Halloween!

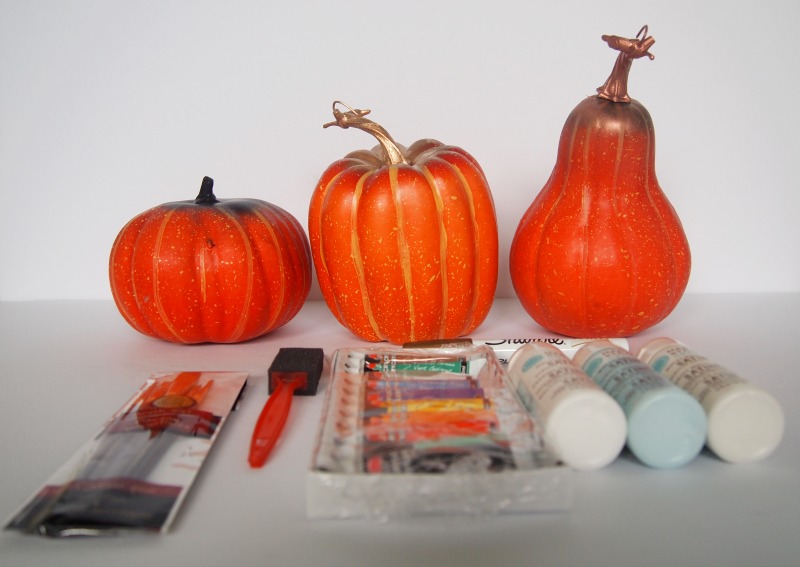
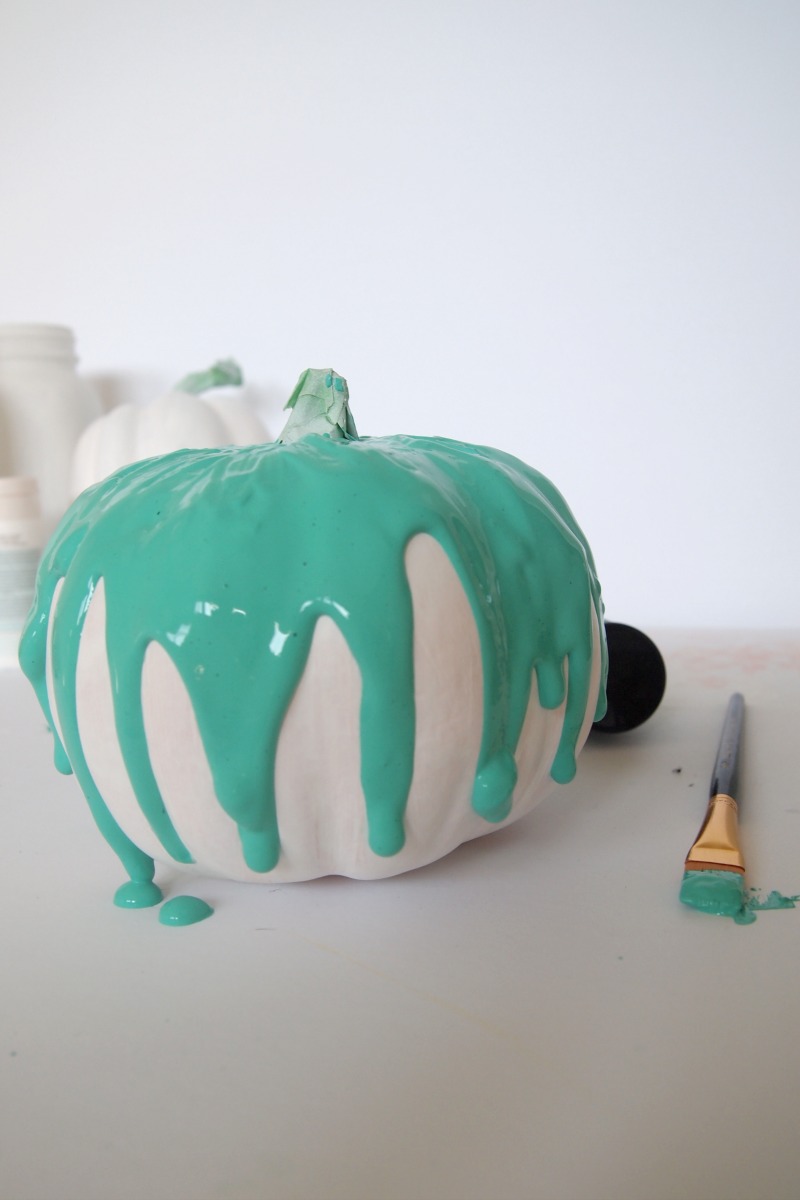
I then painted them all white. It took about 2 thick coats to get them the way I wanted. Here is coat #1.

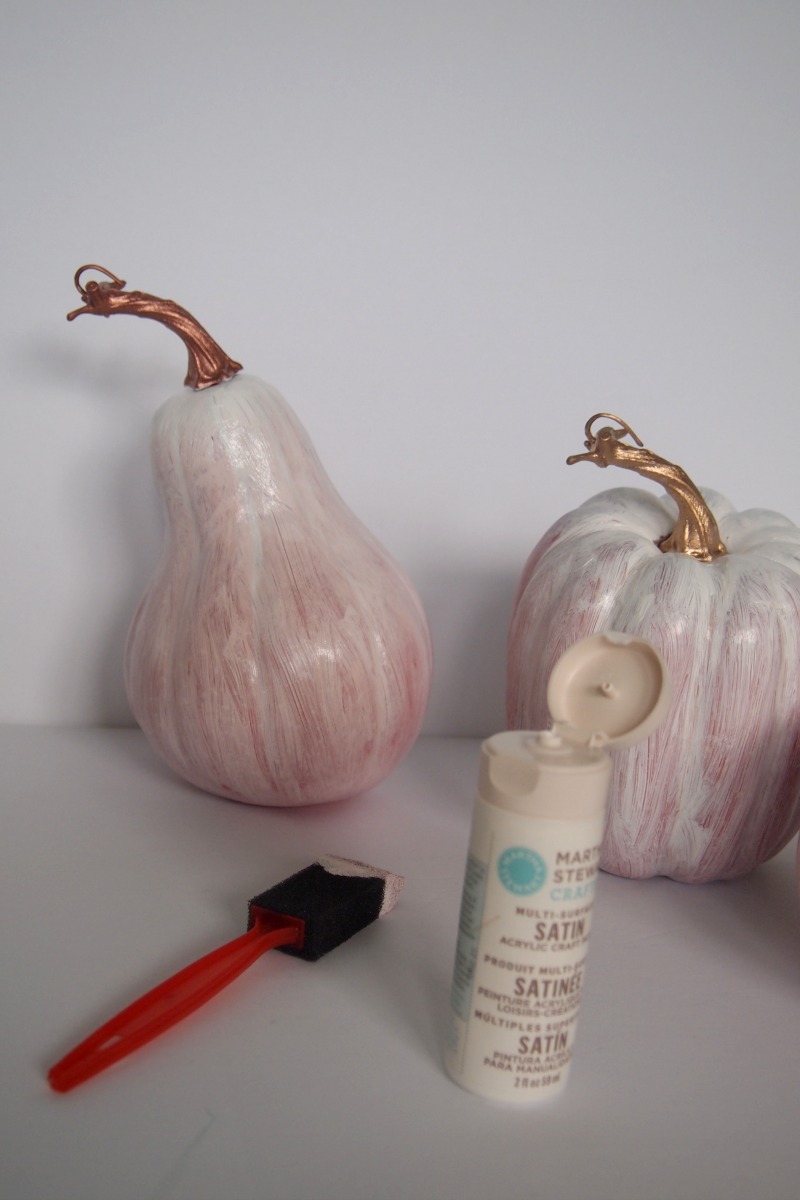
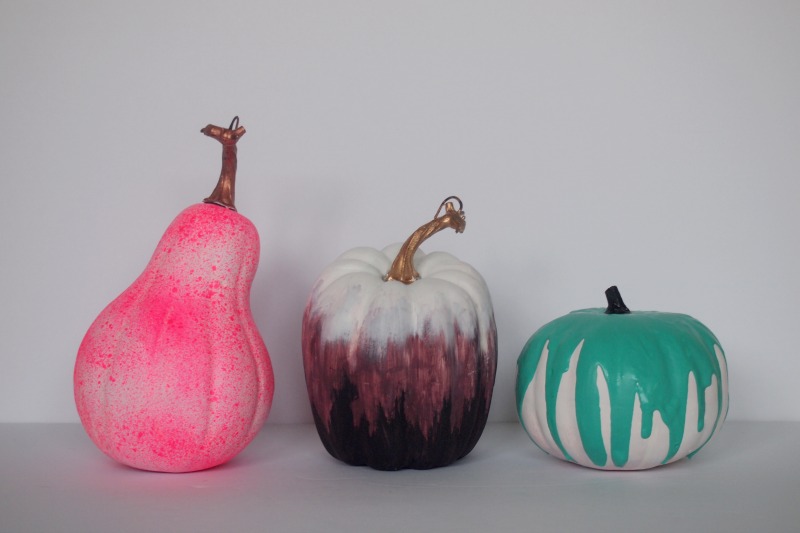
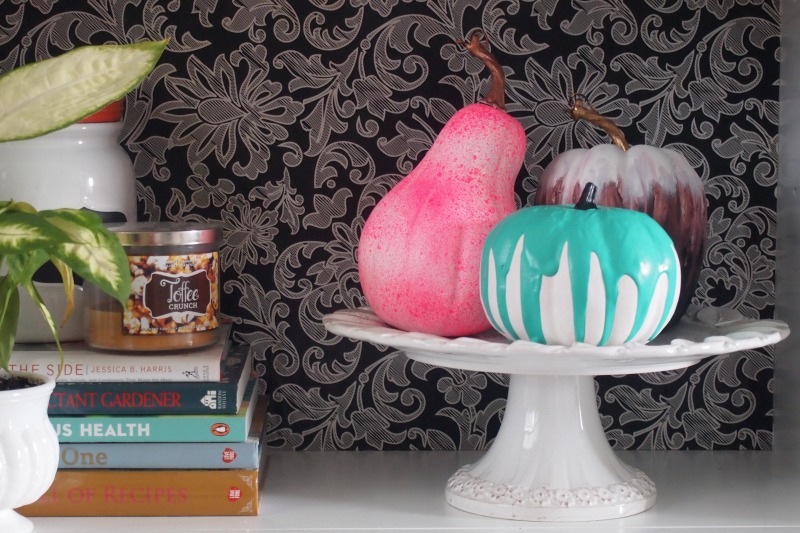
The tops of the pumpkins were painted first, then I taped them and got to work on the painting. The pink one was done by just splattering paint on it, the ombre one was just painted with white, purple and black (I blended them with a cotton ball), and the green one was painted by just pouring paint over the pumpkin!

Here they are all painted and pretty! Oh, did you notice one of them is in Decoist colours? Yes…white, purple and black. Because everyone needs a little Decoist in their home!

Serving you Beyond Halloween
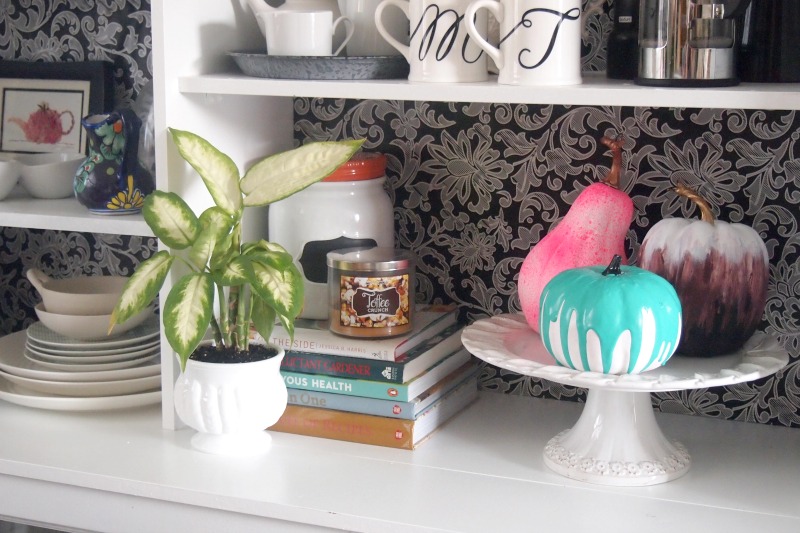
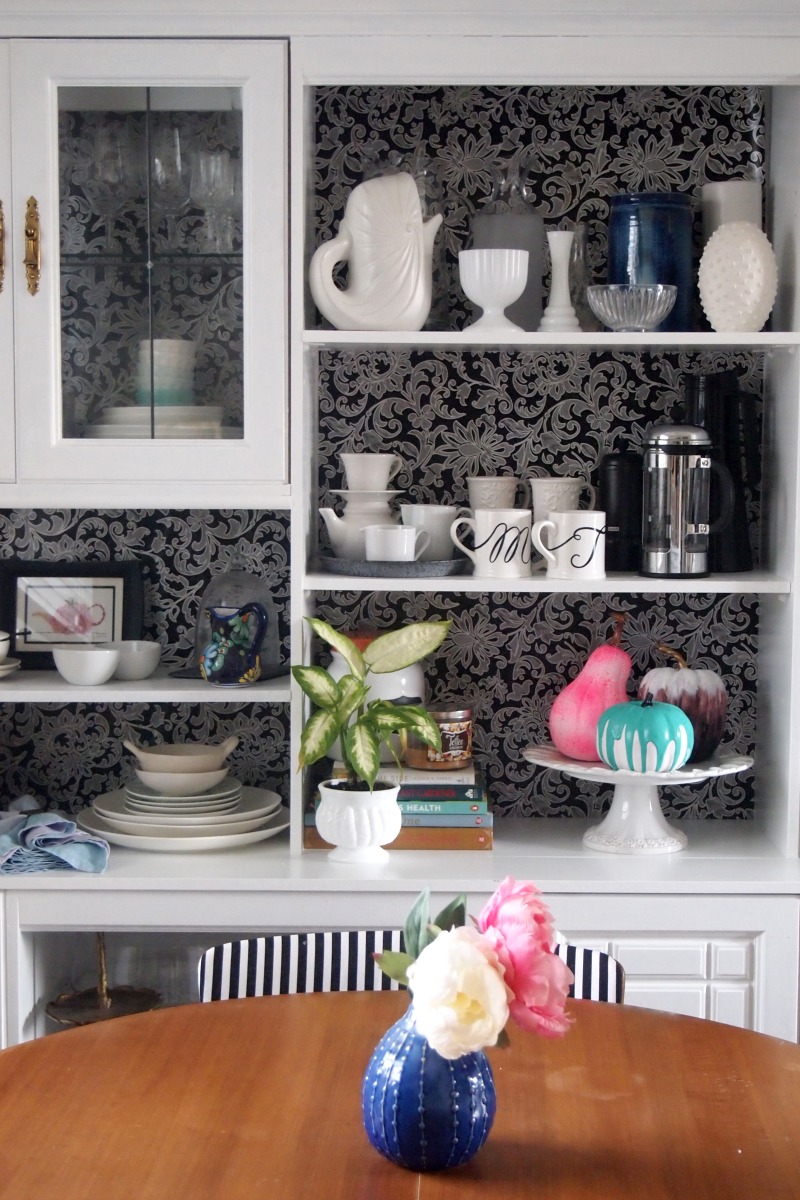
I actually tested these out in two different spots. I love them on a cake stand in a hutch to add a little color to the kitchen. I already have some of these colors in there, so it actually worked really well with the decor!

I also tried them with the metallic drink stir sticks I made last week. Remember these? Well, the pumpkins looked great with them as well!


I wanted to space them all out, however, to make sure the Fall and Halloween decor were together, but not all in the exact same place. Solution?

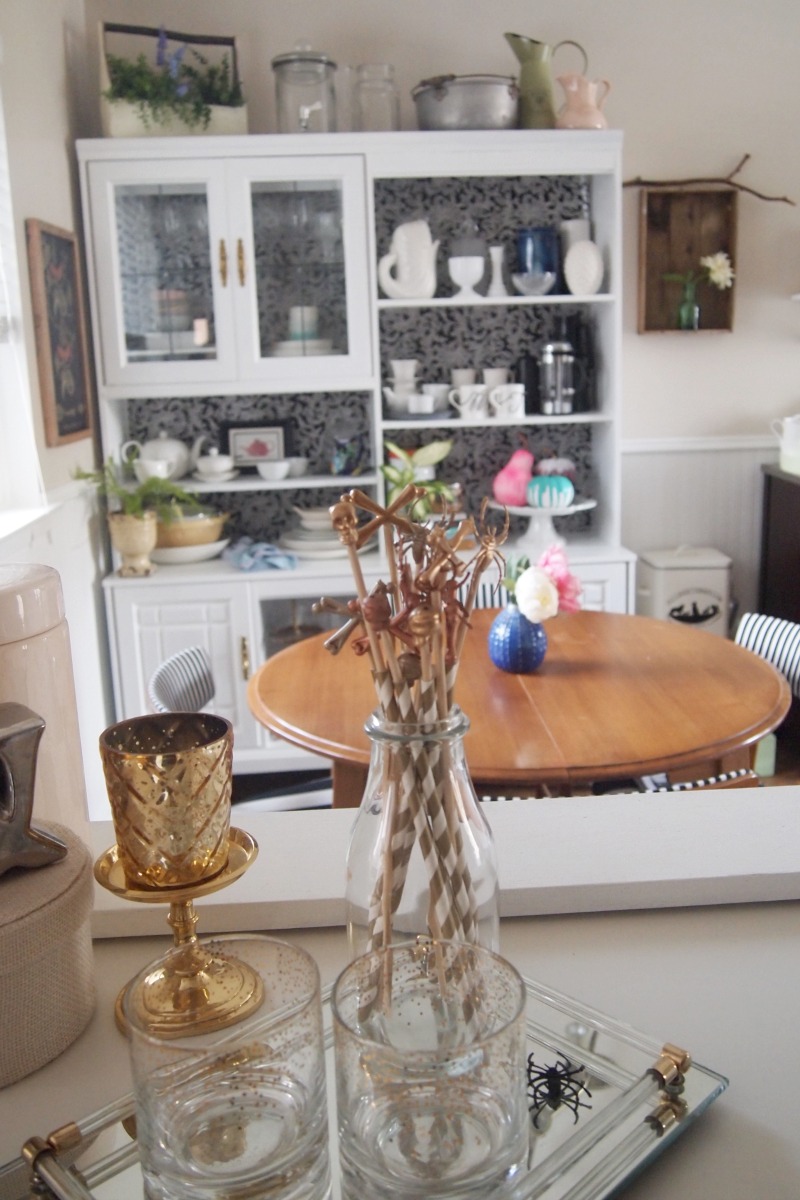
It’s like they’re together without having to be right next to one another, and that’s kind of the best solution as far as I’m concerned! I also loved how the pink in the pumpkin and the flower on the kitchen table worked together along with the touch of pink in the artwork in the hutch. The blues also complement one another well in several items already in the hutch. I love the extra pop of color these have given the kitchen!

The best thing about these? They’re not obvious Halloween decor. They’re fun. They’re colorful. They’re unique! Ok, so that’s like four things, but who’s counting?

With so many possibilities for pattern, color and texture, this is a DIY you should definitely try! This would be such a fun project to try with kids, and imagine how cool larger pumpkins like this would look in front of your house! I mean, really… your neighbours would love it and you’d have the most fun Halloween decor on the block for sure! Give them a try!


