Today I’m sharing my latest DIY project with Decoist readers: a modern hanging planter. Just in time for spring, this easy-to-assemble creation celebrates clean lines and affordable design. Not to mention, purchasing a few supplies can allow you to craft several planters–hanging them in a group makes a big impact. Read on for all the design details…

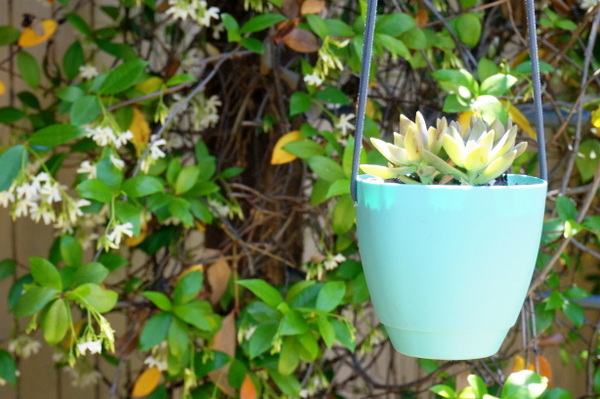
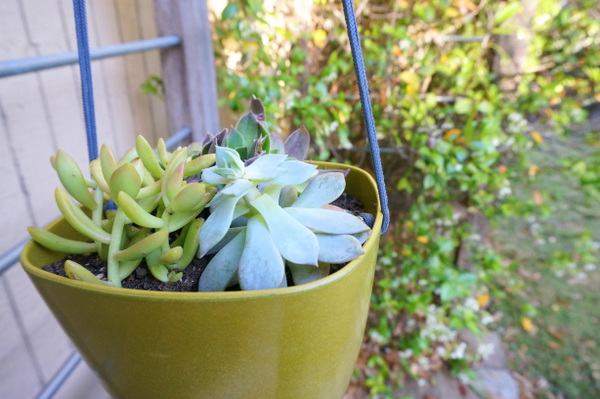
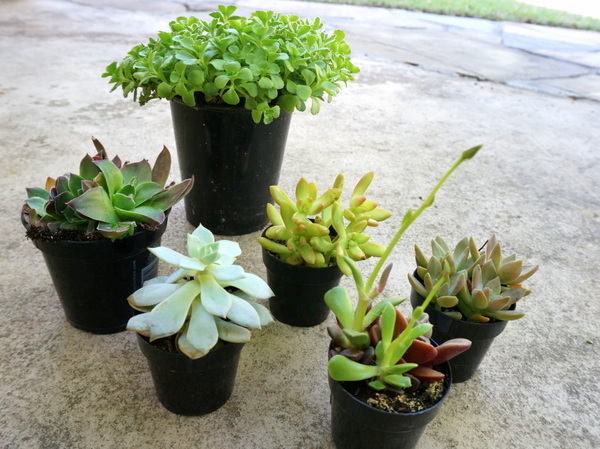
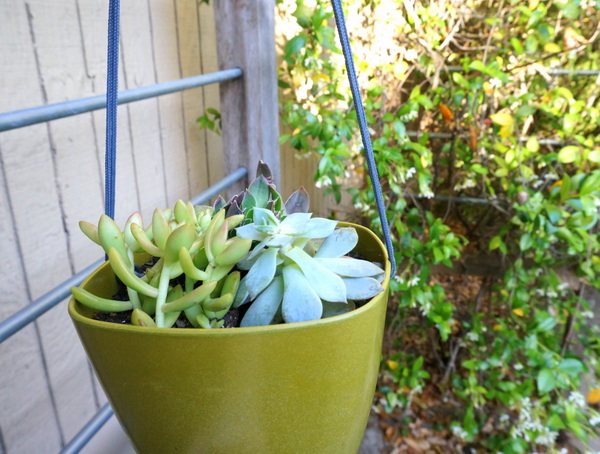
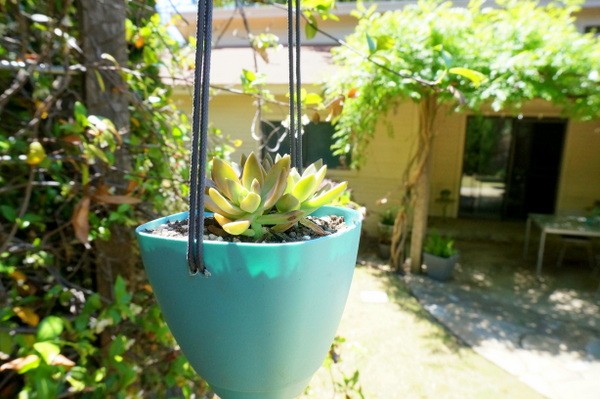
Before listing the supplies and steps, I want to emphasize the fact that this project works best when small, lightweight pots are involved, such as the aqua selection above. For many of the pictures, I feature the olive green planter shown below. It’s a medium size, which makes it easy to photograph. However, when purchasing a pot for this project, I recommend a small size for maximum durability!

Not to mention, succulents are ideal selections for this DIY hanging planter. Not only are they low-maintenance, they truly shine in clean-lined containers:

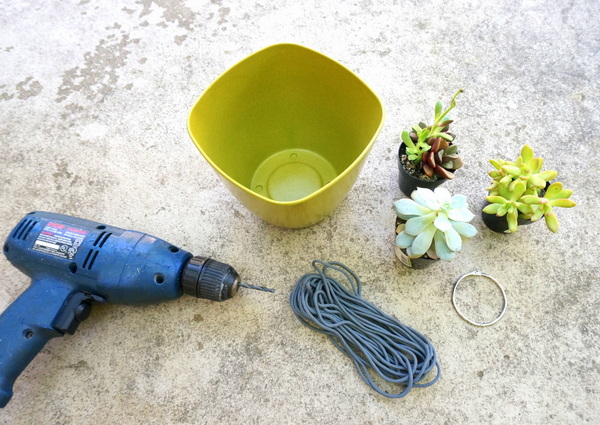
DIY Hanging Planter Supplies
Here’s what you’ll need as you begin the project:
- A lightweight planter
- A drill and a small-ish bit
- Durable string (I used parachute cord)
- Metal shower curtain rings
- Plants and potting soil
- A hot glue gun (not pictured)

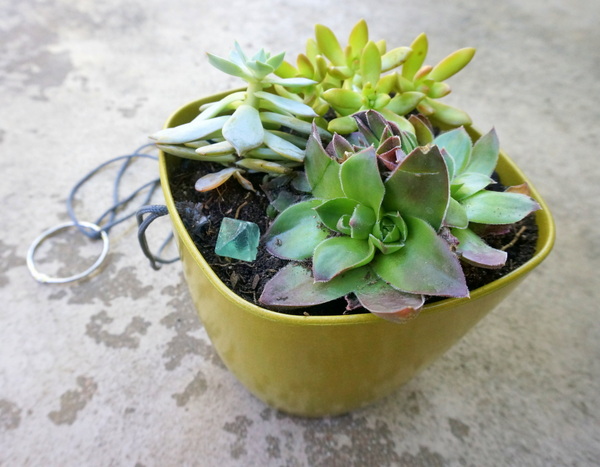
When selecting your greenery, consider the color of the pot you will be using to craft the planter. I love the way the many shades of the succulents in the next image stand out against the olive green of the pot:


Not to mention, since this planter will be hanging above you, you will want to select plants that stand out and add height and/or volume. That way they’ll be visible from your ground-level viewpoint.

Hanging Planter Project Steps
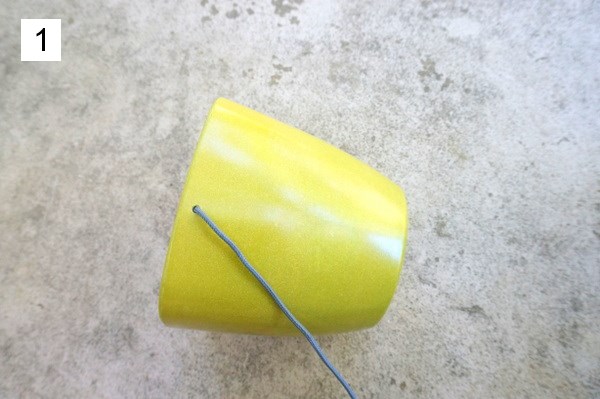
Step 1: Drill a hole on each side of the planter.
I’ll be honest–the olive green planter was a bit tricky to drill through. Make sure you choose a pot that isn’t too thick. Lightweight metal is a good choice, as is lightweight plastic or wood. If the planter is slippery, drill carefully, and you may decide to secure or clamp the pot in place before you drill for added steadiness. In addition, you may want to wear goggles to protect your eyes.

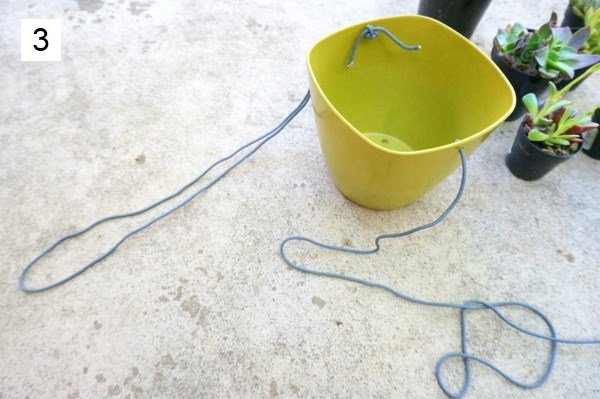
Step 2: Cut your string to the desired length (you will have two identical pieces) and place both ends of one piece through one of the holes of your planter. This will make your string form one long loop (shown below). Use the free ends to tie a knot in the inside of the planter.
Knot the rope several times for extra security. You may then choose to pull the string toward the inside of the planter so there is excess slack, make a loop, feed the knot through, and then tighten. This creates yet another knot for added sturdiness.

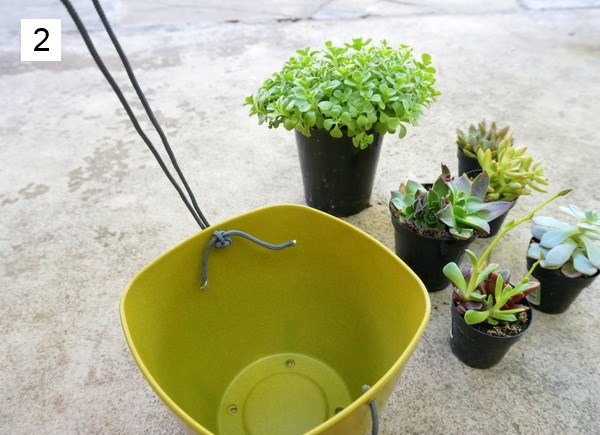
3. When you’ve finished tying the knot on one side, repeat the process on the other side of the planter.
Try to ensure that each side features a long loop roughly the same length. Don’t worry if there is a slight difference. There will be a way to correct length issues when it’s time to hang the planter.

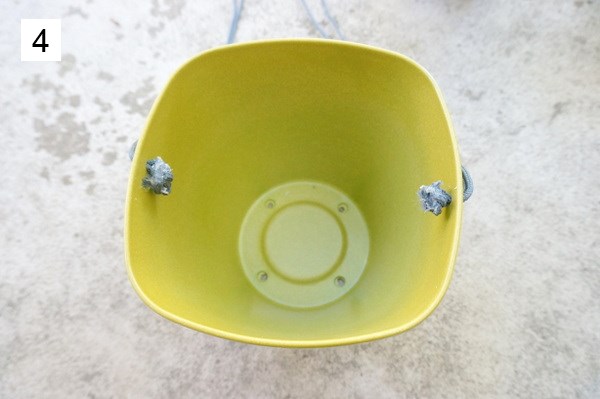
Step 4: Trim the excess string, then dab the ends with hot glue and carefully press them down against the knot so they are held in place.
Use caution when handling hot glue. If your glue gun is not temperature controlled, don’t risk a burn. Use tweezers to secure the glue-y string in place.

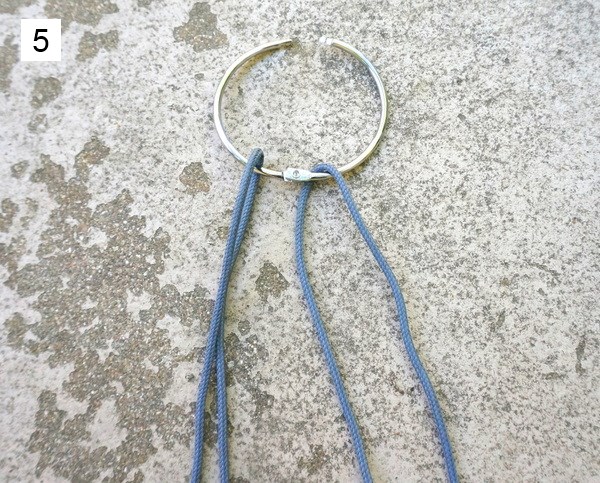
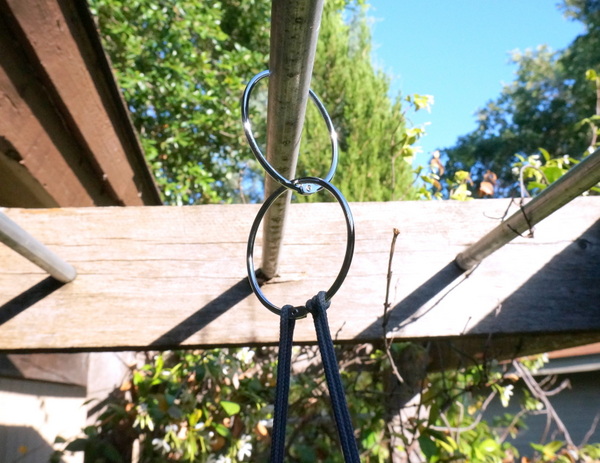
Step 5: Slip the ends of the long, looped string onto one shower ring, then snap the ring closed.
The shower ring brings everything together while providing a loop for hanging purposes. If one side of your planter string is longer than the other, simply wrap it around the shower ring. This picks up excess slack!

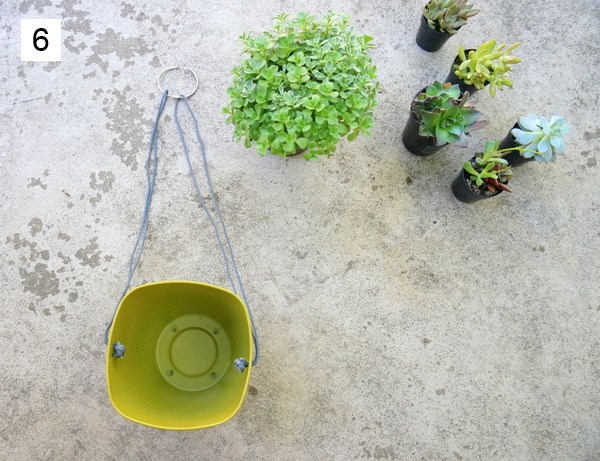
Step 6: Time to plant!
Add soil to the pot, then position your plants as desired. Have fun arranging the greenery to create your composition of choice!

Modern Hanging Planter Display Pointers
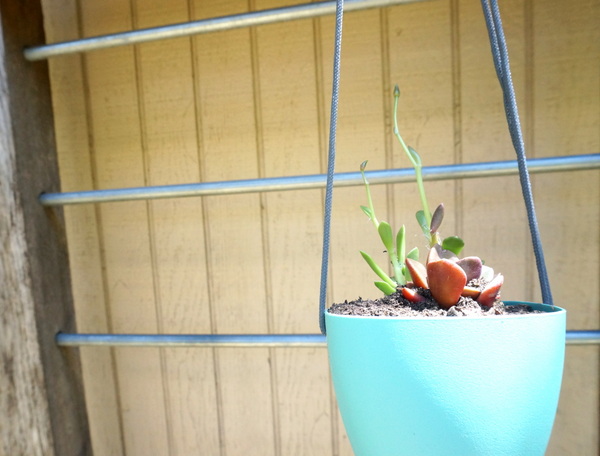
I’ll end today’s post with a series of tips and pointers that help this project to go smoothly. For starters, feel free to add rocks and crystals to your arrangement for added bling:

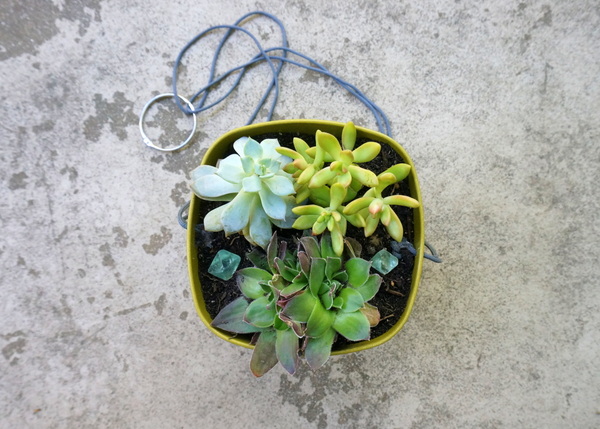
As mentioned, this project works best with small planters. If you have any question about the sturdiness of your planter when hanging, consider adding a third hole/loop to steady the pot and add support. Simply make sure the holes are evenly spaced, secure the string in place, and join all three loops with the shower curtain ring.

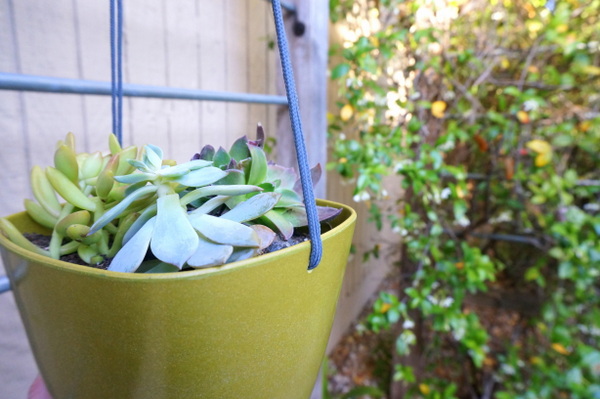
Not to mention, larger planters benefit from stronger cords. For example, not only could the olive green planter above benefit from a third hole and added string support, it would be even stronger if a metal chain were used instead of the parachute cord.

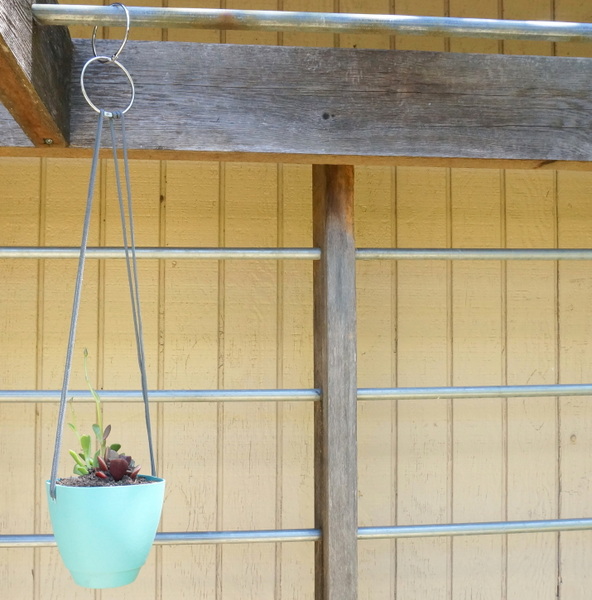
Depending on where you hook the top of your planter, the pot may hang at an angle that you’re not crazy about seeing. Simply add another shower curtain ring to the top, and the planter will turn to face another direction, leaving it’s best side facing you. Not to mention, the added ring helps the planter to hang a bit lower, which may be ideal for your outdoor space.

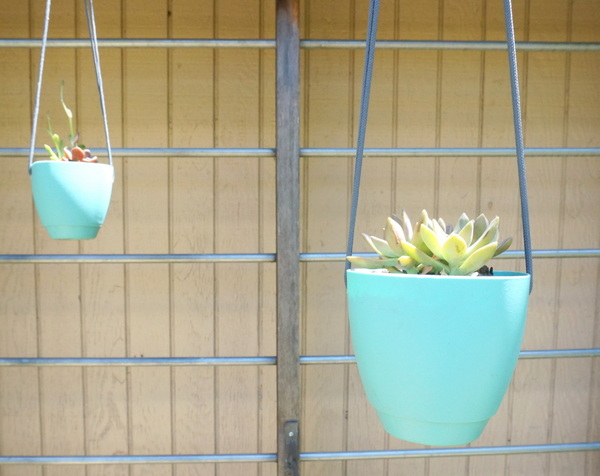
I enjoyed using pots in two colors–they combined to form an interesting vignette against the back wall of our yard, which also happens to be the back of our neighbor’s house.

It’s beige, so a touch of aqua is a welcome addition. Here’s a view of the planter hanging from the top of my trellis:

Not only do these planters help create a modern, organic look in your outdoor space, they would make amazing gifts for holidays and other special events, such as Mother’s Day.

I hope you enjoyed today’s post. Remember that good design doesn’t have to be accompanied by an expensive price tag. I used two planters I already had, then paid $2.50 for the third. Not to mention, the succulents were around $3 apiece. The pack of shower rings was a whopping $6, and I have plenty of rings left over for future planters. Happy crafting!