We know that photos can be an amazing source of design inspiration, so this article may contain affiliate links that will direct you to a particular decor item. Clicking on a link may result in a portion of proceeds being paid to www.decoist.com
Supply List:
- Metal cookie tins with lids
- Metal cutters
- Sandpaper or nail file
- Hot glue gun & glue sticks
- Acrylic paints
- We used teal, black, brown, gold, copper, and metallic teal for this craft.
- Sponges or sponge brushes
- Waterproof clear coat spray
- Felt and twine, or Command hanging strip
Step 1:
Lay the lid of the cookie tin on a flat surface and start by marking out a straight line across the tin cover. Our line is just under the half-way point of the lid.

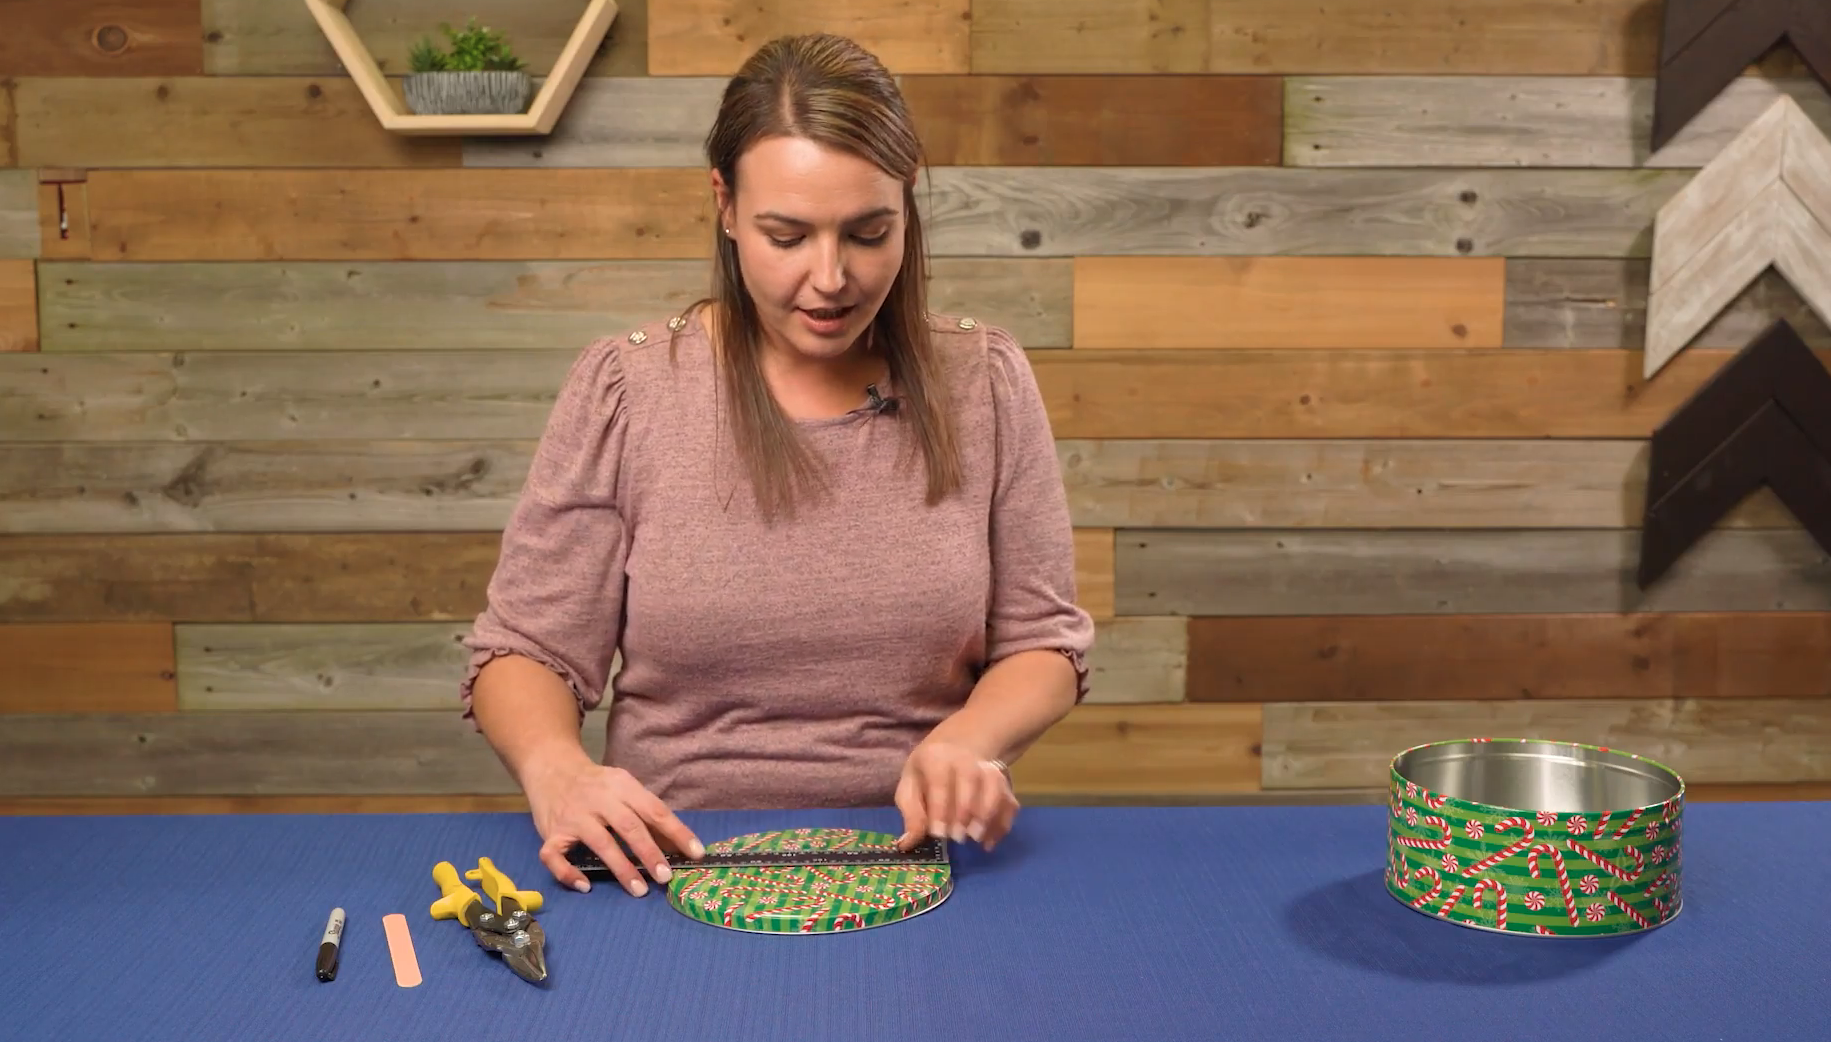
Step 2:
Take your metal cutters and cut across the marking. Discard the excess half.
Step 3:
Glue the half-lid onto your cookie tin, using a generous amount of hot glue.
Step 4:
Sand down the edge of the metal lid using the sandpaper or nail file to smooth out any sharp metal edges.


Optional Step:
If you’re going to be using real plants in your floating planter, drill a few drainage holes into the side of the tin that will be at the bottom of the planter. You’ll also want to place gravel inside the planter before the soil.
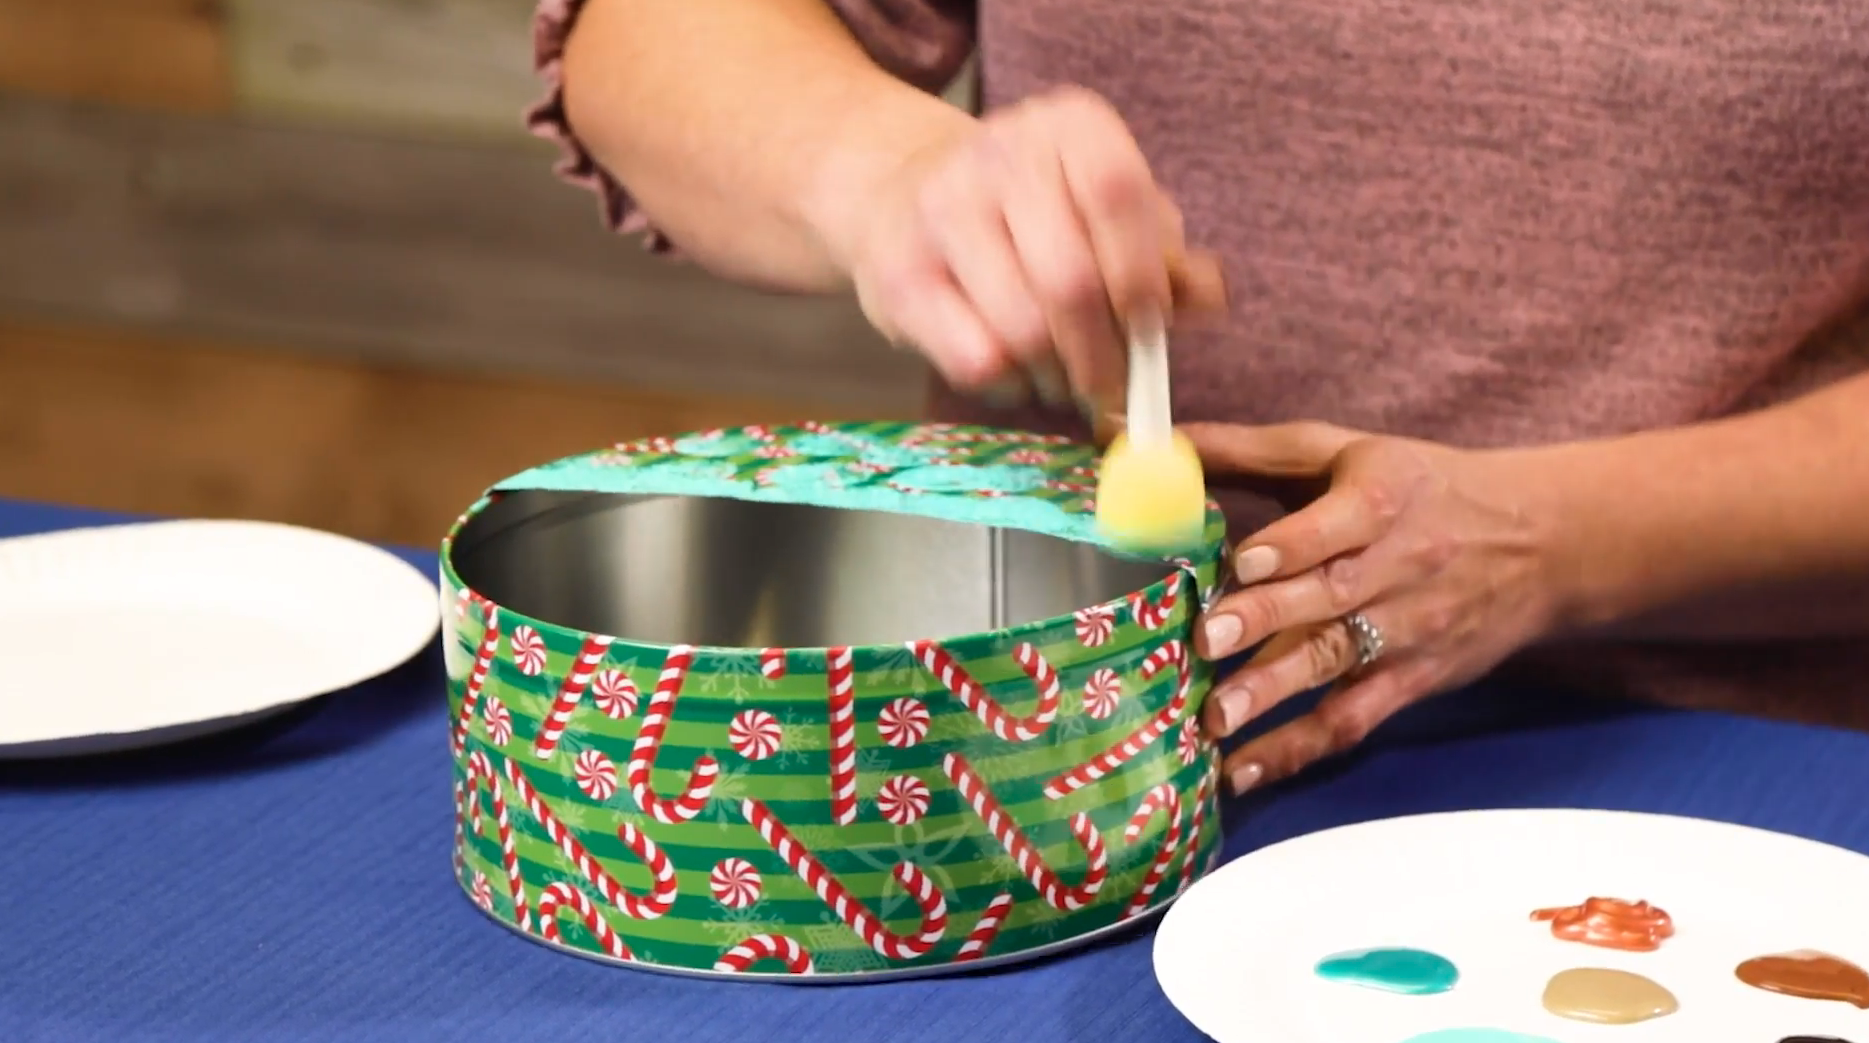
Step 5:
Now it’s time to decorate the cookie tin! We’re going for a Patina effect, which is a thin layer that forms over surfaces like copper or brass produced by oxidization. We selected teal, black, gold, copper, and metallic teal paints to produce the patina look we want.
Step 6:
Using a sponge or sponge brush, begin by applying a base teal color. You want this layer to stay wet in order to blend it in with the other colors so you should apply a generous base layer.

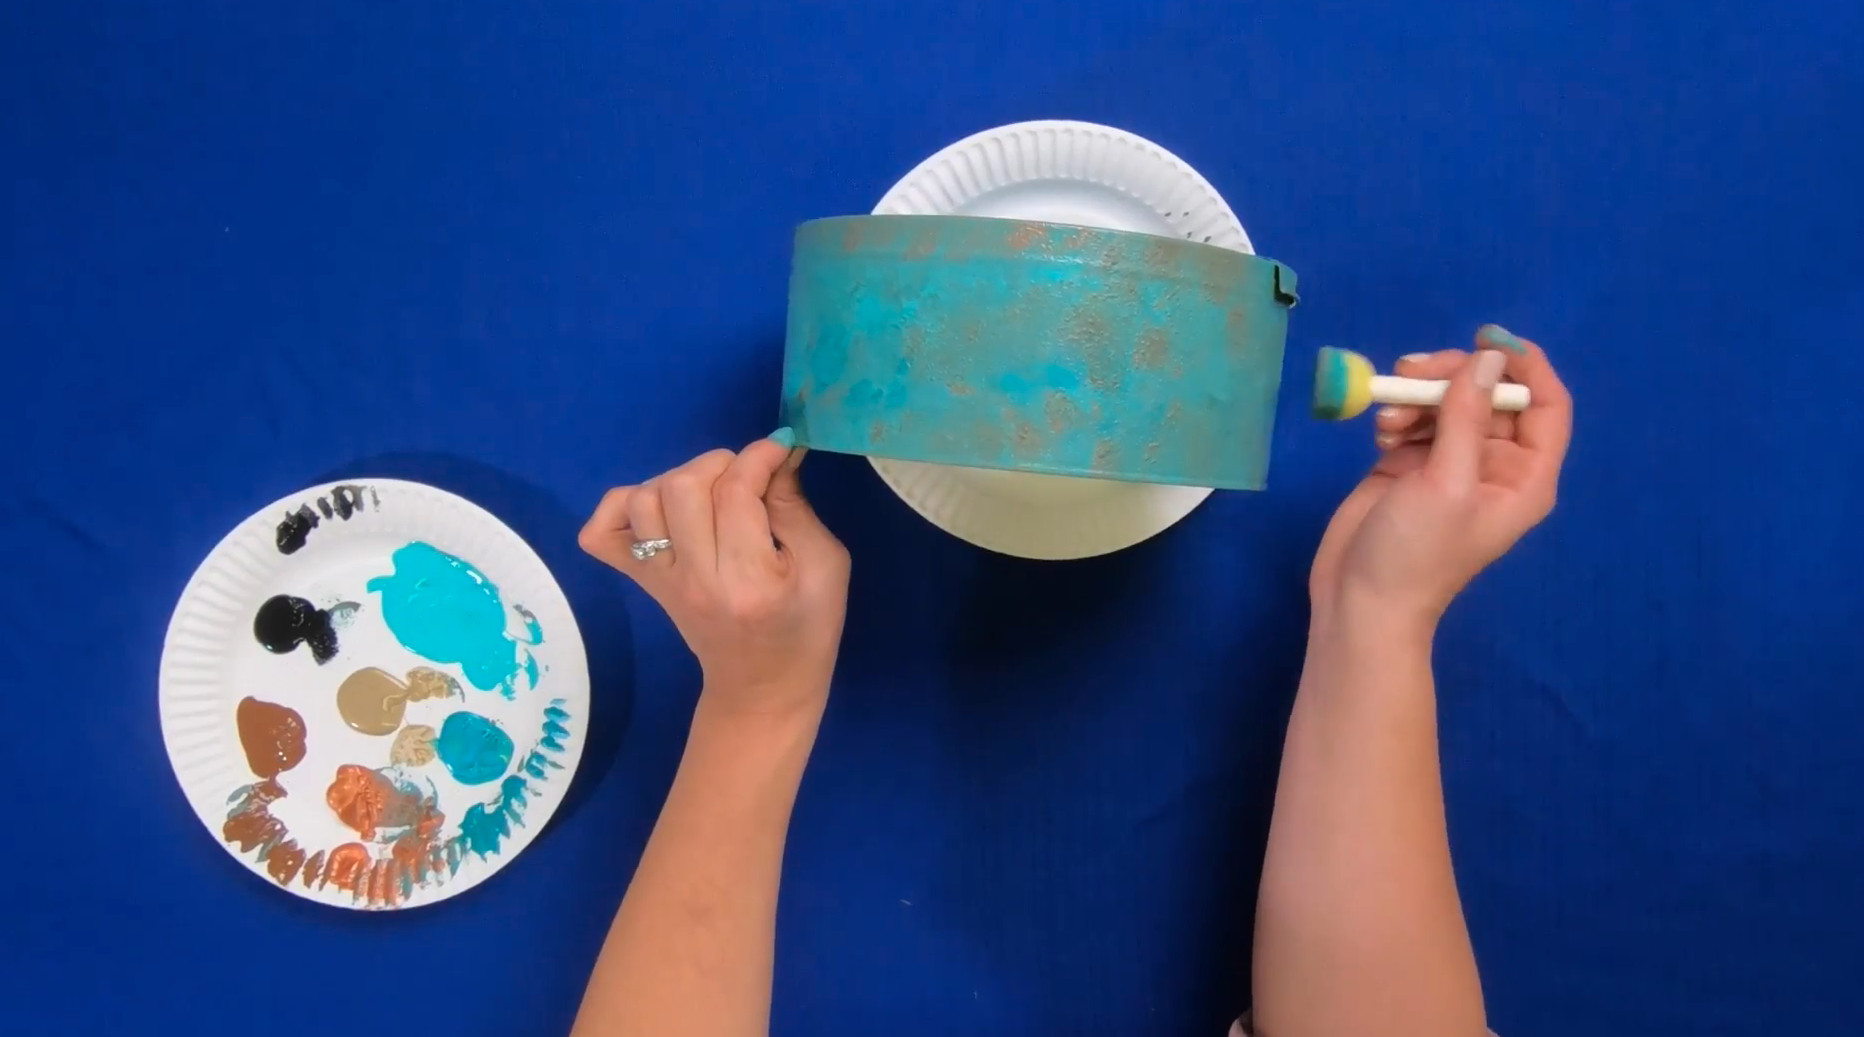
You want to achieve the same paint texture as we did with the galvanized technique when making our DIY rustic metal tier tray, but we’re using a sponge rather than a plastic bag.
Step 7:
Once the teal base is applied, start layering down some of the metallic teal, followed by the brown, black, copper, and gold paints. It should look texturized.

Step 8:
Let the paint on your tin dry completely, then add your hanging fixture. You can use something like a command picture frame hook, or you can use your felt pieces, twine, and hot glue to create a hanging fixture.
Optional Step:
If you want to have an extra seal over your floating planter or you plan to hang it where it might be exposed to the outdoors, use a waterproof clear coat spray to finish it.
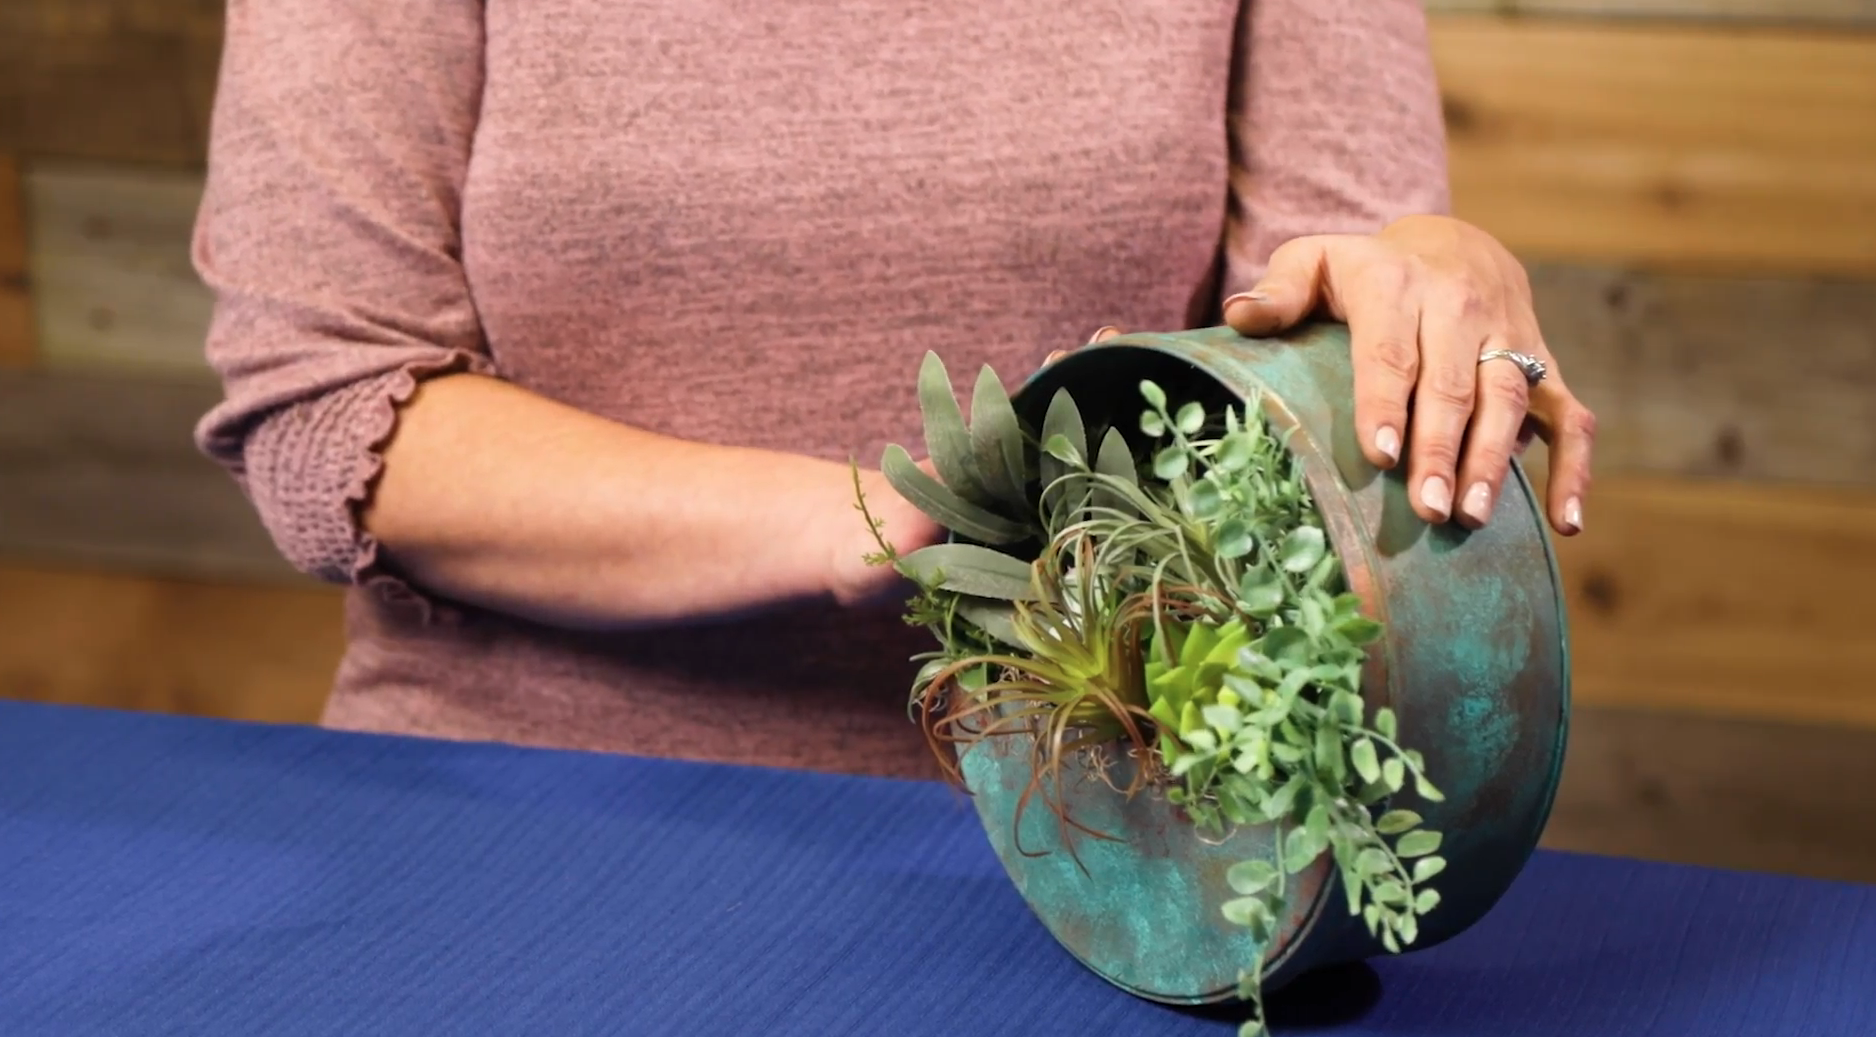
Step 9:
It’s time to add the plants to your patina wall planter. In order to keep our flowers elevated in the planter, we chose to add some filler in the form of decorative grass from the dollar store.

You’ve got your plants in place, and now all that’s left is to hang up your planter! Once you’ve got your plants and their new patina planters proudly displayed, you can share them with us on Instagram, Facebook, or Pinterest.