Now that Christmas is officially over, things like ornaments, trees and stockings are making their way back into storage boxes, and our living rooms might start to feel a little empty! I don’t know about you, but I like the warm and cozy feeling having that extra stuff around gives, especially in the cold of winter! So, to help you out, I’m giving you a craft today that you can have around all winter!

The lovely thing about this project, as you will see in the images below, is that it can be used indoors and out!
Let’s get started…
Here’s what you’ll need:


Pretty simple, right? If you’re wondering where on earth the pine cones came from, I bought them. Yes, I could have gone outside and collected some, but then I’d also have to bake them to make sure anything living inside the pine cones would not also be living inside my house. Did you know that’s a thing? It is. Thankfully in winter, pine cones are readily available for purchase even at the dollar store!
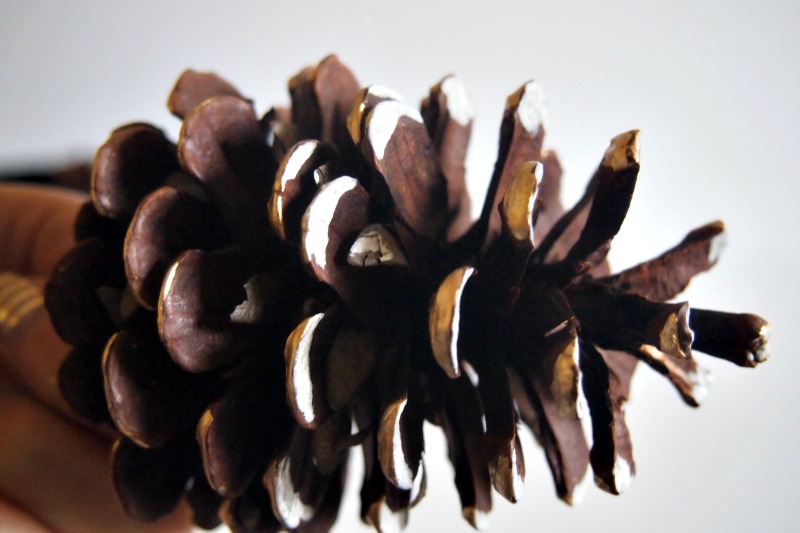
Next, I started with the chalk marker:

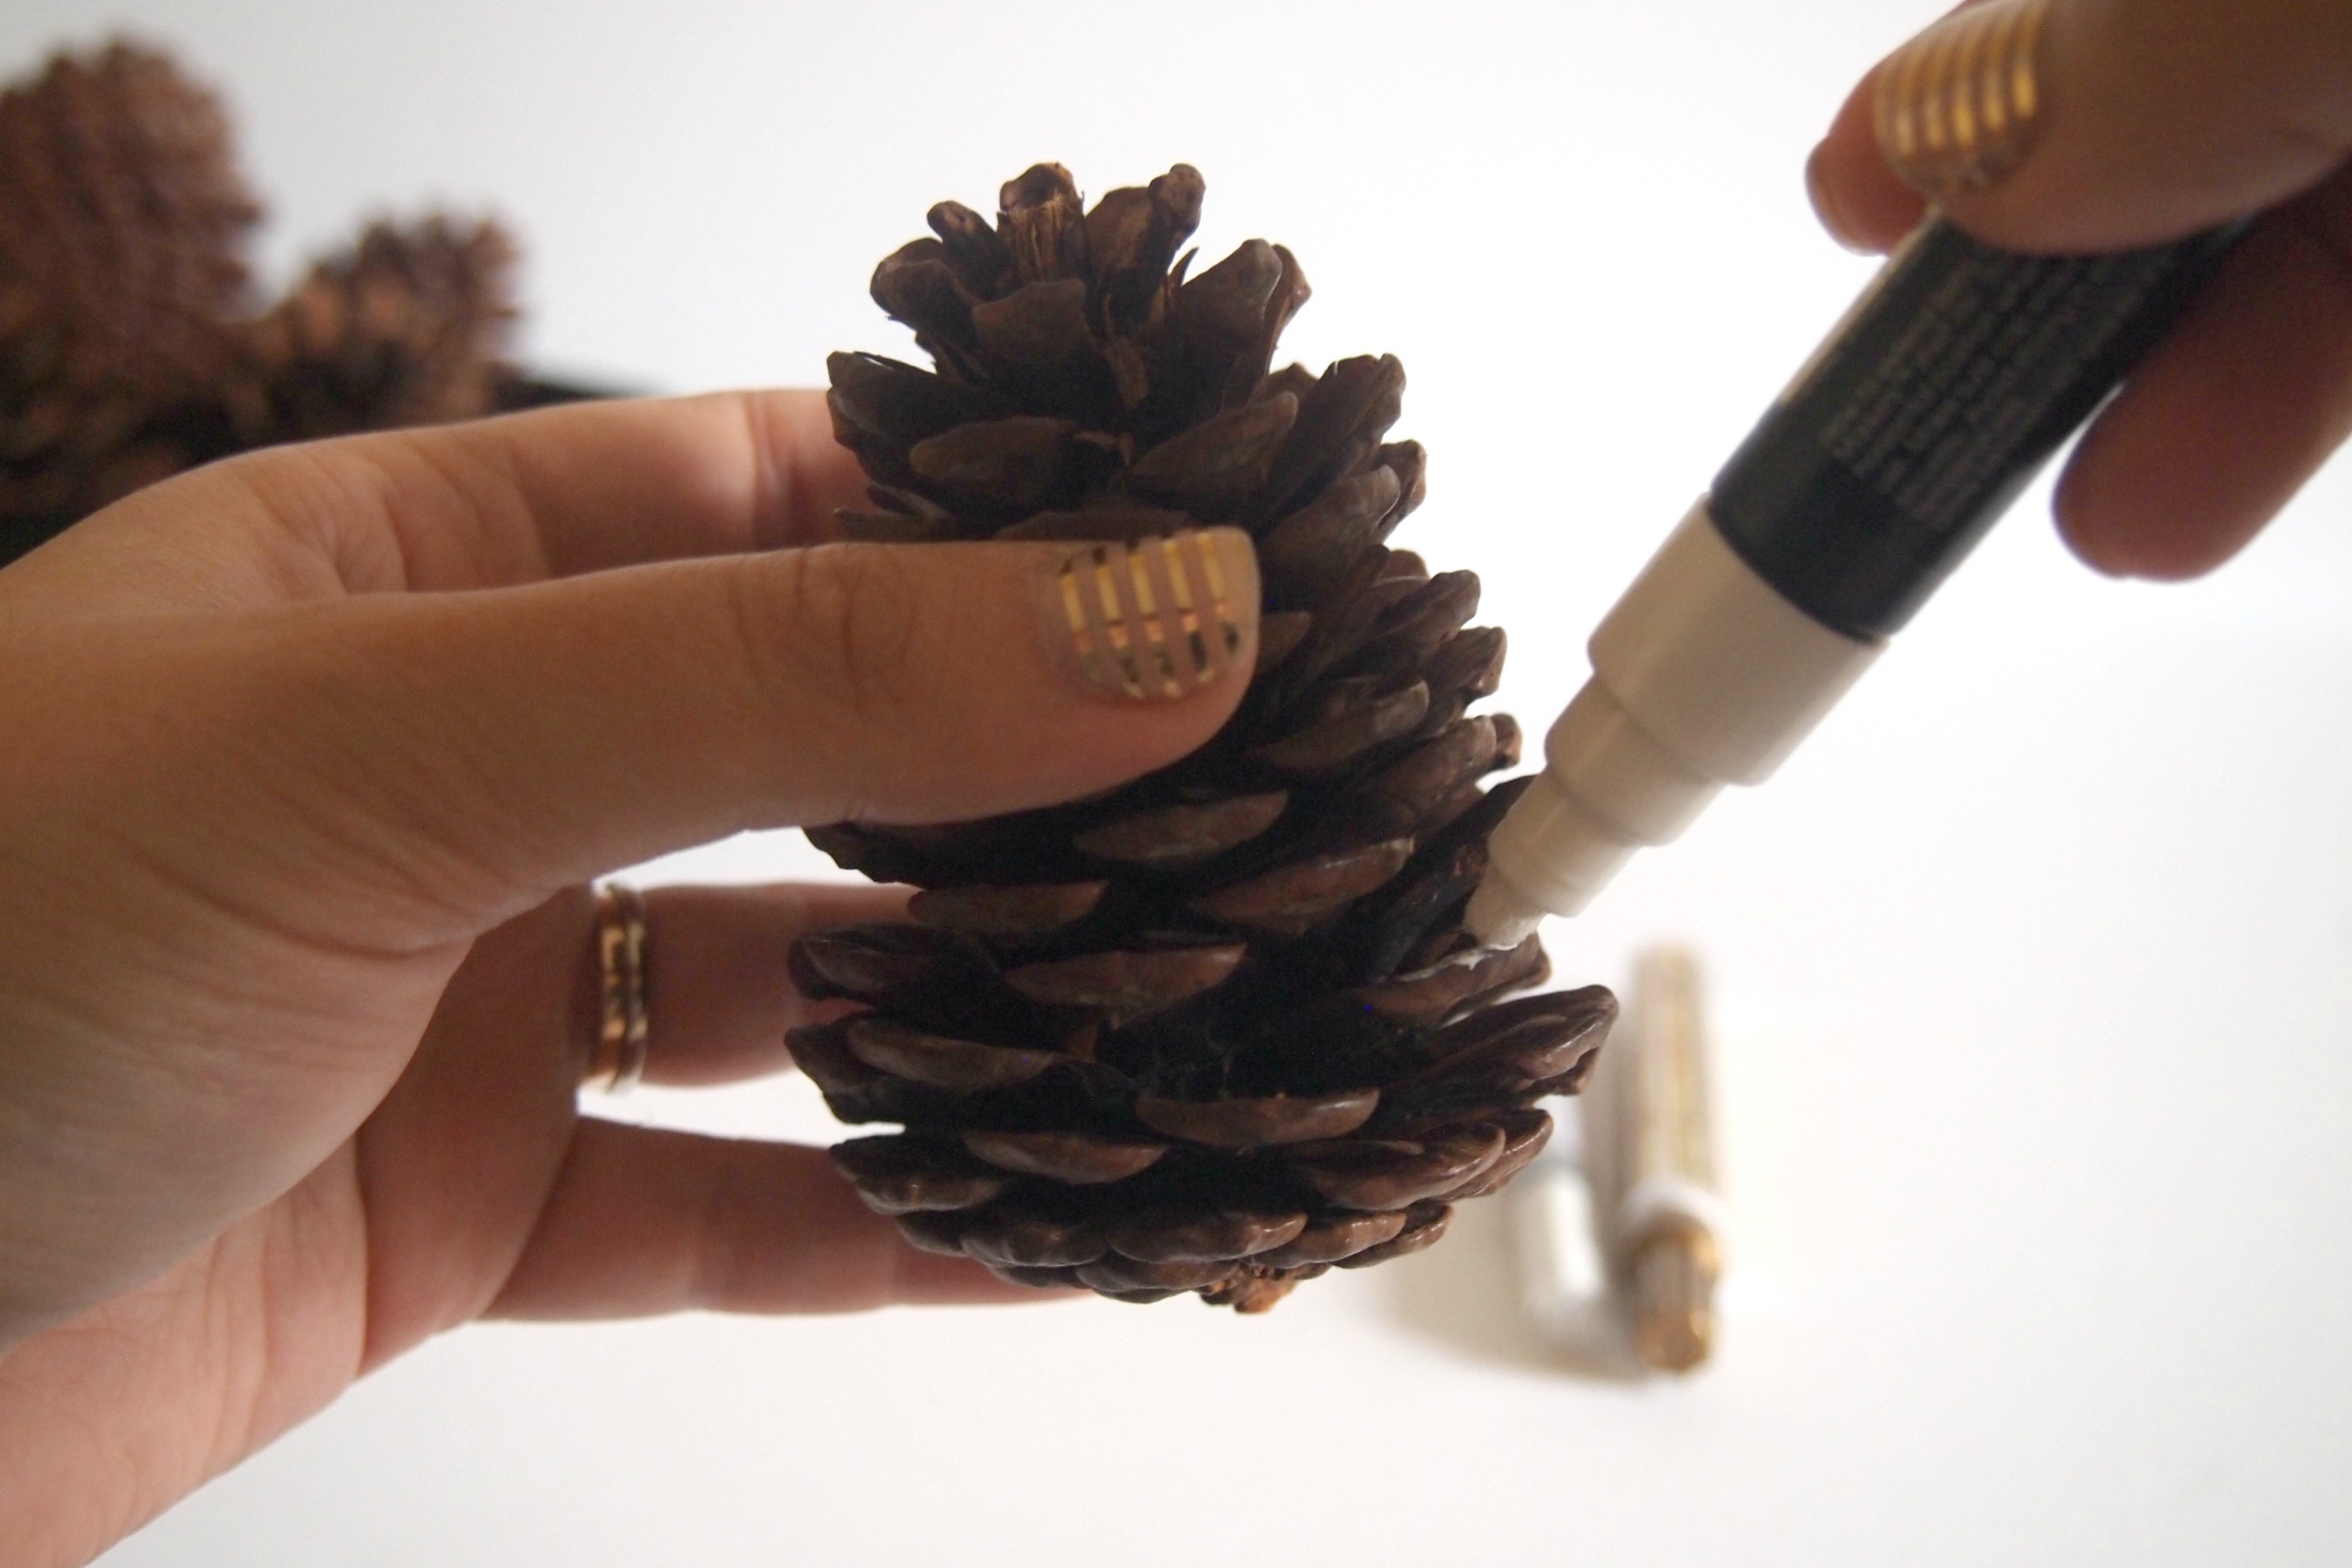
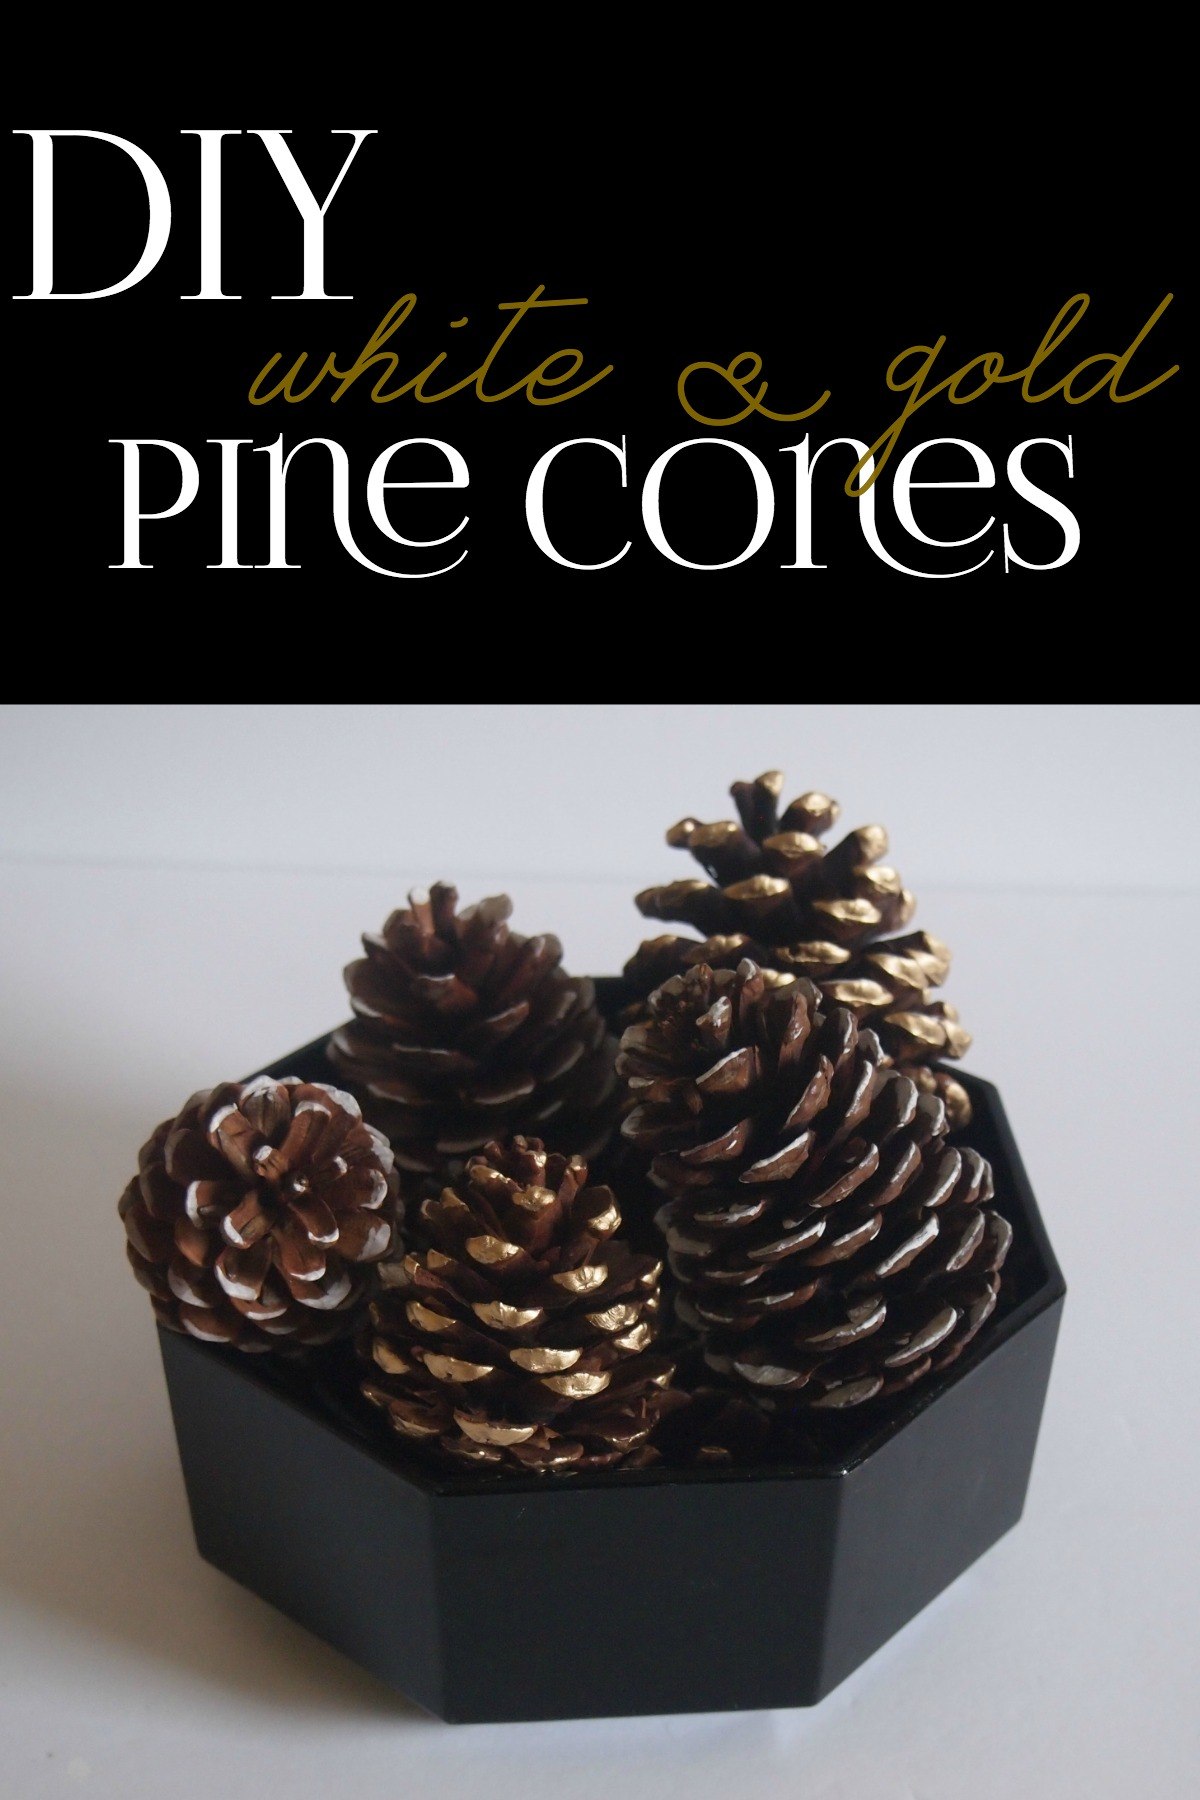
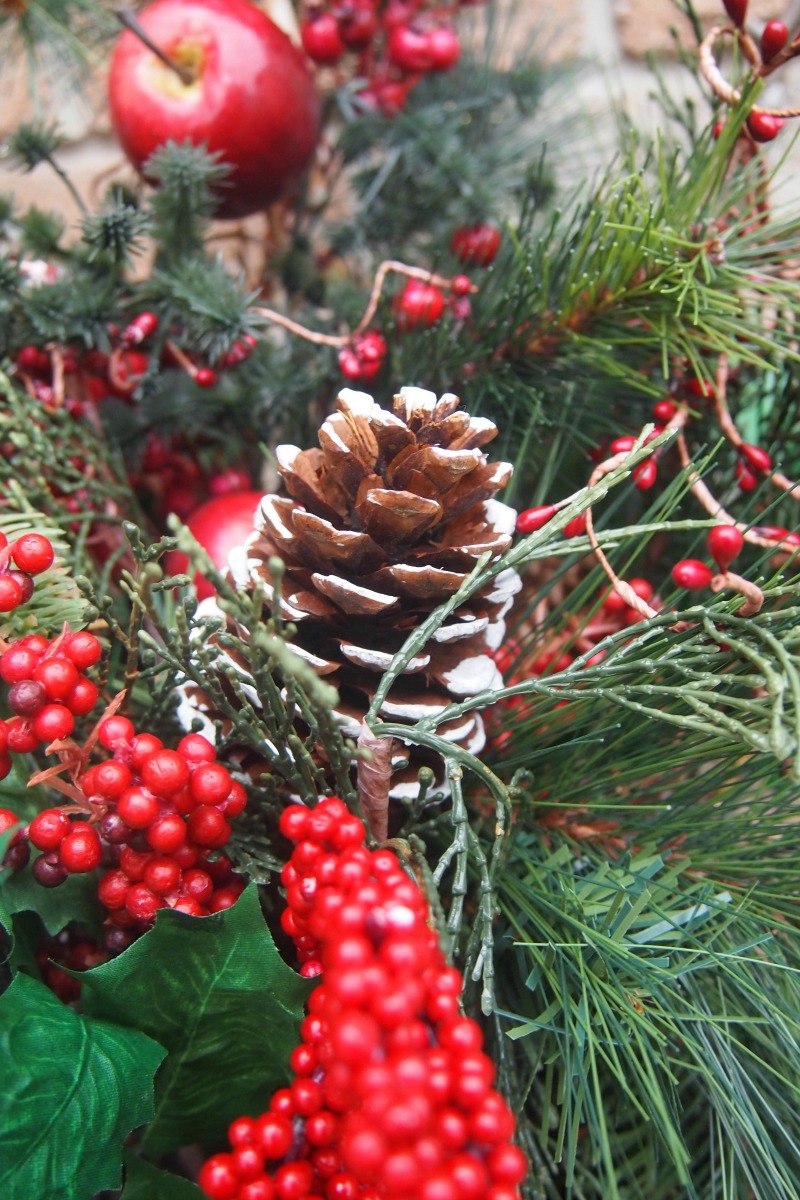
All you need to do is color the tips. This will give you a snow-covered look!

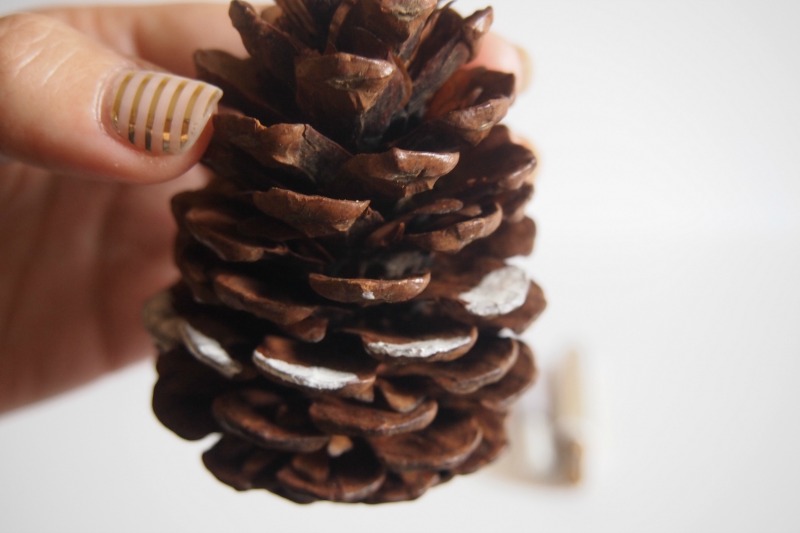
You can start anywhere, and you don’t need to cover up all of the ends, since it’s unlikely that real snow would cover an entire pine cone anyway. However, we’re not worried about realism here. There are painted pine cones in our house. We know the snow isn’t real!


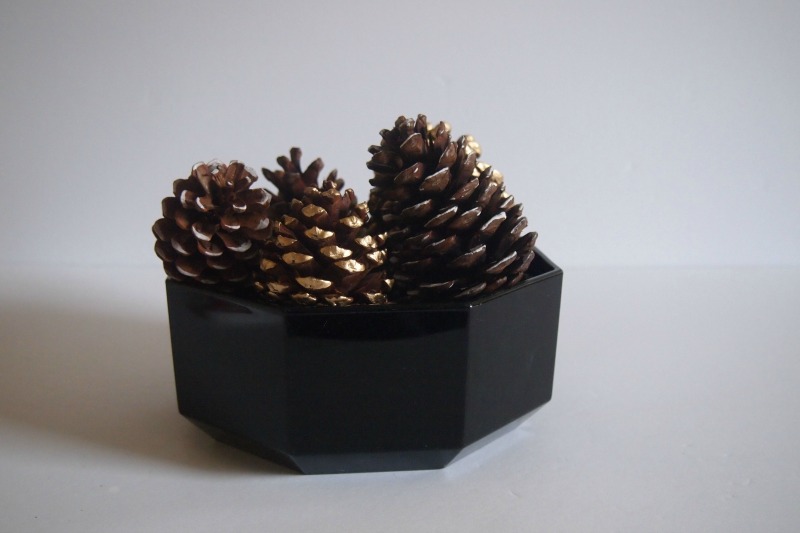
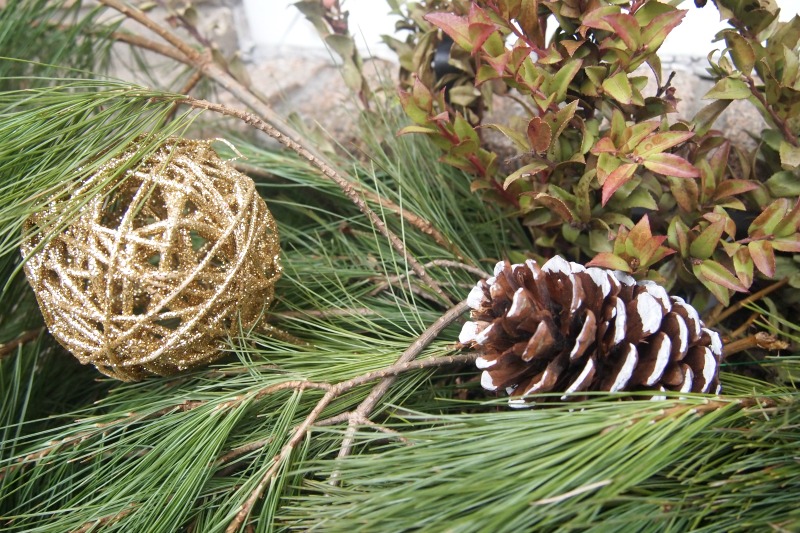
For the gold look, I chose to color the pine cones underneath for a little touch of glimmer, like so:

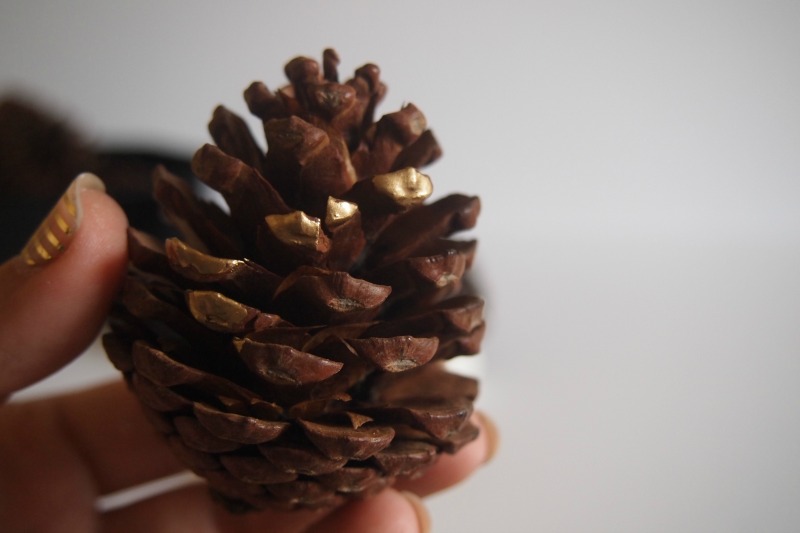
The great thing about this is that the bottom of the pine cone ends up being almost completely covered, so you basically have a golden pine cone!

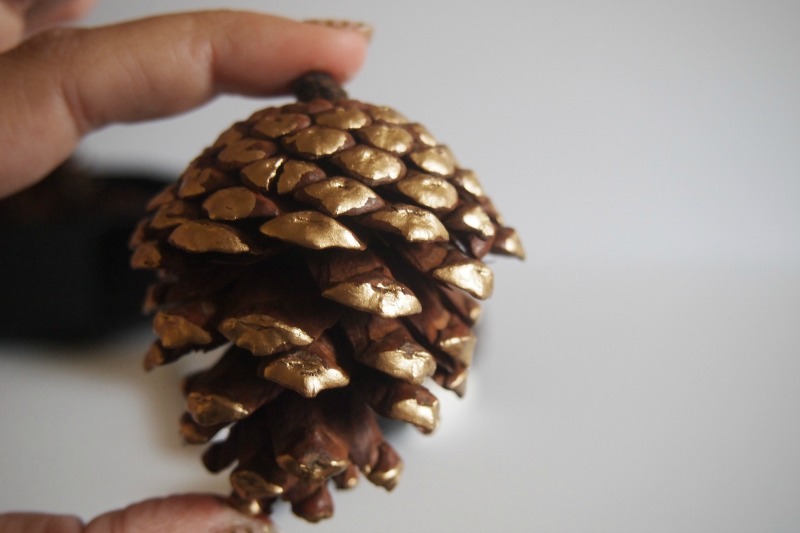
I also mixed the white and gold in a few of these so that when I use them, the direction of the pine cone wouldn’t even matter because I’d get the best of both worlds.

Here they are all together, ready to be put to use both indoors and outdoors!

Decorate with Panache
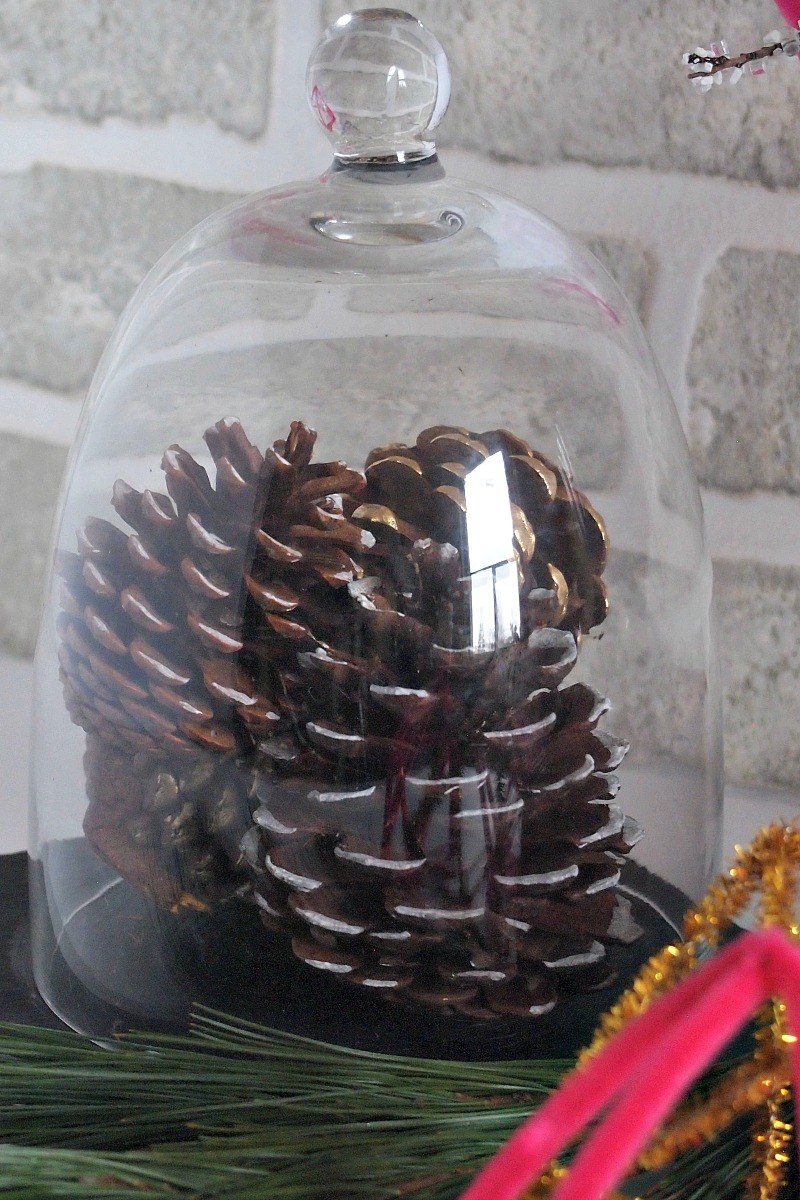
First, I placed these in a cloche for a really simple way to style a table or mantel. I love the ease of this and also how effective it is as a minimal piece of decor.

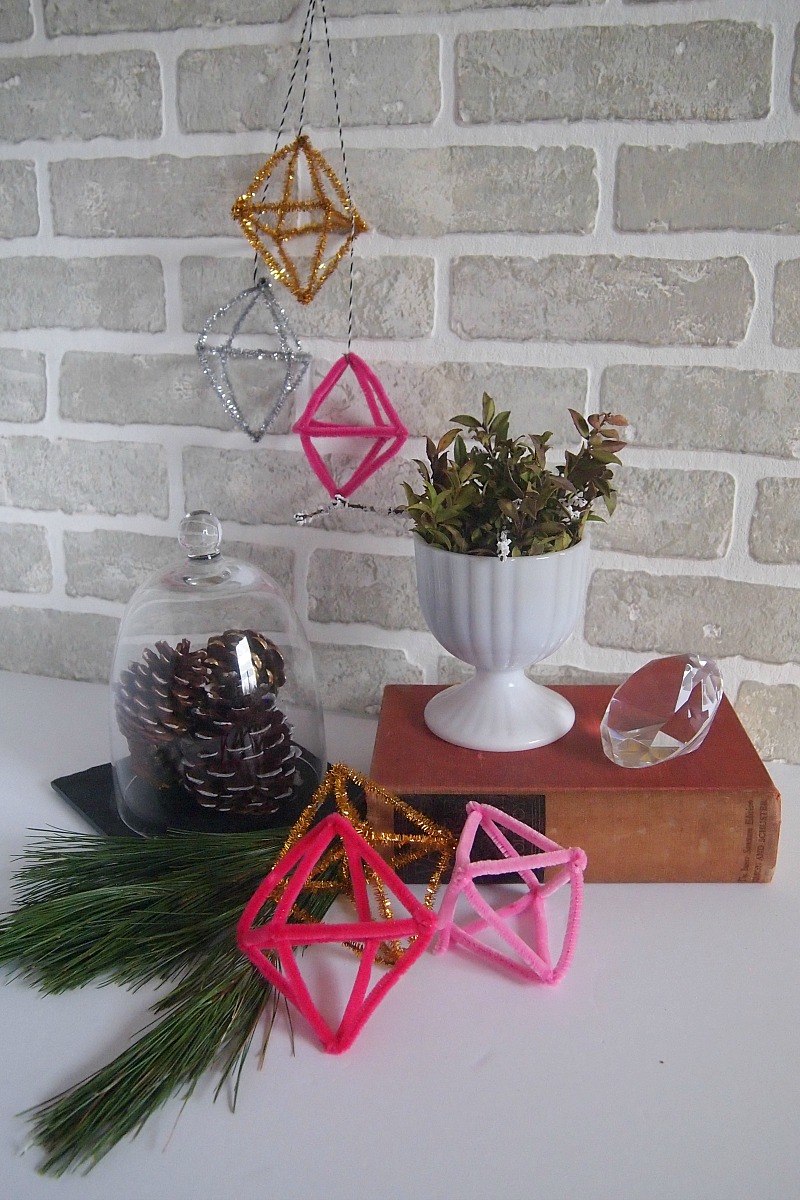
Here is the whole vignette with some colorful touches, and a little greenery to add that outdoorsy feel to the inside of your home:

Outside, I used these in two different places: one was in a colorful urn with lots of red and green. This may feel Christmas-y, but the red berries and the green are true winter components in nature, so I keep this around for the entire winter to give the front door some color.

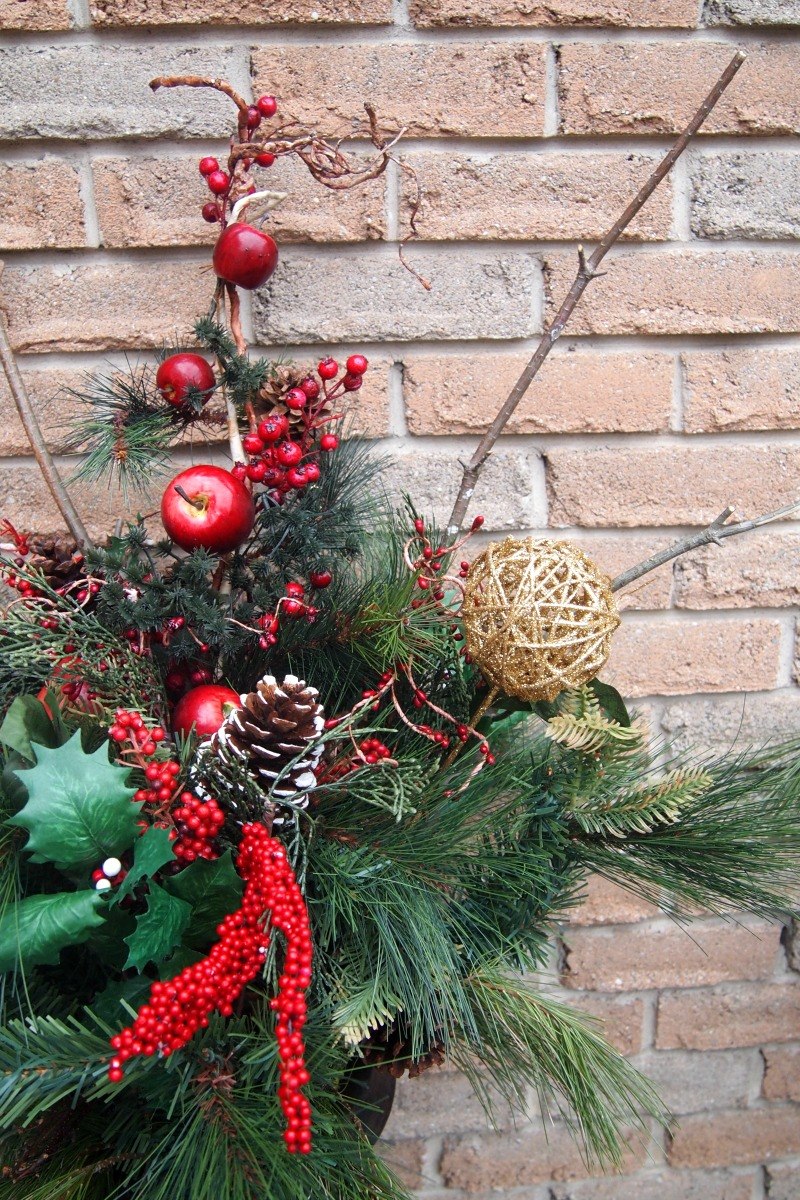
Now, how do the pine cones sit in there without falling off? Simple: I use some gardening wire to attach to the little nub at the bottom of the pine cone, and this way the pine cone can sit in there like any other piece of greenery!

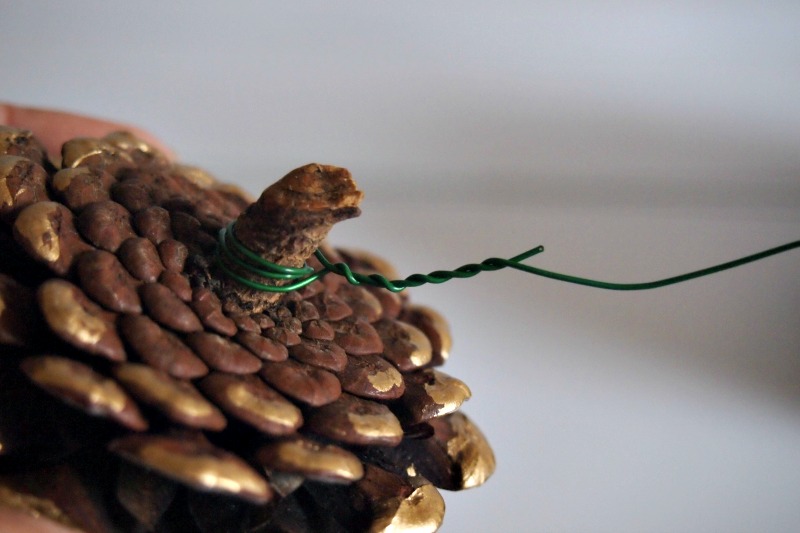
As you can see, the pine cone sits snugly in the arrangement, and I don’t have to worry about it moving around.

If the pops of red aren’t your thing, don’t worry. I also used these in a window box arrangement that has only greenery in it, and I love how the pine cones pop!

And there you have it! Rather than paying far too much for the already decorated pine cones, or even for the pine cones already attached to wire, you can make your own in under 20 minutes! Not to mention, the whole process is slightly therapeutic since you have to give 100% of your attention to coloring in small pieces at a time. So give it a try! The ornaments may be leaving you, but that doesn’t mean winter decor has to be gone altogether!