Getting ready for the holidays? Kate here, and today I’m sharing another DIY project that will help dress up your wall or front door. The look is monochromatic. And metallic! This holiday wall hanging embraces gold-toned style. I love a good natural wreath featuring greenery, but sometimes you have to dial up the shine. By keeping it classic, you can create a festive swag with a heavenly glow. Keep reading for the DIY details…

Project Supplies
Ready to bring this project to life?! These are the supplies you’ll want to have on hand:
- gold faux foliage
- gold craft wire, such as floral wire
- gold ribbon (wired-edge ribbon works well for this project)
- scissors
- a glue gun
- a wooden dowel (optional)

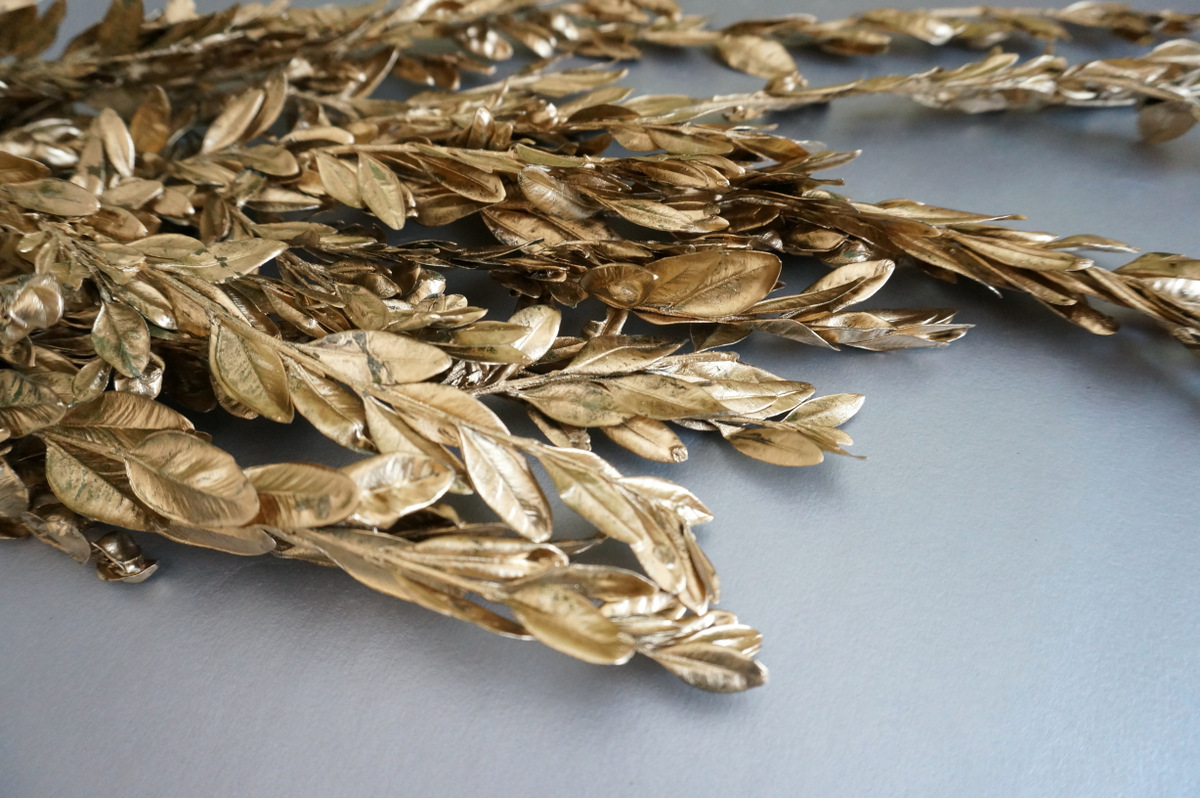
I purchased my foliage in its shiny state, but if you can’t find a selection for a reasonable price, you can always use gold spray paint to cover the faux greenery of your choice. Either way, the project is a messy one (see the gold flecks in the photo below?), so you will definitely want to cover your work space with newspaper or another protective material.
RELATED: An Earthy, Elegant DIY Holiday Wreath

Remember that your floral wire will need to be strong enough to secure your foliage in place. You can anchor it to a thin wooden dowel if you wish. You may also be able to strategically use the wire to form a sturdy display of metallic goodness! Now, are you ready to get started?…
Crafting Your Wall Hanging
Call it a wall hanging, call it a swag, call it a wreath! Whatever you call it, you’ll need plenty of floral wire to give it shape. Here are the project steps, along with some helpful hints:
Step 1: Cut selections of metallic foliage.
You may want to lay out the foliage segments so they form the design you’re going for (before you start wiring it together). This will allow you to see how much foliage you need and how long each snippet should be.

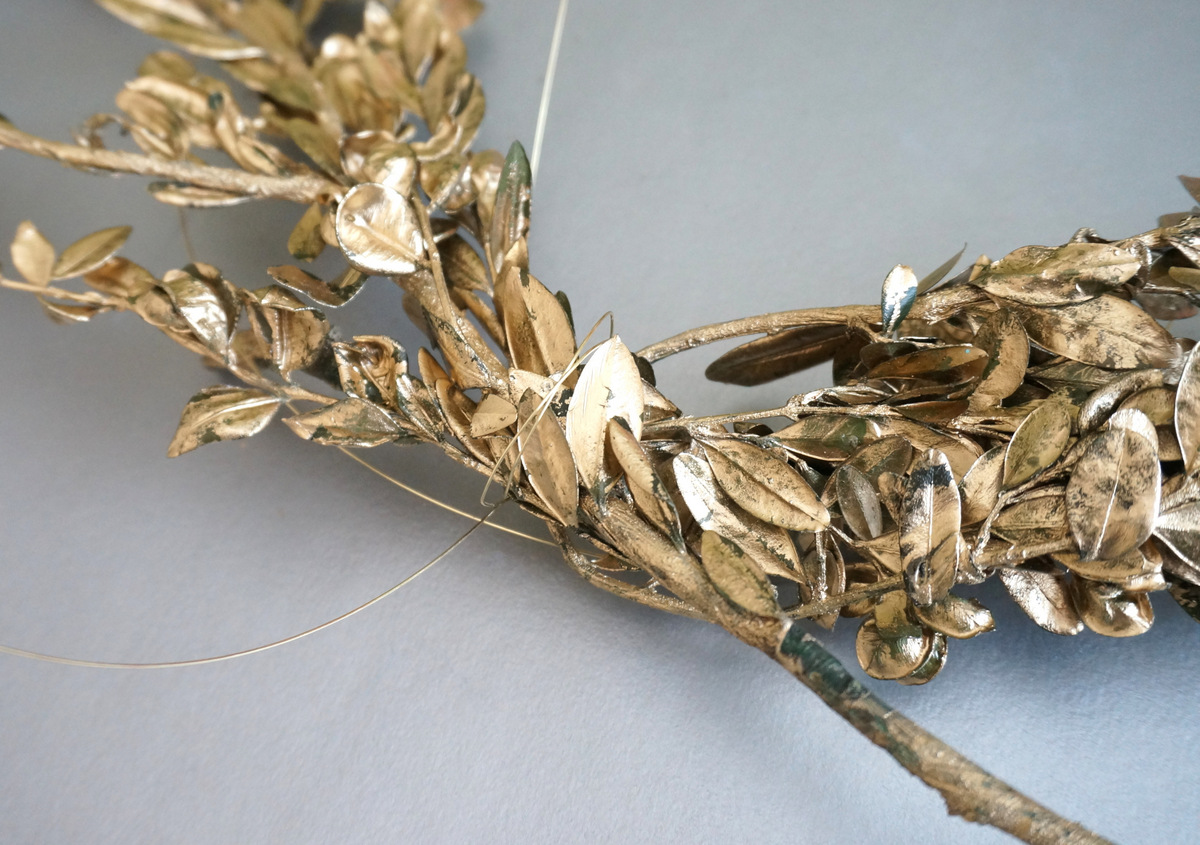
Step 2: Use floral wire to bring the first branches of foliage together.
Since I was going for a symmetrical design, I had the branches meet in the middle. While you want to wrap the wire tightly so you’re not cut by sharp ends that poke out from the design, don’t be too concerned with hiding the wire…

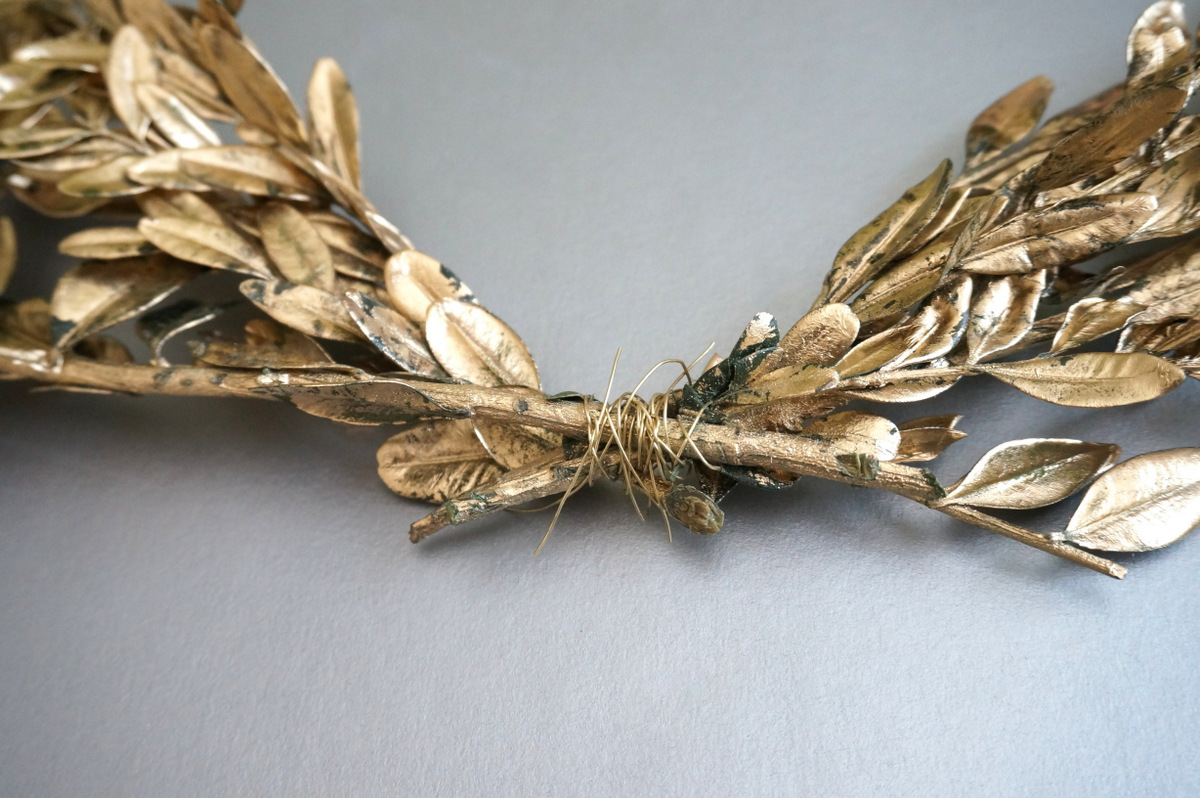
After all, the gold ribbon will disguise it! If you’re anchoring your foliage to a wooden dowel for extra sturdiness, it will come into play here.
RELATED: A Modern DIY Wall Hanging


Here’s a hint of what’s to come with the ribbon (details later in the post):


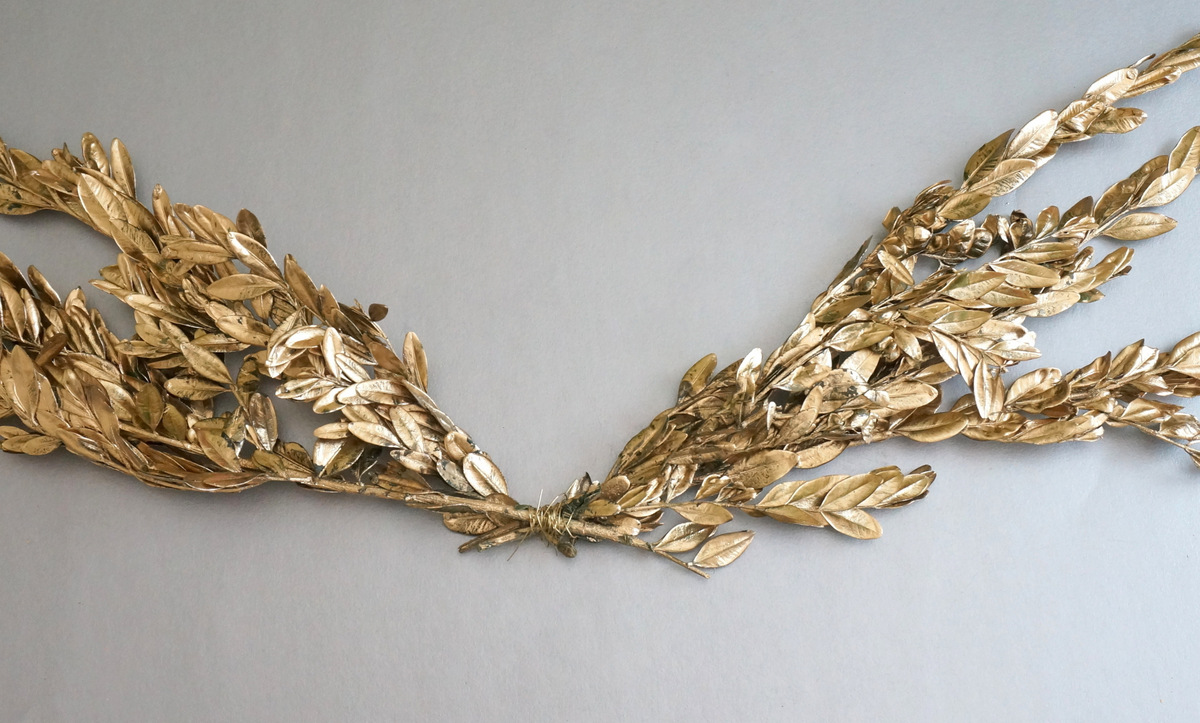
Step 3: Add more foliage to each side until you have a design that you’re happy with.
You can even use floral wire to secure some of the branches to one another. Here’s what my wall hanging/wreath looked like at first:

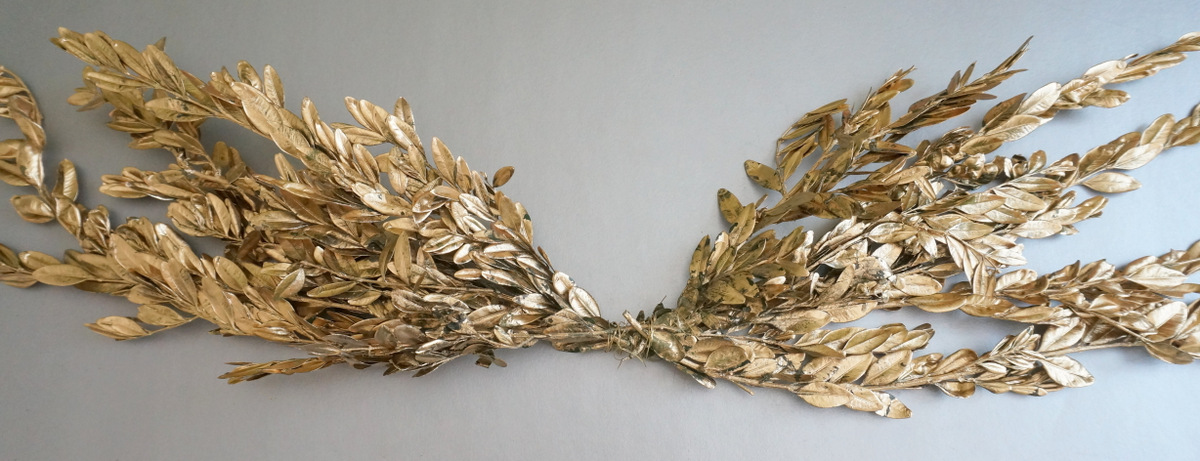
More foliage was definitely in the cards…


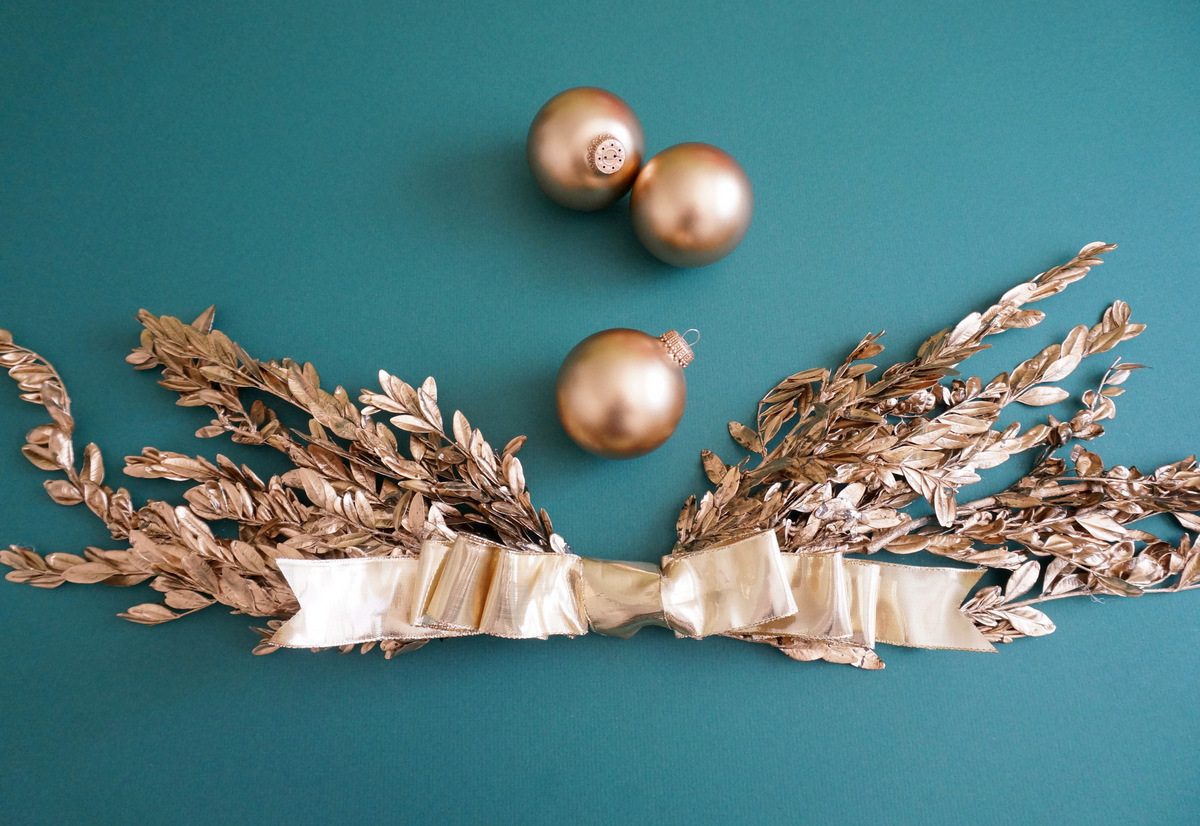
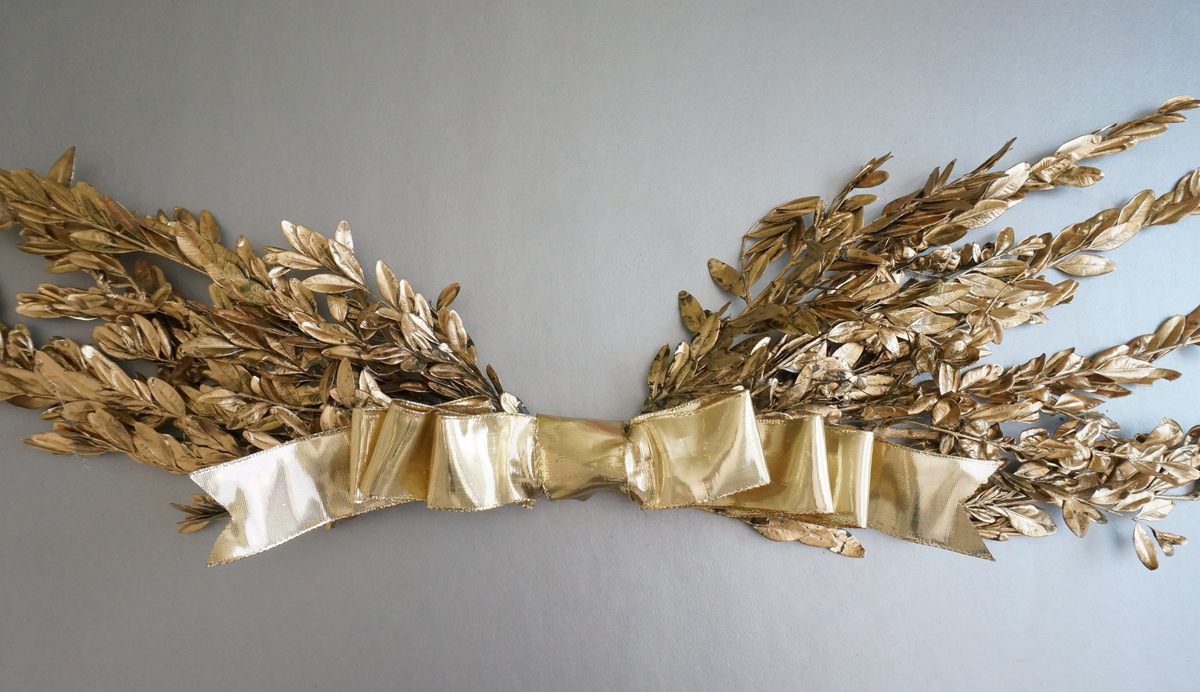
So I bulked it up until it looked full. I love how this wall hanging has an “angel wing” quality in terms of form. Perfect for the holidays, don’t you think?!

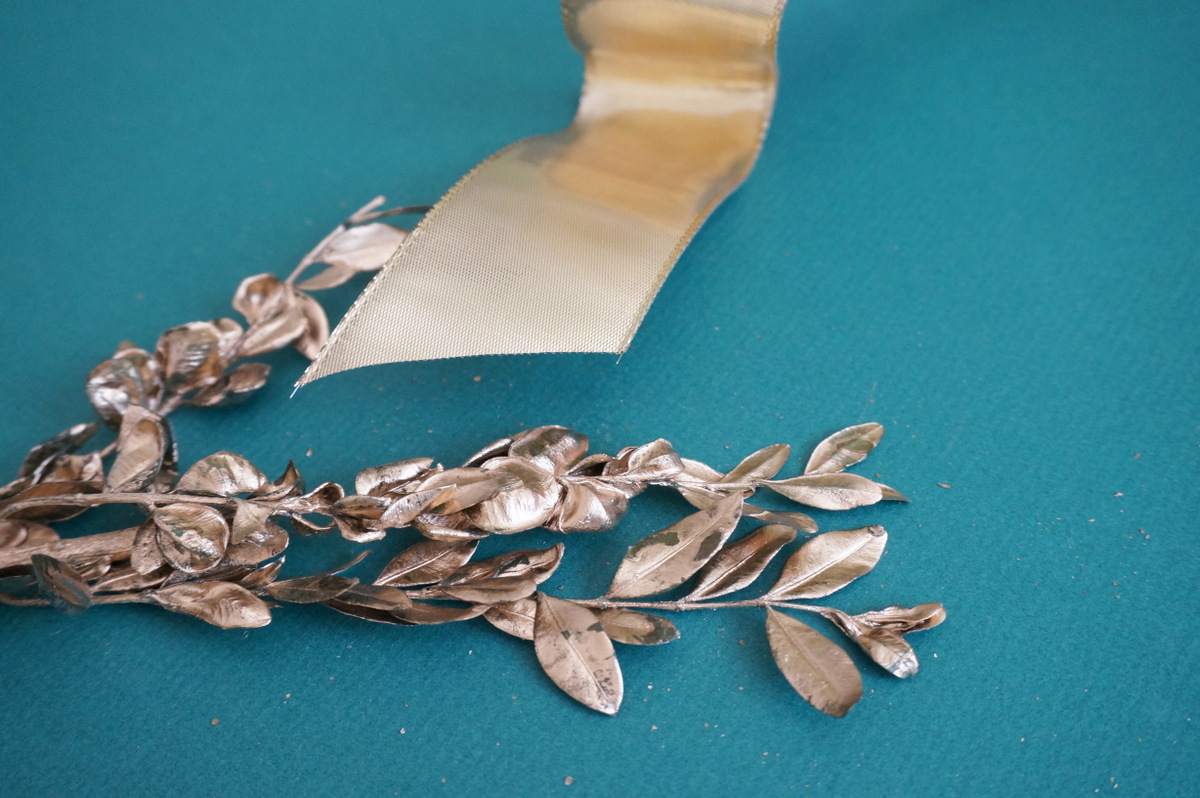
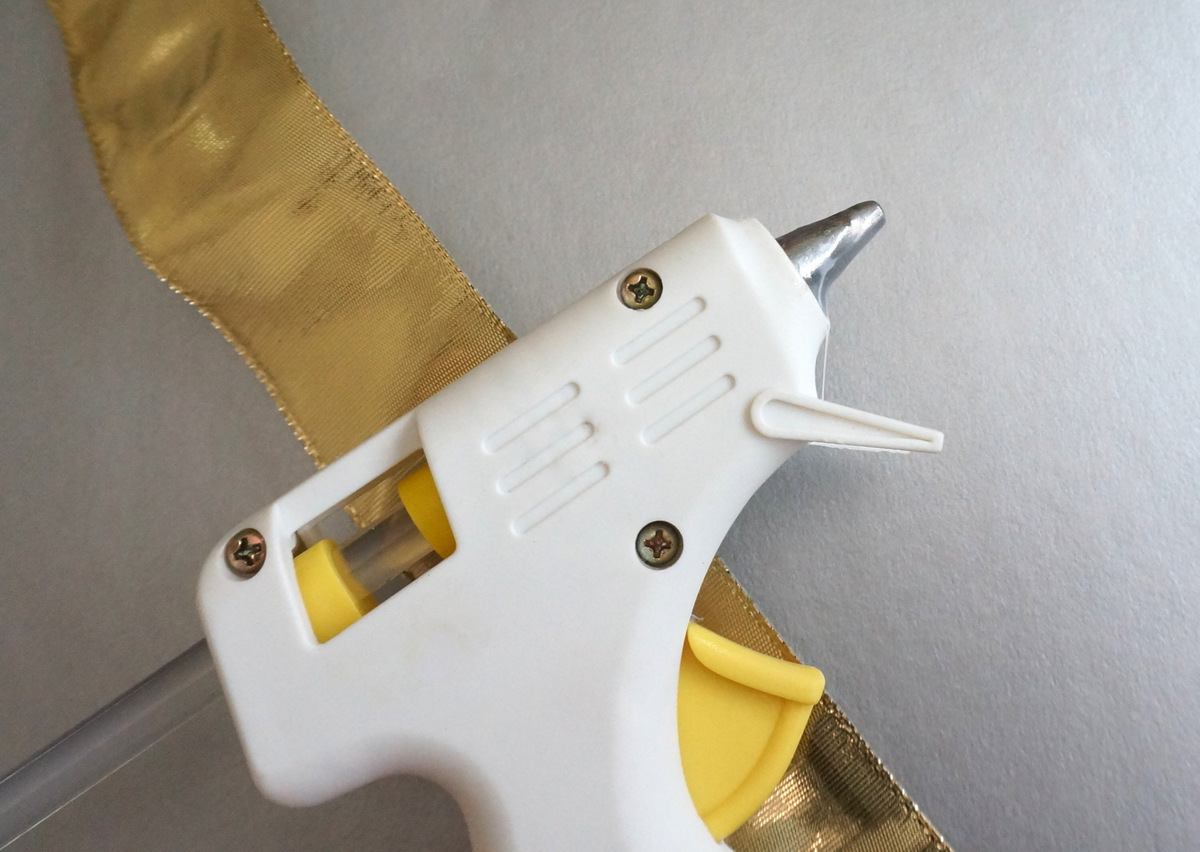
Step 4: Tie a gold ribbon around the center, disguising the wire.
Ribbon to the rescue! Goodbye gold wire. Thick ribbon works well for this project. Start by forming a knot, as shown below:


Instead of tying a formal bow, I created a series of loops, using hot glue to secure them in place. The fact that my ribbon had thin wire along the sides made it easy to form the loops of the bow. Yes, wired-edge ribbon really keeps its shape!

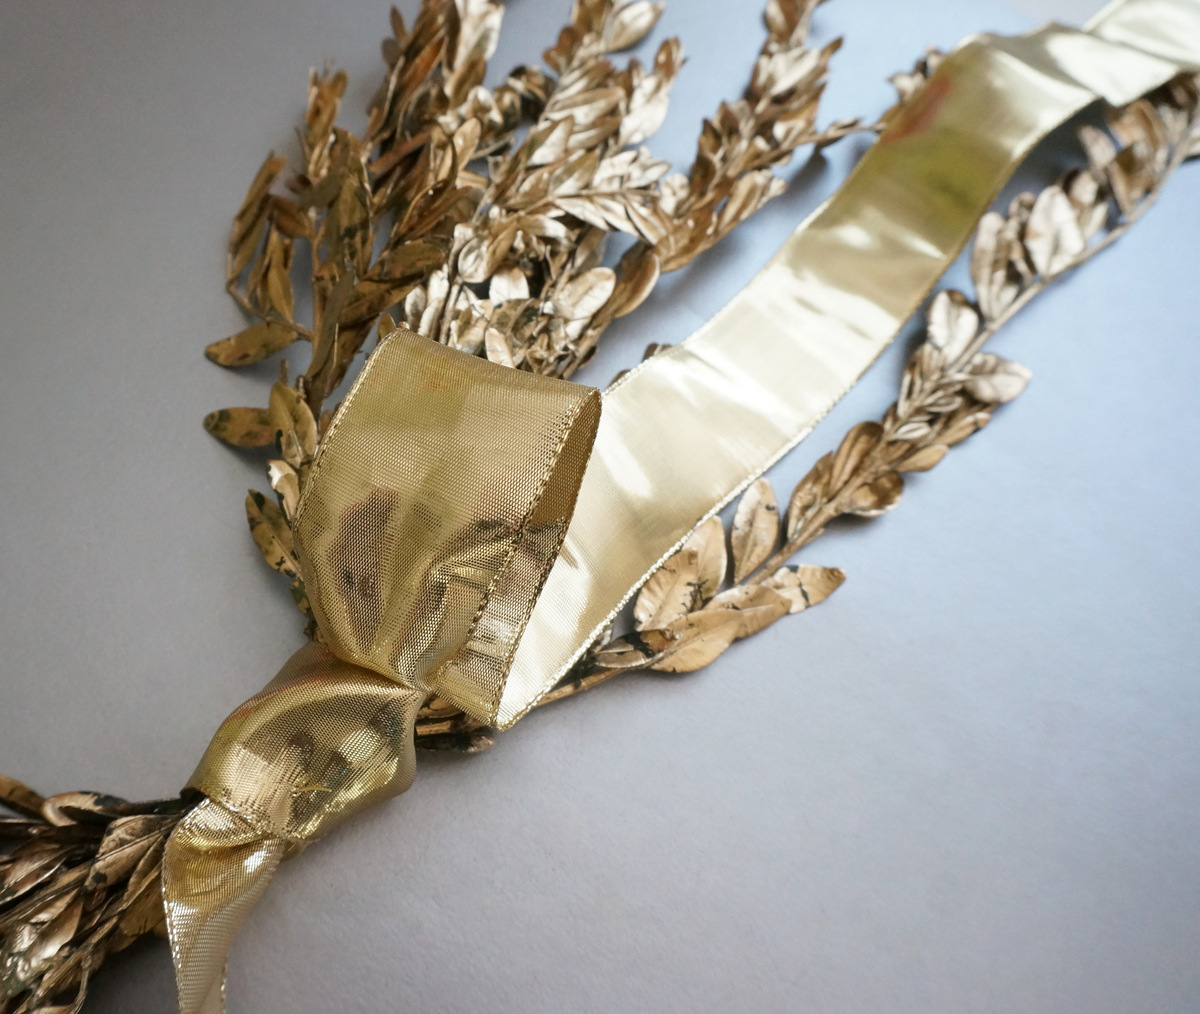

I created three loops on each side, then cut the end of the ribbon for a nice finish:


Here’s what my bow looked like when all was said and done (see below). I love how this wreath takes on a different tone depending on the background. Against silvery grey walls, it appears rich and gold:

RELATED: 20 Chic Holiday Decorating Ideas with a Black, Gold, and White Color Scheme
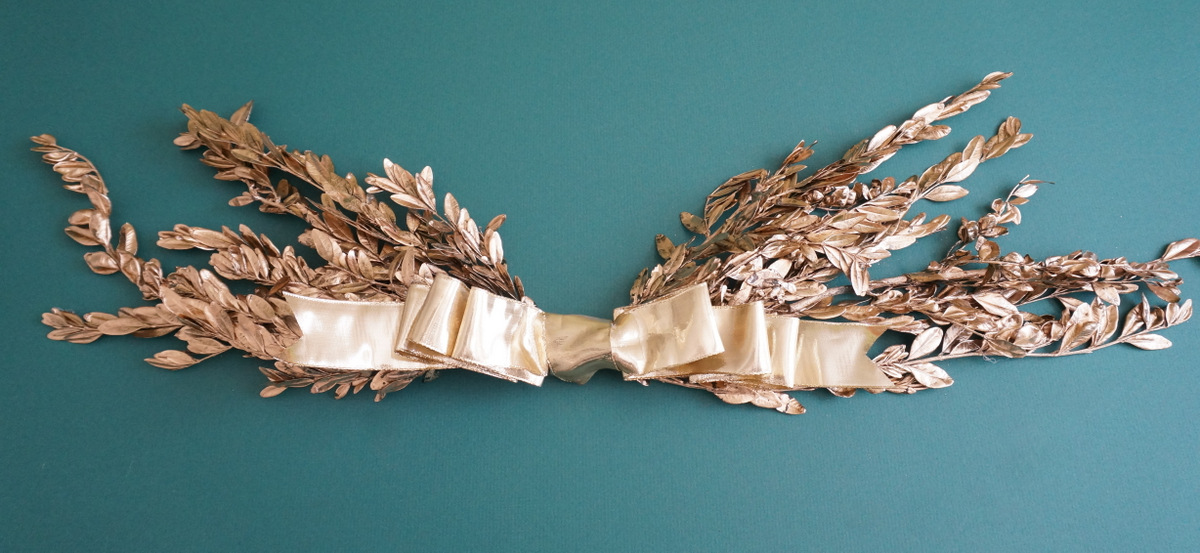
Against green, it can even take on a coppery shine:

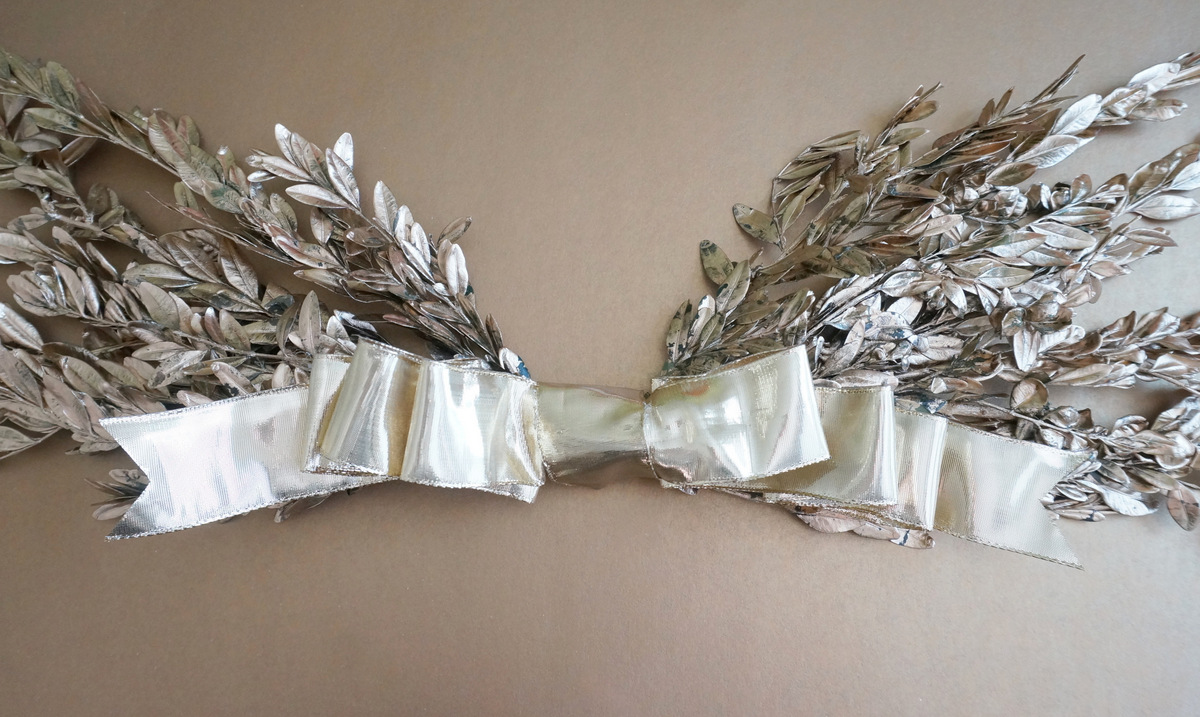
Gold on gold/beige brings monochromatic style home:

Step 5: Display your wall hanging with pride.
When it comes to displaying your wall hanging/wreath, there are many possibilities. I ended up tying mine to the copper tubing of my modern yarn wall hanging (which now mostly features white yarn). If you’ve anchored the faux foliage to a dowel, you can tie a piece of string to each end of the dowel and hang it from the yarn loop that results. You can even tack the foliage to the wall at each end. Choose the display method that works best for your space.


Wishing you a Holiday Season that sparkles and shines. Happy crafting!


