Greetings, Decoist Readers! One of our favorite ways to celebrate modern design is to create original DIY projects and share them with you right here on the blog. Kate here, and today I’m giving you an inside look into the “after” phase of the DIY process. Have you ever wondered how some of these projects hold up over time? Perhaps you’re considering trying a few of our projects, and you’re curious about how the finished products evolve as the months pass. I’m big on honesty, and part of being a DIY enthusiast is evaluating what works, what doesn’t, and how to improve on the next project. Here are a few of my favorites, as well as tips on how to truly enjoy these projects and make them last…
A DIY Succulent Planter
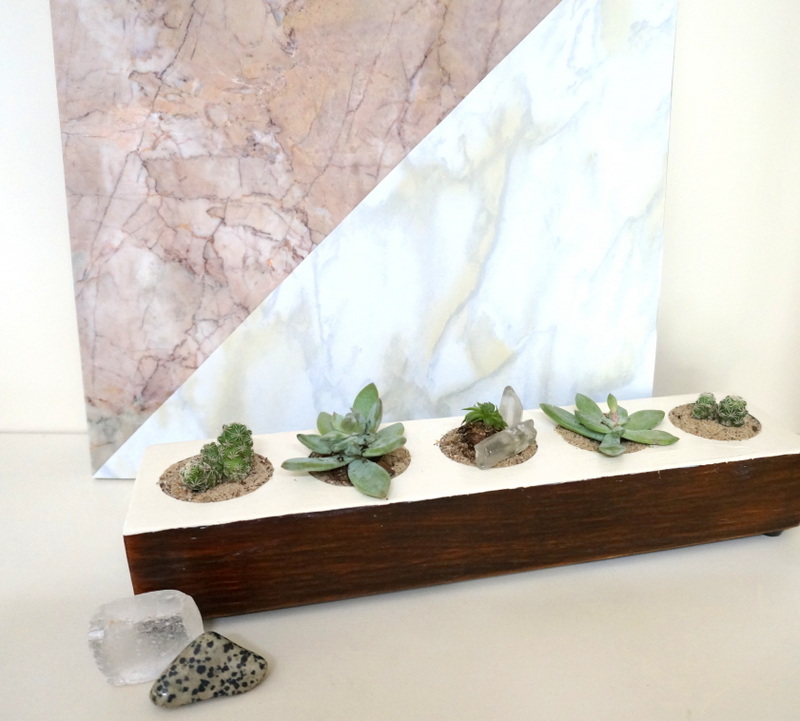
Nearly one year ago, I repurposed a votive candleholder by converting it into a succulent planter! I painted the top, put gravel into each opening, filled them with soil and succulents, and topped them off with sand and crystals. Here’s the result:

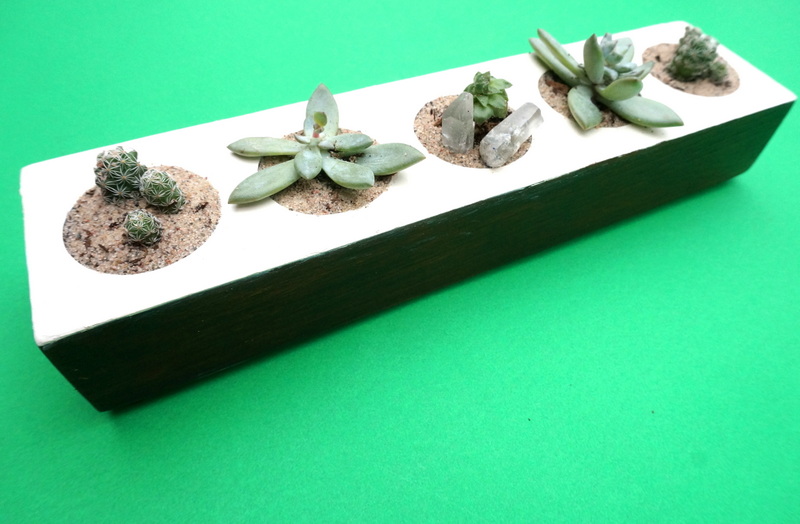
Below we get a closer look at the succulents, which were thriving and healthy at the time of the picture:

How has this planter evolved over the last year? As it turns out, it can be tricky to keep succulents alive in shallow planting holes with no drainage. I grew a bit tired of constantly switching out wilting greenery and replacing it with new options. But I REALLY LOVED this planter, and it’s a perfect fit for my retro-modern powder room. So…

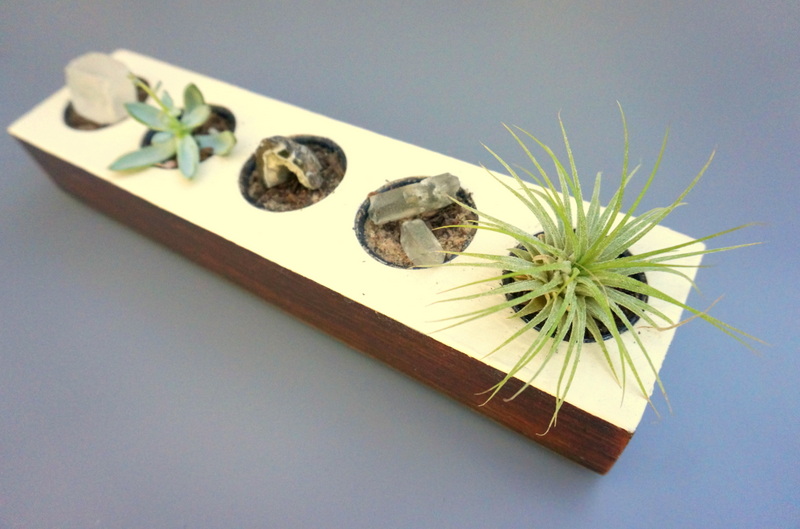
…I decided to make this planter a display piece for both plants AND minerals. I can handle cultivating one healthy succulent, and I added an air plant, which is super low-maintenance and really doesn’t need soil to flourish. Plus, I love the way the crystals look, and giving them their own display areas in the planter created an intriguing finished product.

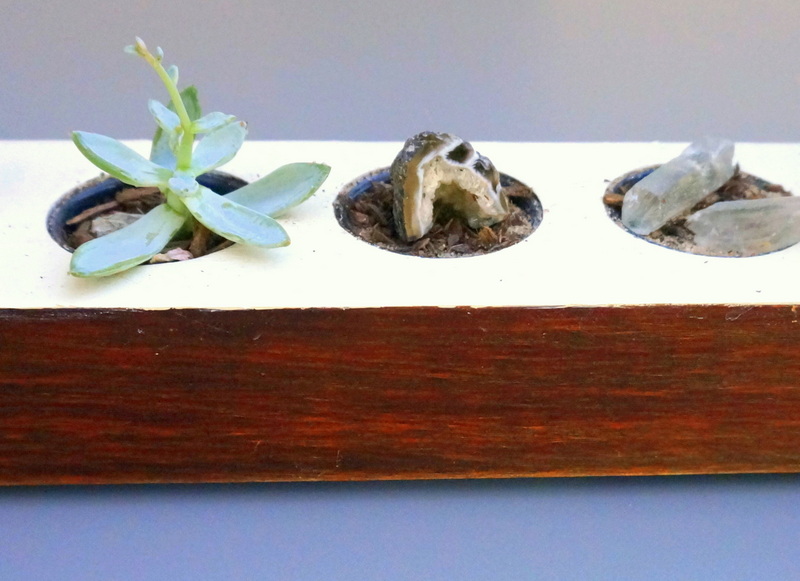
The verdict: If you try this project at home, search for a container with deeper holes. Or pick any votive holder you like, but be prepared to let this project evolve over time, and don’t try to fill every hole with potted plants. Air plants and crystals are just as eye-catching and much less trouble! I’m really glad I stuck with it and came up with a solution that worked for me, for the plants, and for my space, as I always get compliments on this piece. Plus, the planter makes me smile every time I wash my hands at the bathroom sink.
A Hanging Vase with Neon Cording
Remember this hanging vase project? This continues to be one of my all-time favorites, not only because the supplies are super affordable, but because it’s super easy to create! Neon paracord is the material of choice, and macrame-style knots get the job done.

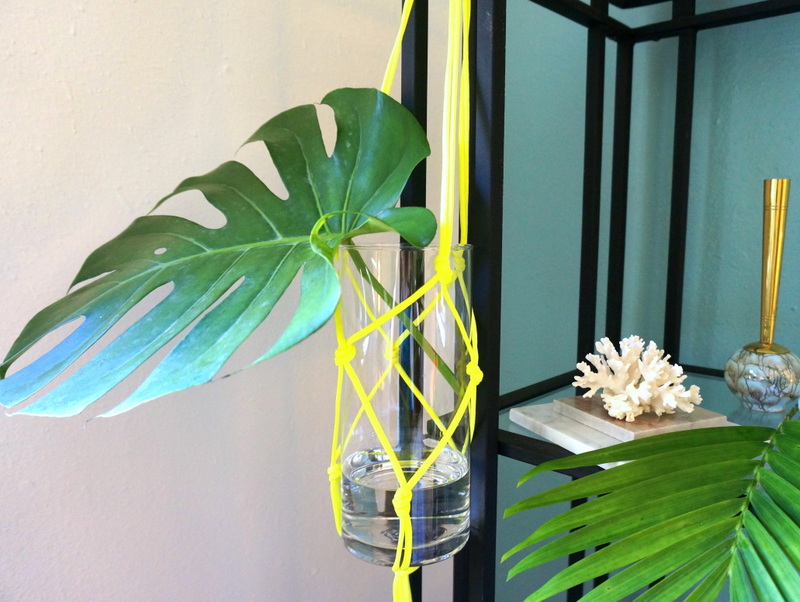
The result is a modern spin on a retro craft idea. To learn more about the process, check out the full post here.

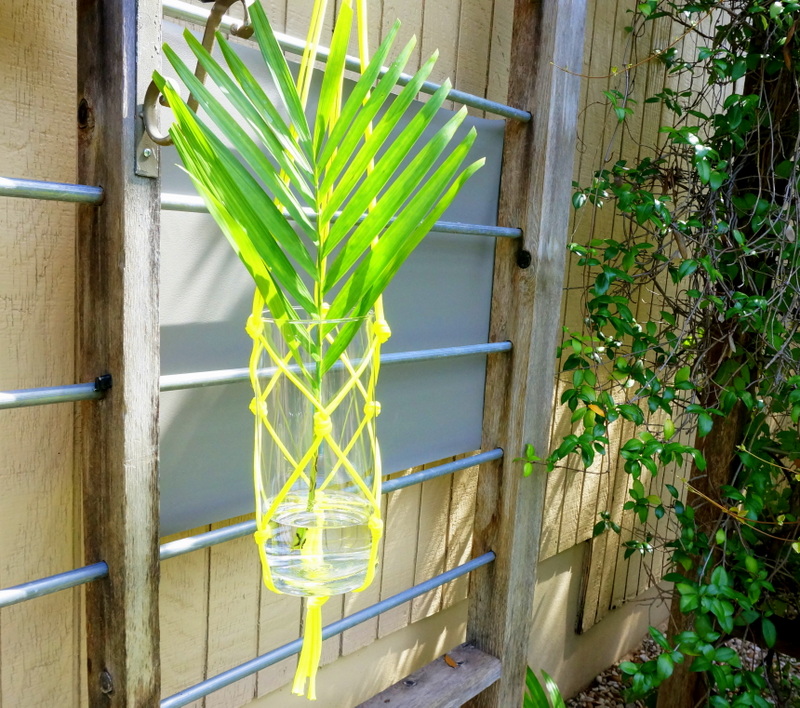
How has this project held up over time? Great news: it’s super sturdy! While this vase typically lives in my bedroom, I’m such a big fan of the project, I’m considering making another one for my outdoor patio (as shown below). In fact, the vase has remained filled with fresh greenery nearly every day since I’ve created it. From tropical leaves to colorful blooms, everything looks amazing in this retro-modern receptacle!

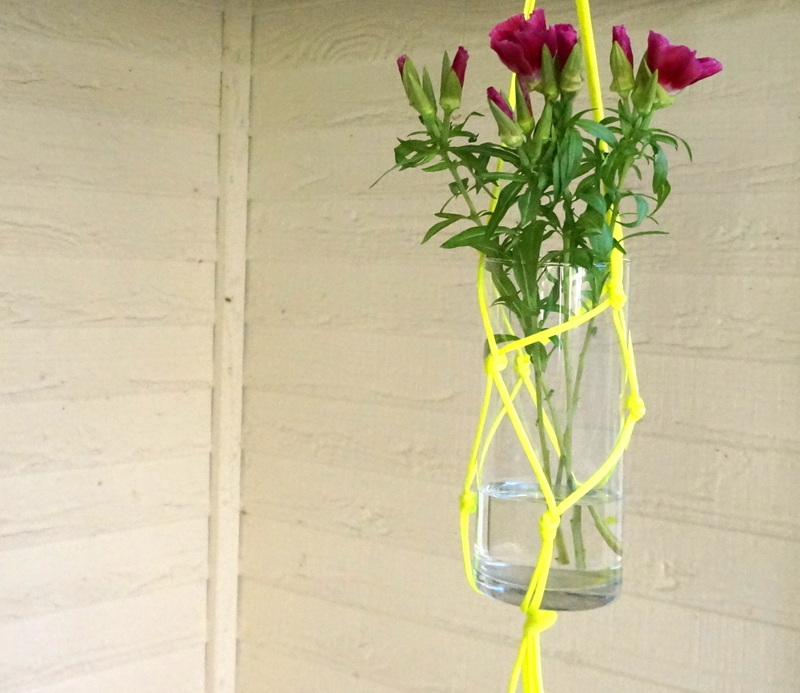
The verdict: This project is quick and simple, and it has real staying power. Plus, you can modify the process so the paracord surrounds a vase of any size or shape. In fact, I recently used the knotting process to create this wall hanging project!
A DIY Monochromatic Painting
When I needed a touch of teal green for my bedroom makeover, I came up with this ombre-style monochromatic painting. Layering and blending craft paint on a blank canvas is the key, and the process is not only therapeutic, it’s lots of fun!

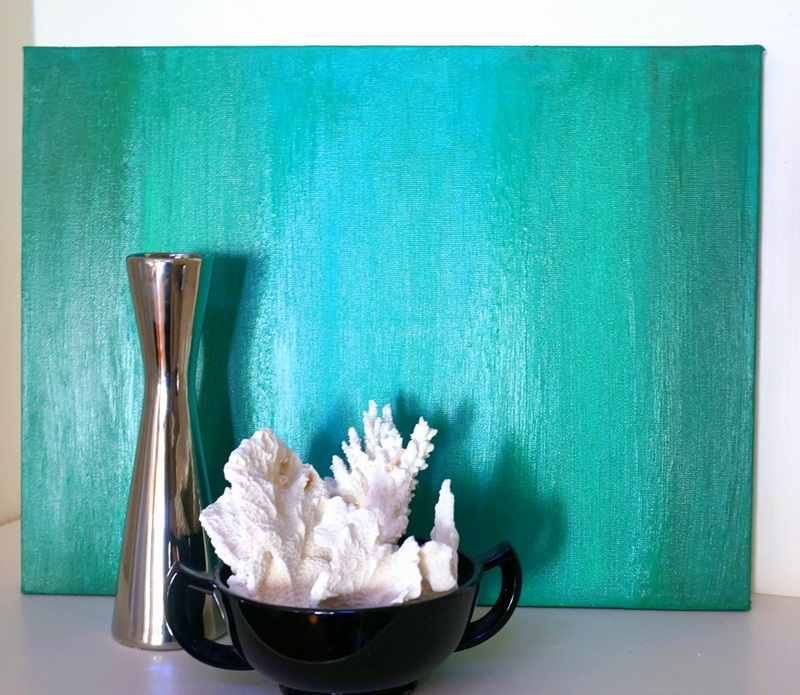
Below we see the painting resting flat on my outdoor table, and you can also see how the green goes from an emerald shade (in the center) to a darker forest green tone at the edges:


Has this project continued to shine? That’s a BIG “yes”! I display this painting on my bedroom dresser, and it’s the perfect backdrop for my mossy terrarium with neon gravel. I would have shown you a photo of this painting in its bedroom setting, but the low light in the space makes the photography less than ideal. However, now that I think about it, this painting makes an interesting tray when displayed flat, doesn’t it?!

The verdict: This fun project is another easy, fulfilling way to add style to your space. Plus, you can use it to bring out/emphasize a chosen color in any room of the house!
A DIY Round Shelf
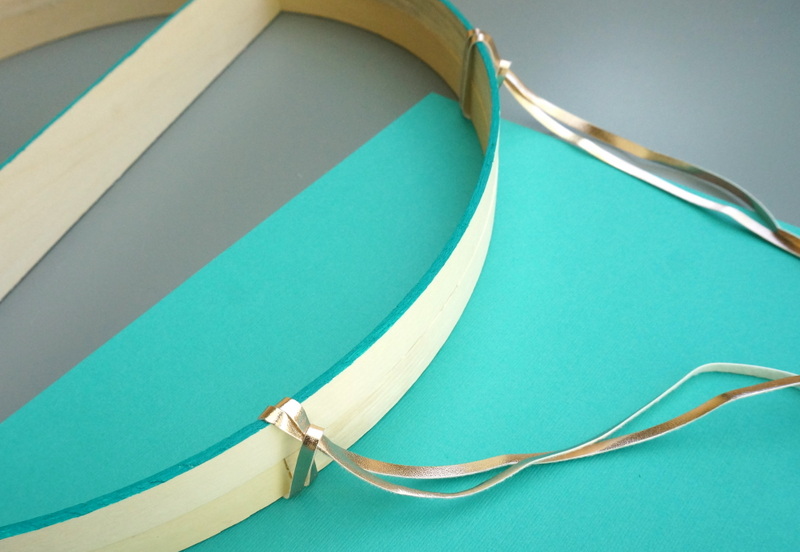
This shelf was a true labor of love. To create it, I used the perfectly round rings from two separate embroidery hoops, hot gluing them together to make a thicker circle. I also cut a flat piece of craft wood to serve as a wooden ledge in the middle of the shelf. Read all about the crafting process here.

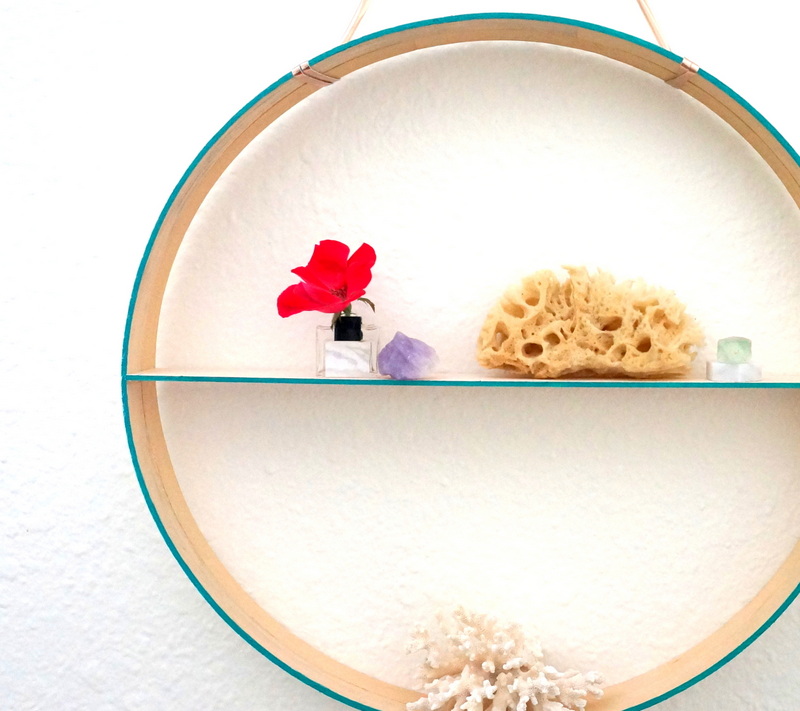
I won’t lie: the project takes patience and a bit of precision. But the fact that you can get a modern, upscale look with nothing more than lightweight wood and a glue gun makes it well worth the trouble! Paint the outer edges of the shelf in the color of your choice and add some cording for hanging purposes, and you’re done. Confession: this is my favorite DIY project of all-time!

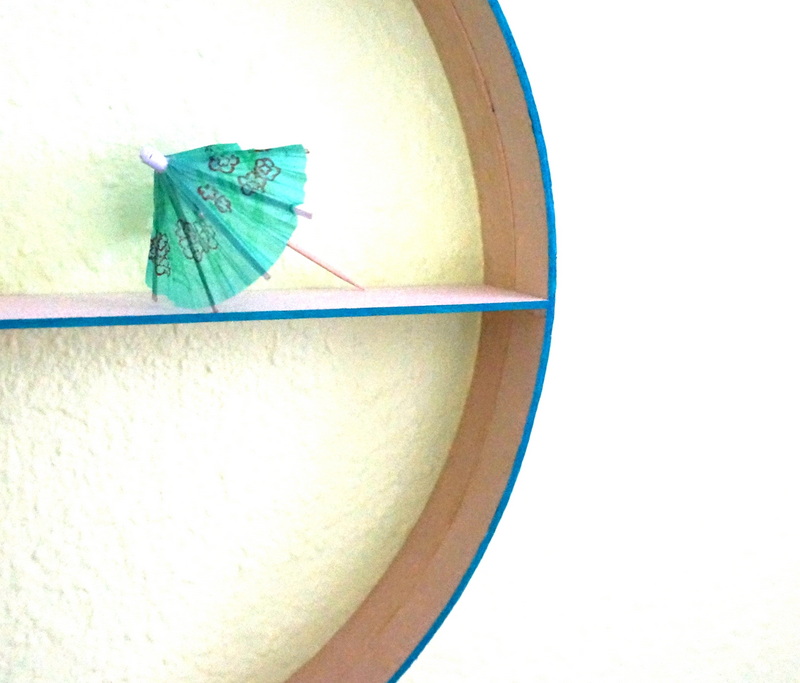
Has the project remained sturdy over time? YES! That’s because you have to go into this project knowing that the shelf should hold nothing but lightweight items. I use it only to display small minerals, pieces of marble, and my latest favorite: a little drink umbrella. If you want to make it sturdier, you can always add little brackets under the middle wooden ledge.

The verdict: This round shelf is perfectly on-trend. It celebrates geo flair, and even more fun than watching it come together is deciding what to display! I was honest from the beginning that the shelf is only for lightweight items, and you must handle it with care. But that’s a small price to pay for being able to construct a round shelf in about an hour with no sanding, sawing or drilling required!
A Modern Wall Hanging
A copper pipe, some yarn and a simple knotting technique are all that’s required to create this modern wall hanging with retro flair. The project was born when I needed a colorful yet earthy backdrop for my Thanksgiving feast. Yes, it was my first year to host this holiday, and I wanted to celebrate in style! This is another fast and easy project to create, folks. Plus, it really packs a powerful punch.

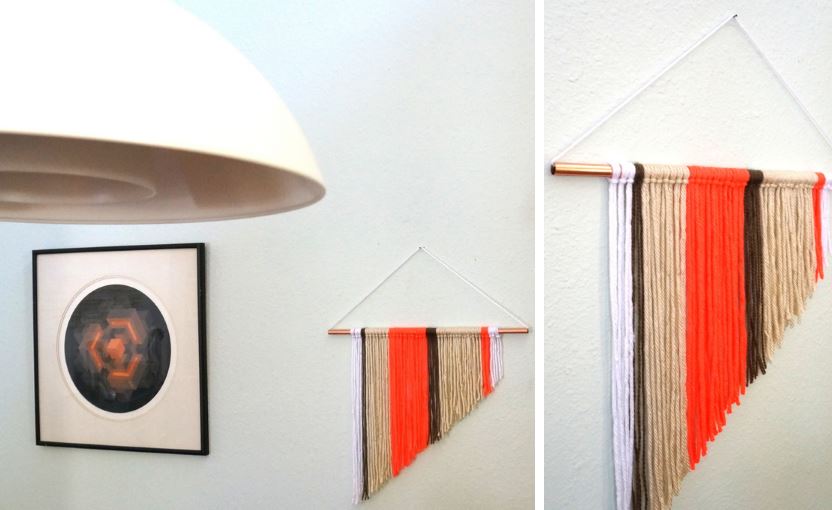
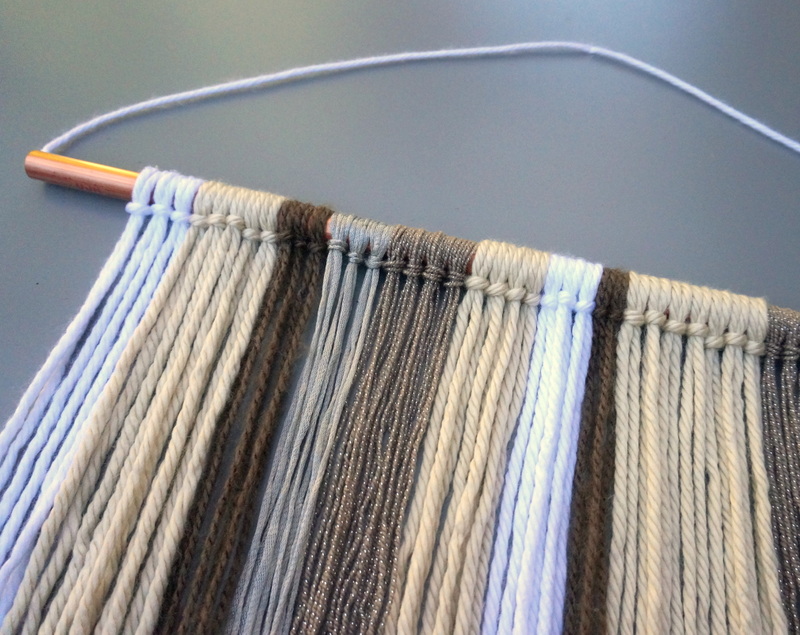
Has the project changed over time? Of course! And that’s the best part of a project like this: you can switch out the yarn with the seasons. After Thanksgiving came and went, I was ready for this wall hanging to evolve as Christmas approached. I removed the bright orange yarn and replaced it with glittery taupe and shiny beige string. The result: still earthy, but a bit more holiday-appropriate!

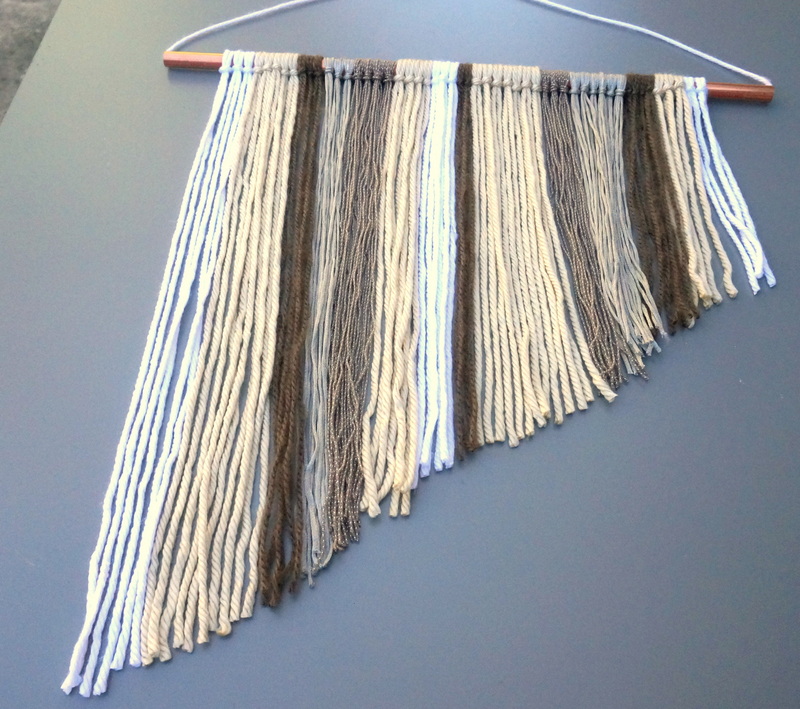
Below we get a closer look at the yarn and string. Learn more about the knotting process here.

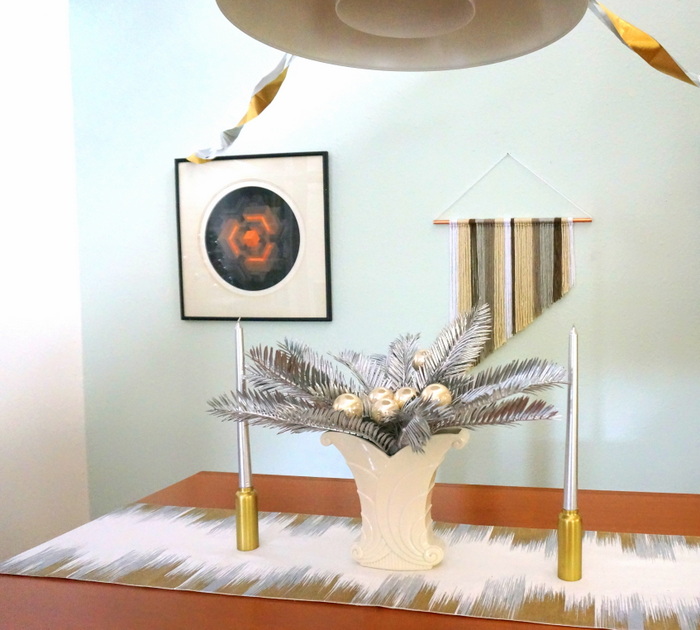
In the next image, we see the wall hanging behind my dining room table. This is how my dining room looked on New Year’s Eve. Learn more about the tropical centerpiece in this post, and read all about my retro-glam New Year’s Eve party at my blog Mirror80.

The verdict: This modern wall hanging represent one of today’s top trends. In fact, ’70s-style wall hangings are sold at designer boutiques and trendy retailers for good money. Make your own affordable version by following the steps outlined in the project, and enjoy a sturdy finished product that can change over time with a simple switching of select segments of yarn. I would do this project again in a heartbeat. In fact, it inspired these colorful boho chic ornaments.
Thanks for joining me on my little recap of DIY projects gone by. When it comes to crafting, expect a bumpy road at times. But it’s a learning process that’s beyond rewarding. And don’t take yourself (or your projects) too seriously. Learn from them, and make the next one that much better. Happy crafting!