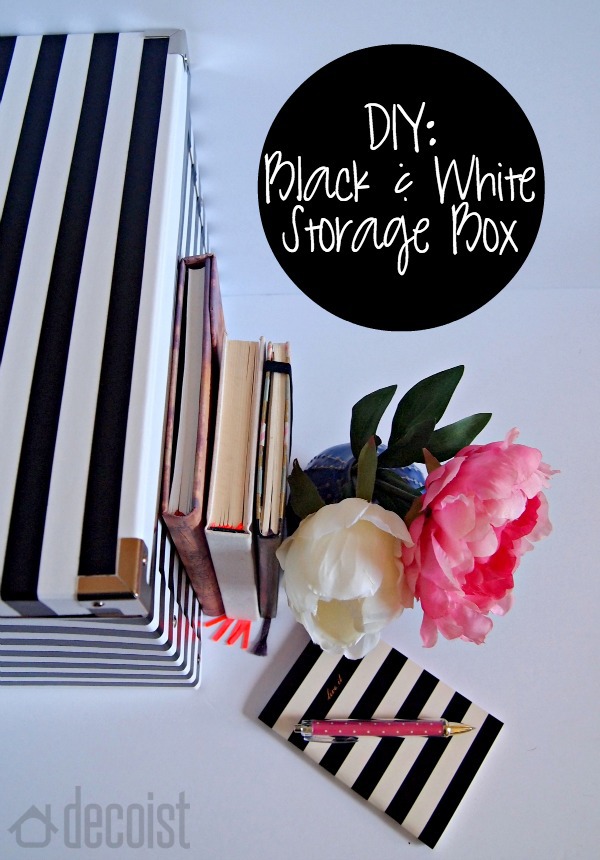
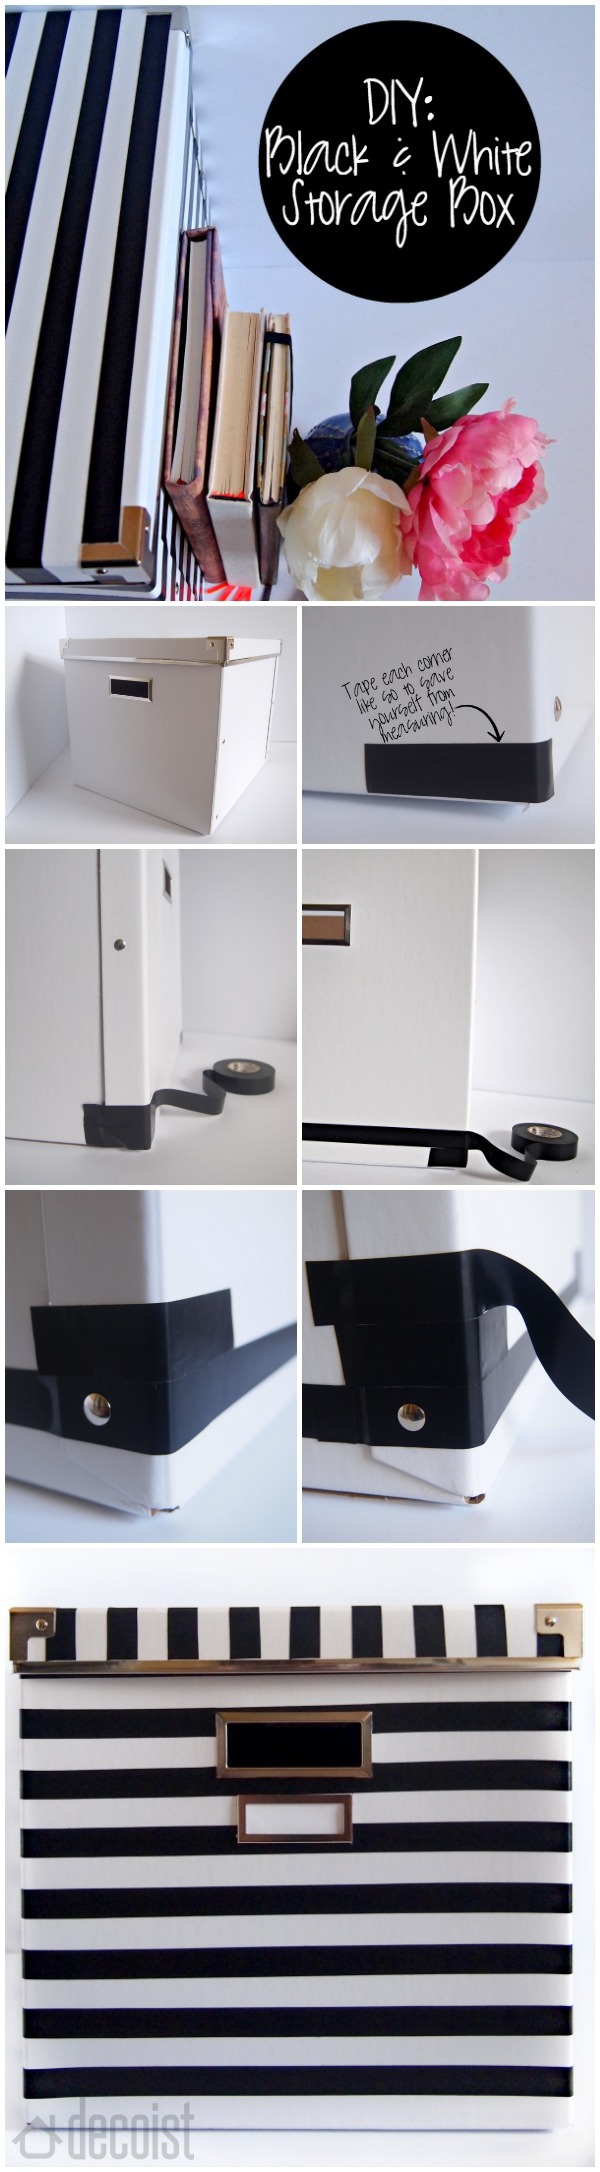
The name Kate Spade is synonymous with a few things these days: black and white, stripes, polka dots, and awesome. I happen to think black and white stripes are the bees knees, so naturally I just had to try my hand at adding them to just about anything, and the first victim was a plain white box.

The materials needed for this are as simple as can be: a white storage box and electrical tape. That’s it. I swear! I used the KASSET box from IKEA because it’s pretty great, and also inexpensive enough that if I were to ever get sick of black and white stripes (yeah right, not gonna happen), I wouldn’t feel so bad getting rid of it.
Let’s get started with the process. Here is the box before:

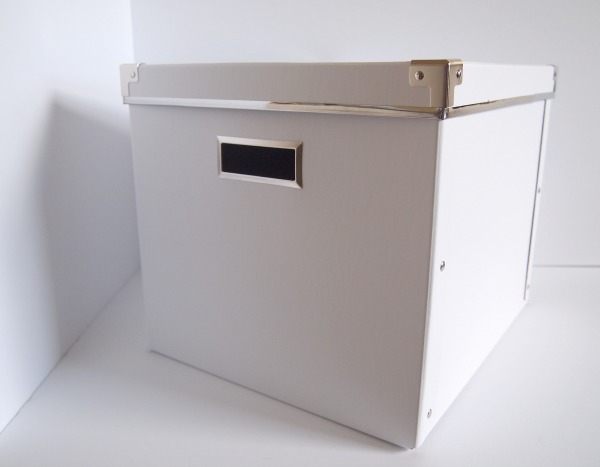
Not exactly an interesting box, right? Now as for measuring the stripes, I didn’t use a ruler, but rather the actual width of the tape itself. I did make sure that the electrical tape strips weren’t too sticky before placing them on the box. This was so that they wouldn’t rip up any of the finish on the box.

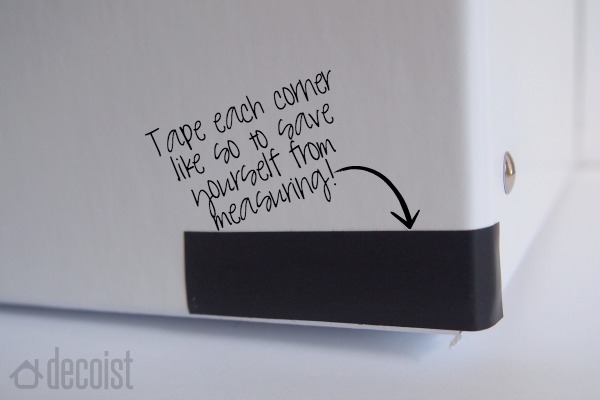
Make sure you do all four corners then tape away. All you need to make sure is that you don’t stretch the tape too much, because that warps it a little, and then you might end up with crooked lines. Don’t worry if you do though, just eyeball it because chances are it’ll all work itself out in the end.

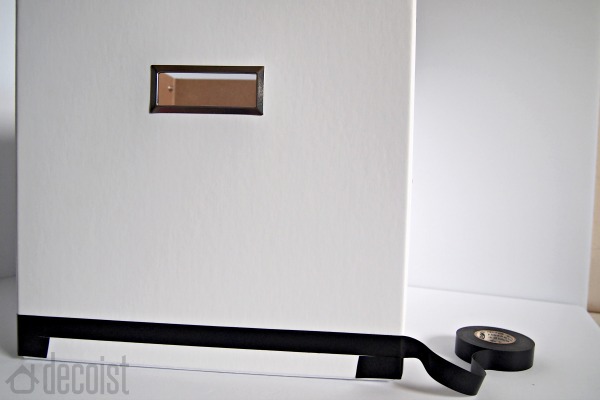
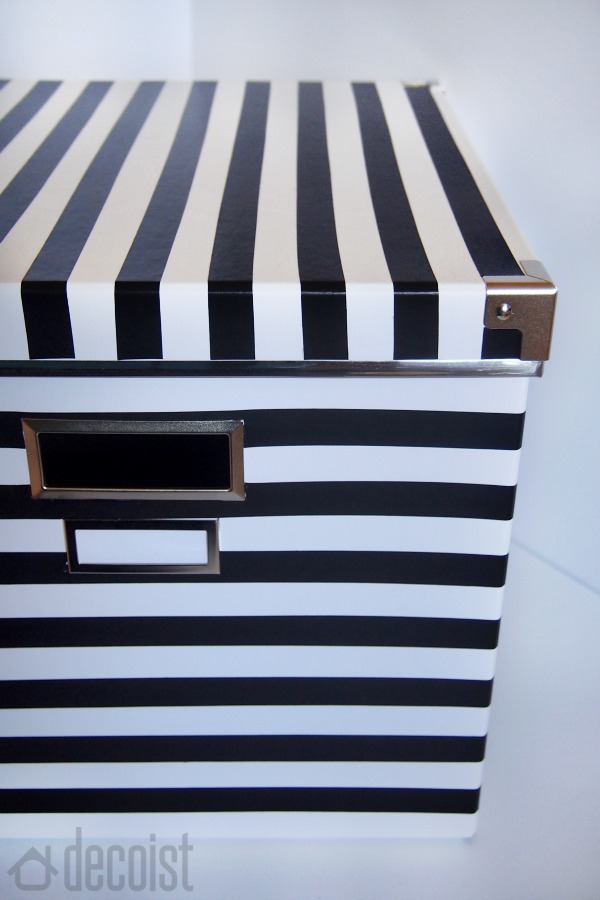
Keep going with this method to the top. When you get to the handles, use an exacto knife to cut around them (carefully). You could remove them if you want to, but cutting works well. As for the round screws, those are easy to remove and put back on over the tape.


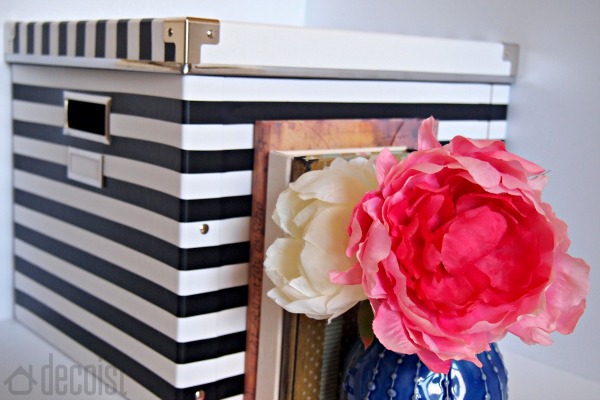
For the lid, I chose to have the stripes go in the opposite direction of the box for a little contrast, and I love how it turned out! When you see the box from the front, the visual effect is much more striking than if there were just an extra stripe on the top of the box.

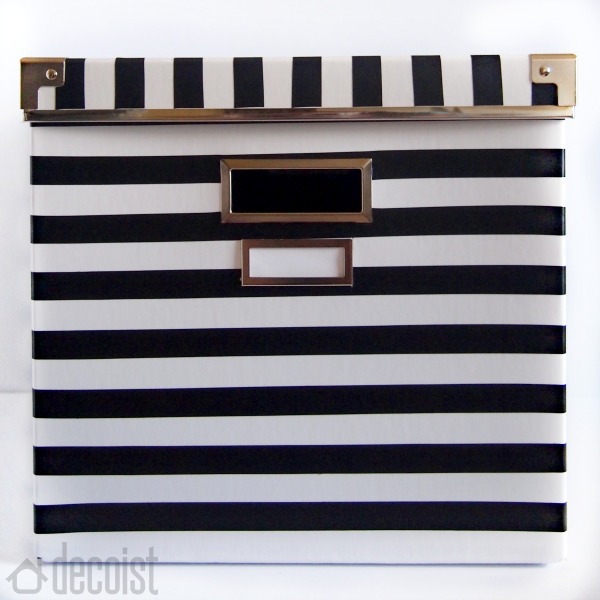
From the side, the stripes run in the same direction, so you get two different looks, depending on which way you look at it. Pretty cool right?

Adding a stripe to the side of the lid looked a bit awkward so I left it as is. I also added the extra hardware for labelling after the stripes were finished. This saved me having to do any extra cutting.

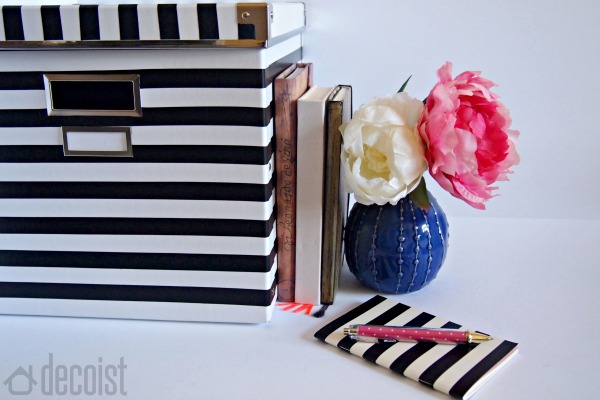
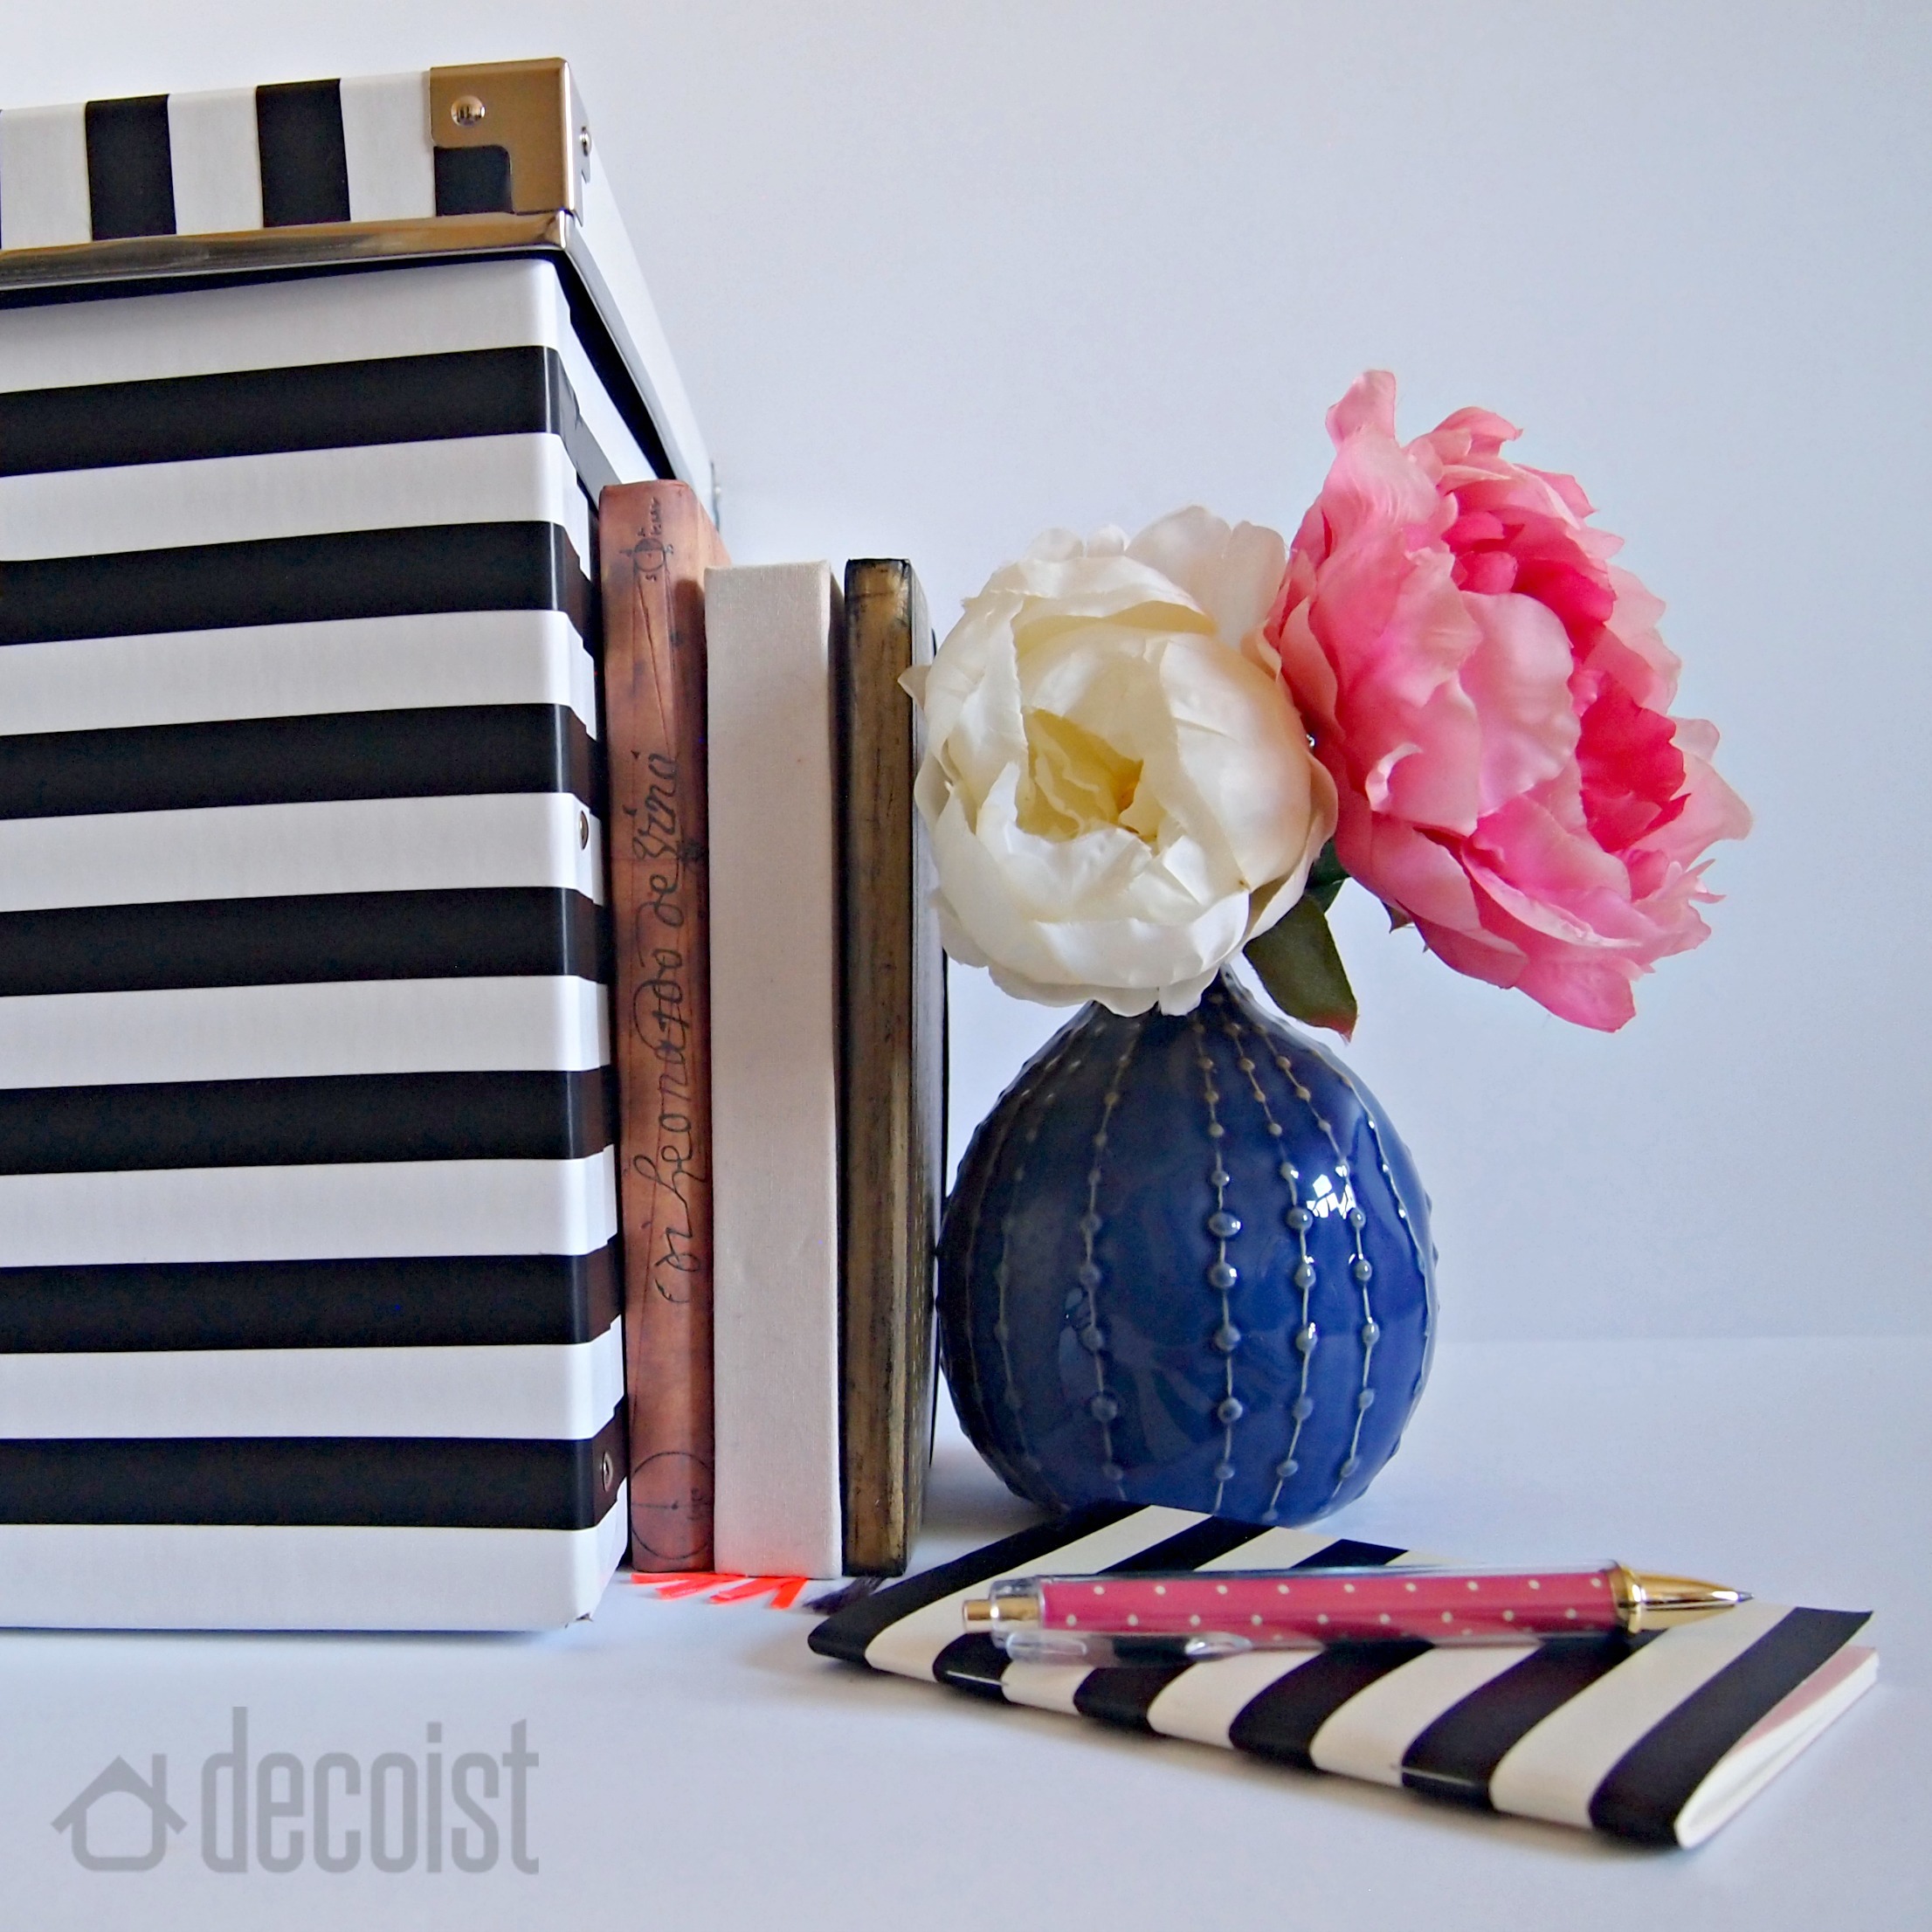
Adding a few pops of color next to the black and white makes the pattern even stronger and bolder. I love the softness of the peonies next to the striking pattern and using old books with such a clean and modern look. Juxtaposition is your friend, so go ahead and use it!

Can we just take one last look at this striped beauty, please? Just try to imagine this in your own office. I think this pattern would be great for a grown-up office, a kids’ room, a dorm… It can really live just about anywhere, because black and white stripes are such a classic!

I figured you might like to have a visual of the whole tutorial, so I made you one all together! This sure makes it easy to Pin, doesn’t it?

I hope you’ve enjoyed this DIY. It was so easy to make, and took no time at all (a total of about 20 minutes, and that included putting the box together!). I’d love to know your thoughts, suggestions, or questions on this little project, so please share away!