This week I’ve been reveling in the textured pattern of marble, the unique flair of mineral specimens, and the raw feel of metal. Kate here, and if you’ve been reading Decoist this week, you probably caught my recent post on one of today’s top design trends: the celebration of materials and simple forms. Geometric shapes are replacing ornate designs, putting a true emphasis on decor favorites such as marble, metal and wood. This new take on natural materials has inspired today’s DIY project–a marble and mineral scape that’s perfect for modern interiors. [All photos below by Kate Simmons]


If you love the look of terrariums but you don’t have a green thumb, this project just might be your ideal DIY solution. It’s also perfect for those who enjoy using decor to make bold statements. Read on for all the design details…
Supplies
Here are a few of the supplies you will need to get started:
- A spherical glass vase or bowl
- Colorful craft sand
- Marble tiles in a variety of shapes and sizes
- Small hardware items such as washers and hex nuts
- Mineral specimens

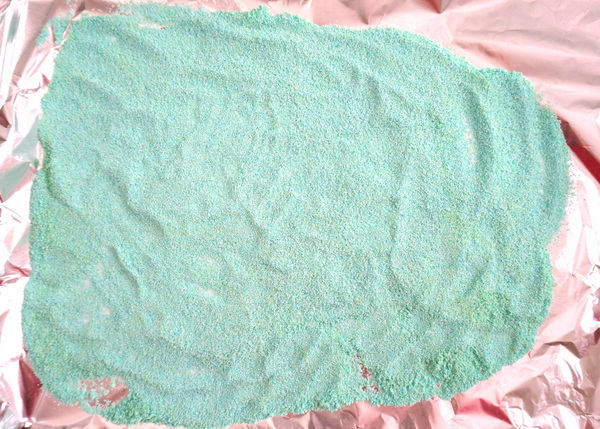
Let’s start with the sand. You can purchase craft sand in the color of your choice, or you can customize white craft sand (or sand from the beach) using food coloring and a few teaspoons of water. I found this tutorial from Project Wedding (created by Victoria Hudgins of A Subtle Revelry) to be extremely helpful. I mixed the food coloring with the water before adding it to the sand, but you can also wet the sand, then add the food coloring. It will evenly disperse. I then baked the sand in the oven for 10 minutes on a low setting of 200 degrees, and I left it out to dry overnight.

Once the sand was ready to go, I began thinking about the supplies that would work well with each color. I decided to make two finished products, one featuring marble and the other featuring minerals. I also incorporated washers in silver and gold tones. A trip to your local home improvement store and a few dollars are all you need to amass a large collection of shiny objects.


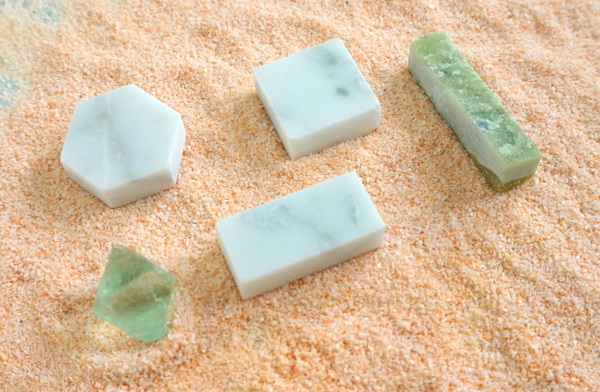
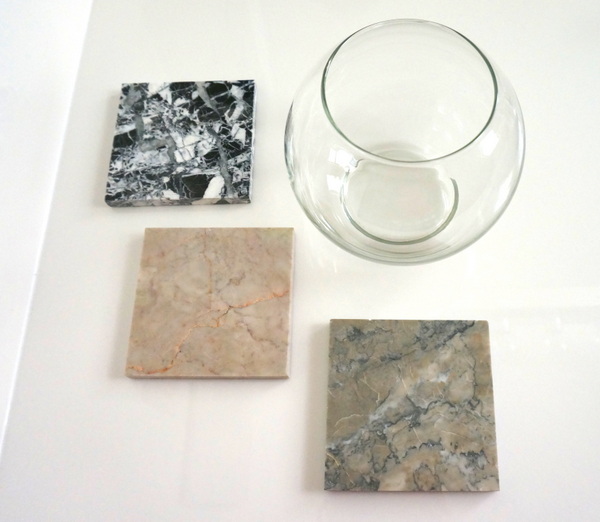
Your local craft store should have simple spherical glass bowls like the one you see below. And those marble tiles? They’re from Floor & Decor. I also picked up smaller tiles (shown two photos above) that are typically not sold separately–they come in sheets for tiling purposes. But many had become dislodged from their original grouping, and the store manager told me I could have them for free. Gotta love that!

Once you’ve gathered your supplies, you’re ready to get started…
Assembling Your Mineral Scape
It’s time to bring your modern mineral and marble scape to life! Begin by grouping items that would make an eye-catching vignette. I placed my marble, mineral and hardware possibilities on top of the sand while it was still on the baking sheet (after it had finished cooling and drying, of course). This gave me a colorful canvas where I could visualize all of my design options.

I have to admit, I was quite taken with the geometric groupings that naturally formed as I simply placed the sand and tiles side by side! This process gave me an extra dose of DIY energy.


When you have a basic idea of how to begin arranging your supplies, place the sand in the bowl. Since my sand was resting on a piece of foil (on top of a baking sheet) after its brief stint in the oven, I was able to mold the foil into a funnel of sorts and pour the sand with ease into the glass container.

Now it’s time to add your minerals, marble and hardware. Yes, it’s that easy! The fun part is trying out different arrangements and configurations. I have a feeling I’ll be tweaking my creations in the days that follow:

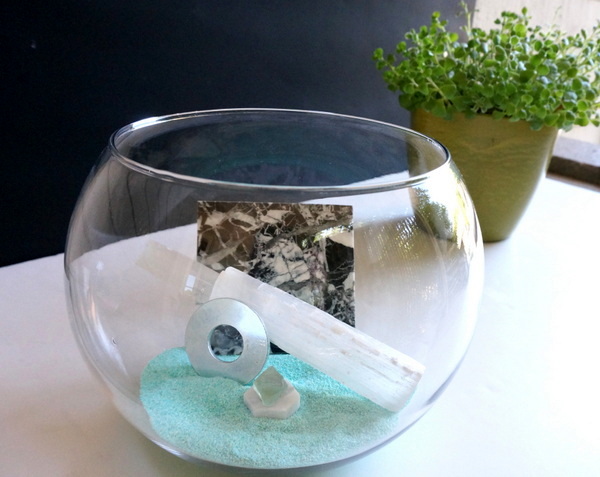
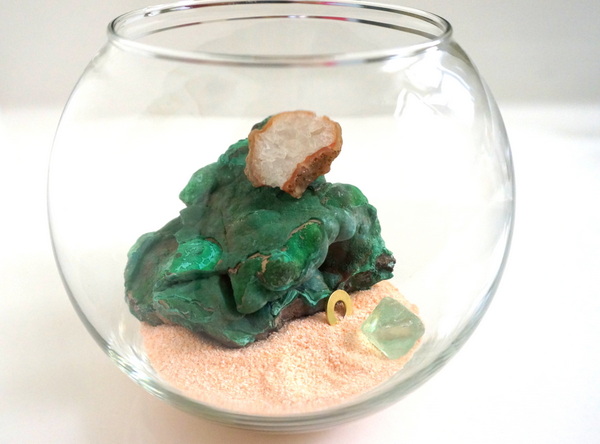
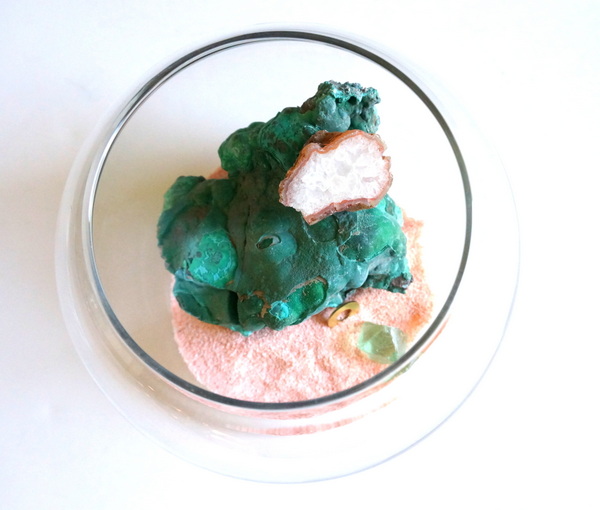
Believe it or not, despite my obsession with marble, no marble tiles actually made it into my second mineral scape. I have a display case filled with interesting mineral samples, and I knew I had to snag a turquoise-hued selection from the shelf to anchor the vignette below:

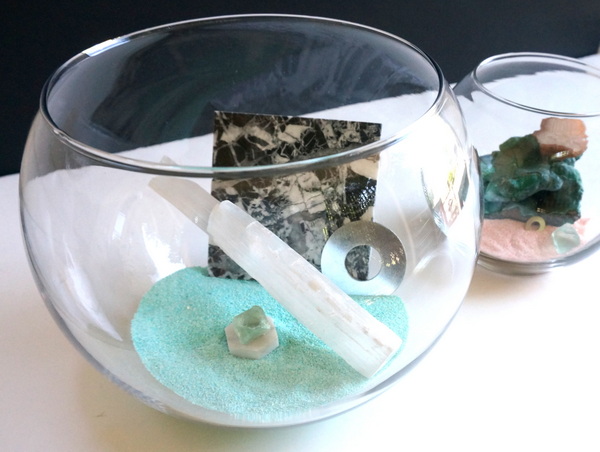
Remember all those photos of supplies at the top of the post? Funny how few of them made the final cut! That’s the beauty of purchasing super affordable items such as hex nuts and small marble tiles to use in your DIY project. You can buy more than you need, then have plenty to choose from so you get a finished product that’s just right!

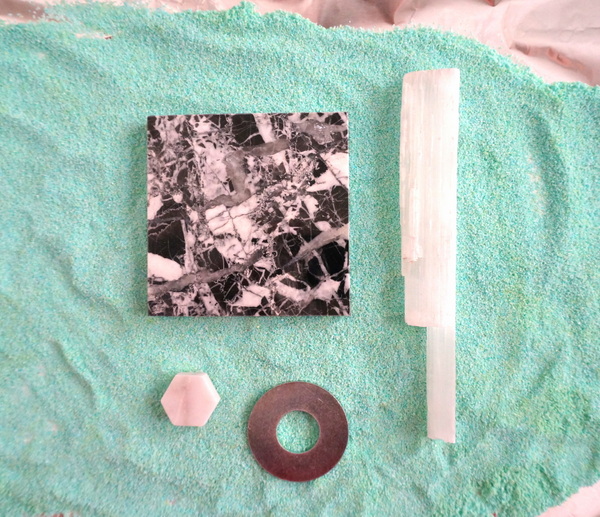
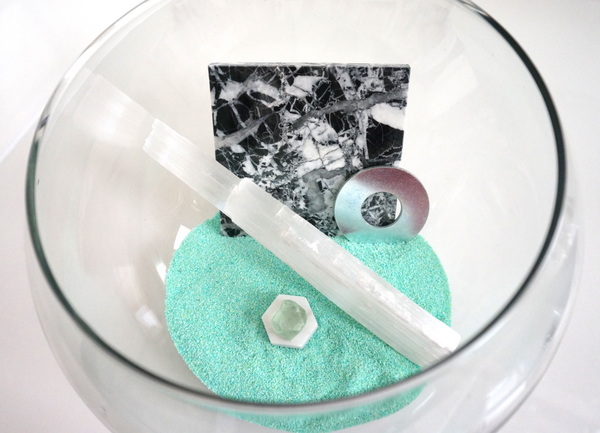
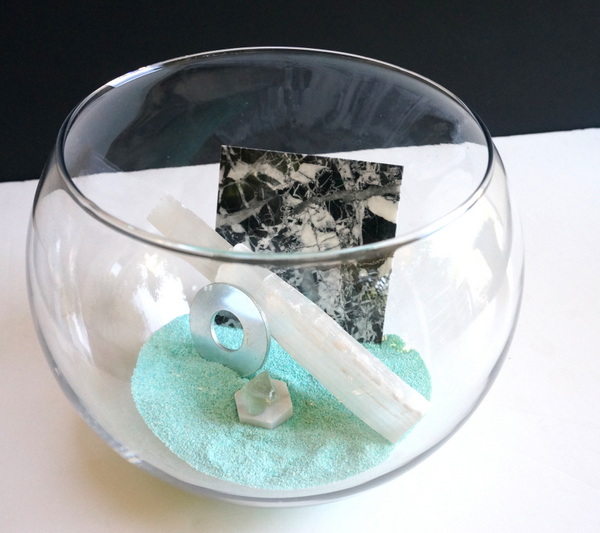
Don’t hesitate to dip into your childhood rock collection for some finishing touches. There’s nothing like decorating with natural wonders! The long mineral sample you see above and below is selenium, a recent purchase from one of my favorite thrift stores. The small diamond-shaped crystals are fluorite. I wish I had more information about the other two minerals, but I definitely like what they bring to the vignette.

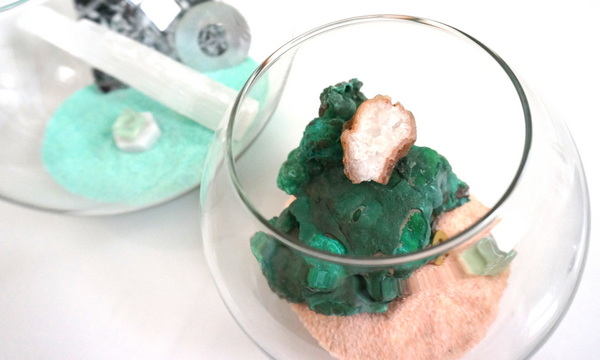
Here’s a view from overhead:

The only thing more fun than assembling your mineral scape is figuring out the best place to display it. Thanks for joining me for my latest DIY project! Remember that you can amend this project to best suit your style. Start with the colorful sand, then add the objects and curiosities of your choice. Happy scaping!