It’s official: my laundry room is getting a makeover! My hubby and I moved this past summer, and we have yet to purchase a washer and dryer. One of our main obstacles: a wall cabinet that’s located in the exact spot where the appliances should go. In preparation for the new washer and dryer, today we had the cabinet moved to the other side of the room. As you might imagine, the process of relocating the cabinet wasn’t easy on the paint job. That’s right–we’re repainting the cabinets, folks!
I thought I’d take this opportunity to pick a fun new color that will jazz up our all-beige laundry room. And since we’ll be painting the cabinets ourselves, now is the time to research our options. How do you successfully paint cabinetry? Do the doors need to be removed before painting? (Yes. So does the hardware.) But don’t let that scare you off! Important steps like this one will save you time in the long run. Today’s post is dedicated to the art of painting cabinets–the fun of choosing a new color, the practicality of making sure the job is done right. These steps will work for all cabinets–from kitchen cabinets to bathroom cabinetry. Read on for all of the DIY details…
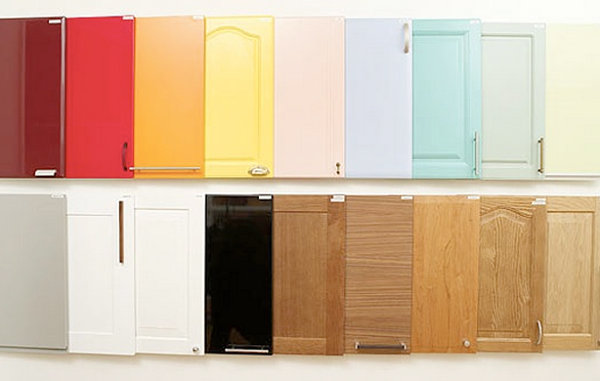
Select a Paint Color for Your Cabinets
Yes, folks… I usually start a project by getting lost in the “fun stuff.” It’s a little way of bribing myself to get on to the nitty gritty. If I have something to look forward to, like the promise of an exciting new color for my cabinetry, I get a burst of energy that sustains me for the duration of the project. And there’s something wonderful about looking forward to the refreshing effect of a new hue. And knowing that I won’t be able to enjoy it until I finish the job–now that’s motivation! Here’s what started it all…
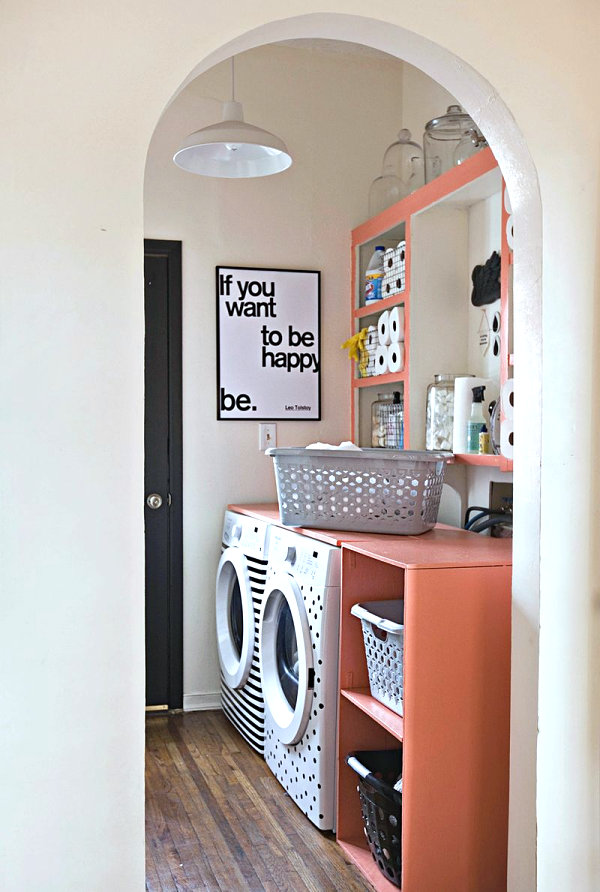
I was inspired by this amazing laundry room makeover from A Beautiful Mess, shown below. Now there’s a laundry room that seamlessly blends function and style! We previously featured this space in a recent Decoist post on laundry room organization. I was immediately drawn to the peach, black and white color scheme. Who says a practical space can’t be unique and creative?!

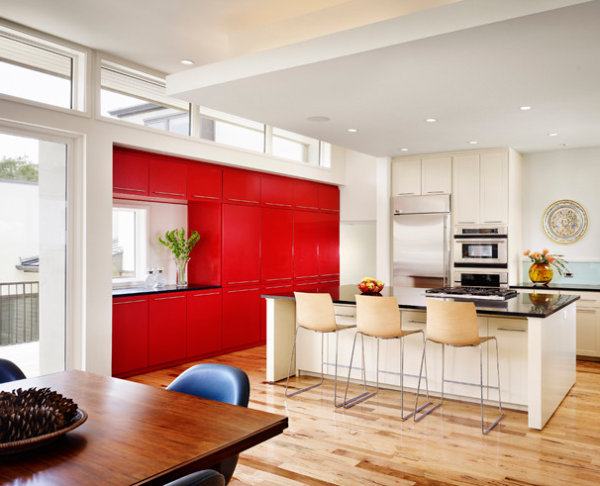
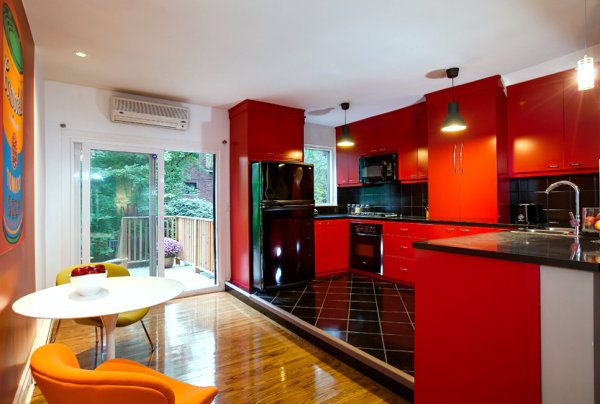
Here are some cabinetry colors I’m considering for my space… First up: tomato red! I love how this color blends well with a variety of shades, from cool grey to warm beige. Plus, the orange tint of tomato adds a certain fire that keeps this shade of red from looking dull or overly formal. [from Alterstudio]

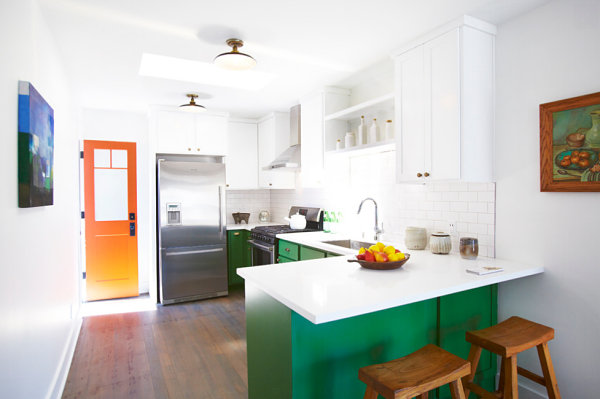
Green is another versatile hue that works well with a variety of other colors. Lately I’ve been drawn to bright green. For example, the kelly green cabinetry below is so striking. And unexpected! Other shades of green that you might want to consider: teal and mint. [from Platform]

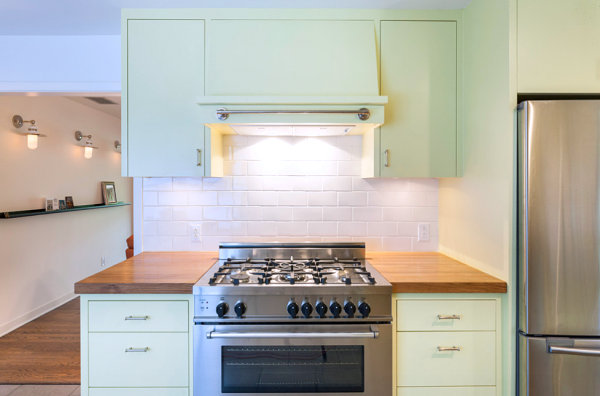
Mint green is indeed a popular choice for cabinets. The color is crisp and refreshing, and it can easily blend with a variety of styles, from the retro to the modern. I’m smitten with the idea of combining mint with another color, such as deep mauve for a cheeky ’80s effect! No, I’m not kidding. [photo by Whit Preston for TAS Construction via Houzz]

Remove the Doors and Hardware
You’re going to laugh, but I’m so tempted to skip this step. Surely I can put some painter’s tape over the hardware and then fill in any gaps with a tiny paintbrush, right? WRONG! Think about how long it would take to paint around hinges and knobs, and to remove the stray paint that would inevitably find its way onto the hardware. While there are some cabinets that may let you get away with a shortcut in this department, it’s often much easier to remove the doors and the hardware, and to effectively paint the cabinet doors while they’re laying flat. [from West Elm]


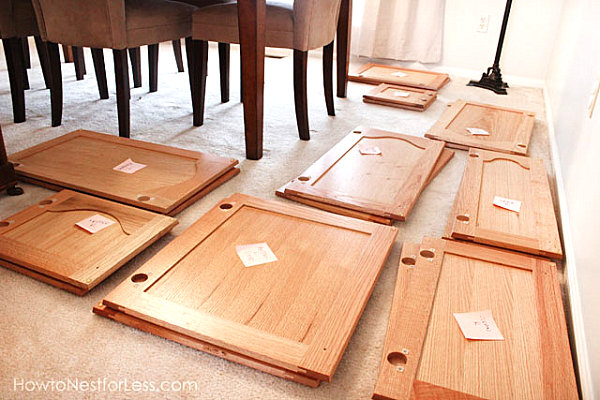
Don’t forget to label the doors and the hardware so you know which pieces go where when it’s time to reassemble everything. A little strip of painter’s tape with a note is helpful in this department, as is a baggie for small hardware pieces. Set the baggie inside of its matching cabinet, and you’re set! [from How to Nest for Less]

Clean the Cabinets
Trust us on this one–there will be gunk on your cabinets, whether they’re in the kitchen, the bathroom or the laundry room. You don’t want to paint over grease spots and patches of grime. Wipe down your cabinets with a cleaner such as a general purpose degreaser spray or a TSP substitute. [from Metro Cleaning Service ABQ]

It’s a dirty job, but somebody’s got to do it…
Smooth the Surface
The intensity of this next step depends on the condition of your cabinets. If there are holes or cracks, you’ll want to fill them with wood putty. Then it’s time to sand away… [from This Old House]

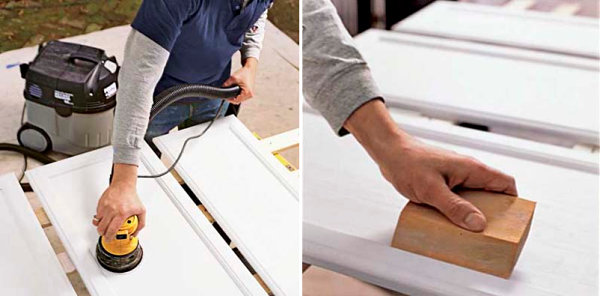
That’s right–rough up the surface of the cabinets with sandpaper. Start by sanding away excess residue from your wood putty or filler. Then sand the entire surface, going with the grain of the wood and using enough pressure to make a difference (but not so much that you’re wearing away the edges of the cabinets and doors). A 100-grit sandpaper works well for this task. [from DIY Network]

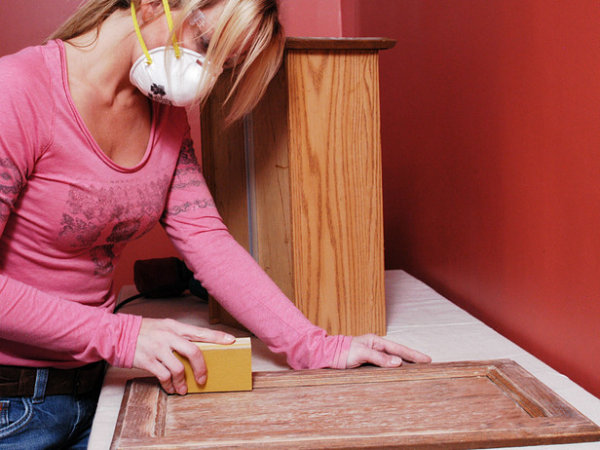
Your goal in sanding is to help the paint stick to the cabinets. Remember, the work you do in this phase of the journey will make the painting that much easier. Be sure you wipe away excess dust created from the sandpaper. You don’t want tiny flecks of wood embedded into the finish of your newly painted cabinets!
Time to Prime
Seriously, it’s not time to paint yet?! If you’re asking this question, know that you’re not alone. I’m one of the most impatient people I know when it comes to DIY projects. Wouldn’t it be great to skip ahead to the part where we apply the color? But as I’ve mentioned several times, the steps you’re taking now will ensure an easy paint job and a beautiful finish. So bear with me just a little bit longer…

When it comes to priming and painting, we at Decoist suggest taking one cabinet door to your local home improvement store and getting some expert feedback on the best primer and paint for your desired effect. An expert can also advise you on whether one or two coats of primer will be necessary. Make sure the primer is completely dry before you begin painting! Some experts recommend sanding the primer coat before applying the paint. Again, consult your local home improvement store for the best plan regarding your cabinetry.
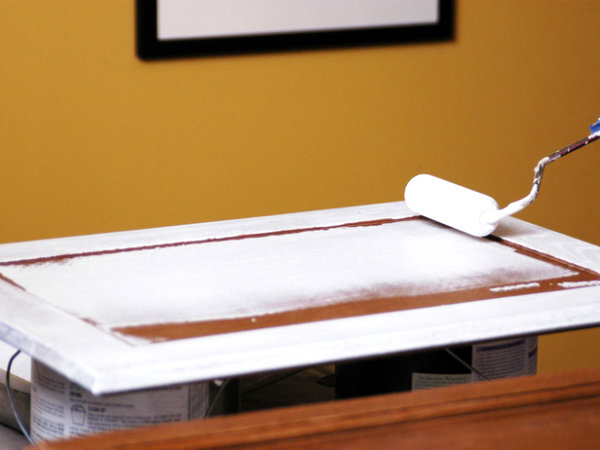
Paint (Finally)!
Yes, folks–the moment you’ve been waiting for is here! Time to paint!!!… [from discoversouthwestnm]

Once again, we recommend consulting the experts on achieving your desired finish, whether it’s glossy, matte, or something in between. Also be sure to inquire about the best paintbrushes for the effect you want to achieve. A combination of a high-quality paintbrush (for the initial application and the details) and a roller brush (to create a smooth finish) tends to work well. [from Padco]

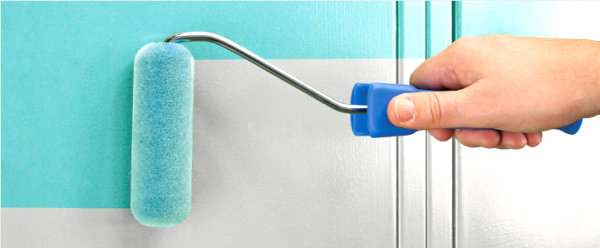
Regardless, it’s likely you’ll need two coats of paint to get the right amount of coverage. Isn’t it nice to see some color after all of your prep work?! And to imagine how wonderful everything will look when you’re finished?… [from Creative Home Designer]

Replace the Doors and Hardware
Time to put everything back together! Hang those doors, attach that hardware, and watch as your newly-painted cabinetry becomes functional… [from Bernard Andre Photography for TRG Architects]

Congratulate yourself on a job well done. Admire your work on a daily basis. Pat yourself on the back. Then use the other hand to pat yourself on the back again…you’ve earned it! [from Grace Homes]

I hope you found today’s post to be helpful and encouraging! If all goes well with my cabinet painting and laundry room makeover, I’d love to share the results here on Decoist. Wish me luck…