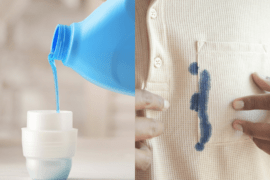
Approximately two weeks ago my brother found a small leak in the master suite bathroom that due to this seepage was anything but masterly. After removing the toilet and sliding the vanity cabinet out, something snapped and he went strangely Home Improvement Tim Allen with strong Chuck Norris vibes peeking out once in awhile. Everything was coming out, tossed haphazardly through the open window and smashed in the front yard.
As he diligently began this bathectomy procedure he encountered layer and layer of wall materials. The last being at least a two-decade-old veneer of thick tacky vinyl wallpaper directly applied to un-sanded plywood. Hours of innovation and persistent work and finally curls of the paper slid down the wall landing in a slimy heap on the raw bone floor.


If you are facing a similar situation there are several ways you can remove wallpaper without having to man up your tools as Tim Allen would advise.
Demolishing the Old, Part I:
Depending on what your ancient withering paper is covering you will have to resort to different methods. If drywall is directly under the wall covering you will want to avoid using any steaming or soaking techniques as this can structurally and permanently damage the drywall and it’s paper.
In circumstances like this you want to approach the removal using dry stripping. Using a special wallpaper remover tool called a paper slitter or scorer slide this tool over the wallpaper. The friction will help loosen the paper and permit easier removal.
Before you try any method, however, it’s always best to start in an upper hand corner and cut a small piece away from the wall to enable better grasp of the top. Gently but firmly pull down making sure the adhesive is being removed too. You can actually cut away the majority of paper by consistent and steady hand movements and patiently letting the paper to come off when it’s ripe and ready.
Demolishing the Old, Part II:
If, like my brother’s, your wallpaper was glued straight onto plywood or other wall elements then you have a broader and perhaps quicker and more effective approach to removal. Begin by performing the dry stripping technique. If you don’t have a paper scorer you can use a utility or razor knife and every several inches make horizontal slits so when you steam or soak the wall there will be open spaces for better penetration.
While you can rent, borrow or buy a wallpaper steamer if you have a heavy duty iron with a steam feature try this first and save yourself a couple extra bucks that can be put back in the “New Wallpaper Fund,” jar. Try to go over inch holding either the steamer or iron in place for 30 seconds to one minute.
Wallpaper Peeling Process:
Bubbles will arise signaling you can begin peeling. It seems that occasionally the more ugly and older the paper, the more there will be left behind. No problem for a plastic putty knife that can scrap away all gooey residue. Now you may encounter some real tough spots. For that you can try the chemical sprays whose potent mixture will dissolve the glue particles and thus you will be able to wipe down the wall to it’s original smooth surface.
If you want to avoid those toxins and have banned their entrance from your home then a quick remedy is equal part white vinegar and water. Fill a spray bottle and douse the entire affected section with this mixture.
Domesticating the New Wallpaper:
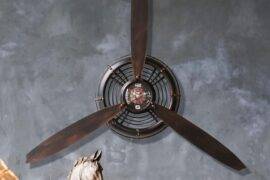
Allow the wall to dry and give extra time for the dampness to leave the room. Running a fan or small heater on low can help speed this process up. Once this is complete you can start preparing for your new and stylishly contemporary paper.
Skim your hand over the wall to verify if it’s free of dirt, dust or missed glue spots. When you find them, sand uneven spots, fill in cracks and once again wipe down your surface and let dry.
Now the fun begins. For all the super ambitious wallpaper installers you have chosen some lined or patterned piece that has to perfectly line up. Get your measuring tape out, as you will need to measure, measure again, and then just to be sure, measure once more. Nothing will aggravate you more than having to walk into the room day in and out for the next 20 years and have to stare at unaligned wall paper, knowing you are to blame for its visual failure.
Since an extra set of hands would make this task easier its time to call in for that favor. Together you can prepare the task by measuring, cutting, then pasting. Once you paste the wall you don’t want to have to paste, turn around to cut, and then try to plaster your paper to a dried mess of paste.
For thicker, heavier paper it is recommended to apply paste directly to paper allowing adequate soaking. Either way it’s up to you. It’s less mess on the wall and you will want to take time with making sure it sticks and stays whether applied to the wall or the paper.
Take your three-dollar wallpaper brush and comb over in straight even paths, top to bottom or left to right to squeeze out any access juice. Keep an eye on the big picture of the paper and watch that it doesn’t pull, slide, rip or crinkle. Once that happens your frustration begins! Patience and rhythm will go a long way in the wallpaper industry.
From there we are back to twiddling our thumbs as it dries. But you should already be able to see how great your workmanship has paid off. You had run your hand over the wall after demolishing the old wallpaper. But as you run your hand over the wall now, your fingers cannot find where one stretch of wallpaper ends and the other begins. Your eyes can’t detect any lines or flaps. This is a wall worth commemorating! Great job, my friend!